A VNC (Virtual Network Computing) Server is a GUI based desktop sharing platform that allows you to access remote desktop machines. In Centos 8 and RHEL 8 systems, VNC servers are not installed by default and need to be installed manually. In this article, we’ll look at how to install VNC Server on CentOS 8 / RHEL 8 systems with a simple step-by-step installation guide.
Prerequisites to Install VNC Server on Centos 8 / RHEL 8
To install VNC Server in your system, make sure you have the following requirements readily available on your system:
- CentOS 8 / RHEL 8
- GNOME Desktop Environment
- Root access
- DNF / YUM Package repositories
Step by Step Guide to Install VNC Server on Centos 8 / RHEL 8
Step 1) Install GNOME Desktop environment
Before installing VNC Server in your CentOS 8 / RHEL 8, make sure you have a desktop Environment (DE) installed. In case GNOME desktop is already installed or you have installed your server with gui option then you can skip this step.
In CentOS 8 / RHEL 8, GNOME is the default desktop environment. if you don’t have it in your system, install it using the following command:
[root@linuxtechi ~]# dnf groupinstall "workstation"
Or
[root@linuxtechi ~]# dnf groupinstall "Server with GUI"
Once the above packages are installed successfully then run the following command to enable the graphical mode
[root@linuxtechi ~]# systemctl set-default graphical
Now reboot the system so that we get GNOME login screen.
[root@linuxtechi ~]# reboot
Once the system is rebooted successfully uncomment the line “WaylandEnable=false” from the file “/etc/gdm/custom.conf” so that remote desktop session request via vnc is handled by xorg of GNOME desktop in place of wayland display manager.
Note: Wayland is the default display manager (GDM) in GNOME and it not is configured to handled remote rendering API like X.org
VNC server will not work properly if SElinux is enabled on your system, as of now work around is to disable it using following commands,
[root@linuxtechi ~]# setenforce 0
[root@linuxtechi ~]# sed -i --follow-symlinks 's/SELINUX=enforcing/SELINUX=disabled/g' /etc/sysconfig/selinux
Step 2) Install VNC Server (tigervnc-server)
Next we’ll install the VNC Server, there are lot of VNC Servers available, and for installation purposes, we’ll be installing TigerVNC Server. It is one of the most popular VNC Server and a high-performance and platform-independent VNC that allows users to interact with remote machines easily.
Now install TigerVNC Server using the following command:
[root@linuxtechi ~]# dnf install tigervnc-server tigervnc-server-module -y
Step 3) Set VNC Password for Local User
Let’s assume we want ‘pkumar’ user to use VNC for remote desktop session, then switch to the user and set its password using vncpasswd command,
[root@linuxtechi ~]# su - pkumar
[pkumar@linuxtechi ~]$ vncpasswd
Password:
Verify:
Would you like to enter a view-only password (y/n)? n
A view-only password is not used
[pkumar@linuxtechi ~]$
[pkumar@linuxtechi ~]$ exit
logout
[root@linuxtechi ~]#
Step 4) Setup VNC Server Configuration File
Next step is to configure VNC Server Configuration file. Create a file “/etc/systemd/system/[email protected]” with the following content so that tigervnc-server’s service started for above local user “pkumar”.
[root@linuxtechi ~]# vim /etc/systemd/system/[email protected]

[Unit]
Description=Remote desktop service (VNC)
After=syslog.target network.target
[Service]
Type=forking
ExecStartPre=/bin/sh -c '/usr/bin/vncserver -kill %i > /dev/null 2>&1 || :'
ExecStart=/sbin/runuser -l pkumar -c "/usr/bin/vncserver %i -geometry 1280x1024"
PIDFile=/home/pkumar/.vnc/%H%i.pid
ExecStop=/bin/sh -c '/usr/bin/vncserver -kill %i > /dev/null 2>&1 || :'
[Install]
WantedBy=multi-user.target
Save and exit the file,
Note: Replace the user name in above file which suits to your setup.
By default, VNC server listen on tcp port 5900+n, where n is the display number, if the display number is “1” then VNC server will listen its request on TCP port 5901.
Step 5) Start VNC Service and allow port in firewall
I am using display number as 1, so use the following commands to start and enable vnc service on display number “1”,
[root@linuxtechi ~]# systemctl daemon-reload
[root@linuxtechi ~]# systemctl start  vncserver@:1.service
[root@linuxtechi ~]# systemctl enable  vncserver@:1.service
Created symlink /etc/systemd/system/multi-user.target.wants/vncserver@:1.service → /etc/systemd/system/[email protected].
[root@linuxtechi ~]#
Use below netstat or ss command to verify whether VNC server start listening its request on 5901,
[root@linuxtechi ~]# netstat -tunlp | grep 5901
tcp        0      0 0.0.0.0:5901            0.0.0.0:*               LISTEN      8169/Xvnc
tcp6       0      0 :::5901                 :::*                    LISTEN      8169/Xvnc
[root@linuxtechi ~]# ss -tunlp | grep -i 5901
tcp   LISTEN  0       5                    0.0.0.0:5901           0.0.0.0:*      users:(("Xvnc",pid=8169,fd=6))
tcp   LISTEN  0       5                       [::]:5901              [::]:*      users:(("Xvnc",pid=8169,fd=7))
[root@linuxtechi ~]#
Use below systemctl command to verify the status of VNC server,
[root@linuxtechi ~]# systemctl status vncserver@:1.service
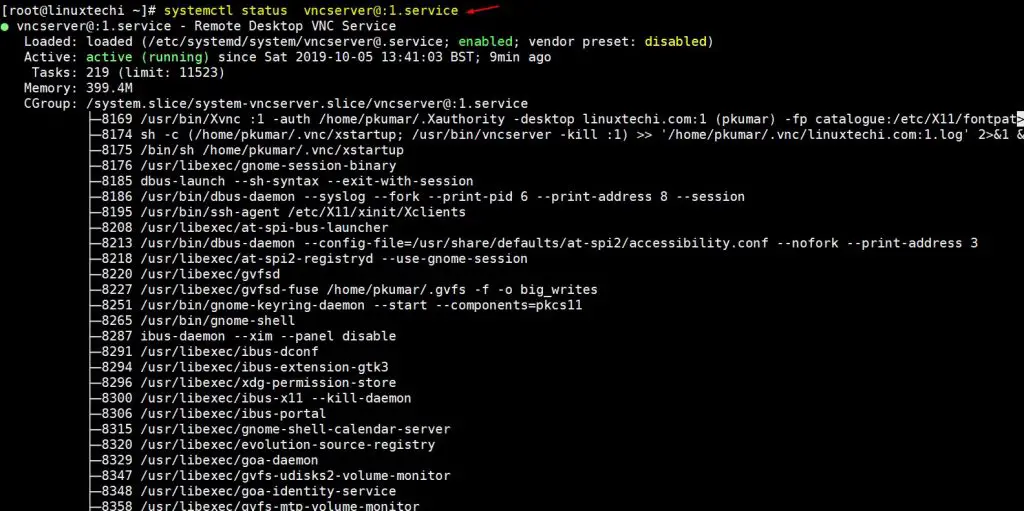
Above command’s output confirms that VNC is started successfully on port tcp port 5901. Use the following command allow VNC Server port “5901” in os firewall,
[root@linuxtechi ~]# firewall-cmd --permanent --add-port=5901/tcp
success
[root@linuxtechi ~]# firewall-cmd --reload
success
[root@linuxtechi ~]#
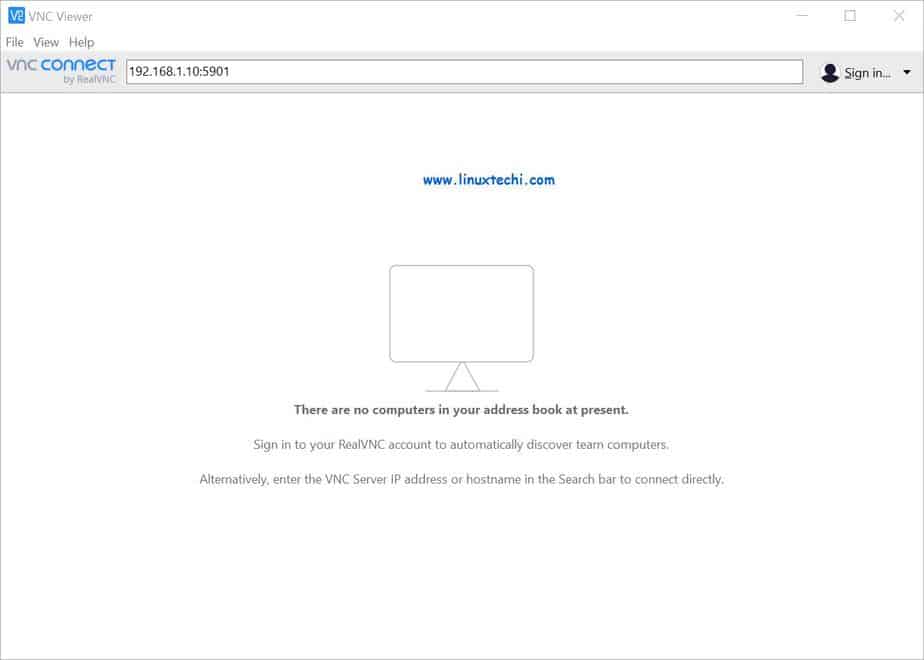
Step 6) Connect to Remote Desktop Session
Now we are all set to see if the remote desktop connection is working. To access the remote desktop, Start the VNC Viewer from your Windows / Linux workstation and enter your VNC server IP Address and Port Number and then hit enter
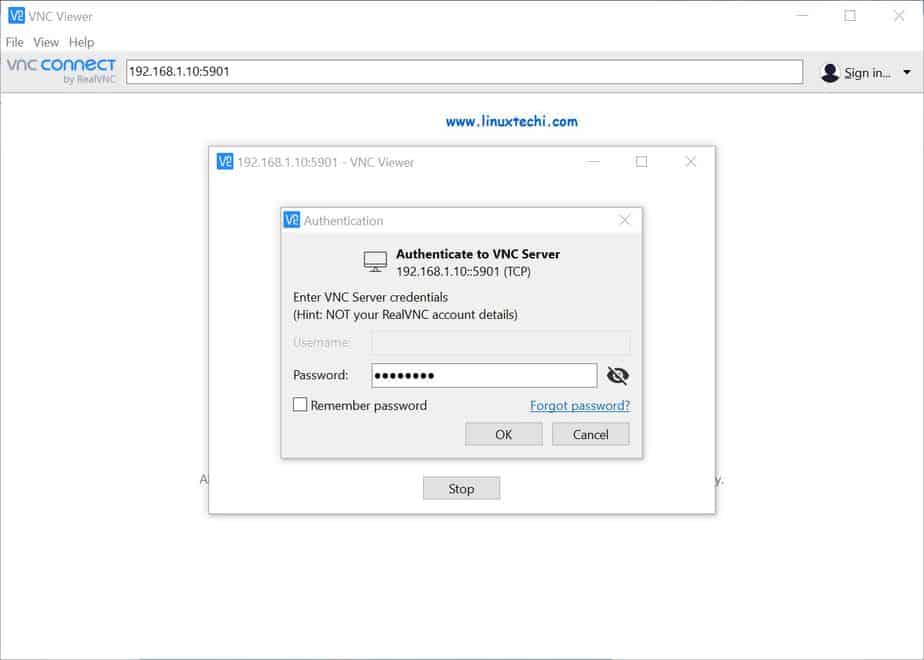
Next, it will ask for your VNC password. Enter the password that you have created earlier for your local user and click OK to continue
Now you can see the remote desktop,
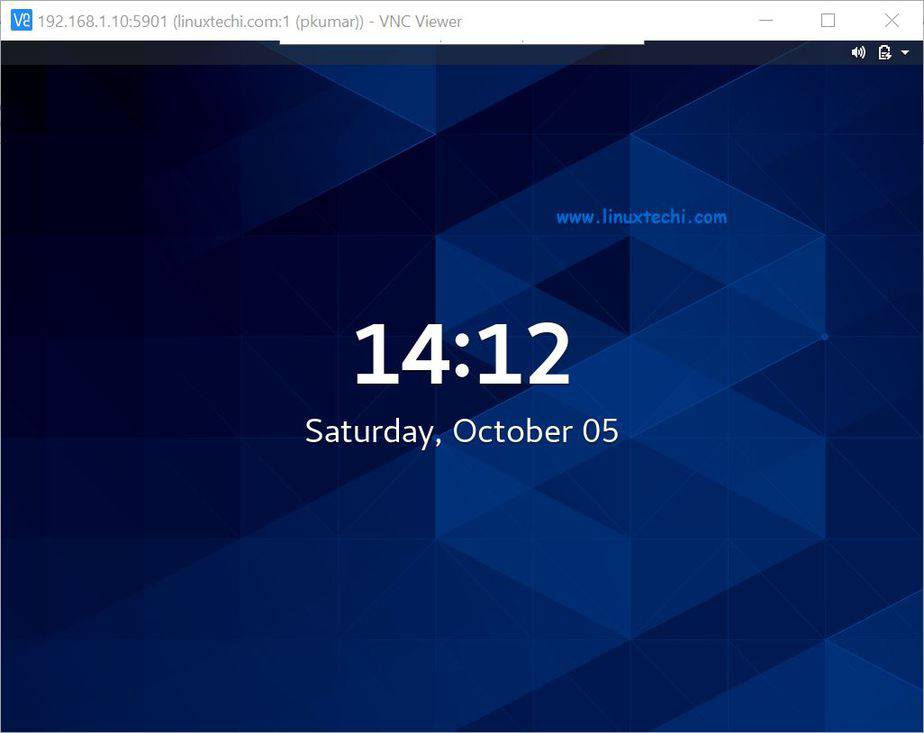
That’s it, you’ve successfully installed VNC Server in Centos 8 / RHEL 8.
Conclusion
Hope the step-by-step guide to install VNC server on Centos 8 / RHEL 8 has provided you with all the information to easily setup VNC Server and access remote desktops. Please provide your comments and suggestion in the feedback section below. See you in the next article…Until then a big THANK YOU and BYE for now!!!
Read Also : How to Configure Rsyslog Server in CentOS 8 / RHEL 8
After you install the BaseOS of RHEL 8 and add the repo files, yum update -y
After you install the workstation or server: yum install gnome* -y
Setting Graphical Login as Default – As root: systemctl set-default graphical.target and reboot.
To enable and use tigervnc, in the following steps:
yum install tigervnc-server -y
semodule -i /usr/share/selinux/packages/vncsession.pp
restorecon /usr/sbin/vncsession /usr/libexec/vncsession-start
If you already have VNC installed, you need to remove “$HOME/.vnc folder” if it exists and recreate again with vncpasswd. This is needed to have “.vnc” folder with correct SELinux context.
Alternatively you can use: restorecon -RFv $HOME/.vnc
vim /etc/tigervnc/vncserver-config-defaults and add “session=gnome”
You can also set other options here. See manual page of Xvnc.
NOTE: You can also have configuration which is specific for a given user, to do that just modify “$HOME/.vnc/config”. You can copy content of “/etc/tigervnc/vncserver-config-defaults” there and do your own modifications.
vim /etc/tigervnc/vncserver.users
Added “:2=test” If you want to add more users, just realize you need to start each instance separately.
NOTE: Spaces are a no-no
NOTE: Example is: :2= and there should be examples in the file for existing users
systemctl start vncserver@:2.service
Connect to the VNCServer
vncviewer or :2
Example: vncviewer 10.10.10.1:2
That last bit about connecting should be
vncviewer or :2
Example: vncviewer 10.10.10.1:2
Followed your tutorial, but systemctl could not start the service.
Error message was ‘geometry 1280×1024 is invalid’
I have the same situation.
The x in the example service file isn’t a proper x when you copy and paste the text. Replace the × with an x and it will then give you a new error with SELinux because the first instruction on disabling SELinux doesn’t actually disable it. This tutorial is rife with FAILS.
Thanks Chris, I have fixed the letter x as you mentioned in comments. I hope it helps our readers.
Anyone display Black Screen?
me too. did you solve it?
I followed it, but when I type ‘netstat -tunlp | grep 5901’ there is no entry shown.
actually the vnc server doesn’t respond. What’s wrong?
GUYS! I found the black screen symptom here!
Make sure the content doesn’t change while copying and pasting which happens for encoding issues or other problems.
That happened to me and the text of geometry 1280×1024 changed to 1280 ^1024. Fix it and reload the daemon and start VNC server again!
I can not start the VNC server which complains geometry 1280×1024.
[root@m2-mapreng-vm167100 ~]# systemctl start vncserver@:1.service
Job for vncserver@:1.service failed because the control process exited with error code.
See “systemctl status vncserver@:1.service” and “journalctl -xe” for details.
Oct 28 09:59:46 m2-mapreng-vm167100 runuser[127322]: vncserver: geometry 1280×1024 is invalid
If I change the ‘x’ between the two number to lower case ‘x’ the VNC server started OK.
[root@m2-mapreng-vm167100 ~]# systemctl status vncserver@:1.service
● vncserver@:1.service – Remote desktop service (VNC)
Loaded: loaded (/etc/systemd/system/[email protected]; enabled; vendor preset: disabled)
Active: active (running) since Wed 2020-10-28 10:20:23 PDT; 42s ago
Main PID: 150965 (Xvnc)
Tasks: 0 (limit: 152821)
Memory: 320.0K
CGroup: /system.slice/system-vncserver.slice/vncserver@:1.service
‣ 150965 /usr/bin/Xvnc :1 -auth /root/.Xauthority -desktop m2-mapreng-vm167100:1 (root) -fp catalogue:/etc/X11/fontpath.d -geometry 1280×1024 -pn -rfbauth /root/.vnc/passwd -rfbport 5901 -rfbwait 300>
Oct 28 10:20:20 m2-mapreng-vm167100 systemd[1]: Starting Remote desktop service (VNC)…
Oct 28 10:20:23 m2-mapreng-vm167100 systemd[1]: Started Remote desktop service (VNC).
However, when connect with VNC viewer, after enter password etc, I got black screen.
my \ got excised… the post should have read…
I’m still experimenting so take this with a grain of salt, but I’ve found that you need to start the daemon with…
“systemctl start vncserver_\@:\.service” to match the name of its config file in /etc/systemd/system/, e.g. /etc/systemd/system/vncserver_\@:\.service
the default resolution of port 5900 (n=0) is 16x1024x768
per: ‘https://wiki.centos.org/HowTos/VNC-Server’
There will also be a /etc/systemd/system/[email protected] config file that is not specific to a user or port.
if you want to change the display geometry (e.g. to 1280×1024), you can do something like…
VNCSERVERARGS[]=”-geometry 1280×1024 -localhost”‘
Hi,
How can I authenticate using unixpwd (PAM Authentication), We no need to manage two passwords for user.
System Password and VNC passwd have to be same and if we change the system password vnc should also update.
Please help
Regards,
Lokesh