This post will explain, how to install and configure Samba on RHEL 8 or CentOS 8. You will also learn how to share a folder from RHEL 8 or CentOS 8 system to Windows machine using samba.
Windows and Linux systems are structured differently and often, a peaceful co-existence between the two is often a challenge. Thanks to Samba, the two systems can now share files and folders over the network. So what is Samba? Samba is a free and open source protocol that allows files to be shared across both systems in a simple and seamless manner. You can have a Samba server on a Linux server hosting various files and folders which can be accessed by windows clients.
Prerequisites
- Pre Installed RHEL 8 or CentOS 8 System
- Sudo user with admin rights
- Red Hat Subscription or Locally Configure Repo for RHEL 8
- Internet Connectivity
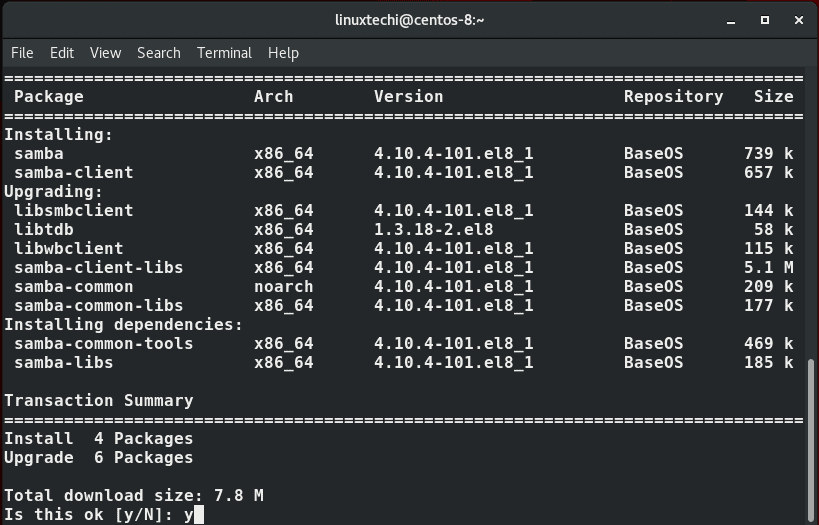
Step 1) Install Samba on RHEL 8 / CentOS 8
Log into your server and run the command below to install Samba and its dependencies.
$ sudo dnf install samba samba-common samba-client
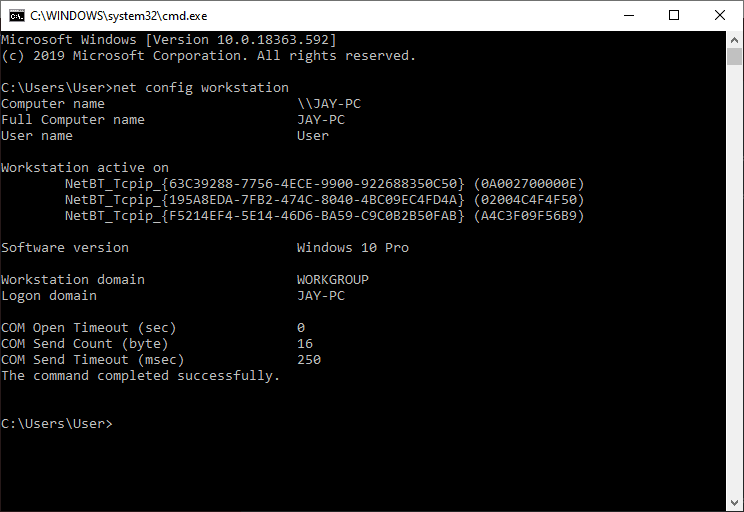
We must also ensure that the Windows and Linux system are in the same workgroup. So, go to your Windows PC and launch command prompt. Type the command:
> net config workstation
From the output, we can clearly see that the workstation domain points to ‘WORKGROUP’.This will also be configured later on the Linux machine.
Step 2) Configuring Samba Server
Having installed Samba, it’s time to make a few configurations. But before we do that, we need to back up the samba config file. So, run the command below:
$ sudo mv /etc/samba/smb.conf /etc/samba/smb.con.bak
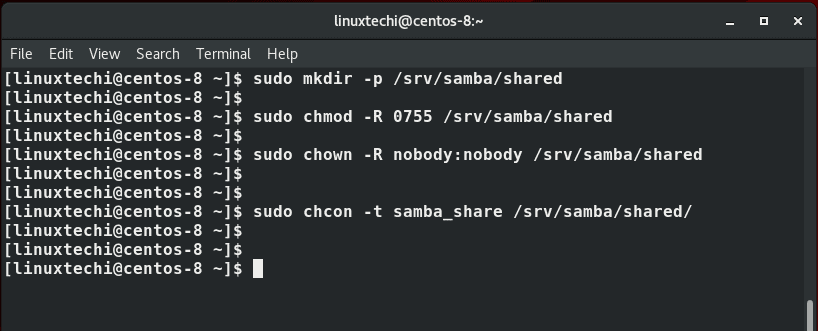
Next, we are going to create a shared folder called shared and assign the necessary permissions and ownership as shown.
$ sudo mkdir -p /srv/samba/shared
$ sudo chmod -R 0755 /srv/samba/shared
$ sudo chown -R nobody:nobody /srv/samba/shared
$ sudo chcon -t samba_share_t /srv/samba/shared
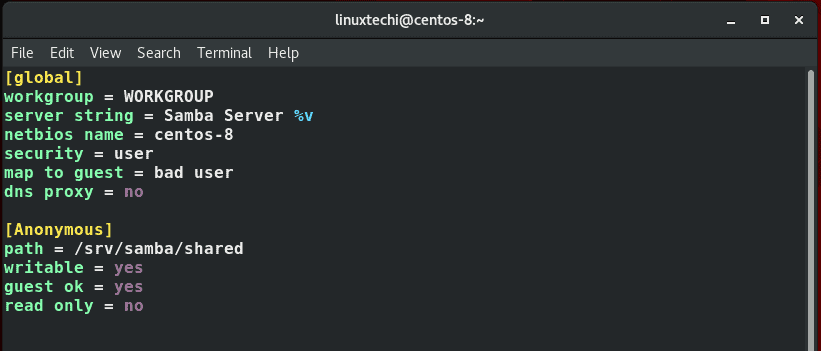
Now create a new samba configuration file
$ sudo vim /etc/samba/smb.conf
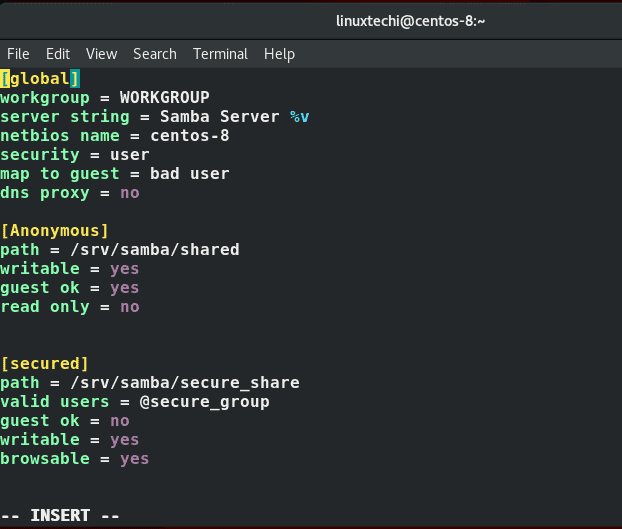
Append the configuration below:
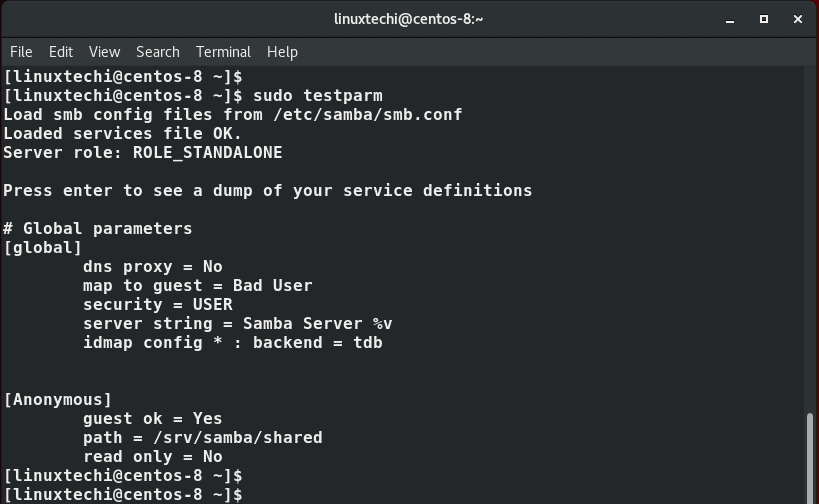
[global]
workgroup = WORKGROUP
server string = Samba Server %v
netbios name = centos-8
security = user
map to guest = bad user
dns proxy = no

[Anonymous]
path = /srv/samba/shared
browsable =yes
writable = yes
guest ok = yes
read only = no
Save and close the configuration file. To verify that the configuration is sound, run testparm command
$ testparm
Step 3) Allow Samba Service in Firewall
Next, allow Samba across the firewall so that outside users can access samba shares.
$ sudo firewall-cmd --add-service=samba --zone=public --permanent
$ sudo firewall-cmd --reload
Step 4) Start and Enable Samba Service
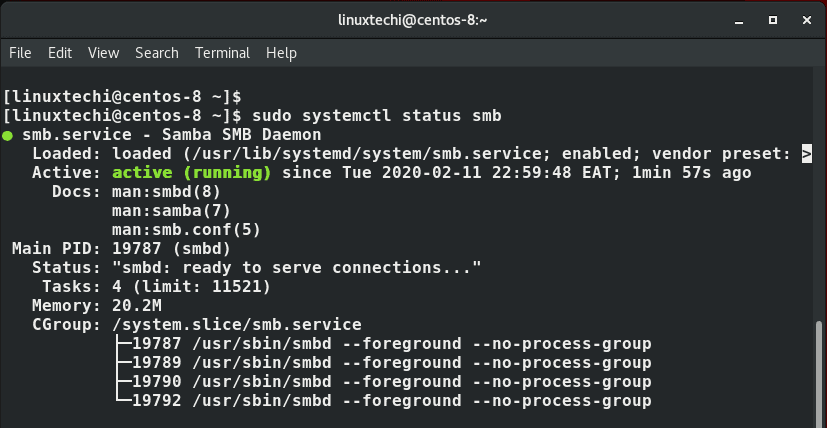
Finally, start and enable Samba & nmb services
$ sudo systemctl start smb
$ sudo systemctl enable smb
Then confirm if smb service is running:
$ sudo systemctl status smb
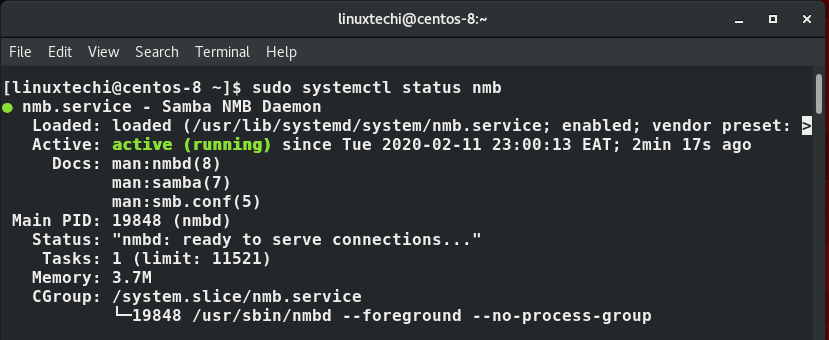
$ sudo systemctl start nmb
$ sudo systemctl enable nmb
Similarly confirm if nmb service is running just like we did with smb service:
$ sudo systemctl status nmb
Step 5) Accessing Samba Share from Windows Machine
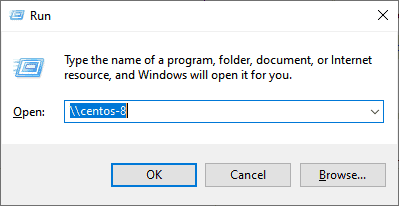
From your Windows PC, press Windows Key + R to launch the Run dialog and type
\\hostname-of-samba server
OR
\\IP-address-of-samba-server

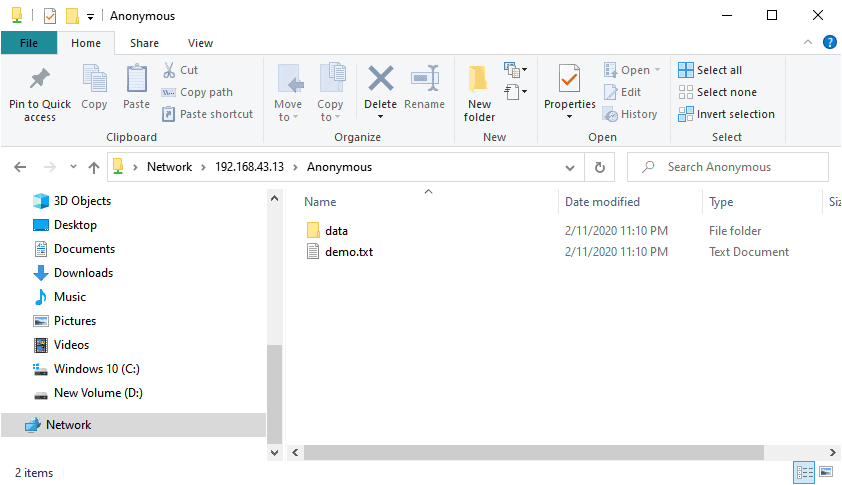
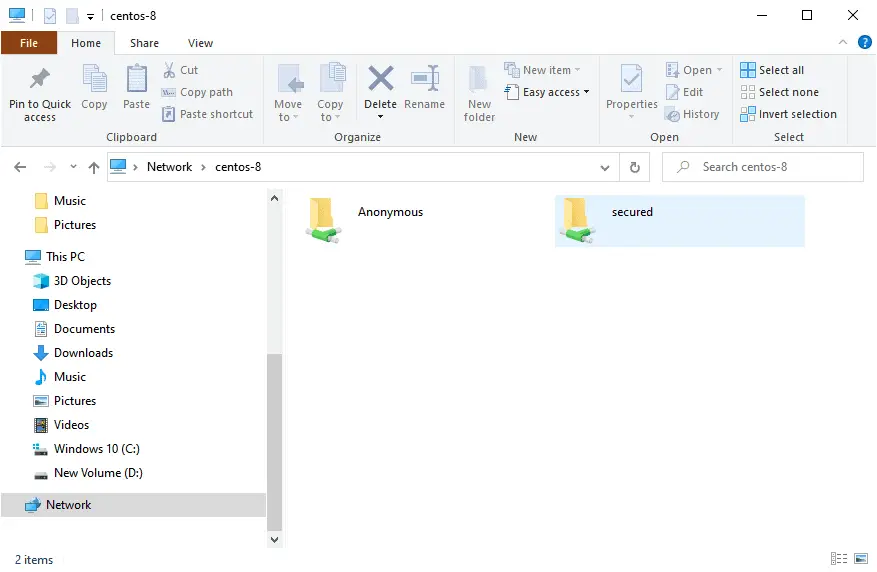
This opens a window below with an ‘Anonymous’ folder.
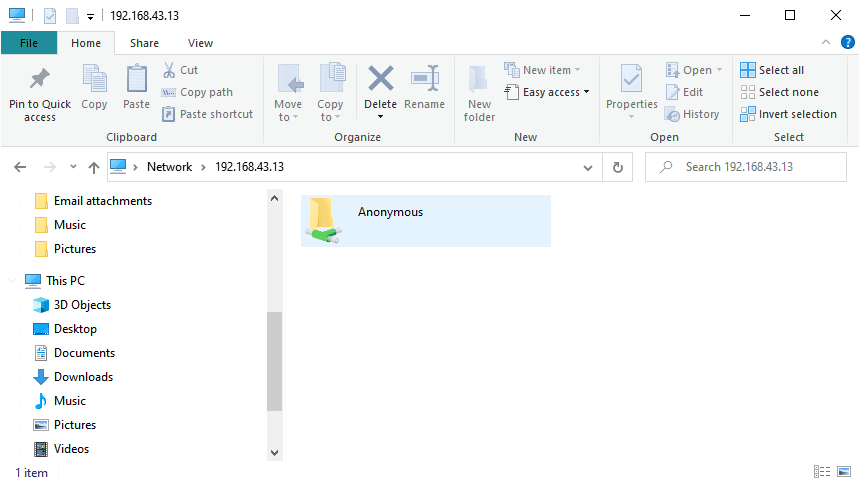
You can create files either from Samba server or from the client and share it with other users

Creating Secure Shares in Samba
The file share we just created is accessible to everyone and any user can create and delete files. This poses a challenge if you want to share critical documents as they can be overwritten or deleted as well. For this reason, we need to create a secure file share to address this challenge.
First, we are going to create a new group for samba users as shown:
$ sudo groupadd secure_group
Then we shall add a new user to the newly created group
$ sudo useradd -g secure_group linuxuser
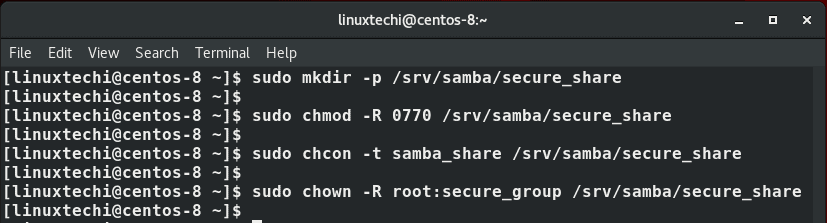
Next, we are going to create a new secure folder and later assign the necessary permissions and file ownership as shown below .
$ sudo mkdir -p /srv/samba/secure_share
$ sudo chmod -R 0770 /srv/samba/secure_share
$ sudo chcon -t samba_share -p /srv/samba/secure_share
$ sudo chown -R root:secure_group /srv/samba/secure_share
Next, we will assign the samba user a password that will be used when accessing the secured file share. This will prompt you to provide a SMP password and later confirm it.
$ sudo smbpasswd -a linuxuser

Now let’s head back to Samba’s configuration file
$ sudo vim /etc/samba/smb.conf
Append the config lines shown below:
[secured]
path = /srv/samba/secure_share
valid users = @secure_group
guest ok = no
writable = yes
browsable = yes
Save & exit and then restart Samba service
$ sudo systemctl restart samba
Accessing Samba Secure Folder from a Windows System
Again, to access Samba share from your windows system hit Windows Key + R to launch the ‘Run’ dialogue. Type \\hostname or \\ samba-IP and hit ENTER.
You’ll now notice that we have another folder called secured.
To access it, double click on it and a login pop-up will prompt you for your username and password credentials.
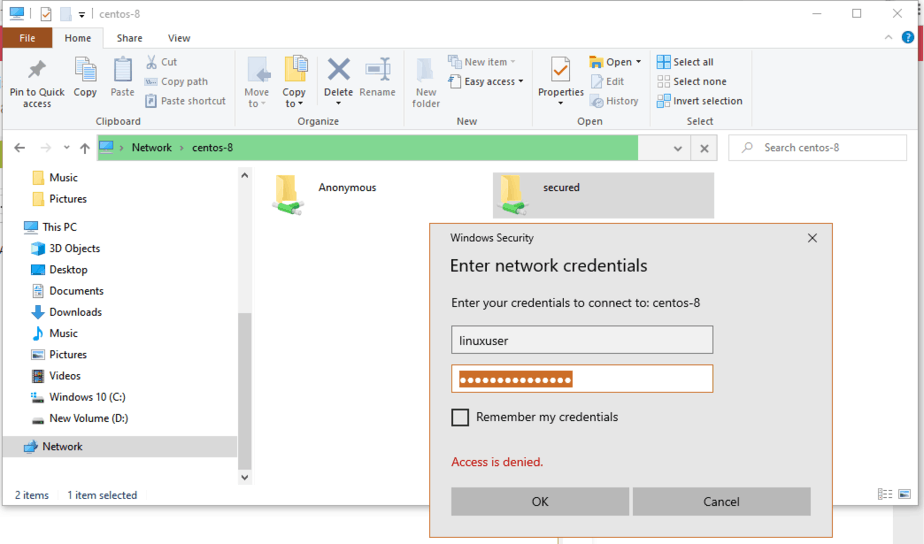
Once done, click on the ‘OK’ button or simply hit ENTER to access the contents of the folder

Accessing Samba Secure Folder from a Linux Machine
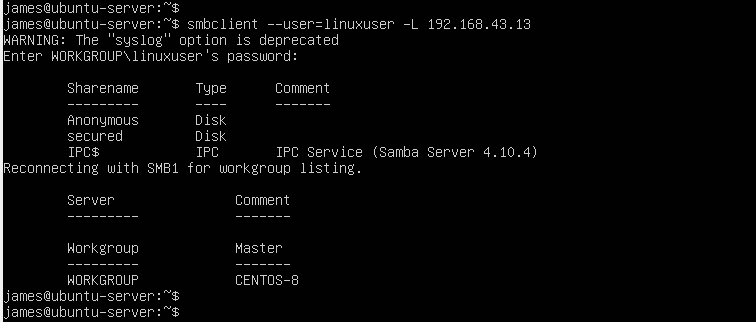
To access the shared directories from a Linux system, simply run the command:
$ smbclient --user=linuxuser -L //192.168.43.13
Provide the password when prompted and hit ENTER
To access the secure share run
$ smbclient //192.168.43.13/secured -U linuxuser
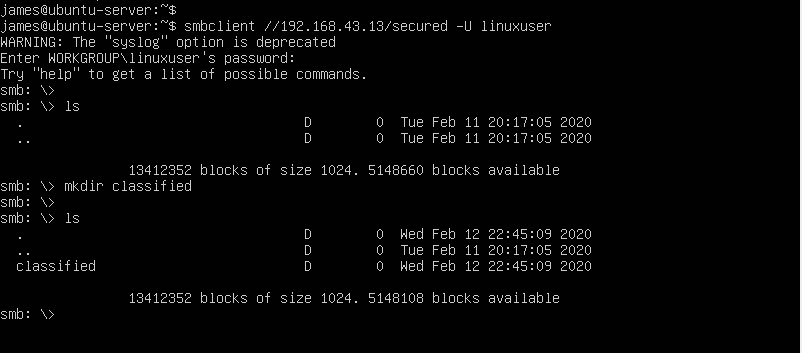
Feel free to create files and directories to share with other samba users.
That’s all from this post, I believe you have found it informative and useful. Please do post your queries and feedback in below comments section.
Had an issue where i could not access “secured”, the reason was that i had changed the name for the group from @secure_group to MYNAME, fixed in config, restartet SMB, and gained access (Y)