Icinga 2 is an open source monitoring tool that is used for checking the availability of IT resources (Network, servers etc) & report the outage in case a resource is down. It also generates performance data for reporting purposes as well.
Icinga 2 has multi-threaded design & can run thousands of checks each seconds without affecting the CPU. We can also setup Icinga 2 with high availability clusters with a distributed setup for large/complex environments.
In this tutorial, we will learn to install Icinga 2 on CentOS/ RHEL 7 systems. Below are my lab setup details for Icinga 2
- Hostname of the machine “icinga2.example.com”
- IP address “192.168.1.2”
- OS : CentOS 7 / RHEL 7
- All the installation will done via linuxtechi user, who is part of wheel group.
Requirements for Icinga 2
1) We need to have a machine with LAMP server installed for installation of Icinga 2. To create a LAMP server, we will first install the apache web server with the following command,
[linuxtechi@icinga2 ~]$ sudo yum install httpd
Next install mariadb server (database) with the following yum command,
[linuxtechi@icinga2 ~]$ sudo yum install mariadb mariadb-server
Start & enable mariadb service using beneath commands,
[linuxtechi@icinga2 ~]$ sudo systemctl start mariadb && sudo systemctl enable mariadb
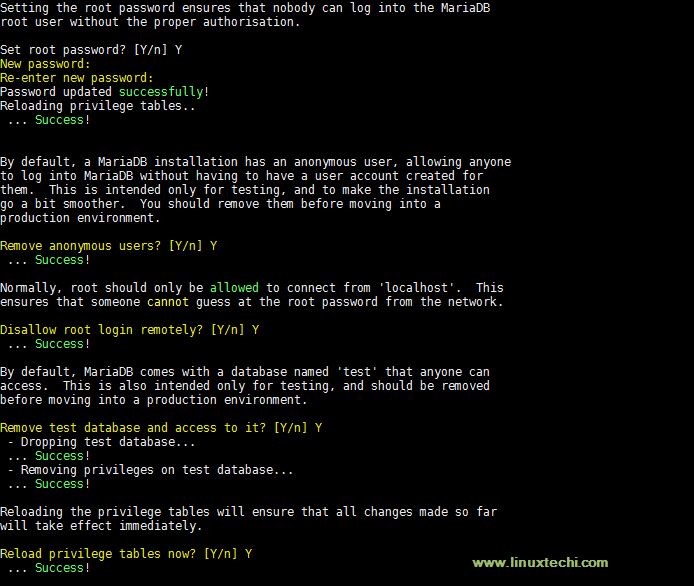
Now secure the mysql installation by executing the following command,
[linuxtechi@icinga2 ~]$ sudo mysql_secure_installation
Then follow the on screen instructions to secure the mysql installation.
Lastly install the required PHP packages, but we need the latest php packages. To install the latest php packages, we will install scl packages,
[linuxtechi@icinga2 ~]$ sudo yum install centos-release-scl
Next run the following yum command to install the latest php packages for Icinga,
[linuxtechi@icinga2 ~]$ sudo yum install rh-php71-php-mysqlnd rh-php71-php-cli php-Icinga rh-php71-php-common rh-php71-php-fpm rh-php71-php-pgsql rh-php71-php-ldap rh-php71-php-intl rh-php71-php-xml rh-php71-php-gd rh-php71-php-pdo rh-php71-php-mbstring -y
Next we will setup a default time zone in php, look for date.timezone and add the following content
[linuxtechi@icinga2 ~]$ sudo vi /etc/opt/rh/rh-php71/php.ini

date.timezone = India/Kolkata
Change the time zone as you see fit & save the file. Now start and enable apache service,
[linuxtechi@icinga2 ~]$ sudo systemctl start httpd && sudo systemctl enable httpd
2) We also need to have EPEL repository enabled as some packages required by Icinga 2 are available on EPEL repositories. Install EPEL repo on CentOS/RHEL 7 with the following command,
[linuxtechi@icinga2 ~]$ sudo rpm -Uvh https://dl.fedoraproject.org/pub/epel/7/x86_64/Packages/e/epel-release-7-11.noarch.rpm
For RHEL, enable optional repository with the following command,
# subscription-manager repos --enable rhel-7-server-optional-rpms
Icinga 2 installation
Icinga is available in the form of the RPM package, but for that first we need to enable icinga yum repository, execute the following command from the terminal to enable it
[linuxtechi@icinga2 ~]$ sudo yum install https://packages.icinga.com/epel/icinga-rpm-release-7-latest.noarch.rpm
Now we will install the icinga 2 along with its plugins,
[linuxtechi@icinga2 ~]$ sudo yum install icinga2-ido-mysql icingaweb2 icingacli nagios-plugins-all
We will also install an additional package, icingaweb2-selinux as we will be keeping our selinux enabled,
[linuxtechi@icinga2 ~]$ sudo yum install icingaweb2-selinux -y
Now restart apache, icinga2 & fpm services, & enable them for boot,
[linuxtechi@icinga2 ~]$ sudo systemctl restart httpd.service
[linuxtechi@icinga2 ~]$ sudo systemctl start icinga2.service
[linuxtechi@icinga2 ~]$ sudo systemctl enable icinga2.service
[linuxtechi@icinga2 ~]$ sudo systemctl start rh-php71-php-fpm.service
[linuxtechi@icinga2 ~]$ sudo systemctl enable rh-php71-php-fpm.service
Configure Firewall rules for ICINGA 2
In case OS firewall is running and enabled on your server then configure following firewalld rules for port 80 & 5665, so that we can access the webpage from our local network & enable the monitoring via port 5665,
[linuxtechi@icinga2 ~]$ sudo firewall-cmd --zone=public --permanent --add-port=80/tcp
[linuxtechi@icinga2 ~]$ sudo firewall-cmd --zone=public --permanent --add-port=5665/tcp
[linuxtechi@icinga2 ~]$ sudo firewall-cmd --reload
Success
[linuxtechi@icinga2 ~]$
As for the SELinux policies, we have already made the necessary changes by installing the ‘icinga-selinux‘ package.
Access Icinga 2 Web and Start the Installation wizard:
Now open a web browser & enter the following URL to access the icinga 2 web setup,
http://<ip-addrees-or-hostname-of-icnga2-server>/icingaweb2/setup
In my case, url is http://192.168.1.2/icingaweb2/setup
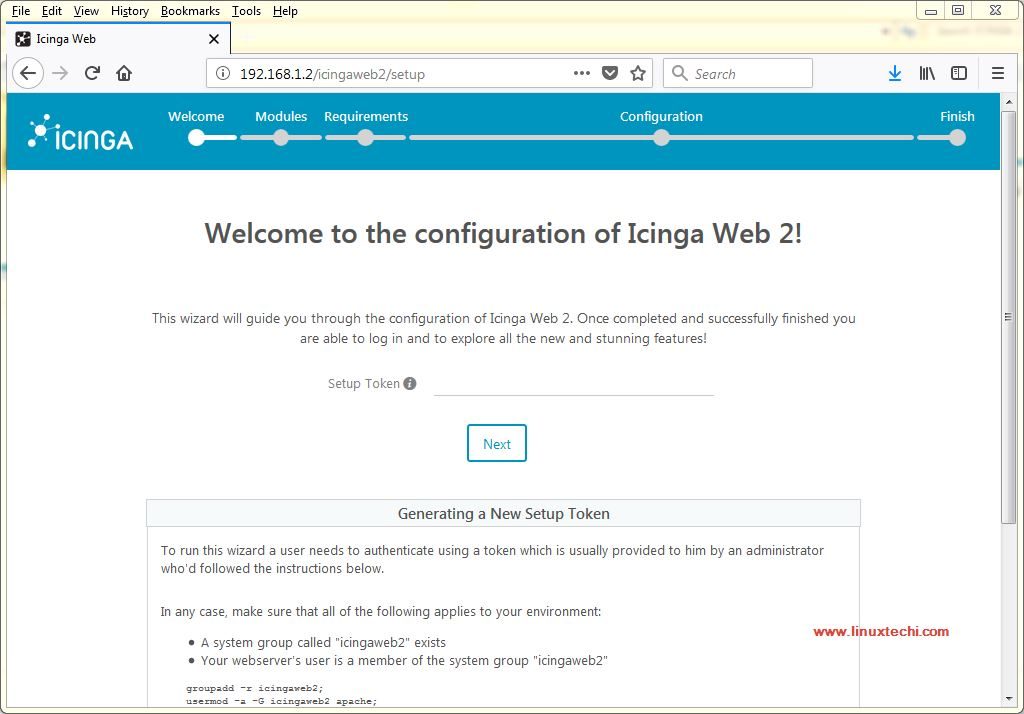
where, 192.168.1.2 is the IP address of the machine where we have installed ICINGA 2. As soon as we enter the URL, we will be greeted with the following screen,
We now need to create the setup token. Run the following commands to create the setup token,
[linuxtechi@icinga2 ~]$ sudo groupadd -r icingaweb2
[linuxtechi@icinga2 ~]$ sudo usermod -a -G icingaweb2 apache
[linuxtechi@icinga2 ~]$ sudo icingacli setup config directory --group icingaweb2
[linuxtechi@icinga2 ~]$ sudo icingacli setup token create
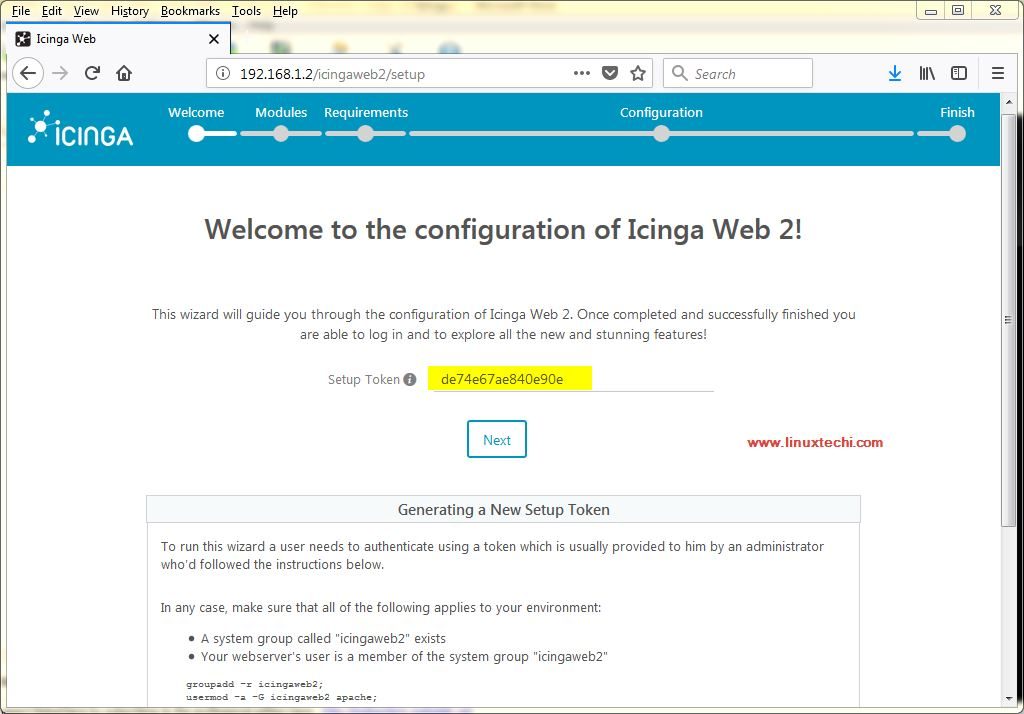
The newly generated setup token is: de74e67ae840e90e
[linuxtechi@icinga2 ~]$
Upon executing the last command, we will get a token as output. Copy the token & paste it on the webpage,
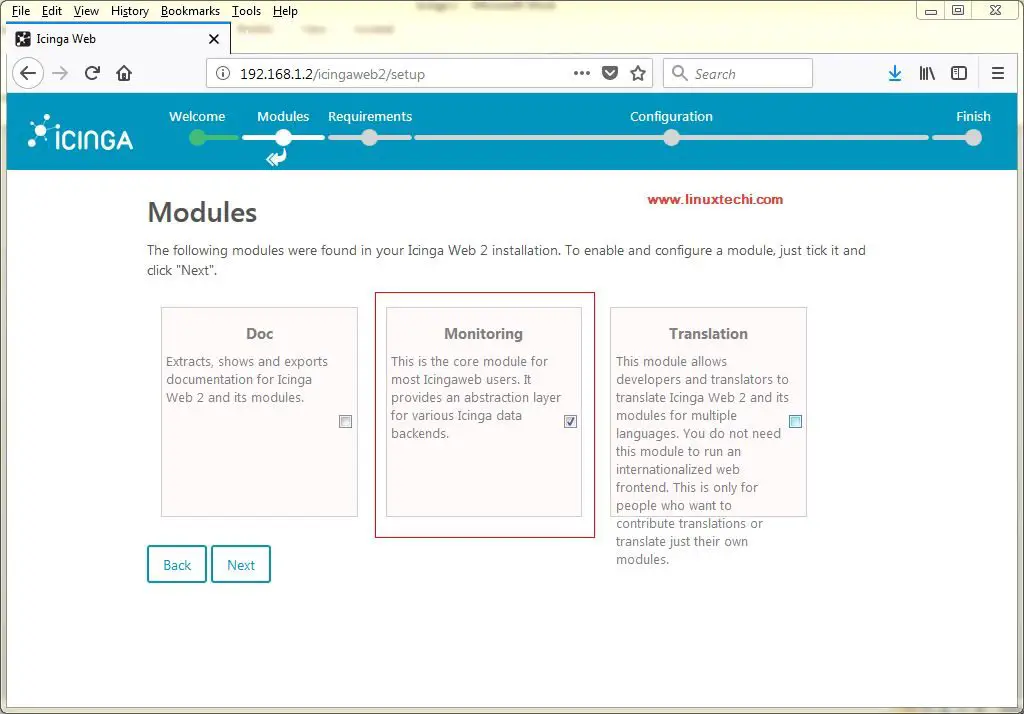
Process to create token is also mentioned on the webpage. On the next screen, select monitoring & click next,
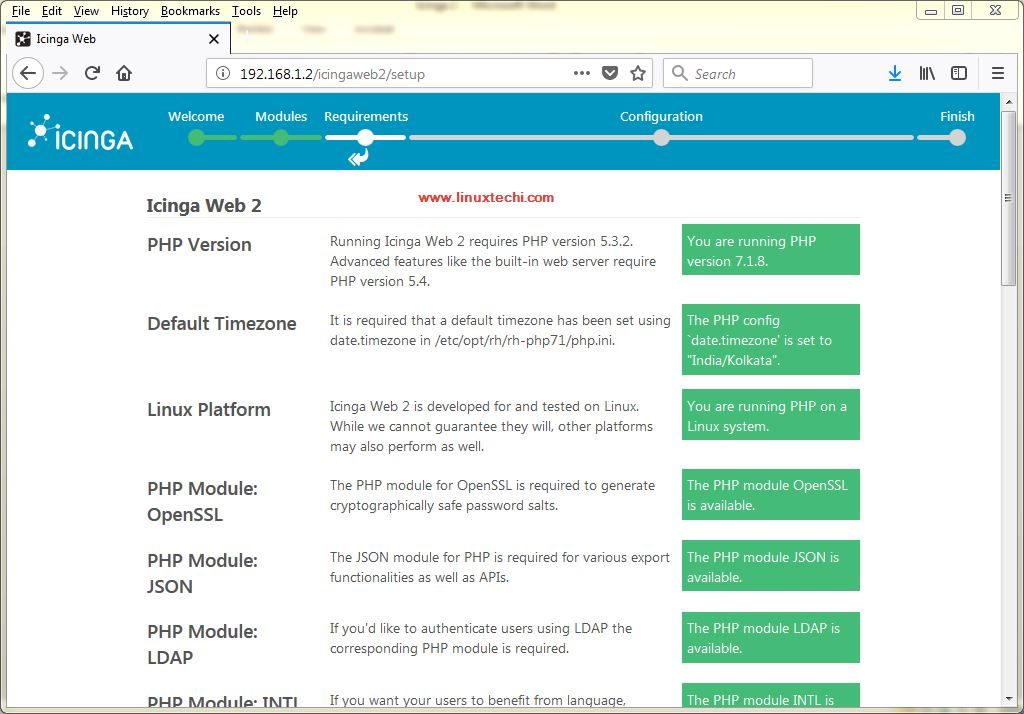
On the next screen, we will find various php modules that we have installed, review them & click next,
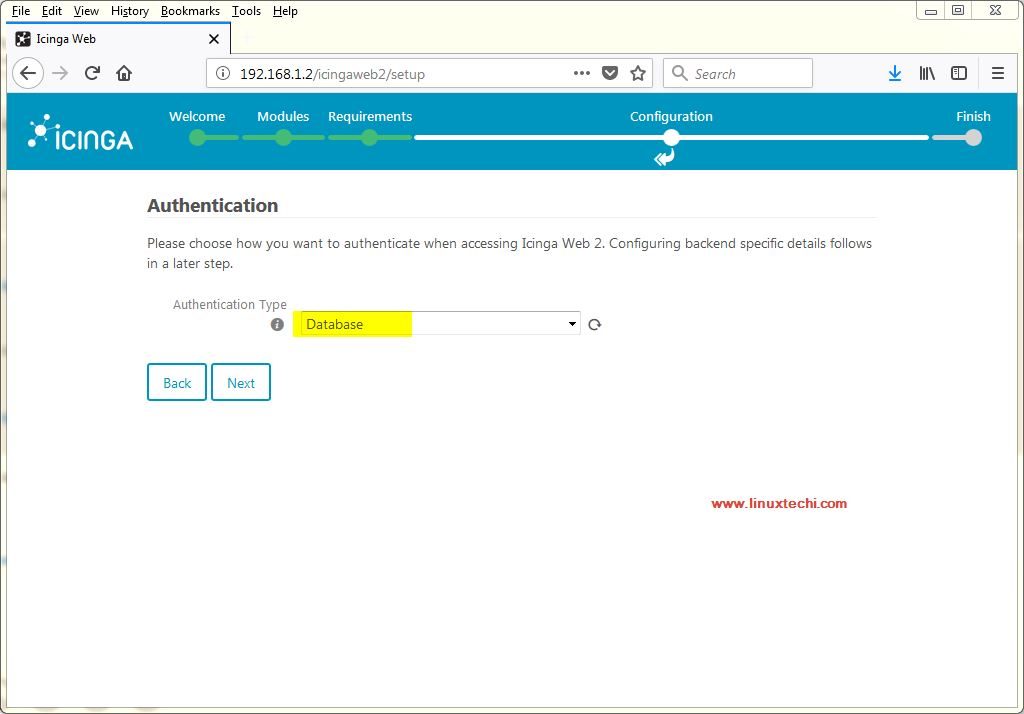
On the next screen, select the authentication type. We will be using ‘Database‘, press next,
We now need to create a database for the Icinga, run the following commands to create a new database for icinga,
[linuxtechi@icinga2 ~]$ mysql -u root -p
Enter password:
MariaDB [(none)]> create database icinga2;
Query OK, 1 row affected (0.00 sec)
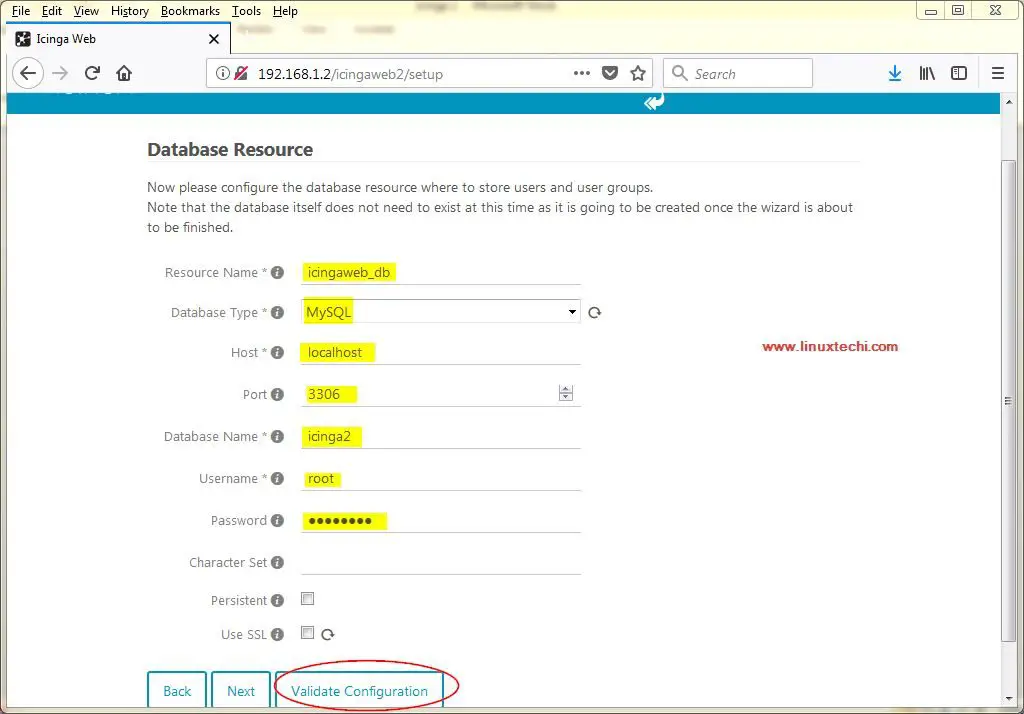
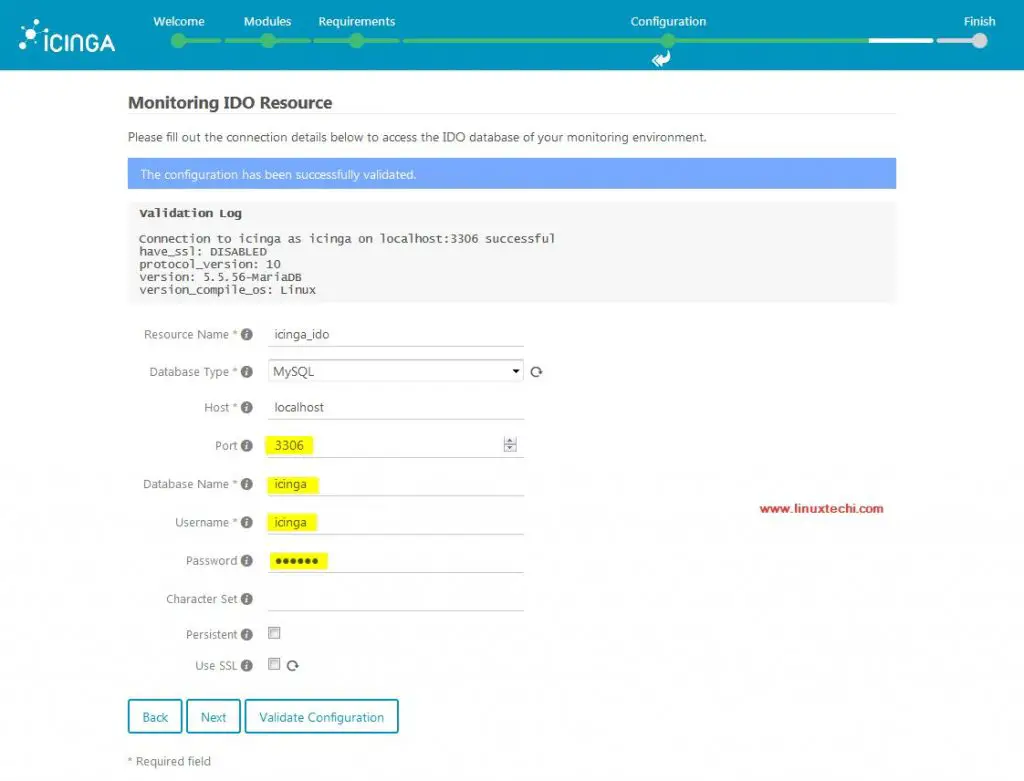
Now exit from mariadb interface & provide the information on the setup page & click on validate,
Once the Configuration has been validated successful and then click on Next
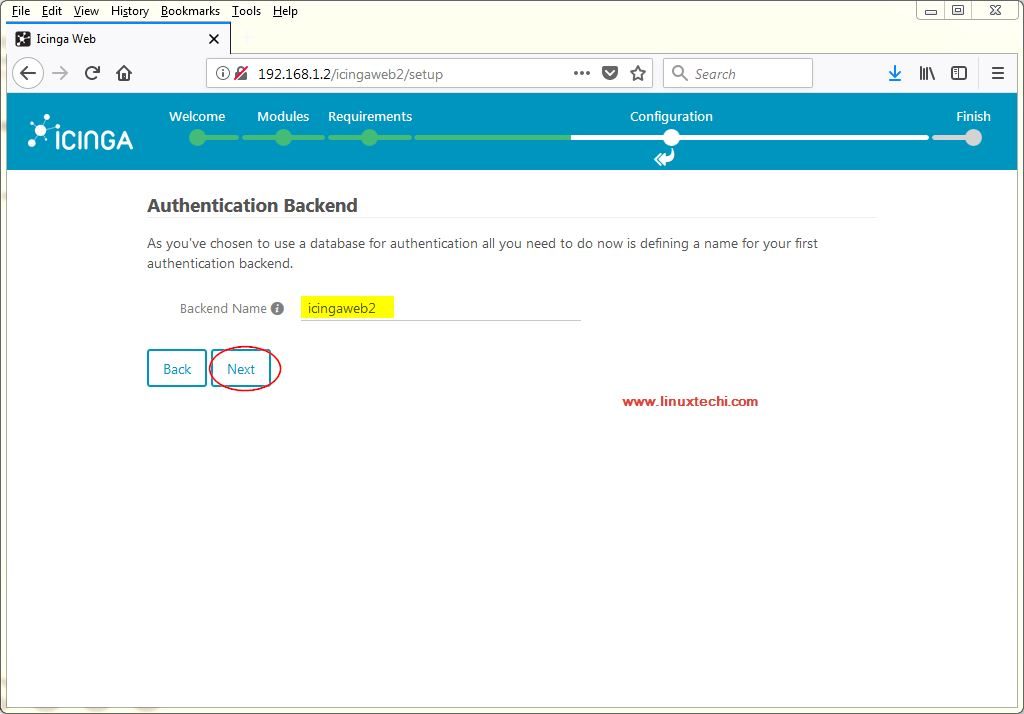
Next, select the Authentication Backend name, we are keeping it default,
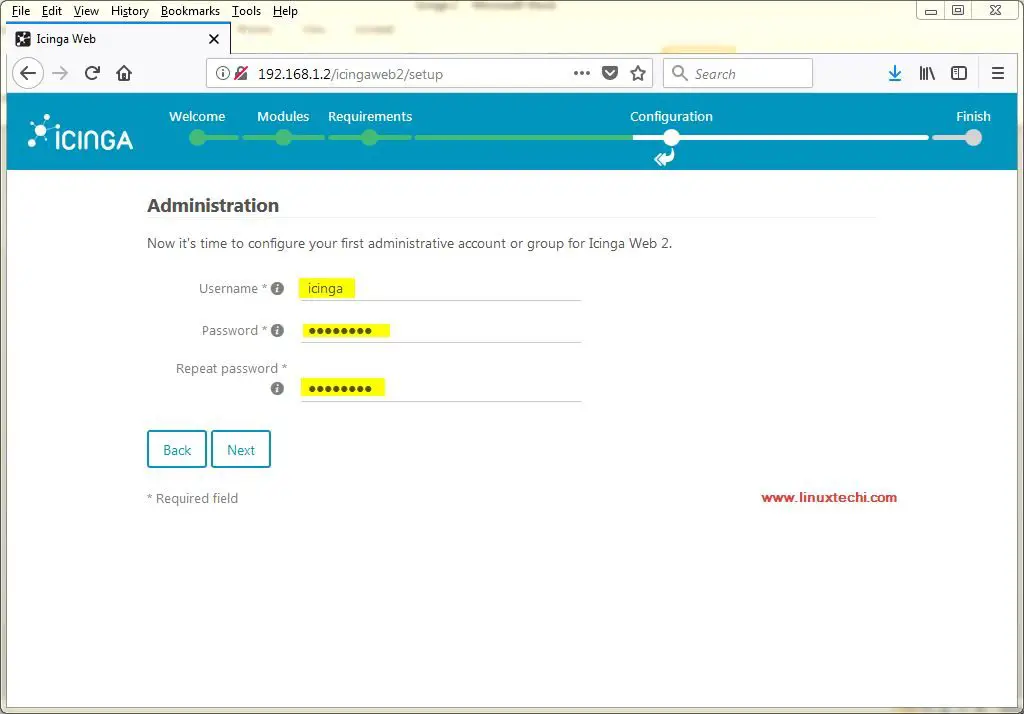
Next select the username & password to administer the Icinga admin web portal (Web Site)
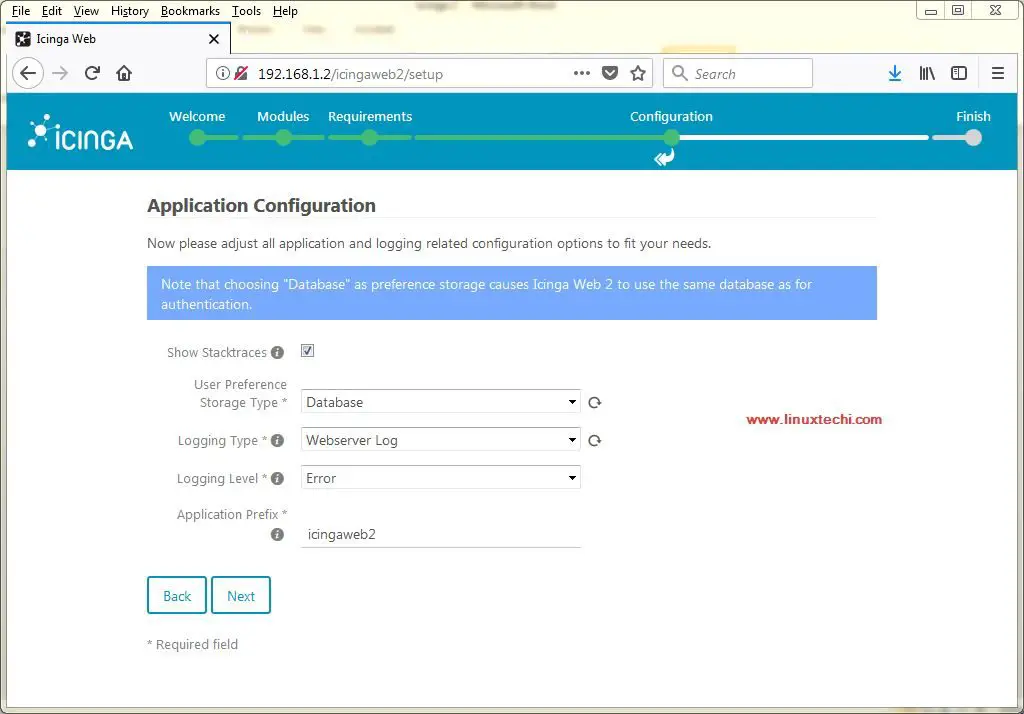
Next configure the settings regarding your application, for us default is good,
Click on Next,
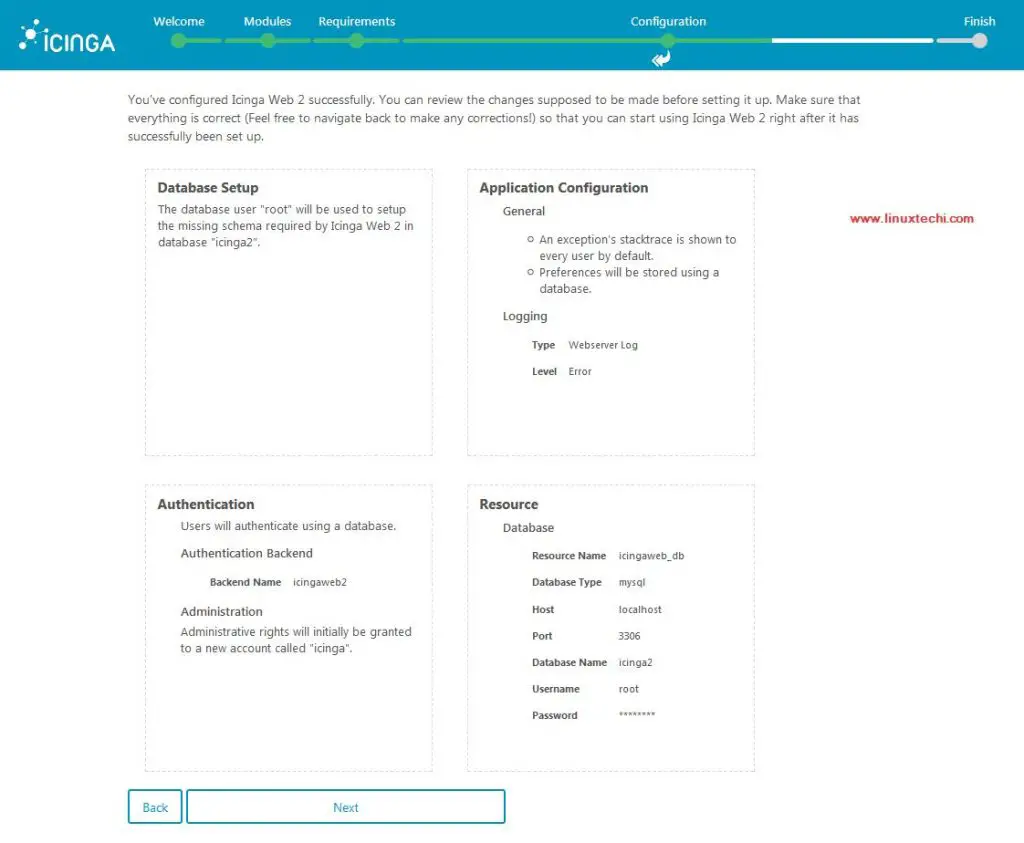
On the next screen, we will be asked to review the changes that we have made for icinga. Make sure that everything is in order & hit next,
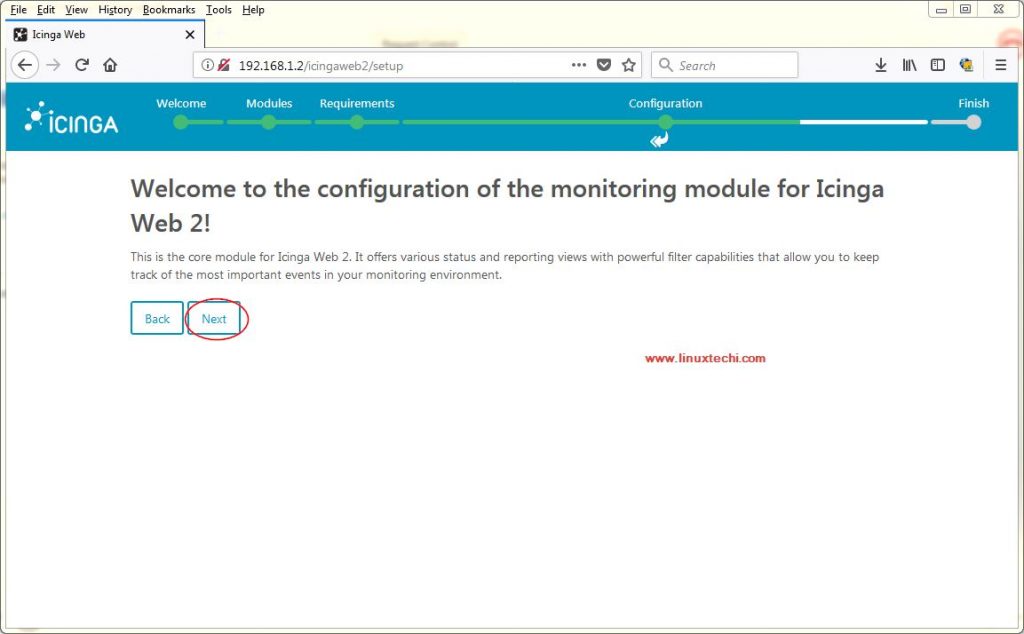
We will now configure the monitoring module of Icinga. Here on the next couple of screens, we will configure the monitoring backend (which is left as default) & then we will have to enter the database information again, but before we do that we need to import the IDO schema.
To import the schema, run the following commands,
[linuxtechi@icinga2 ~]$ mysql -u root -p
 MariaDB [(none)]>  CREATE DATABASE icinga;
 MariaDB [(none)]> GRANT SELECT, INSERT, UPDATE, DELETE, DROP, CREATE VIEW, INDEX, EXECUTE ON icinga.* TO 'icinga'@'localhost' IDENTIFIED BY 'icinga';
 MariaDB [(none)]> FLUSH PRIVILEGES;
 MariaDB [(none)]> EXIT;
Here we created another database for Icinga IDO & will now import the IDO schema to it,
[linuxtechi@icinga2 ~]$ mysql -u root -p icinga < /usr/share/icinga2-ido-mysql/schema/mysql.sql
Also make changes as per your database to the following file,
[linuxtechi@icinga2 ~]$ sudo vi /etc/icinga2/features-available/ido-mysql.conf
/**
 * The db_ido_mysql library implements IDO functionality
 * for MySQL.
 */
library "db_ido_mysql"
object IdoMysqlConnection "ido-mysql" {
  user = "icinga"
  password = "icinga"
  host = "localhost"
  database = "icinga"
}
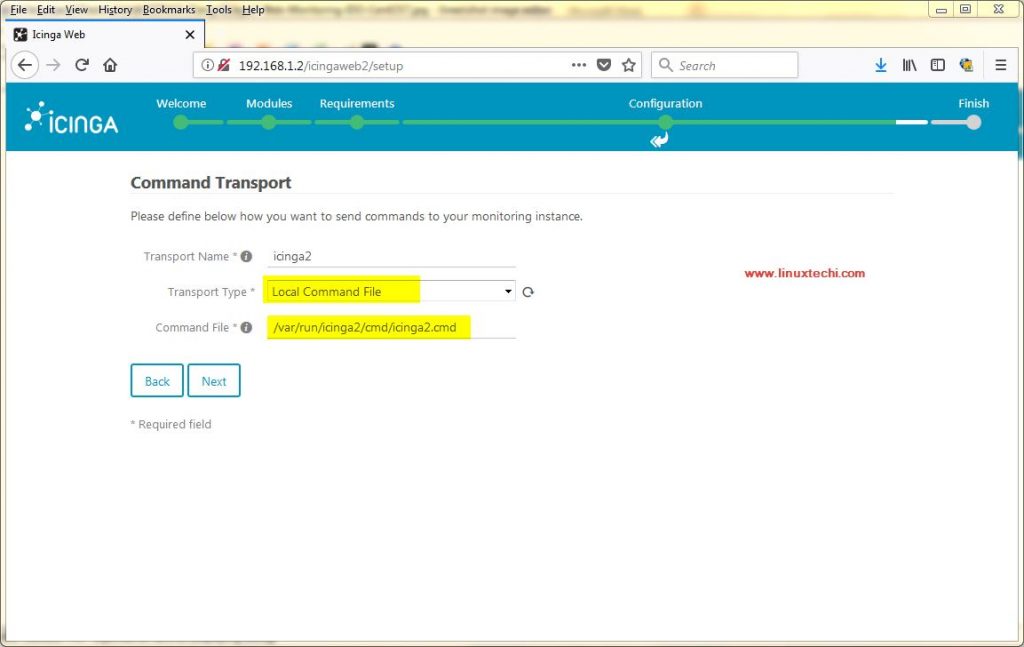
Now after successful validation for the IDO, click next. On this screen, we can configure information regarding our remote icinga instance, change it to ‘Local Command File‘,
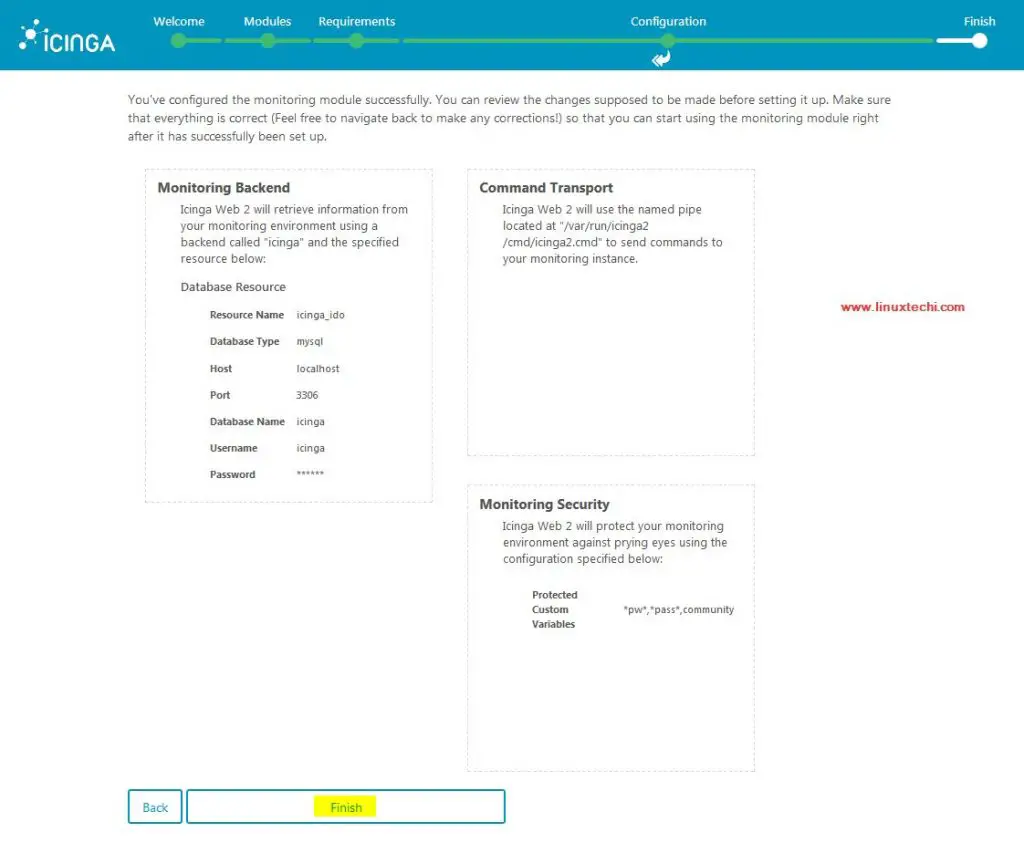
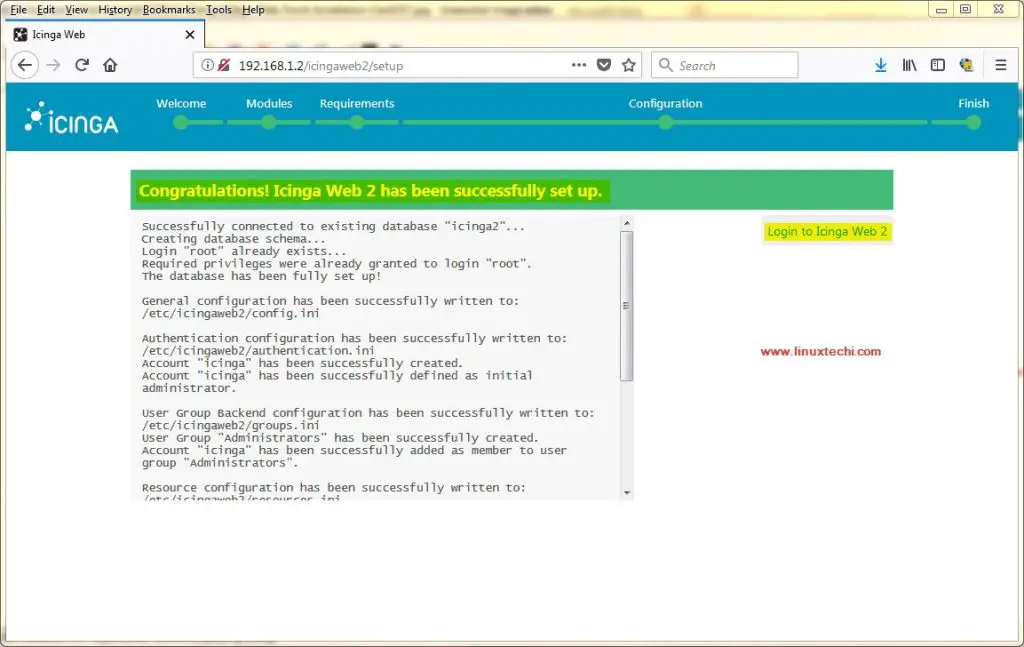
Leave the rest of the screens as default & on the last screen, review all the changes & hit finish. We will then get the following screen,
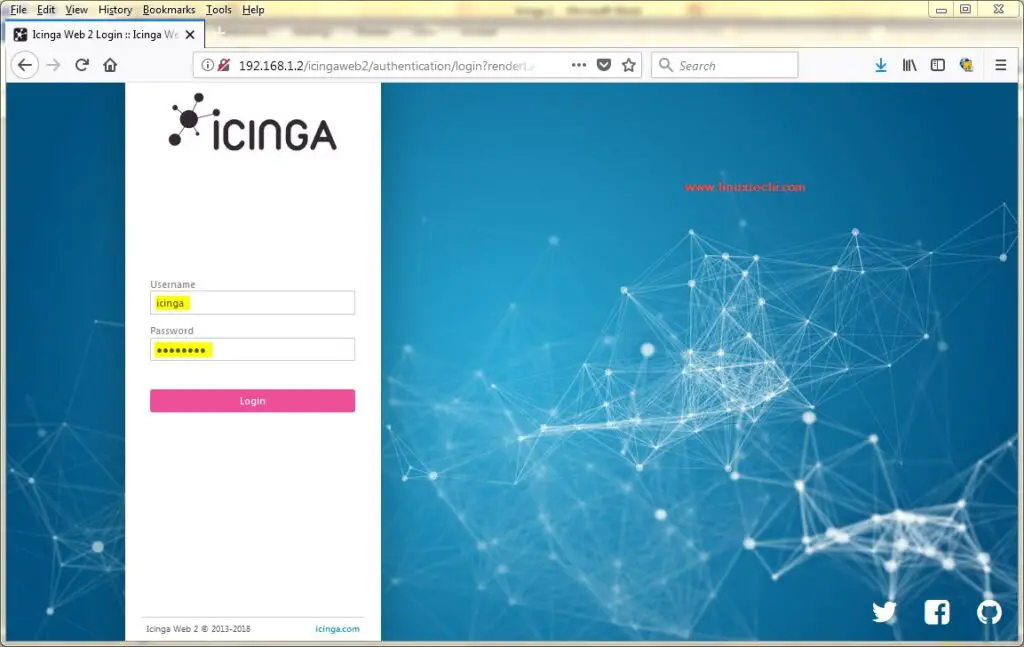
Click on “Login to icinga Web 2” & we will redirected the login page for icinga. Login using the credentials that we specify in above the installation steps.
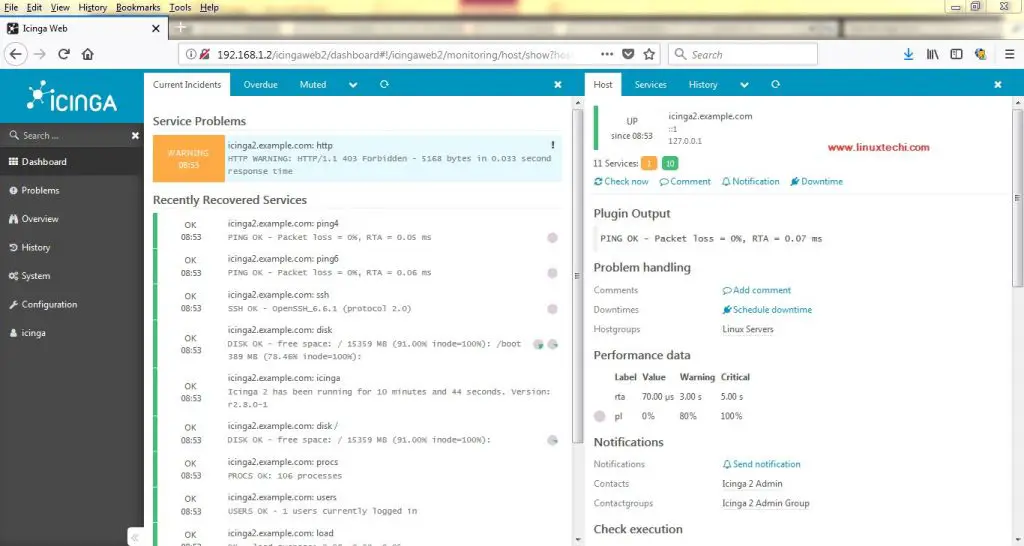
Upon successful authentication, we can now see the icinga dashboard with all the services & their status,
This confirms that we have successfully installed the Icinga 2 monitoring tool. Please feel free to send in your queries or suggestions using the comment box below.
Read More – How to add remote Linux and Windows Host to Icinga 2 for Monitoring
This documentation is great! I installed icinga2 + icingaweb2 on CentOS 7.7.1908 successfully with some additional tweaking below. e.g. install missing module, fix permission issue, etc. The following should fix most issues mentioned above
sudo yum install icinga2 icinga2-ido-mysql icingaweb2 icingacli nagios-plugins-all
sudo yum install rh-php71-php-imagick -y && systemctl restart rh-php71-php-fpm.service ← this fixes The PHP module Imagick is NOT available.
sudo icinga2 feature enable ido-mysql command
touch /var/www/html/index.html← this fixes HTTP WARNING: HTTP/1.1 403 Forbidden error
sudo yum install icinga2-selinux -y ← this fixes “icinga2: Can’t send external Icinga command to the local command file “/var/run/icinga2/cmd/icinga2.cmd”: Permission denied” error
These commands Disable Apache welcome page and Forbid Apache from exposing files and directories within the web root directory (see here for details)
sudo sed -i ‘s/^/#&/g’ /etc/httpd/conf.d/welcome.conf
sudo sed -i “s/Options Indexes FollowSymLinks/Options FollowSymLinks/” /etc/httpd/conf/httpd.conf