Red Hat announced the General Availability of RHEL 9 on 17th May 2022. This is the latest release of RHEL (Red Hat Enterprise Linux), and it comes with numerous features and enhancements.
Notable highlights include:
- New software versions including PHP 8.0, Ruby 3.0, Perl 5.32, Node.JS 16 and so many more.
- Security enhancements made in SELinux and OpenSSH services.
- Enhanced performance monitoring using the web console.
- Live kernel patching from the web console.
- Introduction of an image builder tool for creating custom RHEL system images in multiple formats.
For a comprehensive list of all the interesting new features and enhancements, visit the RHEL 9 release notes
In this guide, we will show you how to upgrade from RHEL 8 to RHEL 9 step by step with screenshots.
Prerequisites
Before you get started, here is what you need.
- An instance of RHEL 8.6
- A fast and stable internet connection for performing the upgrade
- Minimum boot partition of 100 MB
With the minimum requirements satisfied, let us get started.
Step 1) Delete the ‘tmp_leapp_py3’ Directory
If by any chance you had previously migrated from RHEL 7 to RHEL 8, then you need to remove the /root/tmp_leapp_py3 directory. Use below rm command
$ sudo rm -Rf /root/tmp_leapp_py3
However, if you are starting from a fresh installation of RHEL 8, skip this step and move along.
Step 2) Ensure that Your System has an Active Red Hat Subscription
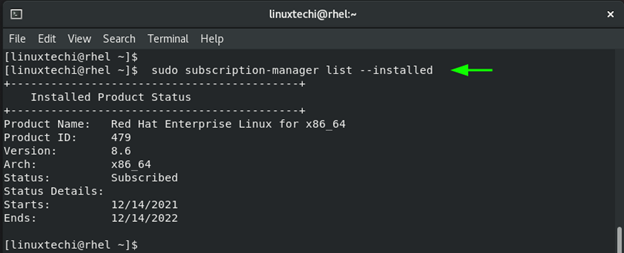
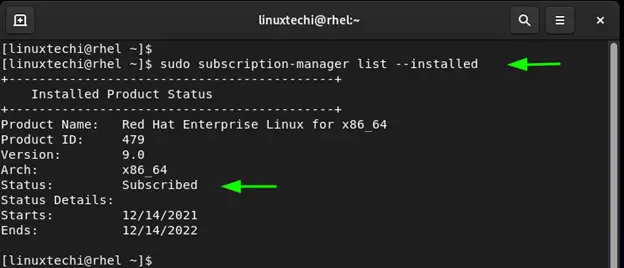
For the Upgrade to proceed as planned, ensure that you have an active Red Hat Subscription. To verify if you have an active subscription, run the following command:
$ sudo subscription-manager list --installed
If your system has a subscription, you should get the following output.
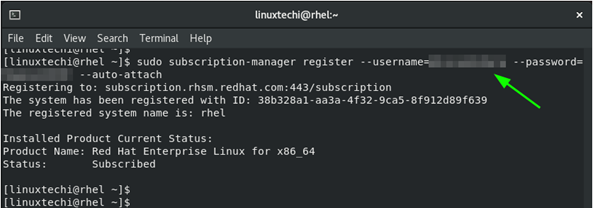
If your system is not yet registered to the Red Hat Subscription Management, register it on the command line as shown.
The username and password credentials are the login details to your Red Hat account.
$ subscription-manager register --username=username --password=password --auto-attach
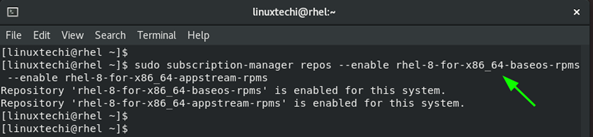
Step 3) Ensure Appropriate Repositories have been Enabled
Next, you need to ensure that the required repositories are enabled. This command enables the Base and App stream repositories for the 64-bit Intel architecture.
$ sudo subscription-manager repos --enable rhel-8-for-x86_64-baseos-rpms --enable rhel-8-for-x86_64-appstream-rpms
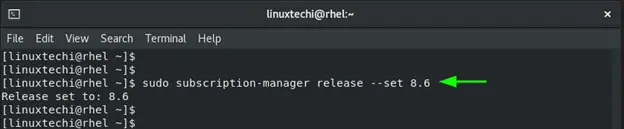
Step 4) Lock the System to RHEL 8.6
Next, lock your RHEL system to RHEL 8.6. This marks the version of RHEL from which the upgrade will start.
$ sudo subscription-manager release --set 8.6
Step 5) Enable RHUI repositories (For AWS instances only)
If you are running an RHEL 8 instance hosted on AWS, you need to enable and install the required Red Hat Update Infrastructure repositories to prepare the system for the upgrade.
$ sudo dnf config-manager --set-enabled rhui-client-config-server-8
$ sudo dnf -y install rh-amazon-rhui-client-ha leapp-rhui-aws
Step 6) Update Packages to their Latest Versions
Next, be sure to upgrade all the packages to their latest versions.
$ sudo dnf update
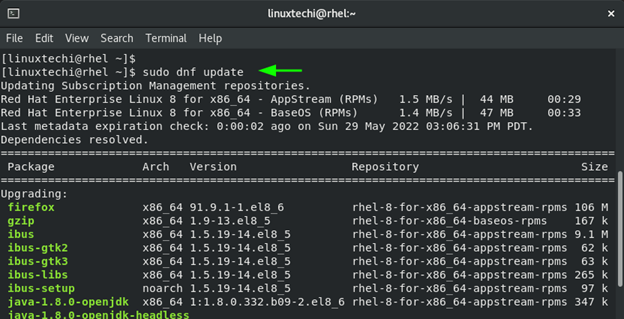
Once complete, reboot your system.
$ sudo reboot
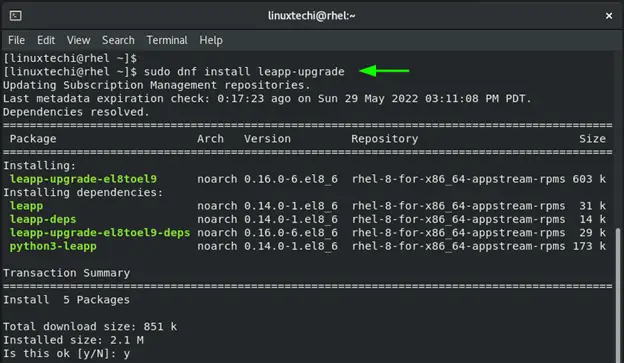
Step 7) Install the leapp-upgrade Tool
Next, install the leapp-upgrade tool which will automate the upgrade from RHEL 8 to RHEL 9.
$ sudo dnf install leapp-upgrade
Step 8) Remove Versionlock Plugin
Versionlock is a plugin that protects packages from being upgraded to new versions. If you had already set this, you need to clear is as shown.
$ sudo dnf versionlock clear
Step 9) Modify Firewalld configuration
For the upgrade to proceed smoothly, you need to disable the AllowZoneDrifting value in the Firewalld configuration. So, access the firewalld configuration file.
$ sudo vi /etc/firewalld/firewalld.conf
Scroll down and comment the AllowZoneDrifting attribute.

Save the changes and exit the configuration file.
Step 10) Perform Pre-upgrade
Before performing the actual upgrade, it is recommended to perform a pre-upgrade check. This simulates the actual upgrade and provides a report in case any error hindering the upgrade is found.
Therefore, run the following command to run the pre-upgrade check.
$ sudo leapp preupgrade --target 9.0
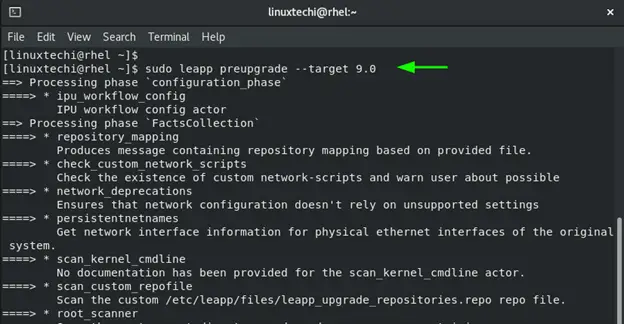
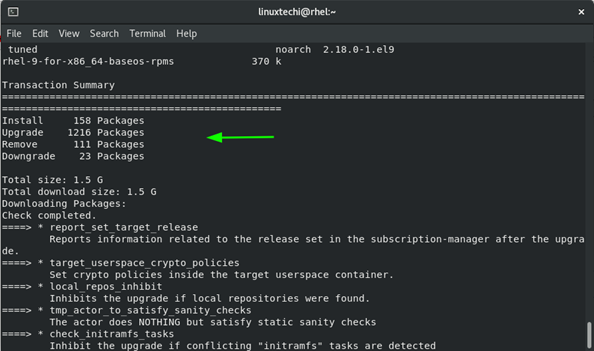
The command checks all the system configuration including the kernel, drivers and provides a summary of the total number of packages that will be installed, upgraded and removed. It also provides the number of packages that will be downgraded and the total download size of the new packages.
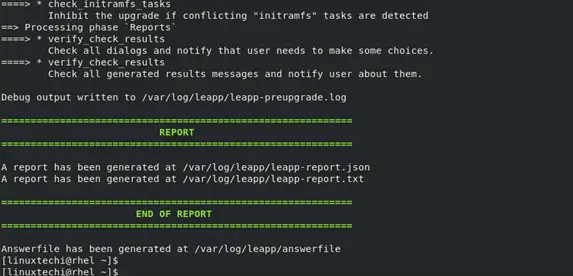
The report of the preupgrade is generated and saved in the /var/log/leapp/leapp-report.json and /var/log/leapp/leapp-report.txt text files.
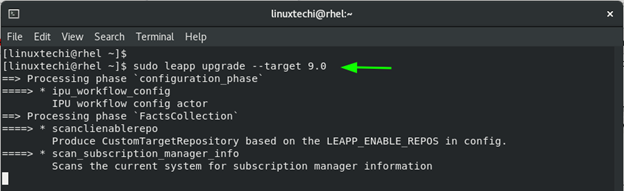
Step 11) Upgrade from RHEL 8 to RHEL 9
At this point, we are ready to perform an in-place upgrade from RHEL 8 to RHEL 9. To achieve this, run the following command.
$ sudo leapp upgrade --target 9.0
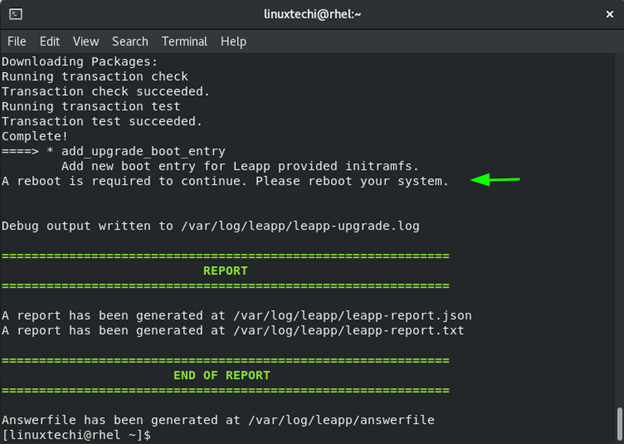
The upgrade downloads new packages and upgrades existing ones to new versions. Some obsolete packages are also removed, and some are downgraded. This takes about 20 minutes on a fast and stable internet connection.
At the end, you will be required to reboot your system. Details about the upgrade are recorded or saved in the /var/log/leapp/leapp-report.json and /var/log/leapp/leapp-report.txt text files.
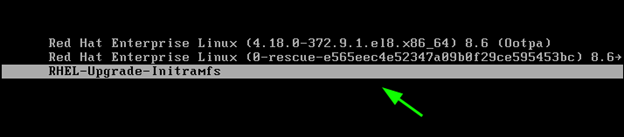
Step 12) Select RHEL-Upgrade-Initramfs GRUB Entry
Upon rebooting, select the RHEL-Upgrade-Initramfs entry from GRUB menu.
Next, press CTRL + D to proceed with the upgrade.
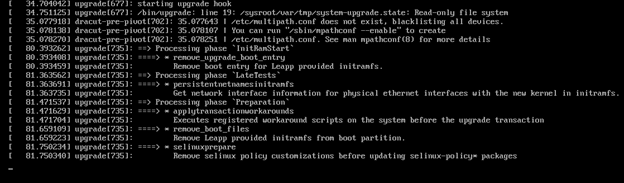
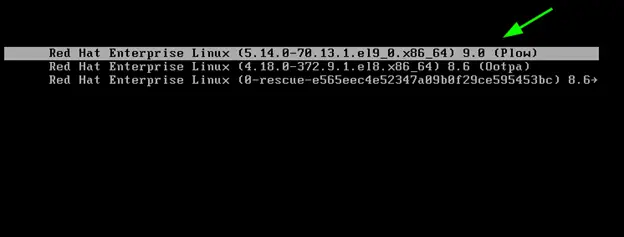
This takes quite some time, so be patient as the upgrade progresses. Once complete, the system will reboot. This time around, you will see a menu option for RHEL 9.0. Select this option by pressing ‘ENTER’.
Step 13) Login to RHEL 9
On the login screen, provide your login password and hit ‘ENTER’
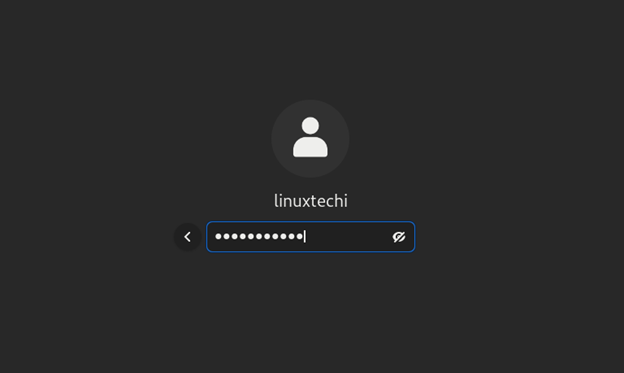
Once logged in, the RHEL 9 desktop will come to view with the new-look GNOME 42.

In addition, you can verify that the upgrade was successful by running the command:
$ cat /etc/redhat-release

Also, verify that it is a part of the RHEL subscription.
$ sudo subscription-manager list --installed
And there you go! We have successfully performed an in-place upgrade from RHEL 8 to RHEL 9. All the best as you start using your RHEL 9 instance.