In this tutorial, we will walk you through how to install Ubuntu server 24.04 LTS step-by-step.
Ubuntu 24.04 LTS was officially released on April 25th and ships with new exciting features and a bundle of enhancements and performance improvements. Check out our guide on how to install Ubuntu 24.04 LTS desktop and the top 11 things to do after installing Ubuntu 24.04 LTS
Prerequisites
- Minimal 4 GB of RAM
- 2 GHz dual-core processor
- 25 GB disk space
- Internet Connectivity (Optional)
- Installation Media (Bootable USB or DVD).
1) Download the Ubuntu Server ISO Image
The first step is to download the Ubuntu 24.04 ISO image. So, head over to the official Ubuntu download page (https://ubuntu.com/download/server) and download the ISO file.
With the ISO file at hand, prepare the installation media by burning the ISO file into USB. You can use a software utility such as Rufus if you are running Windows or UNetbootin for Linux, macOS, and Windows.
2) Start Ubuntu Server Installation
With the USB boot medium in place, plug it into the system you want to install the Ubuntu server OS and reboot. Be sure to configure your bootable medium to take the highest boot priority in the BIOS and continue booting.
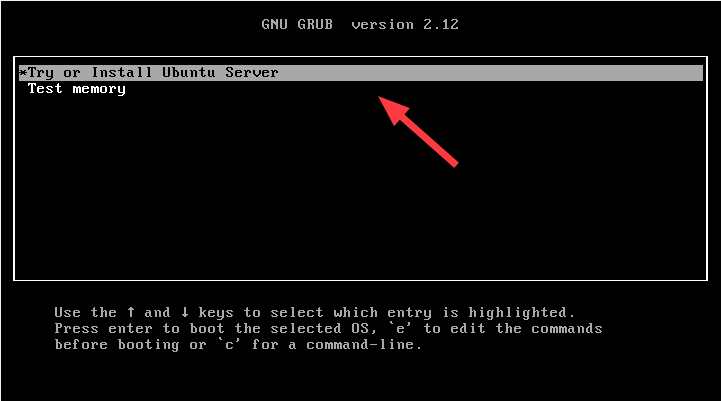
Upon booting, you will see the GRUB menu with two options: “Try or Install Ubuntu Server” and “Test memory“. The first option comes pre-selected. This is what we want. So just hit ENTER to proceed.
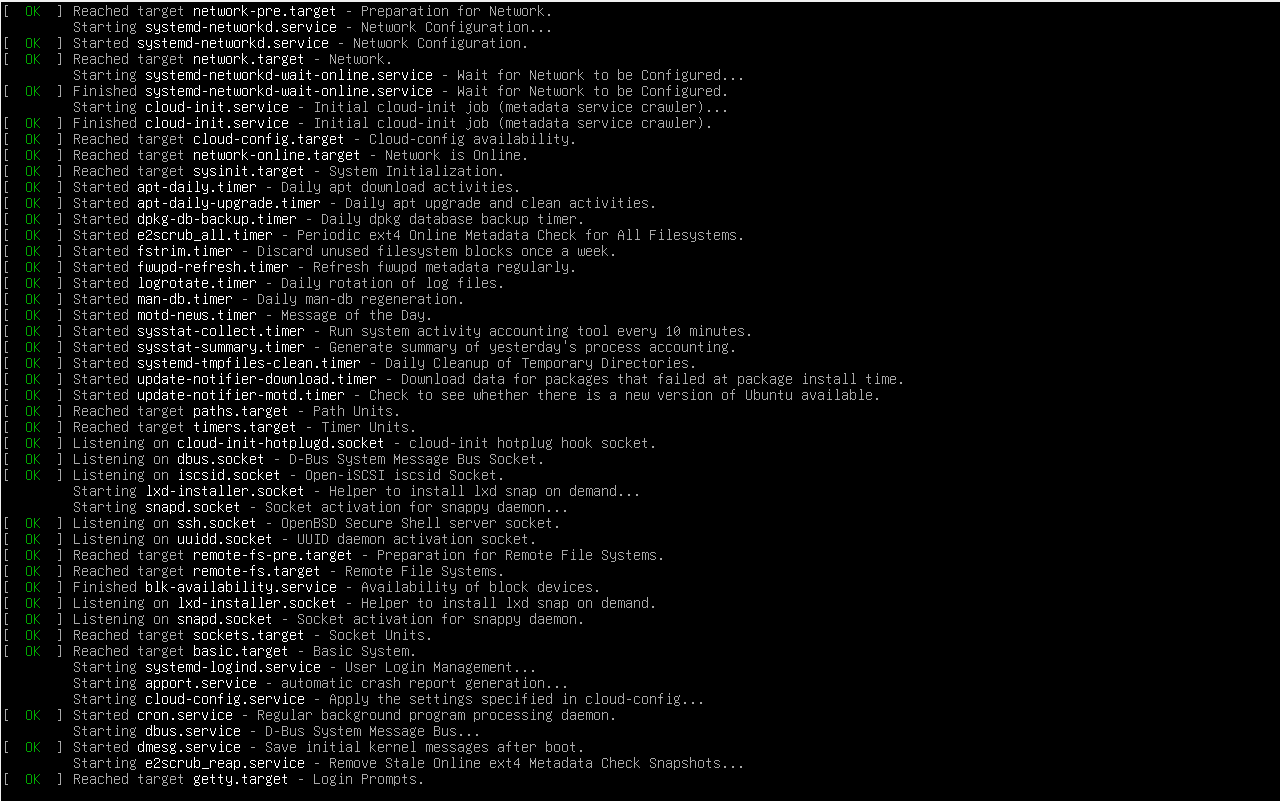
You will see some boot messages on the screen for a few seconds.
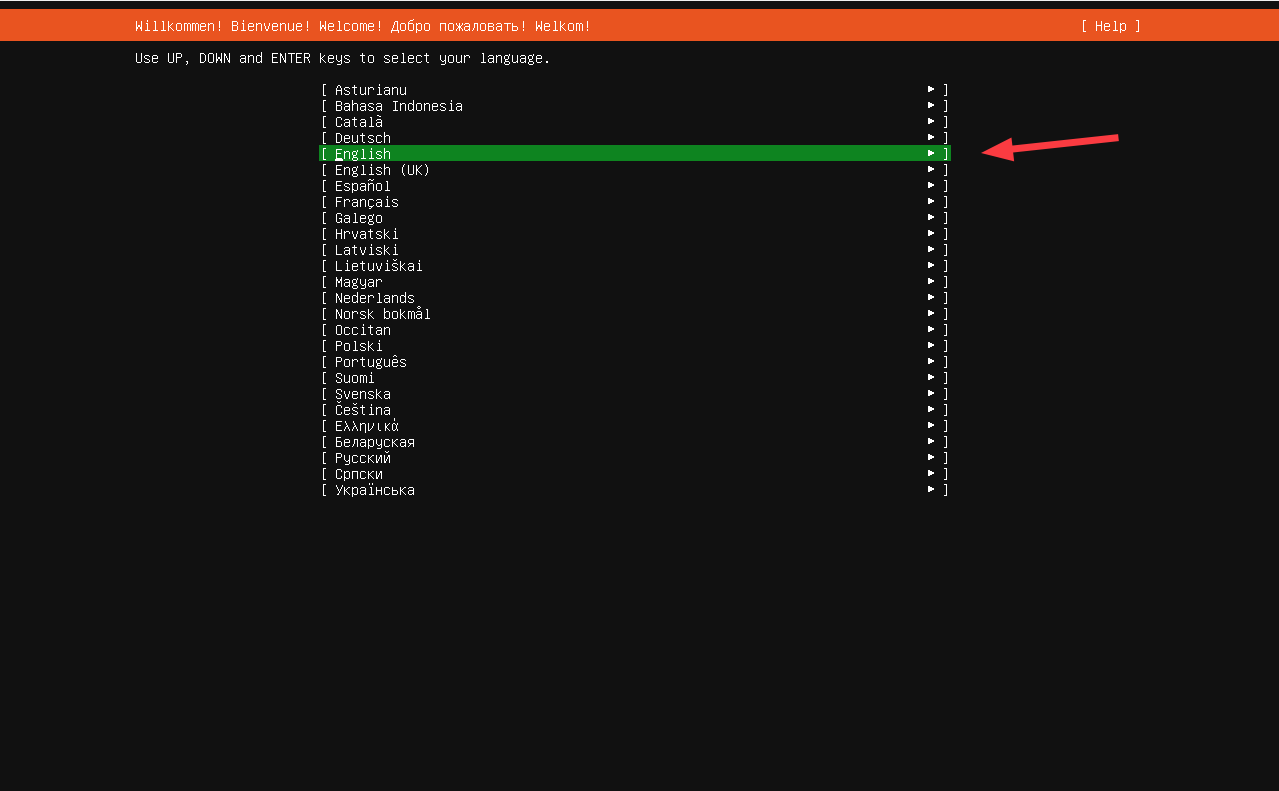
3) Select the Installation Language
Once the system has finished booting, select your preferred installation language. By default, this is set to English. This looks good for our case, so hit ENTER to proceed to the next step.
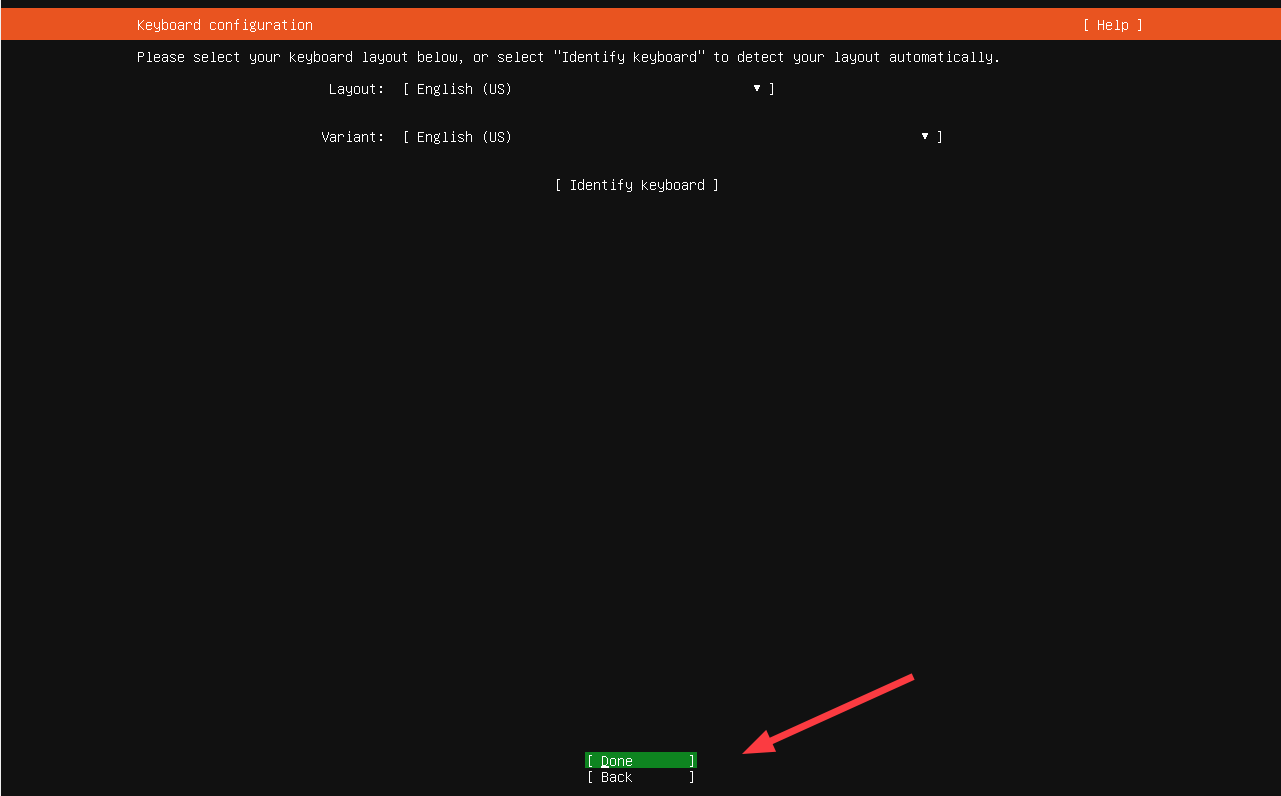
4) Select Keyboard Layout
Next, select your preferred layout. The default selection for the layout and variant is English (US). Feel free to select your preferred option, select `Done` with your arrow key, and hit ENTER to proceed to the next step.
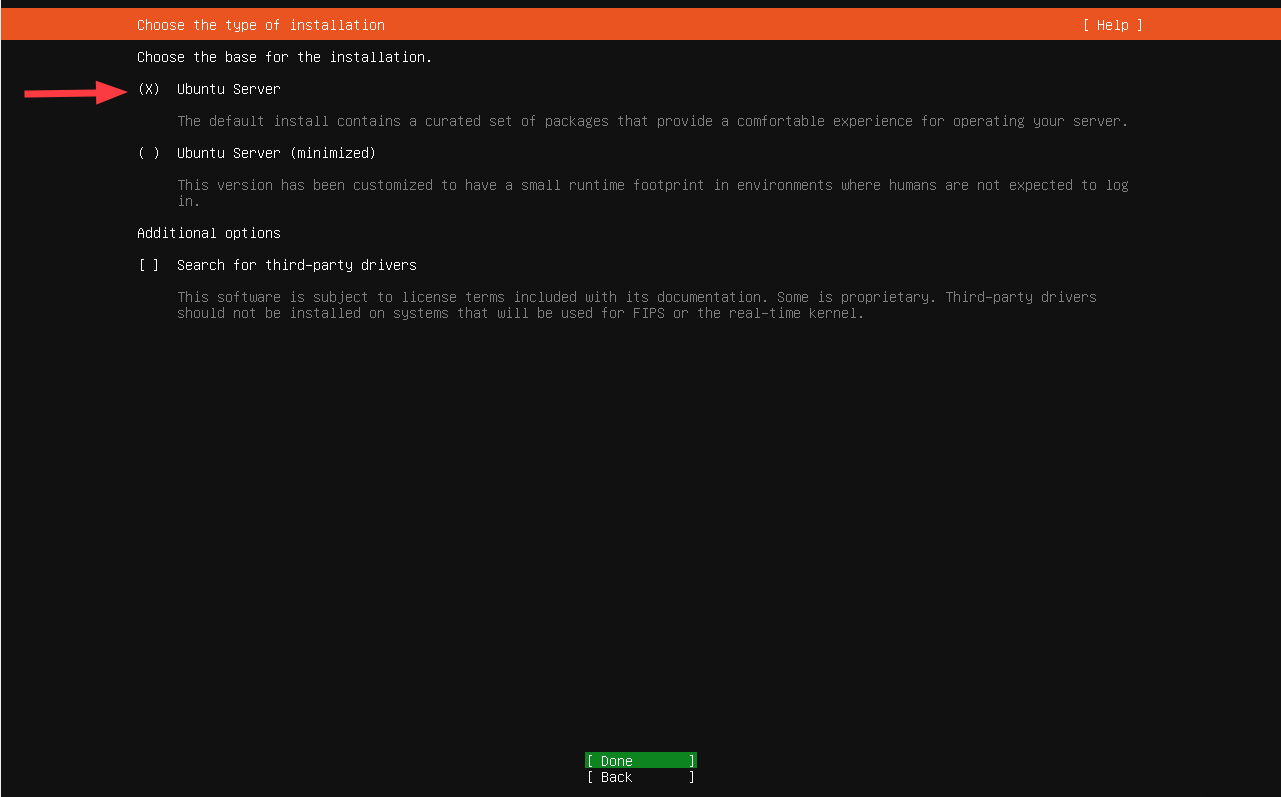
5) Choose the Type of Installation
The next step will require you to select your preferred installation type. By default, the “Ubuntu Server” option is selected. In addition to that, you can also choose the “Ubuntu Server (“minimized”) option which is a version customized to have a small footprint in environments that do not require login by users.
In this guide, we will go with the “Ubuntu Server” option. So we will hit ENTER.
6) Configure Network
In this step, you need to configure at least one active interface for network and internet connection. Active connections will be displayed with corresponding IPv4 addresses since DHCP is selected by default.
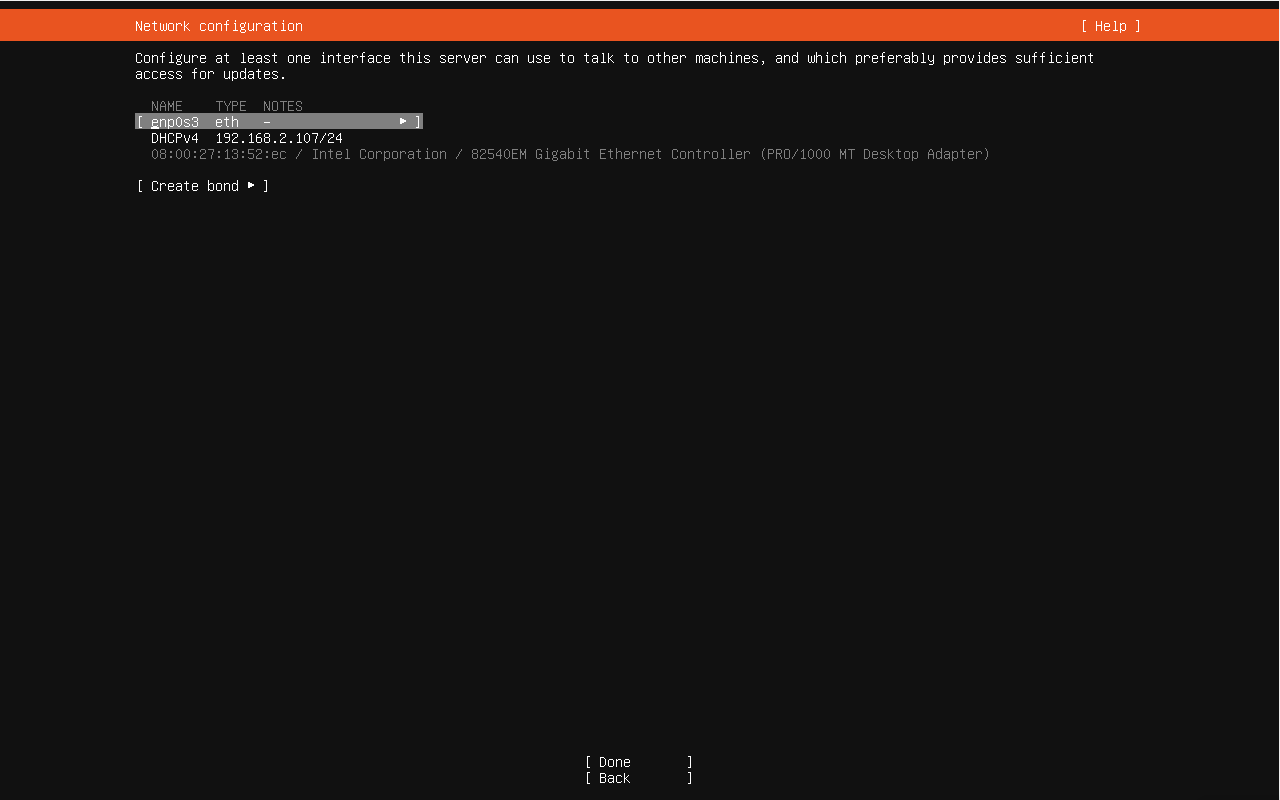
In our setup, “enp0s3” is the only active network interface. Instead of DHCP, we will configure a static IP address since the instance will act as a server.
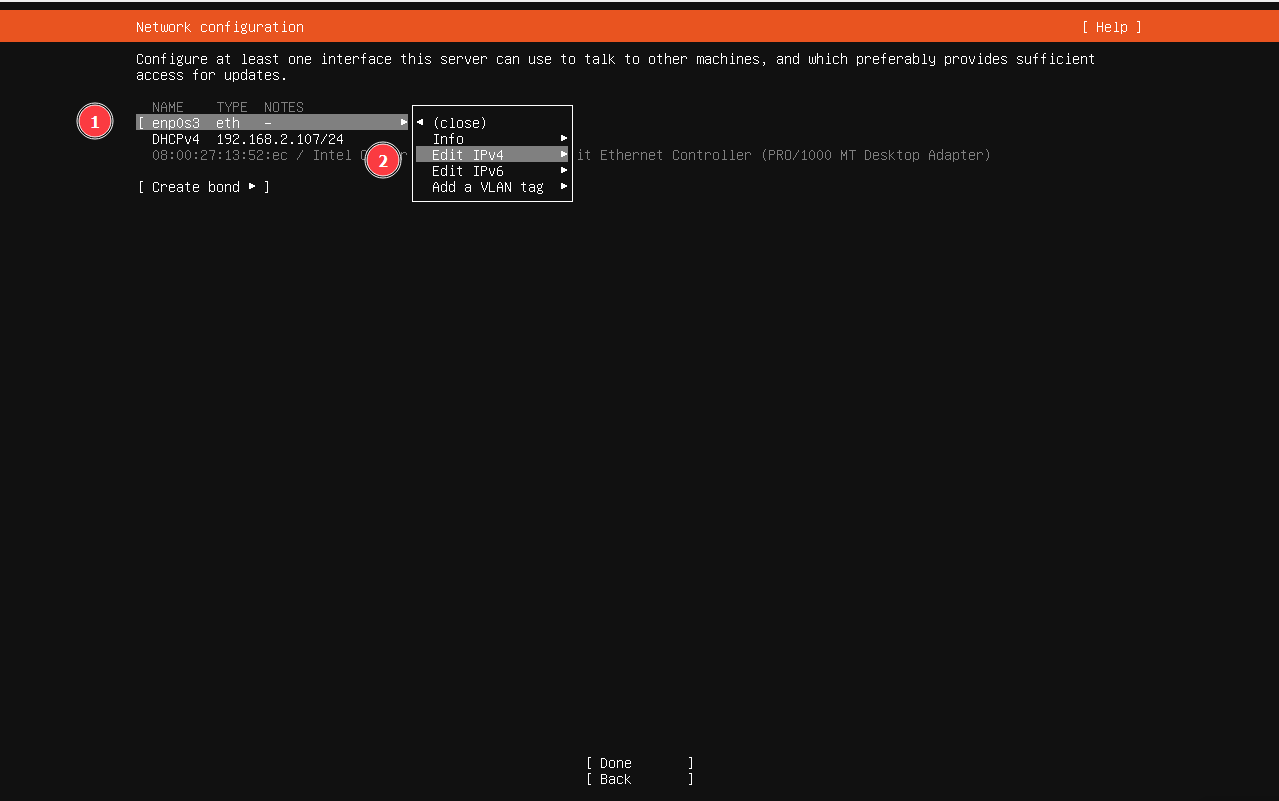
So, ensure your active interface is selected, then hit the arrow-right key on the keyboard, and on the menu that appears, select `Edit IPv4` using the arrow-down key.
On the pop-up CLI that appears, select the `Manual` option and hit ENTER.
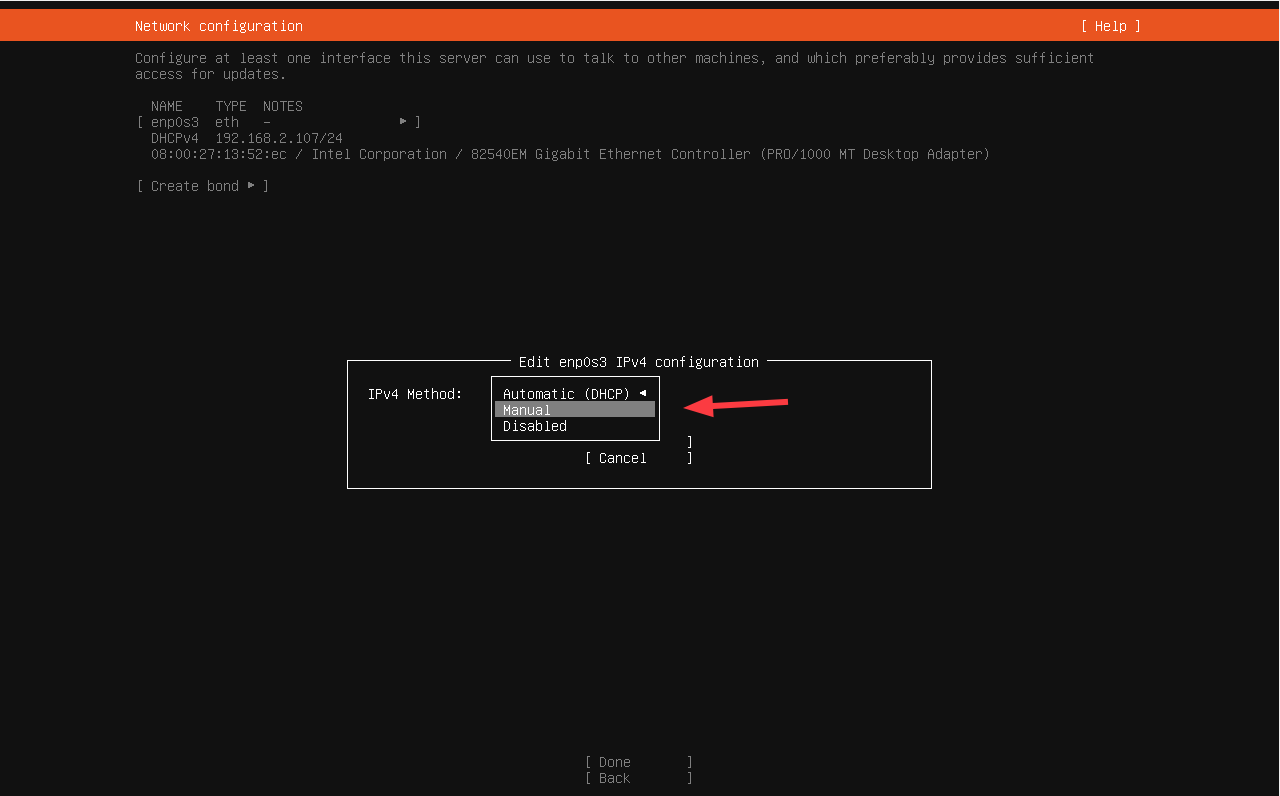
Be sure to fill in the IP details, i.e. subnet, IP address, gateway, Nameservers, and Search domains, if any. Then select `Save` and hit ENTER.
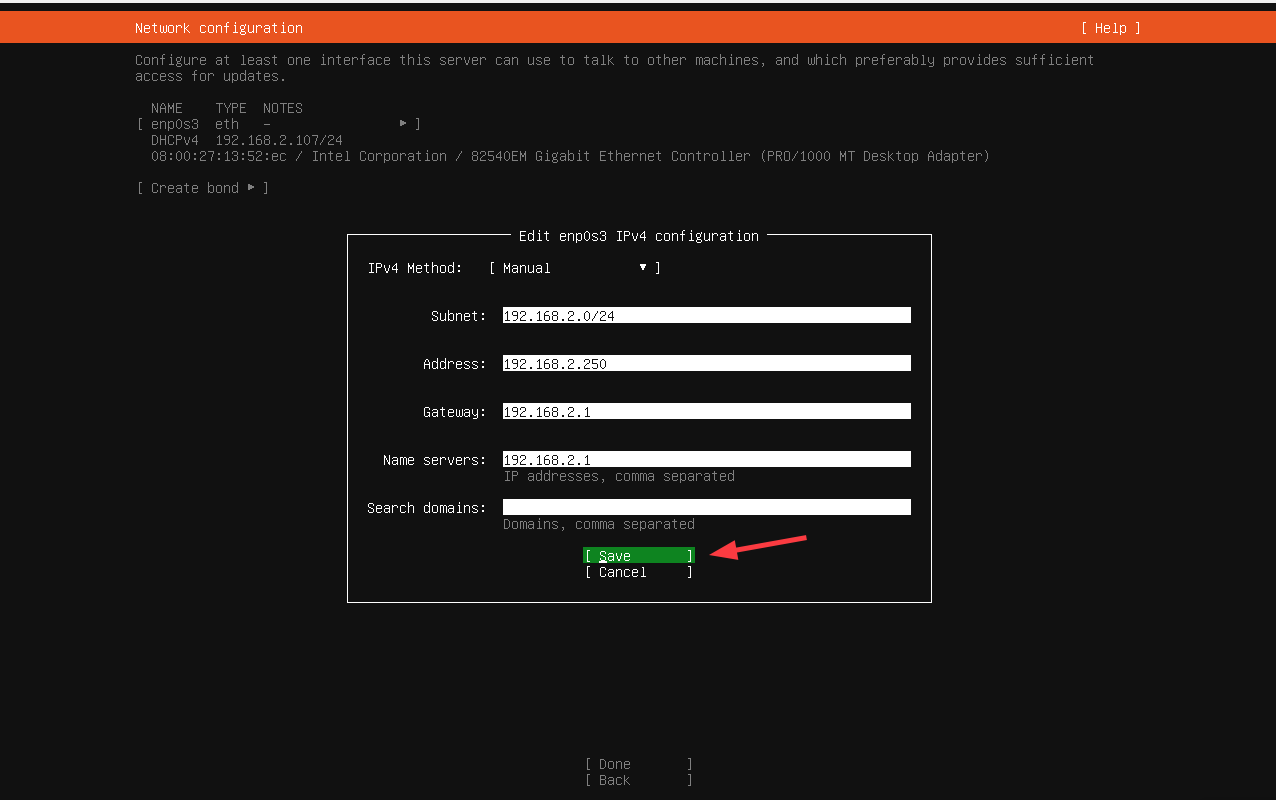
Next, select `Done` and hit ENTER.

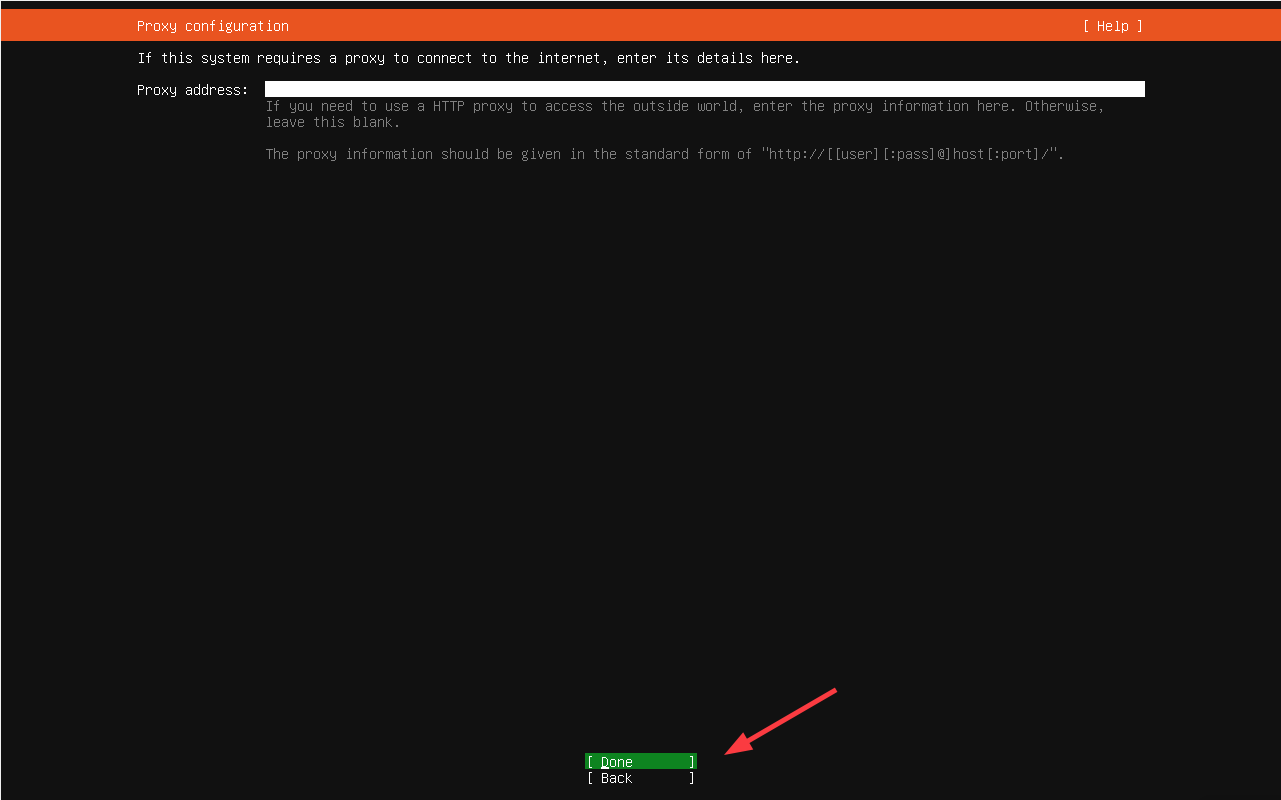
7) Configure Proxy
If you intend to connect to a Proxy server, here’s the chance to provide your Proxy server address. If you are not running a proxy server, leave it blank and hit `Done`.
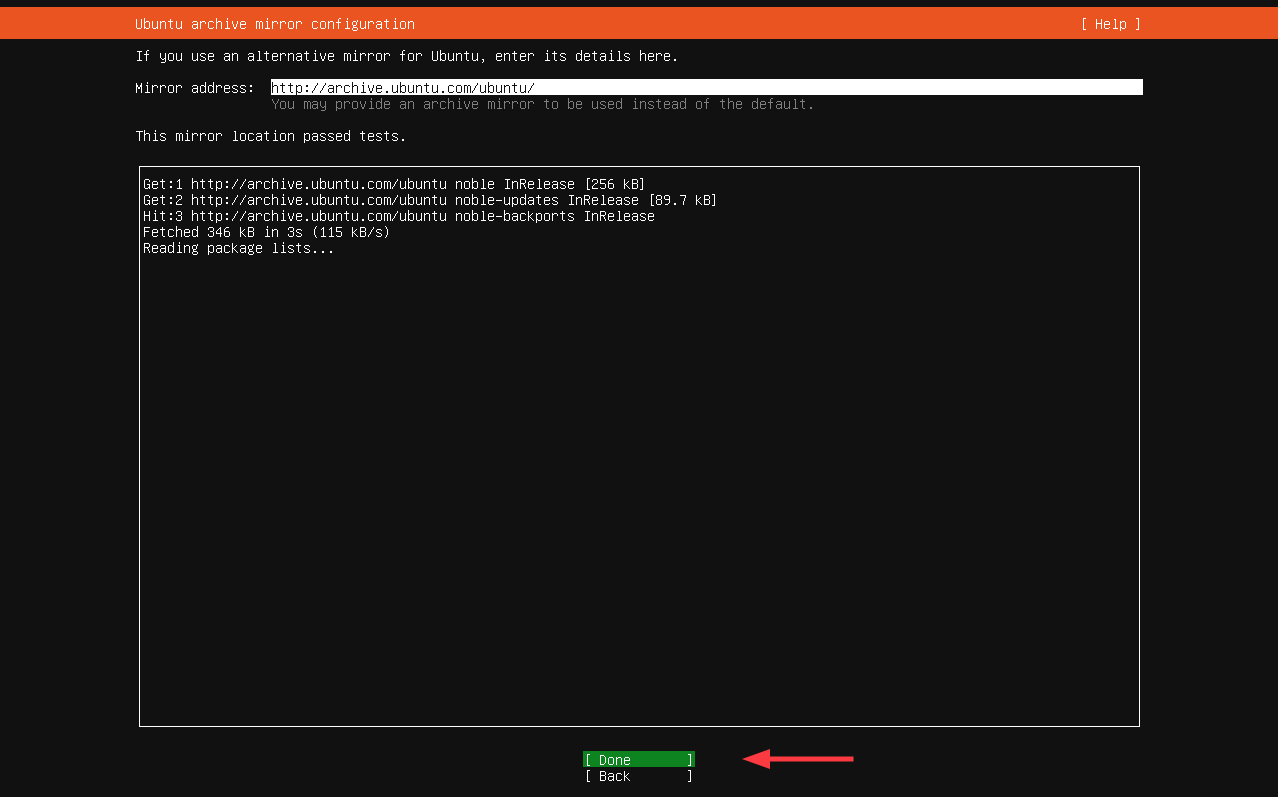
The installer will perform a mirror test by updating the package index. The default mirror address is http://archive.ubuntu.com/ubuntu/ which is just fine. You can also provide an alternative mirror instead of the default one.
Once the mirror test is complete, select `Done` and hit ENTER.
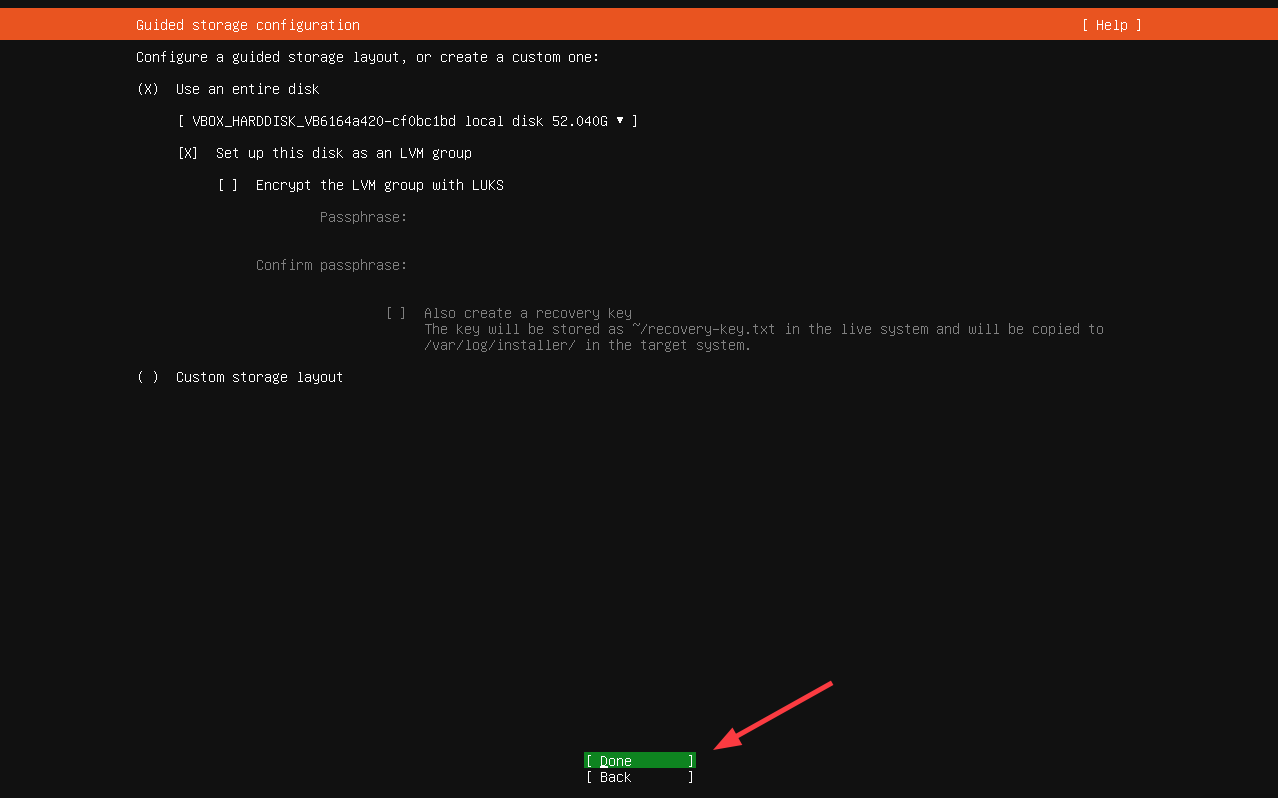
8) Disk Partitioning
In this step, you will be required to configure disk partitions. By default, guided storage is selected. This auto-partitions your hard drive using the most recommended settings based on the size of your drive.
The other option – “Custom storage layout” – lets you manually specify the partitions including the partition type and size.
For simplicity, we will go with the first option – “Guided storage layout“. With this option selected, installer will intelligently partition the disk for you and allocate space for swap, /boot, and / ( root ) partitions.
Select `Done` and hit ENTER.
The partition table will be displayed next. If all looks good, select `Done` and hit ENTER. Otherwise, if you need to make some changes, select `Reset` and hit ENTER to head back and make the needed adjustment.
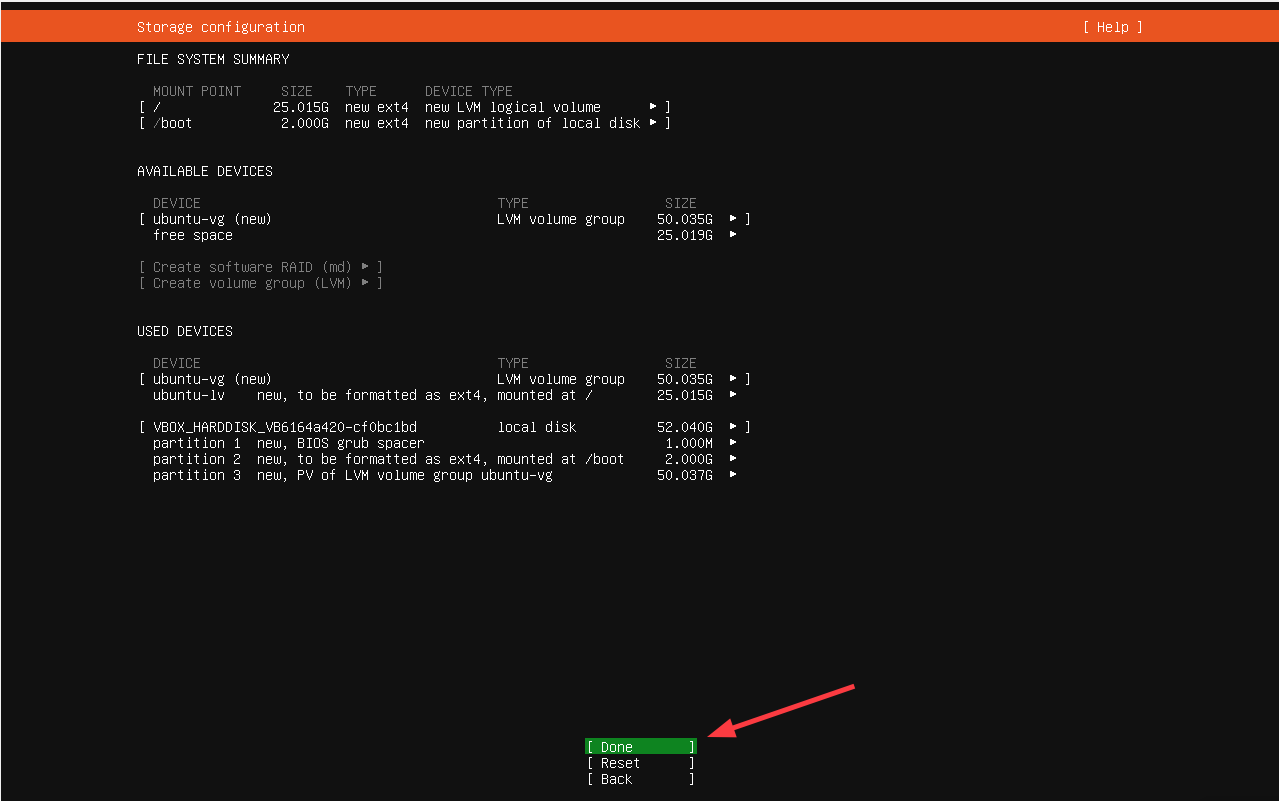
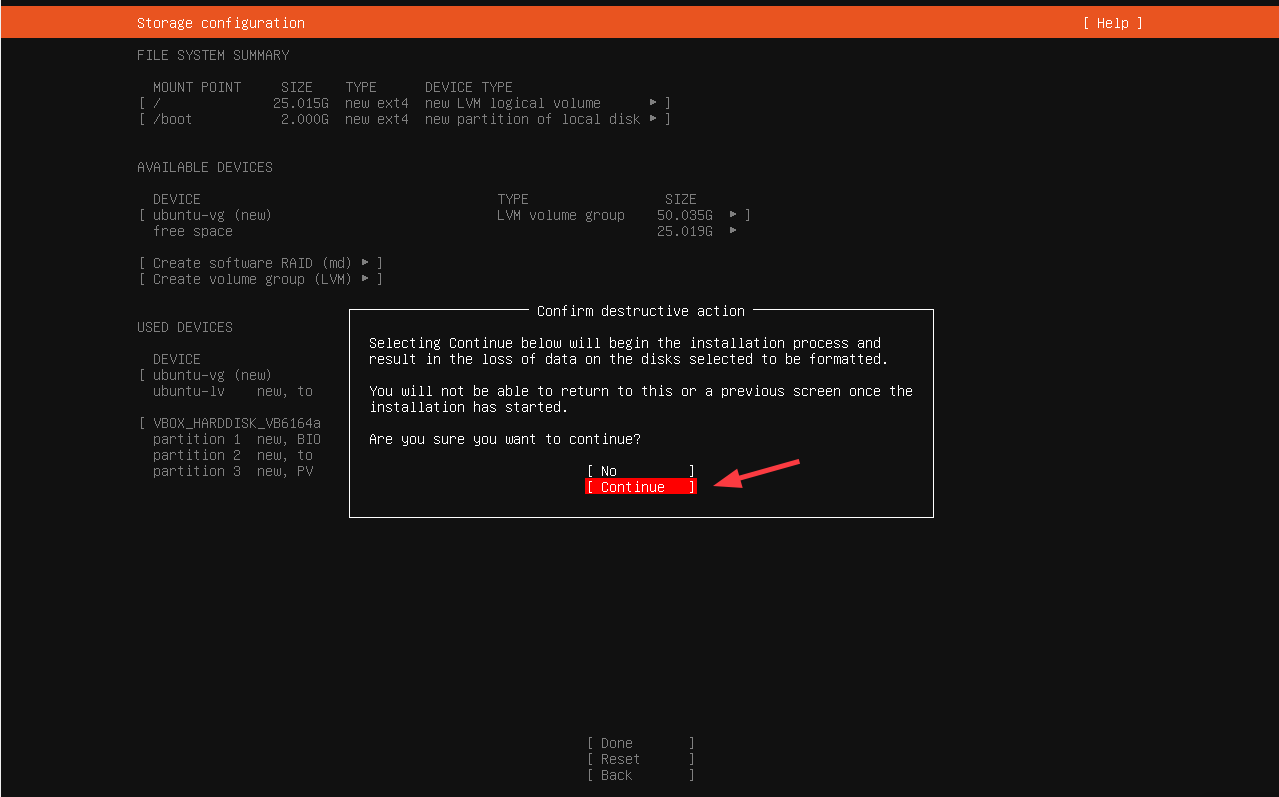
On the pop-up window that appears, select `Continue` and hit ENTER to write the changes to disk.
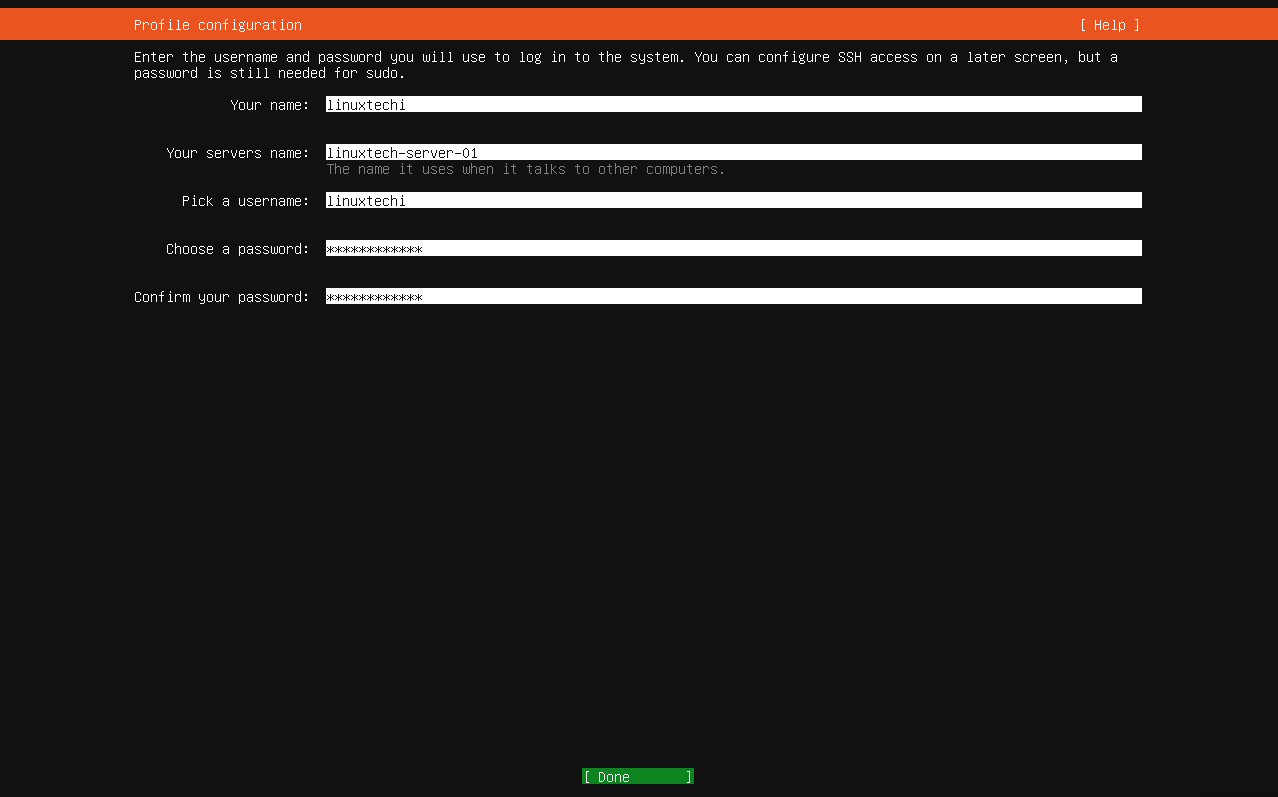
9) Create a User Account
Next, you will be required to create a user account. So, provide the required details including your name, the server’s name, username, and password, and hit ENTER to move to the next step.
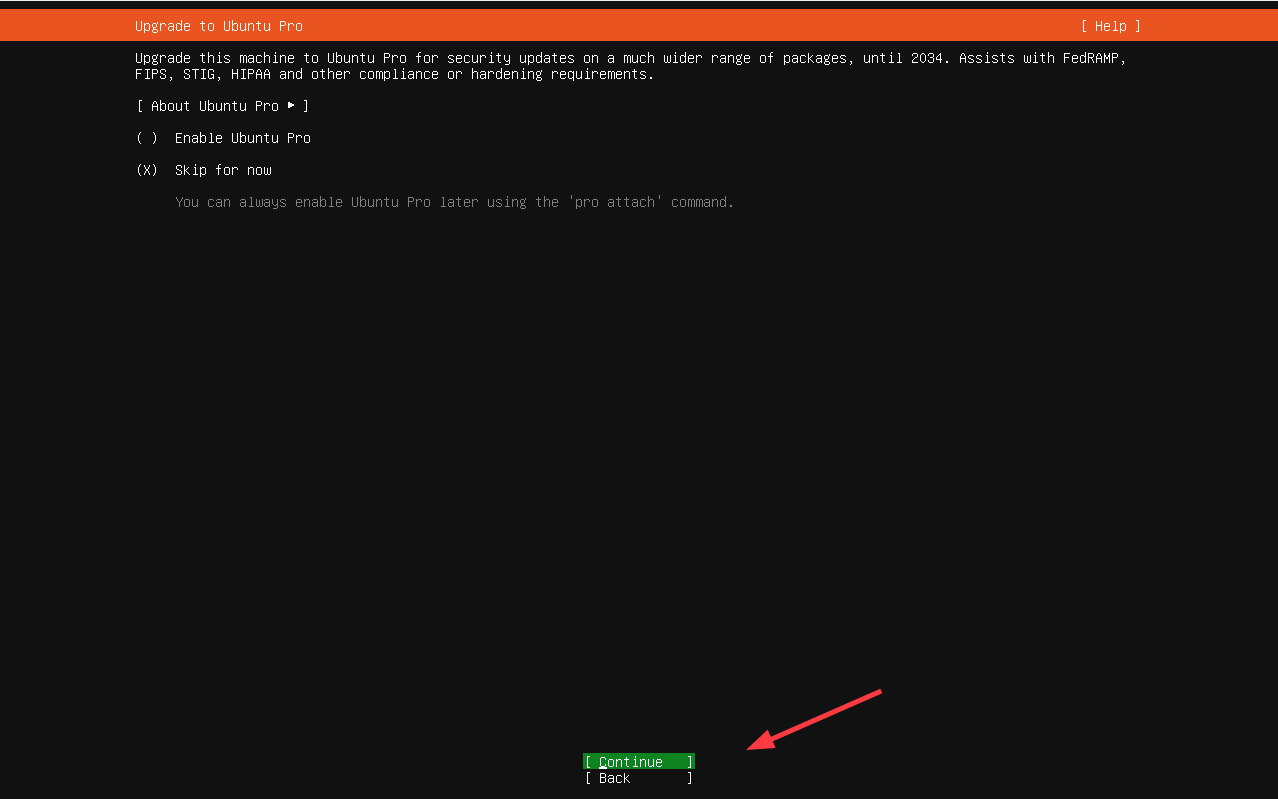
10) Select whether to enable Ubuntu Pro
Ubuntu Pro is an additional service on top of Ubuntu that provides extended support and maintenance including compliance for your OS. It provides 10 years of paid support and you can use up to 5 devices free for personal use. This, however, requires a Ubuntu One account.
For now, we will skip this – You can enable it later. So hit `Continue`.
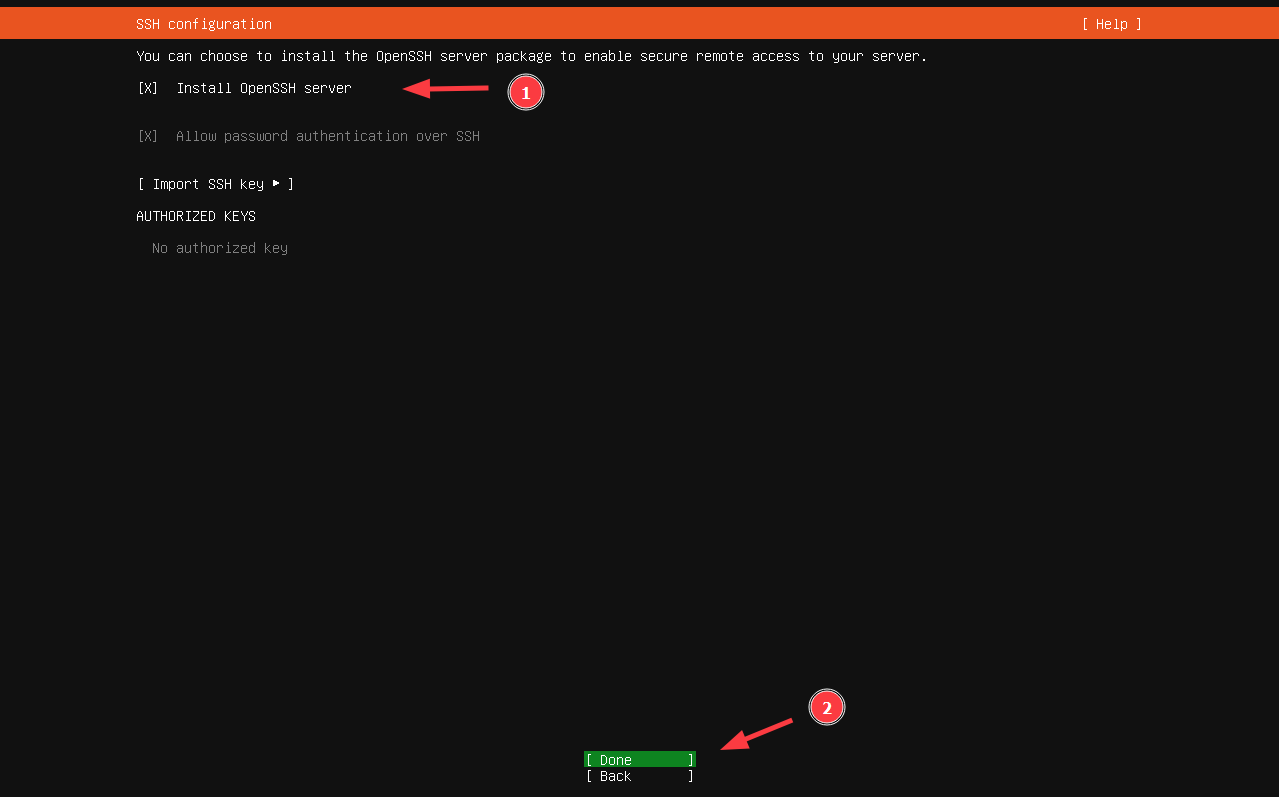
11) Select Whether to install the OpenSSH server & additional software
Next, select whether you want to install the OpenSSH server which will allow remote login to the server. In our case, we will select to install it. Once selected, select `Done` and hit ENTER.
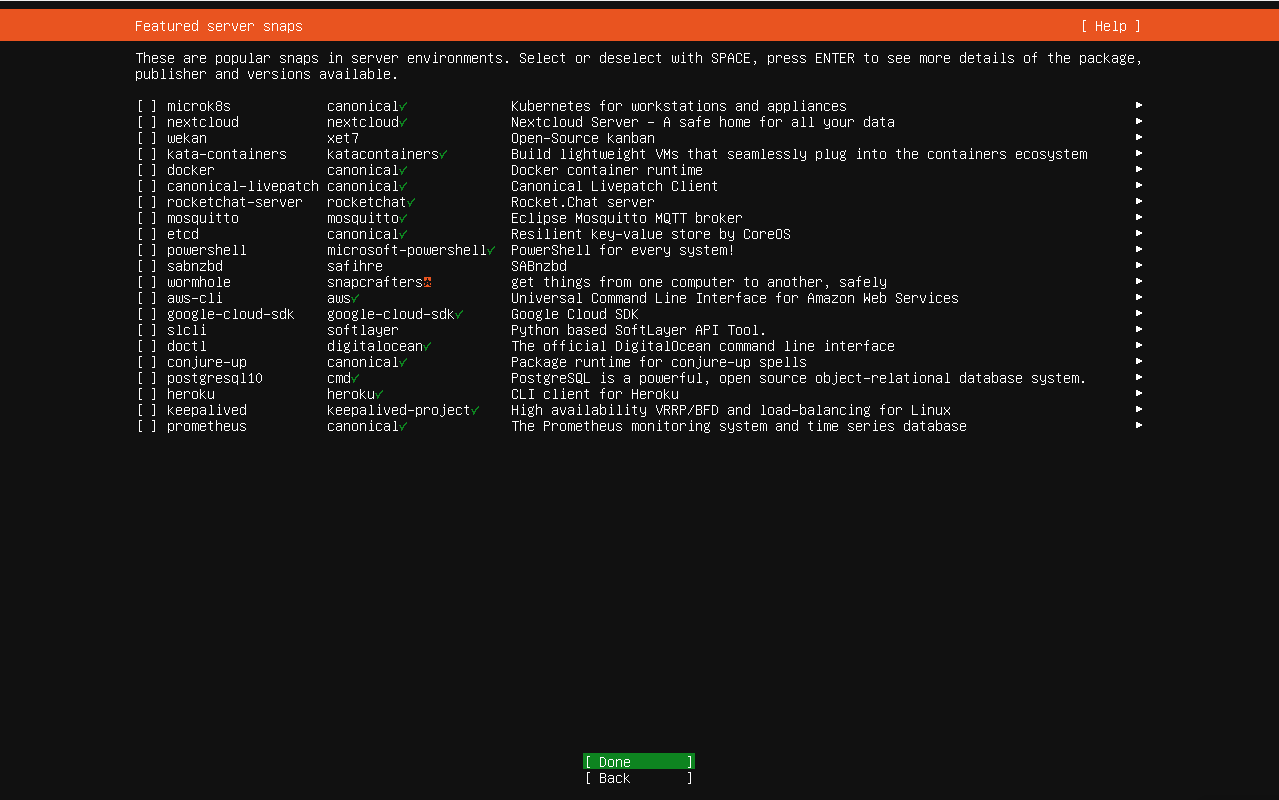
Next, you will be required to select whether to install some featured applications in the form of snaps. So go through the list and enable your preferred snap. Alternatively, you can skip and install them later.
For now, we will not install snaps. So select `Done` and hit ENTER.
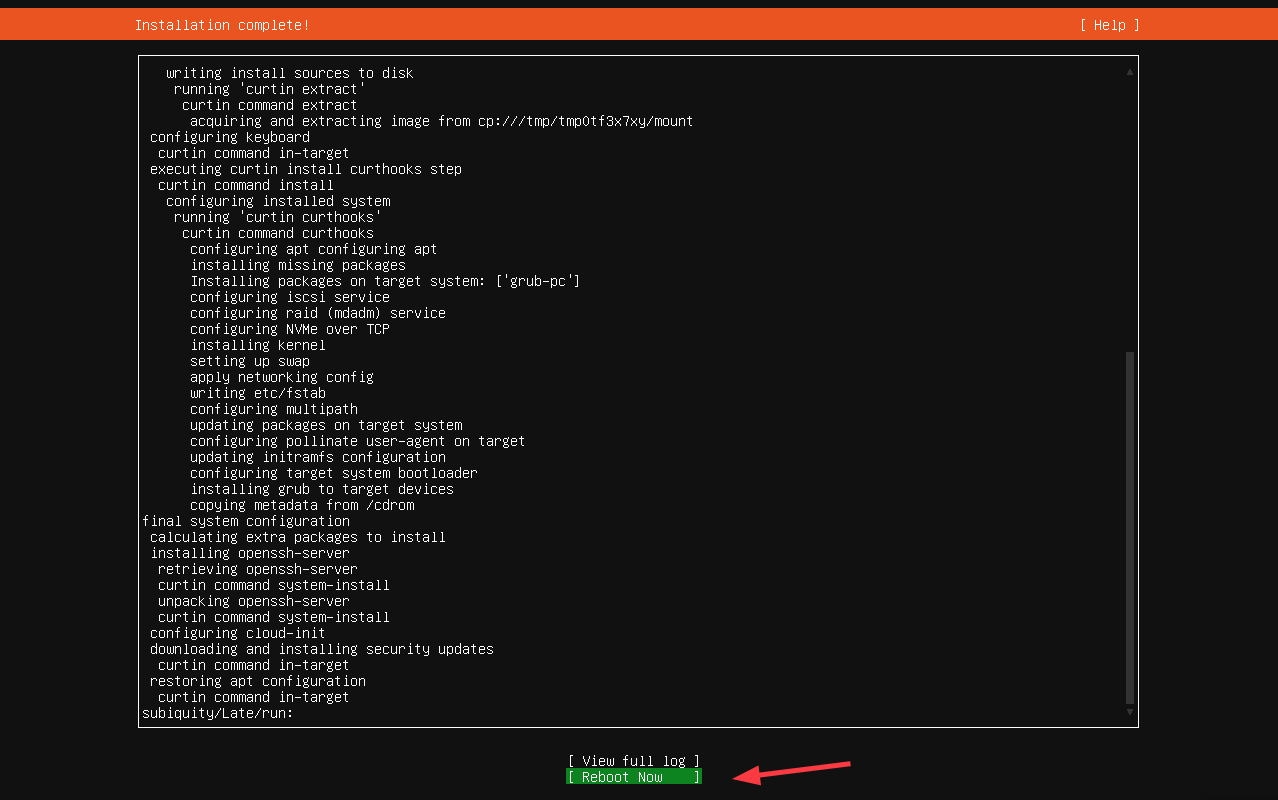
12) Finish the Installation and Reboot
From here, the installer will copy all the files from the bootable medium install them on your hard drive, and configure all the required settings.

Finally, select `Done` and hit ENTER to reboot.
Once the system has rebooted, provide your user account’s password and hit ENTER to log in.
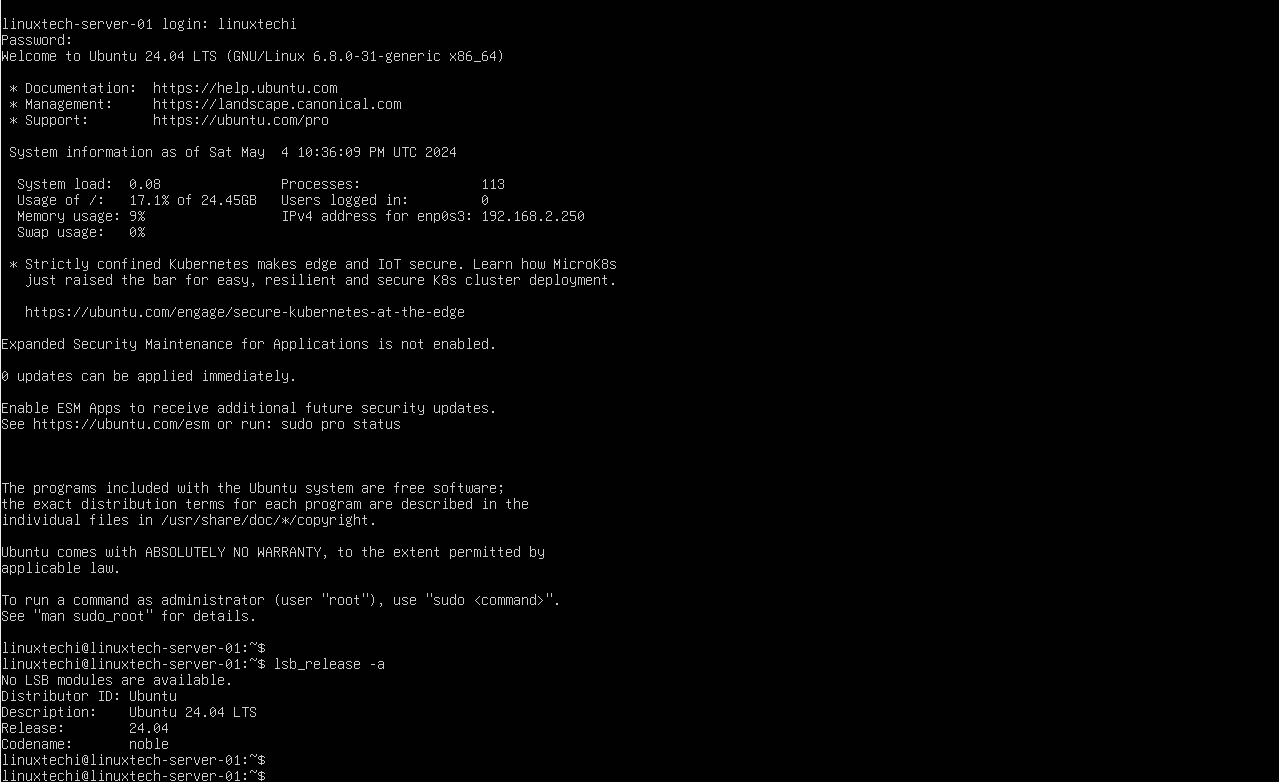
From here you can enjoy your new Ubuntu server 24.04 installation!
Conclusion
That’s all for this installation guide. We hope that you can now install Ubuntu Server 24.04 seamlessly. Feel free to post your queries and feedback in below comments section.