Formerly known as Nagios, Nagios Core is a free, open-source, and powerful network monitoring tool that allows you to monitor servers and applications on your network. You can monitor both Linux and Windows servers as well as running applications.
Nagios core enables the monitoring of crucial metrics such as memory usage, swap space, disk usage, load average, and current running processes on a system.
In this guide, you will learn how to install Nagios Core on Rocky Linux 9 and Alma Linux 9 step-by-step.
Prerequisites
To get things running, you need to ensure that you have the following in place first.
- An instance of Rocky Linux 9 / Alma Linux9 server with SSH access
- A sudo user configured
- Internet Connectivity
Step 1: Update packages
To start off, access your server via SSH and upgrade all the packages to their latest versions.
$ sudo dnf update
Step 2: Install Apache and PHP
Nagios is PHP-driven and runs on the front end. Therefore, as part of the installation procedure, you need to install Apache web server and PHP.
Therefore, install Apache and enable it as shown.
$ sudo dnf install httpd
$ sudo systemctl enable httpd
Once installed, confirm that Apache is installed as shown.
$ httpd -V

Be sure to allow port 80 on the firewall as shown.
$ sudo firewall-cmd --add-port=80/tcp --permanent
$ sudo firewall-cmd --reload
Next, we will install PHP from the Remi repository which provides the latest PHP versions. In this case, we will install PHP 8.2 which is the latest version of PHP.
In order to enable Remi repository, run the beneath command:
$ sudo dnf install dnf-utils http://rpms.remirepo.net/enterprise/remi-release-9.rpm
Next, enable the Remi repository as follows
$ sudo dnf module reset php -y
$ sudo dnf module enable php:remi-8.2 -y
Once enabled, install PHP and associated PHP modules
$ sudo dnf install php php-gd php-opcache php-curl -y
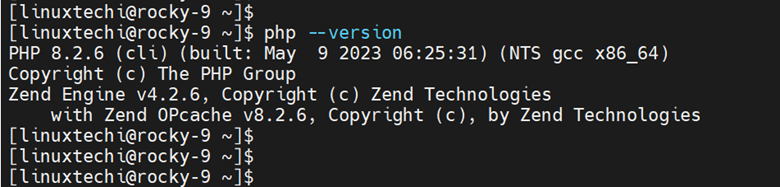
When the installation is complete, verify that PHP has successfully been installed.
$ php --version
Then enable php-fpm as shown
$ sudo systemctl enable --now php-fpm
Step 3: Configure SELinux
Before you proceed further, ensure that you set SELinux to permissive mode as shown. This is crucial for you to access the Nagios web interface from the browser.
$ sudo sed -i 's/SELINUX=.*/SELINUX=permissive/g' /etc/selinux/config
$ sudo setenforce 0
Step 4: Download Nagios Core
The next step is to download and install Nagios core. Before you do so, install EPEL repository and some dependencies and development libraries as shown.
$ sudo dnf install epel-release
$ sudo dnf install gcc glibc glibc-common gd gd-devel make net-snmp openssl-devel unzip wget gettext autoconf net-snmp-utils postfix automake perl-Net-SNMP -y
Next, download the latest Nagios Core tarball file from the official downloads page using the wget command as follows. At the time of writing this guide, the latest version is Nagios 4.4.11.
$ wget https://assets.nagios.com/downloads/nagioscore/releases/nagios-4.4.11.tar.gz
Once download, extract the tarball file.
$ tar -xvf nagios-4.4.11.tar.gz
Next, move the uncompressed Nagios folder to the /usr/src/nagios directory.
$ sudo mv nagios-4.4.11 /usr/src/nagios
Next, navigate to the Nagios directory.
$ cd /usr/src/nagios
Then compile Nagios using the following commands.
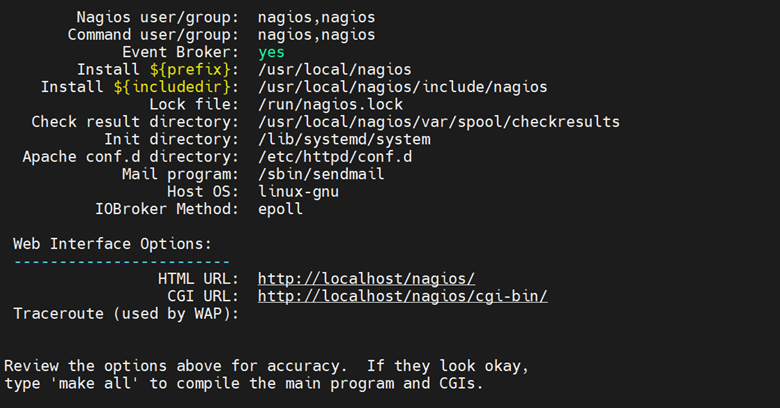
$ sudo ./configure
At the end of the command, you will get the following output.
Then compile the source code as shown. This installs the main program, HTML files, and CGIs.
$ sudo make all
Step 5: Create Nagios User and Group
Nagios server needs a user and group to run it. Therefore, run the following command,
$ sudo make install-groups-users

Next, add the Apache user to the Nagios group.
$ sudo usermod -a -G nagios apache
Step 6: Install Nagios Core
Next, run the following command to install the init script in the /lib/systemd/system path.
$ sudo make install-init
Once that’s done, create an external command directory for Nagios to process commands from external applications.
$ sudo make install commandmode
Next, install sample configuration files.
$ sudo make install-config
Be sure to also install sample Apache configuration files.
$ sudo make install-webconf
For all the changes to come into effect, restart the Apache web server.
$ sudo systemctl restart httpd
Then initialize the systemd unit file as shown.
$ sudo make install-daemoninit
Step 7: Enable HTTP Authentication
In this step, we will configure HTTP authentication for Nagios Core. This ensures that only authorized personnel have access to the Nagios web interface.
To enable HTTP authentication, run the following command:
$ sudo htpasswd -c /usr/local/nagios/etc/htpasswd.users nagiosadmin
You will be prompted to supply a new password and confirm it. This is the password for the admin user called nagiosadmin.

You can add another user by editing the /usr/local/nagios/etc/cgi.cfg file and replace all instances of “nagiosadmin” with your preferred username as follows:
authorized_for_read_only=username
Once you have done so, be sure to restart the Apache web server.
$ sudo systemctl restart httpd
Step 8: Install Nagios Core Plugins
The next step is to install Nagios plugins. These are standalone extensions that process command-line arguments and monitor just about anything in Nagios Core.
To proceed, head over to the Nagios Plugin downloads page and download the latest tarball file.
$ wget https://github.com/nagios-plugins/nagios-plugins/releases/download/release-2.4.4/nagios-plugins-2.4.4.tar.gz
Next extract the tarball file.
$ sudo tar -xvf nagios-plugins-2.4.4.tar.gz
Next, move the extracted folder to the /usr/src/ directory.
$ sudo mv nagios-plugins-2.4.4 /usr/src/nagios-plugins
Some dependencies are required by Nagios plugins to function as expected. Install them as follows.
$ sudo dnf install openssl-devel net-snmp-utils postgresql-devel openssh-clients lm_sensors perl-Net-SNMP openldap-devel bind-utils samba-client fping -y
To install the plugins, navigate to the /usr/src/nagios-plugins directory.
$ cd /usr/src/nagios-plugins
Then compile the source code as follows.
$ sudo ./configure
$ sudo make
$ sudo make install
Step 9: Install NRPE Plugin
The next step is to install the NRPE (Nagios Remote Host Plugin Executor) plugin. This is an agent used for communicating with remote hosts.
To install the NRPE plugin run the command
$ sudo dnf install nrpe
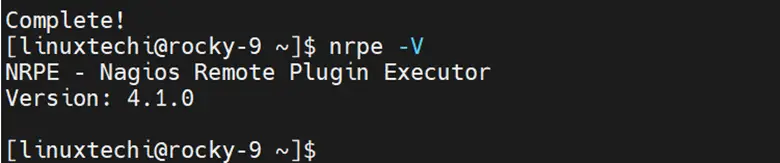
Confirm that the plugin has been installed
$ nrpe -V
Now enable and start the NRPE service
$ sudo systemctl enable nrpe --now
Then confirm if it is running.
$ sudo systemctl status nrpe
From the output, the service is up and running.
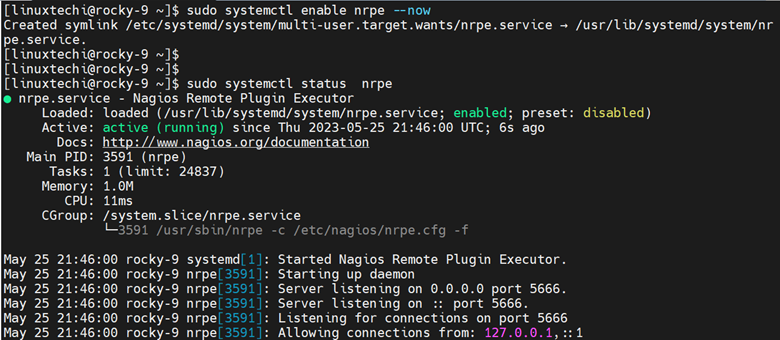
The NRPE service listens on port 5666. You need to allow this port across the firewall as shown.
$ sudo firewall-cmd --add-port=5666/tcp --permanent
$ sudo firewall-cmd --reload
Step 9: Add a Remote Host
With NRPE installed, it’s now time to configure a remote host. Create a configuration file as shown
$ sudo vi /usr/local/nagios/etc/objects/nodes.cfg
Add the following lines of code which define the templates to be used. Be sure to adjust the values to match your environment.
# REMOTE HOST DEFINITION
define host {
    use                     remote-linux-server
    host_name               node1.linuxtechi.com
    alias                   node1
    address                 192.168.2.50
}

# REMOTE HOST GROUP DEFINITION
define hostgroup {
    hostgroup_name         remote-linux-servers
    alias                  remote-linux-servers
    members                node1.linuxtechi.com
}

define service {
    use                     local-service
    host_name               node1.linuxtechi.com
    service_description     PING
    check_command           check_ping!100.0,20%!500.0,60%
}

define service {
    use                     local-service
    host_name               node1.linuxtechi.com
    service_description     Root Partition

    check_command           check_local_disk!20%!10%!/

}

define service {
    use                     local-service
    host_name               node1.linuxtechi.com
    service_description     Current Users
    check_command           check_local_users!20!50
}

define service {
    use                     local-service
    host_name               node1.linuxtechi.com
    service_description     Total Processes
    check_command           check_local_procs!250!400!RSZDT
}

define service {
    use                     local-service
    host_name               node1.linuxtechi.com
    service_description     Current Load
    check_command           check_local_load!5.0,4.0,3.0!10.0,6.0,4.0
}

define service {
    use                     local-service
    host_name               node1.linuxtechi.com
    service_description     Swap Usage
    check_command           check_local_swap!20%!10%
}

define service {
    use                     local-service
    host_name               node1.linuxtechi.com
    service_description     SSH
    check_command           check_ssh
    notifications_enabled   0
}

define service {
    use                     local-service
    host_name               node1.linuxtechi.com
    service_description     HTTP
    check_command           check_http
    notifications_enabled   0
}
Save the changes and exit the configuration file. For Nagios to start using the configuration, edit the following configuration file.
$ sudo vi /usr/local/nagios/etc/nagios.cfg
Comment out the localhost configuration file and append the following line.
#cfg_file=/usr/local/nagios/etc/objects/localhost.cfg
cfg_file=/usr/local/nagios/etc/objects/nodes.cfg
Save the changes and exit the configuration file.
Step 10: Start and Enable Nagios Core daemon
Before you start the Nagios server, run the following commands:
$ sudo mkdir /usr/local/nagios/var/rw
$ sudo chown nagios.nagios /usr/local/nagios/var/rw
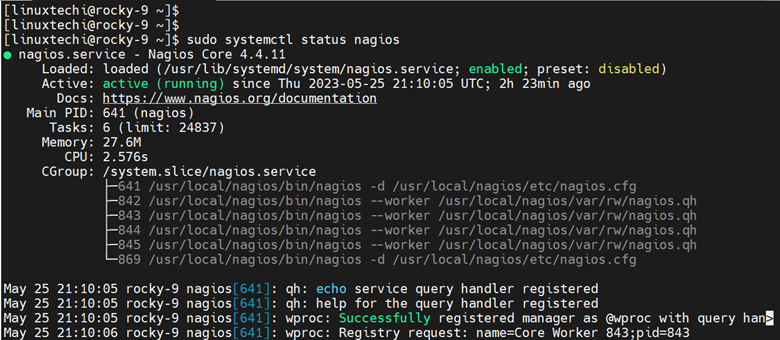
Now start the Nagios Core server and confirm its status.
$ sudo systemctl start nagios
$ sudo systemctl status nagios
Step 11: Access Nagios Core Web UI
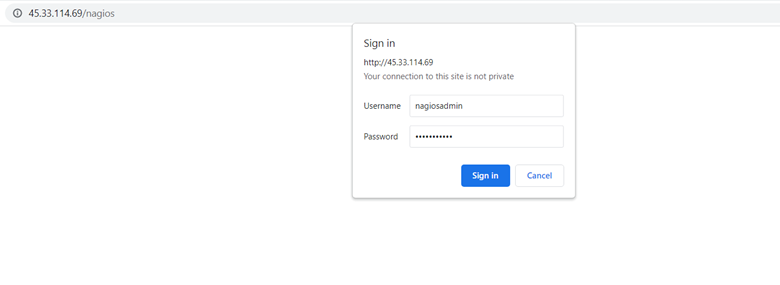
Finally, access the Nagios web interface by navigating to the following server IP address.
http://server-ip/nagios
Authenticate with the login details you configured in Step 7.
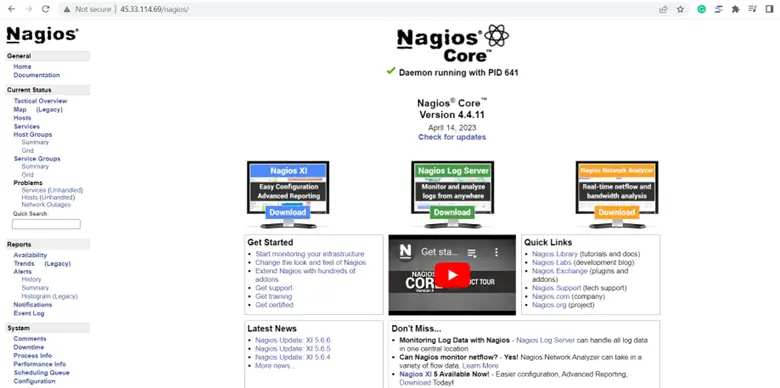
Once logged in, you should be able to see the Nagios Core welcome page as shown.
Conclusion
And that’s it for this guide. We have demonstrated how to install Nagios Core on Rocky Linux 9 / AlmaLinux 9. Your feedback and comments are welcome