In this guide, we will demonstrate how to install FreeIPA server on RHEL 9 step-by-step.
Sponsored by RedHat, FreeIPA, – Identity Policy Authentication – is a free and opensource identity and Authentication management solution designed specifically for Linux/Unix environments. FreeIPA is to Linux what Active Directory is to Windows.
FreeIPA provides a centralized solution for authentication and authorization of user accounts in a Linux environment. It is the Upstream to RedHat’s IdM (Identity Manager) and is built on top of the following opensource components:
- NTP Server – Network Time Protocol Server
- Apache HTTP Server – A web server that allows you to access and manage FreeIPA from the Web browser.
- 389 Directory Server – This is an implementation of LDAP and is the main data store that provides a full multi-master LDAPv3 directory infrastructure.
- Dogtag PKI Certificate Authority – It provides CA certificate management functions.
- MIT Kerberos KDC – This provides a Kerberos database and service for Single-Sign-on authentication.
- ISC Bind DNS server – It manages Domain Names
- Python Management framework
Prerequisites
To get started, here are some of the prerequisites that you need to pay attention to:
- A fresh installation of RHEL 9 Server
- Minimum 4GB RAM
- Minimum 2 vCPUs
- Minimum 10GB hard disk space.
- Red Hat Subscription or locally configured yum repository.
- An FQDN (Fully Qualified Domain Name ) pointing to your server’s Public IP address. For this guide, we are using a registered domain called linuxtechwhiz.info pointing to the server’s public IP 74.207.228.169.
- Ports 443 and 80 should not be in use by any other application
Step 1) Configure hostname and update /etc/hosts file
To start off, you need to configure the hostname of your server to correspond to the FQDN. To change the hostname, use the following syntax:
$ sudo hostnamectl set-hostname your-hostname
In our case, the command will be:
$ sudo hostnamectl set-hostname linuxtechwhiz.info
To confirm the hostname change, run the command:
$ hostname
Next, access the /etc/hosts file.
$ sudo vim /etc/hosts
Add an entry for your FQDN as shown
server-public-ip fqdn.example.com
In our case, this will be:
74.207.228.169 linuxtechwhiz.info
Save the changes and exit.
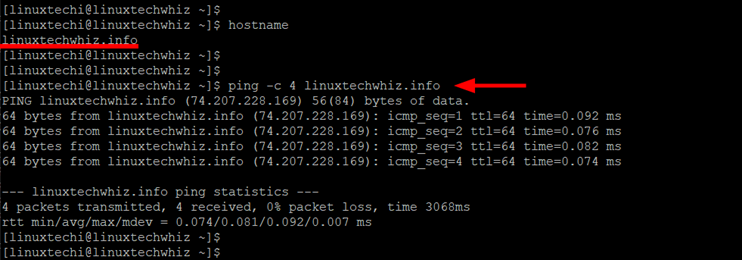
Next, confirm that the registered domain which is also configured as the hostname resolves to the public IP of the server. You can do this by pinging the domain name.
$ ping -c 4 linuxtechwhiz.info
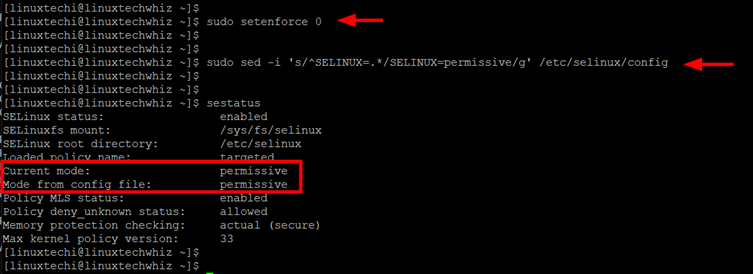
Step 2) Configure SELinux
Next, you need to configure SELinux so as to access the FreeIPA server from a browser. Here, we will set the SELinux to ‘permissive’ mode.
To do so, run the following commands:
$ sudo setenforce 0
$ sudo sed -i 's/^SELINUX=.*/SELINUX=permissive/g' /etc/selinux/config
To confirm the change in the SELinux status, run the command:
$ sestatus
Then reboot the system for the changes to come into effect.
$ sudo reboot
Step 3) Install FreeIPA Server on RHEL 9
To install the FreeIPA server on your system run the command
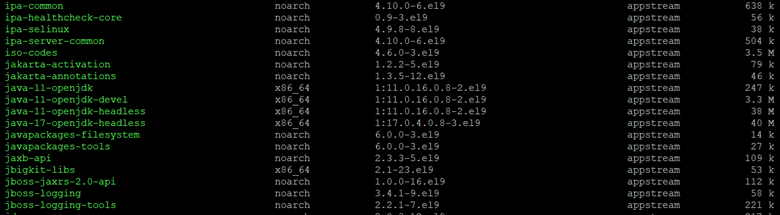
$ sudo dnf install freeipa-server -y
This installs a host of FreeIPA packages and a host of other additional packages.
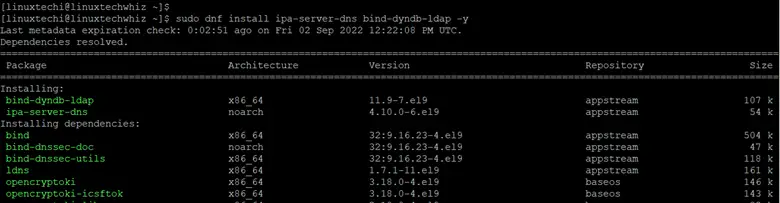
If you wish to install the FreeIPA DNS Server, go ahead and install the DNS packages as shown.
$ sudo dnf install ipa-server-dns bind-dyndb-ldap -y
Step 4) Setup FreeIPA Server
Setting up of the FreeIPA Server is simplified using a simple script that automates the configuration of several components of the FreeIPA server.
To begin the server setup run the following script,
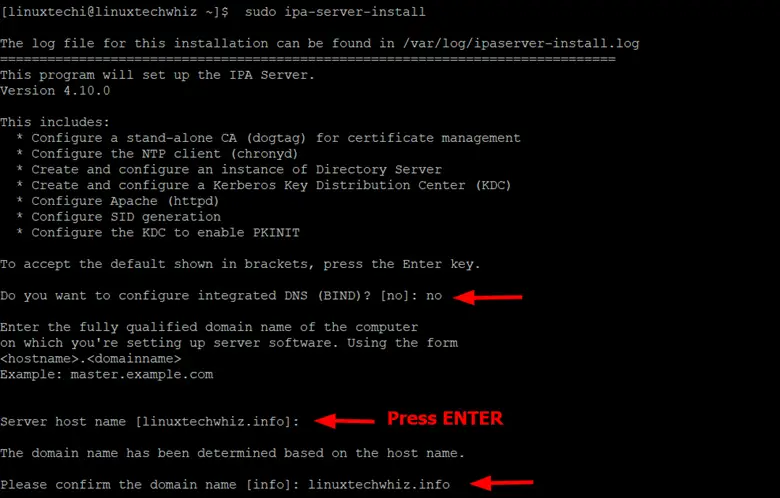
$ sudo ipa-server-install
The script walks you through a series of prompts. The first prompt will require you to set up integrated BIND DNS. By default, pressing ENTER chooses the default selection. In this guide, we will skip using the BIND DNS option.
Next, configure the server hostname and the domain name.
Then, provide the realm name, and Directory Manager Password, and then specify the password for the IPA server administrator.
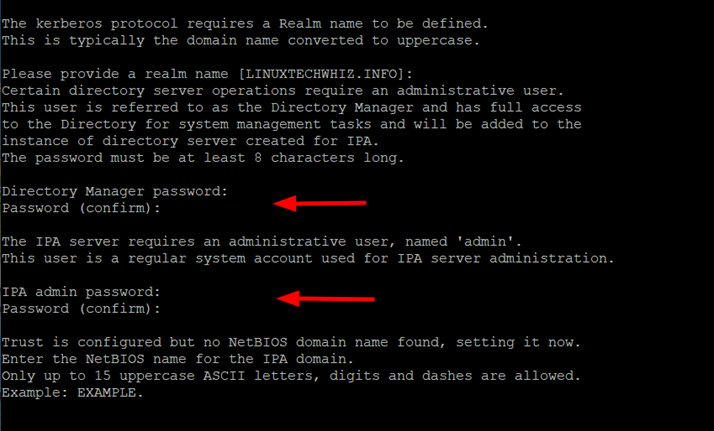
Next, provide the NetBIOS name. You can choose whether or not to configure Chrony with NTP Server. This is entirely up to you, and in our case, we have chosen not to configure Chrony.
Shortly after, details of the IPA Master will be displayed. To continue configuring the system, type ‘Yes’
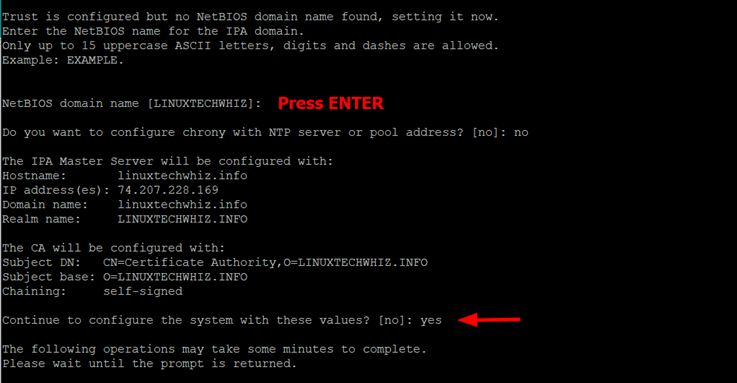
Thereafter, the script will continue to perform the following tasks.
- Configure a stand-alone CA (dogtag) for certificate management
- Create and configure a Kerberos Key Distribution Center (KDC)
- Create and configure an instance of Directory Server
- Configure Apache (httpd)
- Configure the KDC to enable PKINIT
At the end of the configuration of the IPA server, you will get the following output indicating the ports or services that you need to open and that the configuration and setup of the server were successful.
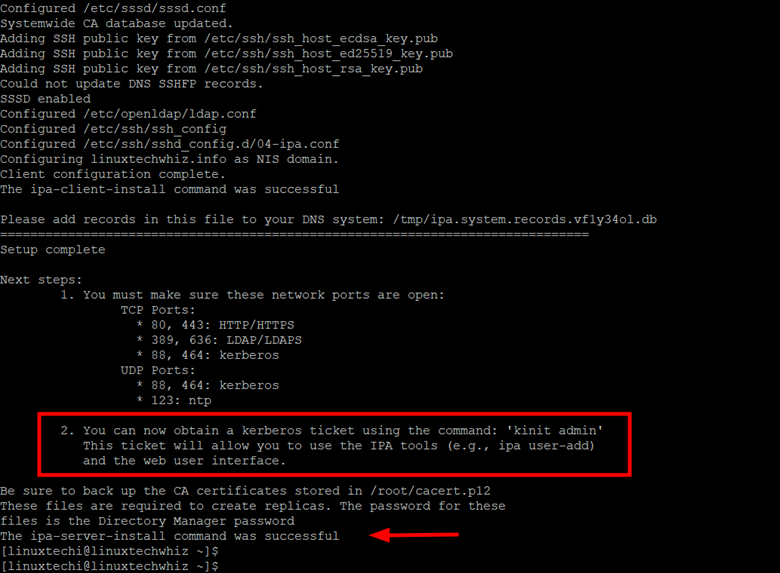
Step 5) Configure Firewalld for FreeIPA
At this juncture, the FreeIPA Server has successfully been installed. However, you need to allow a few crucial services on the firewall. These are services that are currently being used by the server.
Therefore, run the following command:
$ sudo firewall-cmd --add-service={http,https,dns,ntp,freeipa-ldap,freeipa-ldaps} --permanent
$ sudo firewall-cmd --reload
Step 6) Accessing the FreeIPA Server
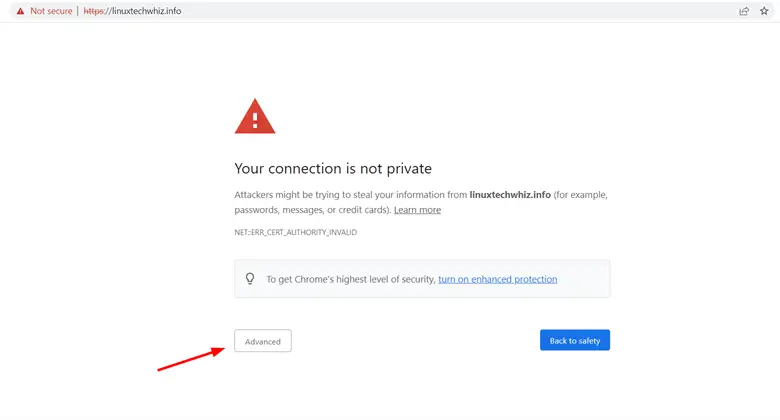
Finally, you can access the WebUI by browsing your FQDN on a browser as follows.
https://linuxtechwhiz.info
Initially, you will encounter a warning on your browser. This happens because a self-signed certificate was generated for your server during the setup of FreeIPA and is not recognized by a Certificate Authority.
To bypass this hurdle, click ‘Advanced’.
Then click ‘Proceed to domain name’.
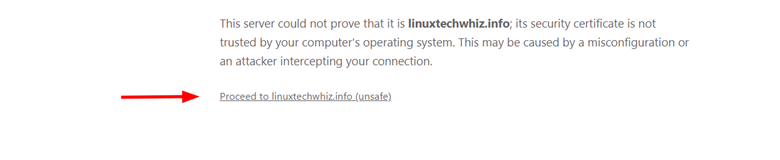
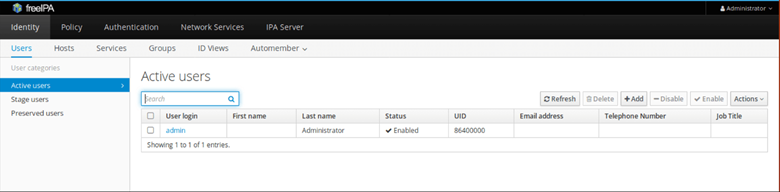
On your browser, authenticate with the admin username and password that you generated in Step 4.
This gives you access to the dashboard as shown.
Using FreeIPA on Command-line
FreeIPA installation provides a command-line client that allows you to interact with the server. Before you start using the CLI, first, you need to generate a Kerberos ticket.
To generate a Kerberos ticket, run the command:
$ sudo kinit admin

You can check the ticket’s expiry information as shown.
$ sudo klist

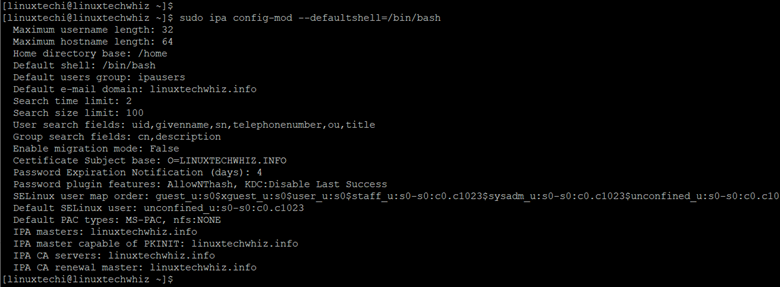
Additionally, you can set the admin user’s default shell to /bin/bash as shown.
$ sudo ipa config-mod --defaultshell=/bin/bash
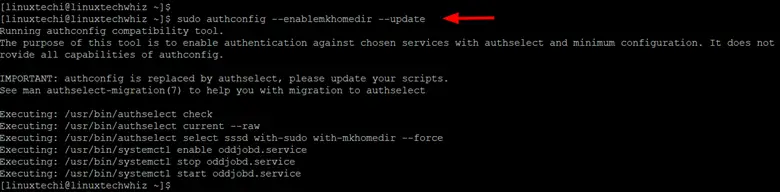
Also, you can enable the creation of the admin user’s home directory on login.
$ sudo authconfig --enablemkhomedir --update
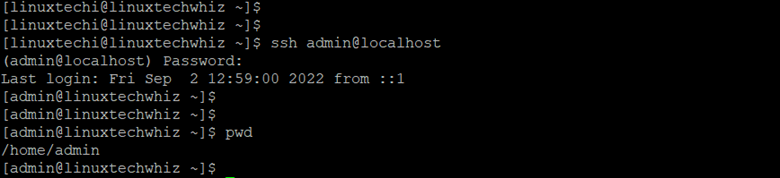
Now you can try logging in as an admin user using SSH
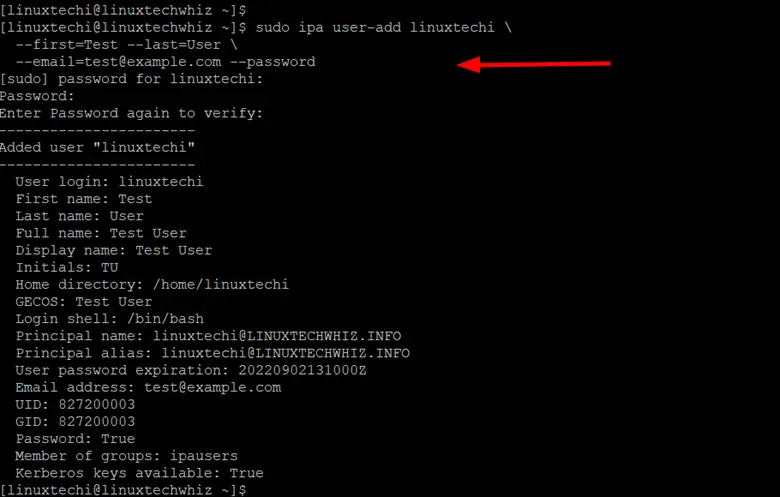
You can also create a new user account using the following command. The command creates a new user called linuxtechi with Test and User as the first name and last name respectively.
$ sudo ipa user-add linuxtechi \
  --first=Test --last=User \
  [email protected] --password
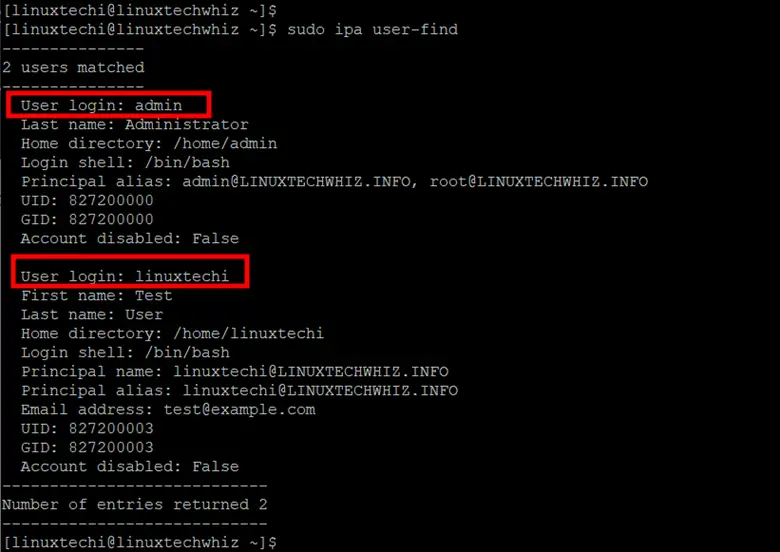
To list all the users created in the FreeIPA server run the command
$ sudo ipa user-find
From the output, you can see that two users have been created – the admin user created during the setup process and linuxtechi which we have just created.
Uninstall FreeIPA Server
If you no longer need the FreeIPA server, you can uninstall it as shown.
$ sudo ipa-server-install --uninstall
Conclusion
In this guide, we demonstrated how to Install and Setup FreeIPA Server on RHEL 9. I hope you have found it informative, so do post you queries and feedback in below comments section.
Very good post.