In this guide, we will demonstrate how to install and configure HAProxy on RHEL 9 with Apache HTTP Server step by step.
HAProxy stands for High Availability Proxy. It is an opensource and high-performance TCP/HTTP load balancer and reverse proxy for web applications. It works by distributing traffic across multiple backend web servers using a specified algorithm to prevent an application from being flooded by requests.
Top websites that use HAProxy in their software stacks include Twitter, Reddit, Tumblr and Stack Overflow.
Lab Setup
To demonstrate how the HAProxy functions as a load balancer we have a three-node setup with one HAProxy load balancer and two web servers.
- haproxy-rhel-09 10.128.0.48
- apache-web-1 10.128.0.49
- apache-web-2 10.128.0.50
Step 1) Update hosts file on all the nodes
The first step is to update the hosts file on all nodes with the hostnames and IP addresses. So, access the hosts file on all systems as shown.
$ sudo vi /etc/hosts
Next update it as follows:
10.128.0.48  haproxy-rhel-09
10.128.0.49  apache-web-1
10.128.0.50  apache-web-2
Save the changes and exit.
Step 2) Install HAProxy on RHEL 9
Next, we are going to install the HAProxy package on the RHEL 9 server which will act as the load balancer. So, log into your server and upgrade the packages first.
$ sudo dnf update -y
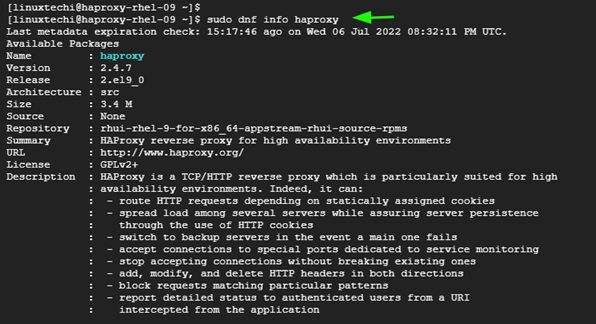
Next, you can search for the availability of the HAProxy package in the RHEL 9 repositories and more information about it as shown.
$ sudo dnf info haproxy -y
From the output, you can see a flurry of information about HAProxy including the version, release, and architecture just to mention a few,
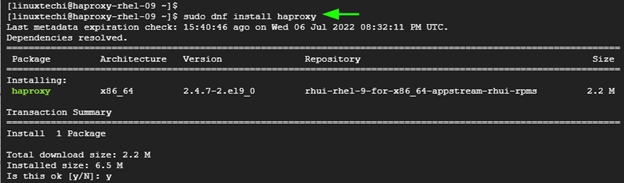
To install the package from the repositories, run the command:
$ sudo dnf install haproxy
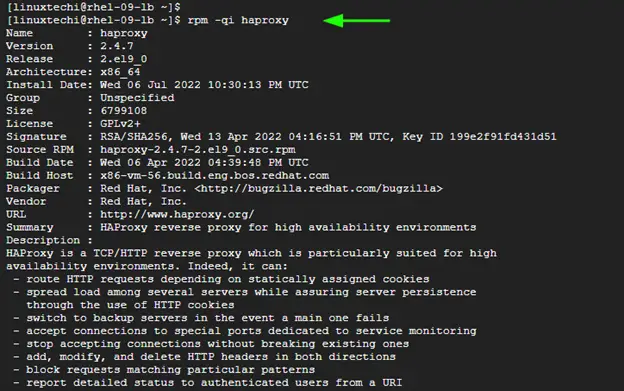
Just to confirm that HAProxy is installed, run the command.
$ rpm -qi haproxy
Step 3) Configure HAProxy to Act as a Load Balancer
The next step is to configure HAProxy. But before you do so, make a backup copy of the configuration file in case of any eventuality. Using following cp command,
$ sudo cp /etc/haproxy/haproxy.cfg /etc/haproxy/haproxy.bak
Next, open the configuration file
$ sudo vi /etc/haproxy/haproxy.cfg
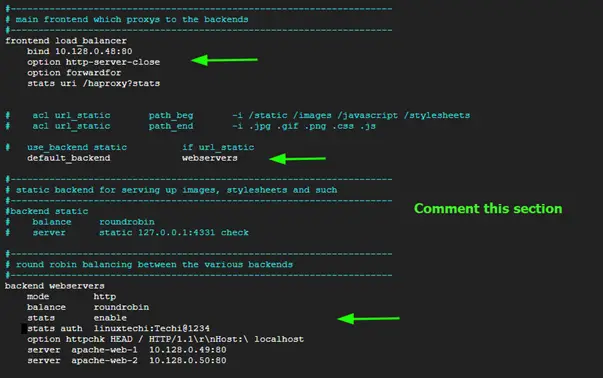
We are going to update two sections: the frontend and the backend section.
In the Frontend section, we will define the following attributes.
- The IP address of the HAProxy load balancer and the port it will listen to.
- The Stats URI
For the Backend section, we will define the following attributes.
- The load-balancing algorithm.
- The username and password for accessing the load balancer statistics on the browser.
- The webservers’ hostnames and IP addresses.
frontend load_balancer
    bind 10.128.0.48:80
    option http-server-close
    option forwardfor
    stats uri /haproxy?stats

default_backend   webservers

backend webservers
    mode        http
    balance     roundrobin
    stats       enable
    stats auth  linuxtechi:Techi@1234
    option httpchk HEAD / HTTP/1.1\r\nHost:\ localhost
    server  apache-web-1  10.128.0.49:80
    server  apache-web-2  10.128.0.50:80
Step 3) Configure Rsyslog
The next step is to configure the Rsyslog service so that it can log HAProxy statistics. To do so, access the Rsyslog configuration file.
$ sudo vi /etc/rsyslog.conf
Uncomment these lines
module(load="imudp")
input(type="imudp" port="514")
Save the changes and exit the configuration file.
Next, create an HAProxy configuration file.
$ sudo vi /etc/rsyslog.d/haproxy.conf
Then paste the following lines to define the location of the log files.
local2.=info     /var/log/haproxy-access.log
local2.notice    /var/log/haproxy-info.log
Save the changes and exit the configuration file. Next, set the following SELinux rule.
$ sudo setsebool -P haproxy_connect_any 1
Restart and enable Rsyslog to effect the changes.
$ sudo systemctl restart rsyslog
$ sudo systemctl enable rsyslog
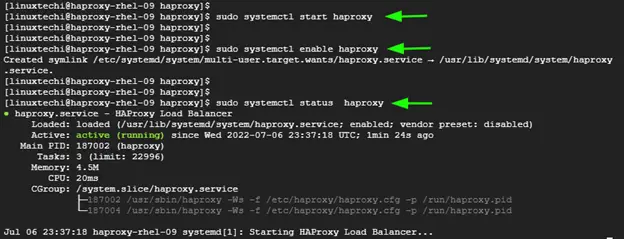
Then start and enable HaProxy to run upon a reboot.
$ sudo systemctl start haproxy
$ sudo systemctl enable haproxy
Just to be sure that HAProxy is running, run the command:
$ sudo systemctl status haproxy
If you have a firewall configured, make sure to allow port 80.
$ sudo firewall-cmd  --add-port=80/tcp --permanent
$ sudo firewall-cmd  --reload
Step 4) Setup Web Servers
So far, we have configured the HAProxy server to act as a load balancer and distribute the workload across the web servers using the round-robin algorithm. The next step is to setup the webservers.
Next, install the Apache package on each of the servers.
$ sudo dnf install httpd -y
Next, start and enable the Apache service.
$ sudo systemctl start httpd
$ sudo systemctl enable httpd
The next step is to configure the webservers and create different index.html files in order to distinguish them from a browser.
For Web Server 1
Switch to the root user and create a sample HTML file.
$ echo "<h1>Success! Welcome to Web Server 1</h1>" > /var/www/html/index.html
Then, restart the Apache service.
$ sudo systemctl restart httpd
For Web Server 2
Similarly, Switch to the root user and create a sample HTML file.
$ echo "<h1>Success! Welcome to Web Server 2</h1>" > /var/www/html/index.html
Then, restart the Apache service to effect the changes
$ sudo systemctl restart httpd
Step 5) Test the HAProxy Load Balancing
The last step is to test whether the load balancer is working or not. To do so, visit the load balancer’s IP address
http://loadbalancer-IP
First, you will be directed to either of the web server’s HTML pages. In this case, you can see that the request has been sent to the first web server.
Now reload the webpage, and this time around, you should see the second web server’s HTML page. This confirms that the round-robin algorithm is being applied in distributing the requests across the backend web servers.

Alternatively, you can run the curl command multiple times to test the Round Robin algorithm.

Bravo! This also confirms that haproxy is working properly as it is distributing traffic between two nodes.
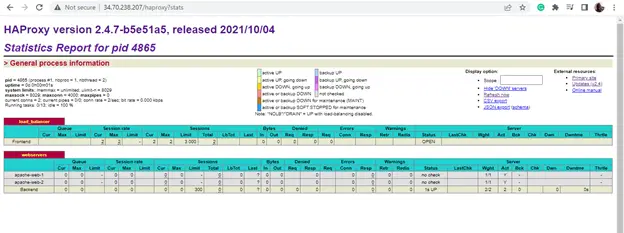
You can also view the statistics by browsing the following URL
http://loadbalancer-IP/haproxy?stats
It will prompt you for user name and password, use the same credentails that we define while configuring haproxy.
Conclusion
This concludes our guide. In this tutorial, we walked you through the installation of HAProxy on RHEL 9 and simulated its operation using the round-robin algorithm.