In this post, we will cover how to install Ansible on RHEL 9 step by step. Later we will learn how to use ansible to manage remote linux systems.
Ansible is a free and open-source automation and configuration tool. On RHEL 9, ansible core package is available in the default package repository (AppStream). This means, we don’t need to enable any additional repositories like Ansible Engine or EPEL.
Prerequisites
- Minimal RHEL 9 installation
- Sudo user with admin rights
- Locally Configured Repository or Subscription
Once above prerequisites are met then refer the following steps,
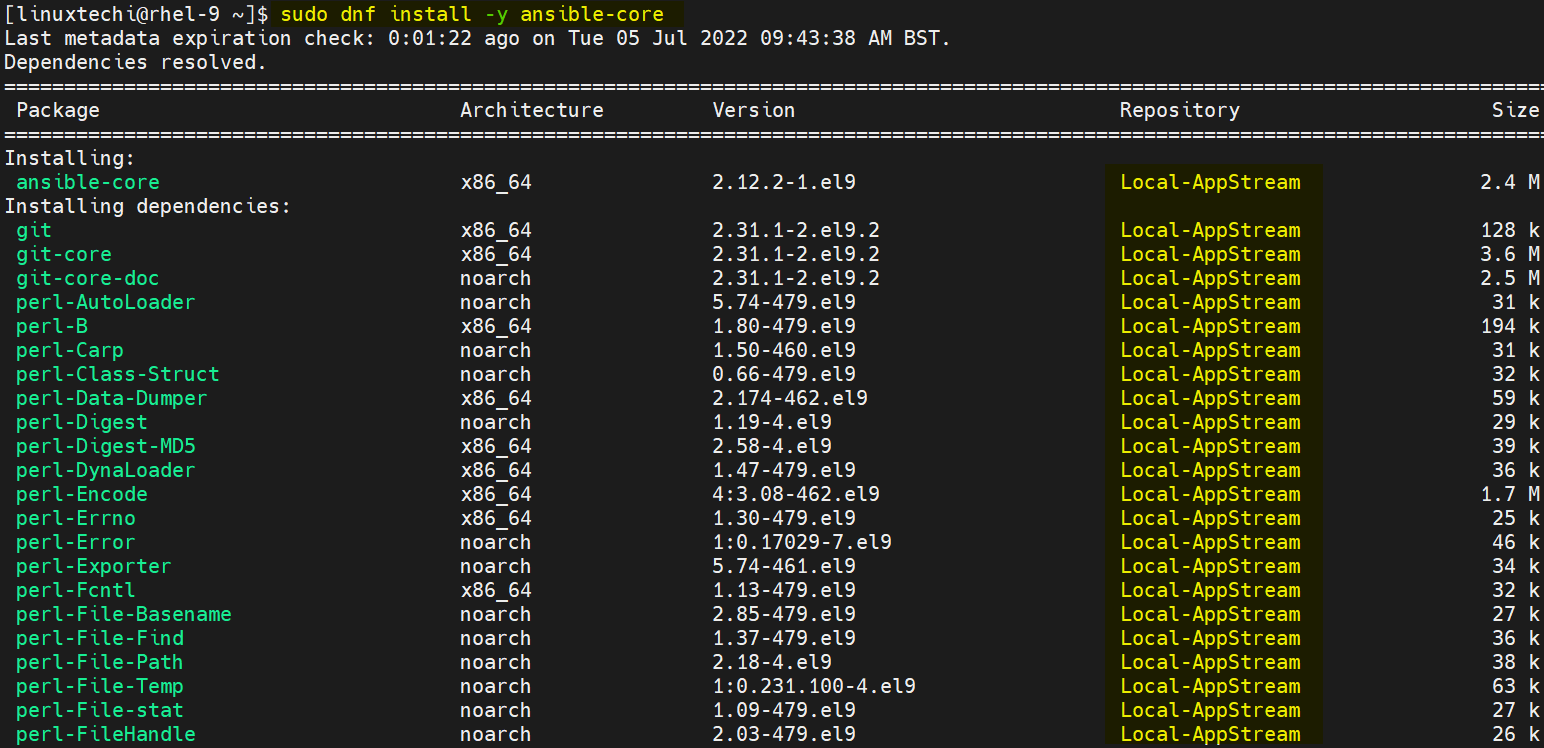
Step 1) Install Ansible with dnf Command
Open the terminal and run beneath dnf command,
$ sudo dnf install -y ansible-core
Once the ansible and its dependencies are installed the verify its version by running,
$ ansible --version
Output,

2) Test Ansible Installation
To test ansible installation, we will be using one remote linux system apart from ansible control node (RHEL 9)
- Ansible Control Node – RHEL 9 – 192.168.1.163
- Ansible Managed Node – Ubuntu 22.04 – 192.168.1.167
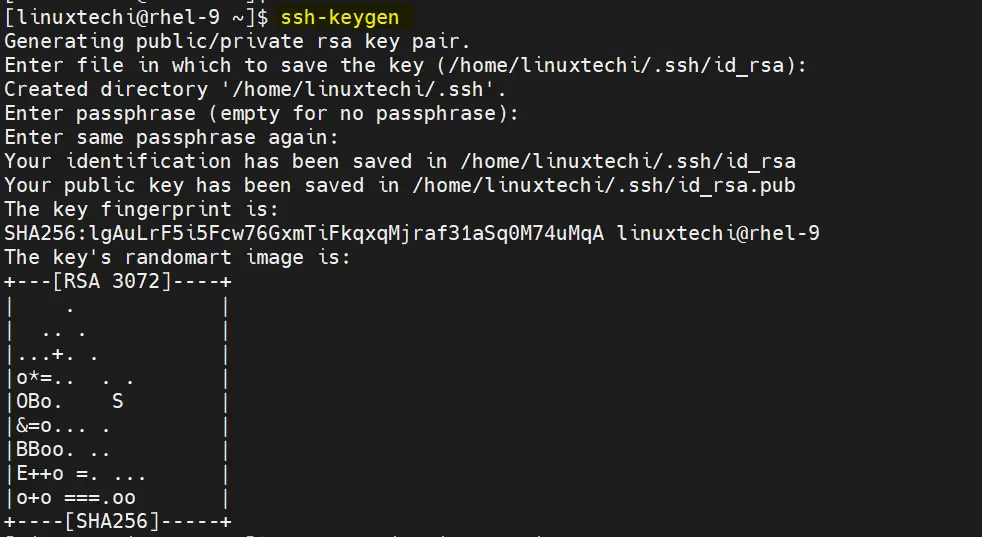
Generate SSH keys for the user (in my case it is linuxtechi) and share ssh key to managed node.
$ ssh-keygen
Output,
Share the ssh keys with managed node using following ssh-copy-id command,
$ ssh-copy-id [email protected]

On the managed node, create the following file
$ echo "linuxtechi ALL=(ALL) NOPASSWD:ALL" | sudo tee /etc/sudoers.d/linuxtechi
Head back to Ansible control node and create ansible.cfg file with beneath content
$ mkdir ~/automation && cd ~/automation/
$ vi ansible.cfg
[defaults]
inventory = ./inventory
host_key_checking = false
remote_user = linuxtechi
ask_pass = False

[privilege_escalation]
become=true
become_method=sudo
become_user=root
become_ask_pass=False
save & exit the file.
Create the inventory file with following content
$ vi ~/automation/inventory
[dev]
192.168.1.167
Save & close the file
Run following ansible command to perform the ping pong connectivity from control node to managed node,
$ cd ~/automation/
$ ansible all -m ping
Output,
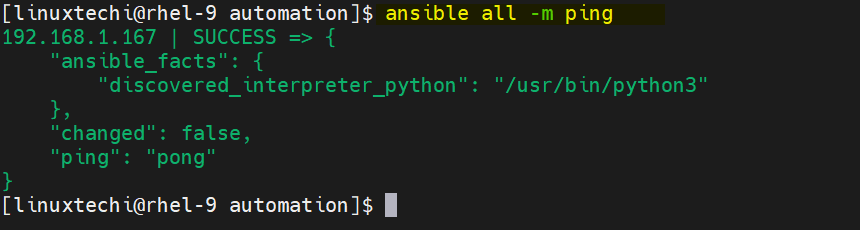
Above output confirms, ping connectivity is fine between control and managed node. Let’s create a demo ansible playbook to install nginx on managed node.
$ vi nginx-deploy.yaml
---
- name: Playbook to Install and Start Nginx
  hosts: dev
  tasks:
  - name: Install nginx
    package:
      name: nginx
      state: present

  - name: Start nginx Service
    service:
      name: nginx
      state: started
Save and exit the file.
Run the above created playbook using following command,
$ ansible-playbook nginx-deploy.yaml
Output of above ansible playbook,
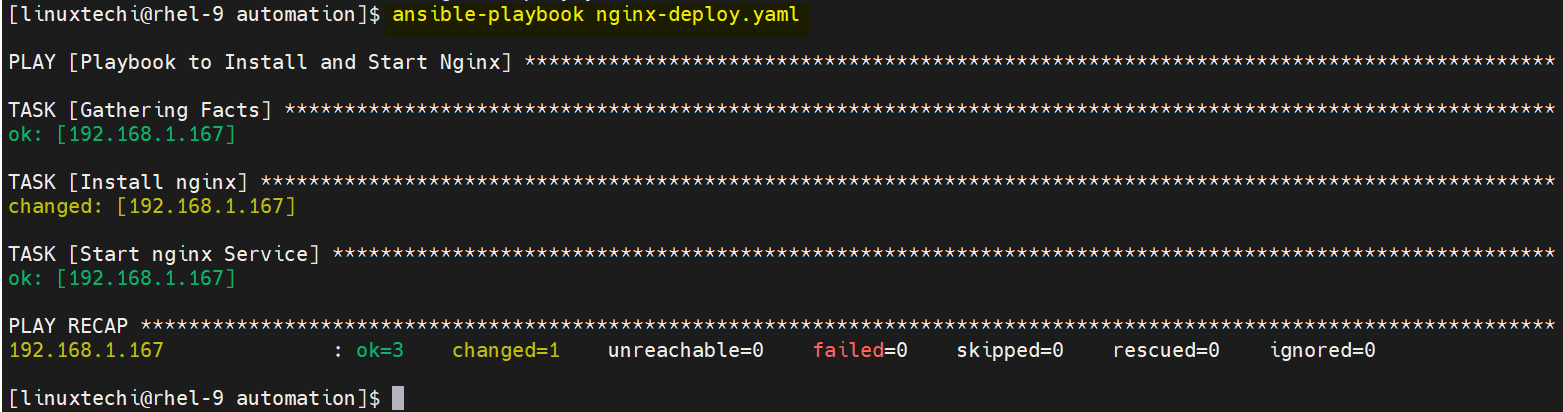
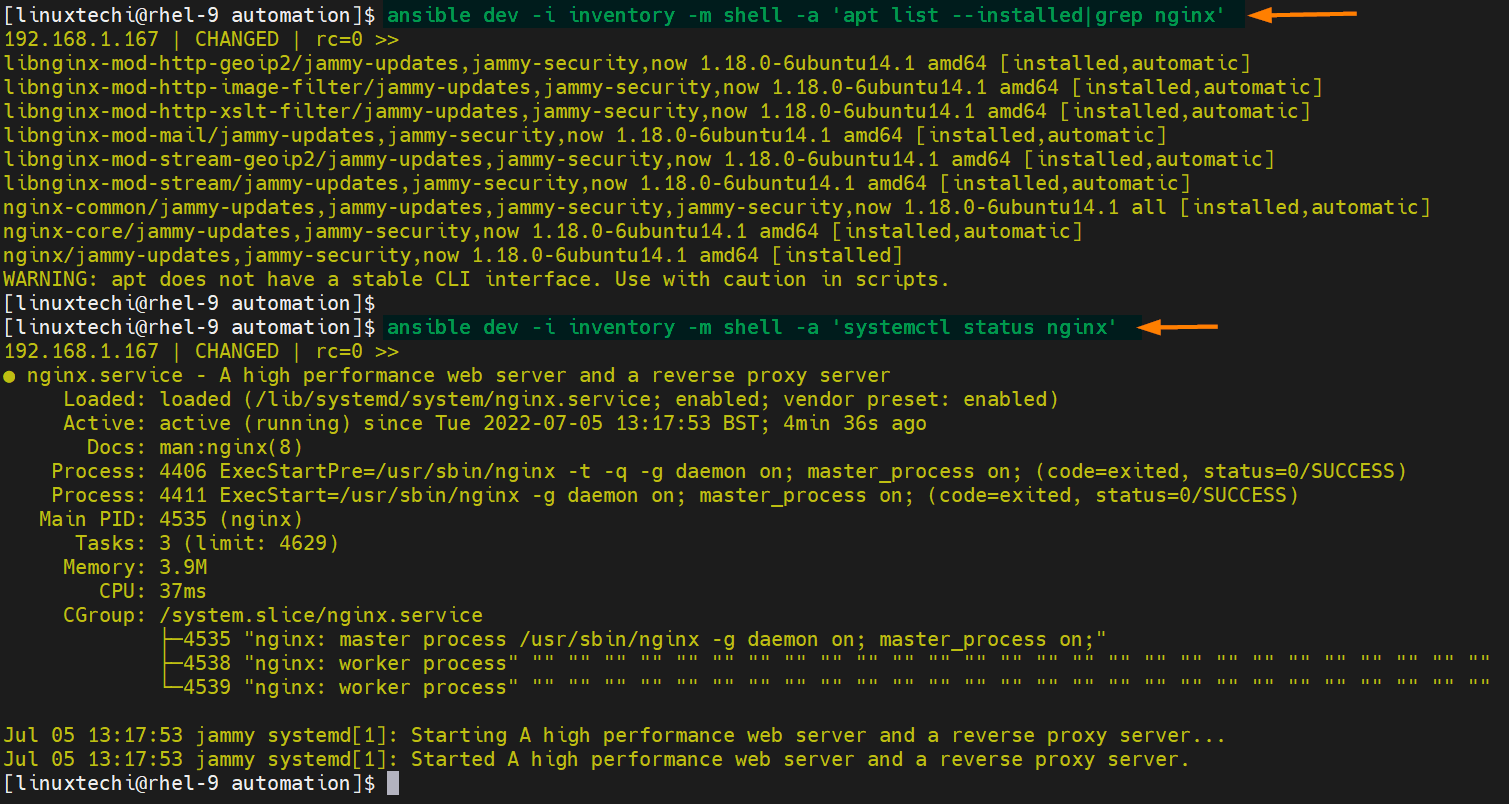
Output above confirms that playbook has been executed successfully. Verify now using following ansible ad-hoc commands,
$ ansible dev -i inventory -m shell -a 'apt list --installed|grep nginx'
$ ansible dev -i inventory -m shell -a 'systemctl status nginx'
That’s all from this guide, I hope this guide helps you to install and test ansible on rhel 9 system. Kindly do post your doubts and queries in below comments section.
Also Read : How to Create Local Yum/DNF Repository on RHEL 9
Thank you!, It works like charm
Other a couple of boneheaded mistakes I made, this set of instructions is spot-on!
Thank you!