In this post, we will show you how to setup dynamic nfs provisioning in Kubernetes (k8s) cluster.
Dynamic NFS storage provisioning in Kubernetes allows you to automatically provision and manage NFS (Network File System) volumes for your Kubernetes applications on-demand. It enables the creation of persistent volumes (PVs) and persistent volume claims (PVCs) without requiring manual intervention or pre-provisioned storage.
The NFS provisioner is responsible for dynamically creating PVs and binding them to PVCs. It interacts with the NFS server to create directories or volumes for each PVC.
Prerequisites
- Pre-installed Kubernetes Cluster
- A Regular user which has admin rights on Kubernetes cluster
- Internet Connectivity
Without any further delay, let’s deep dive into steps
Step1) Prepare the NFS Server
In my case, I am going to install NFS server on my Kubernetes master node (Ubuntu 22.04). Login to master node and run following commands,
$ sudo apt update
$ sudo apt install nfs-kernel-server -y
Create the following folder and share it using nfs,
$ sudo mkdir /opt/dynamic-storage
$ sudo chown -R nobody:nogroup /opt/dynamic-storage
$ sudo chmod 2770 /opt/dynamic-storage
Add the following entries in /etc/exports file
$ sudo vi /etc/exports
/opt/dynamic-storage 192.168.1.0/24(rw,sync,no_subtree_check)
Save and close the file.
Note: Don’t forget to change network in exports file that suits to your deployment.
To make above changes into the effect, run
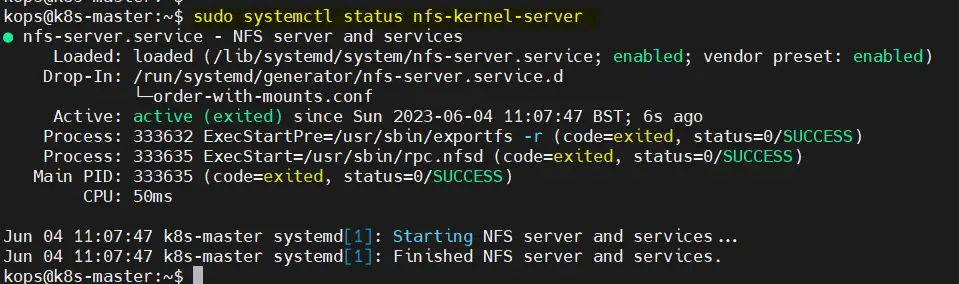
$ sudo exportfs -a
$ sudo systemctl restart nfs-kernel-server
$ sudo systemctl status nfs-kernel-server
On the worker nodes, install nfs-common package using following apt command.
$ sudo apt install nfs-common -y
Step 2) Install and Configure NFS Client Provisioner
NFS subdir external provisioner deploy the NFS client provisioner in your Kubernetes cluster. The provisioner is responsible for dynamically creating and managing Persistent Volumes (PVs) and Persistent Volume Claims (PVCs) backed by NFS storage.
So, to install NFS subdir external provisioner, first install helm using following set of commands,
$ curl -fsSL -o get_helm.sh https://raw.githubusercontent.com/helm/helm/main/scripts/get-helm-3
$ chmod 700 get_helm.sh
$ ./get_helm.sh
Enable the helm repo by running following beneath command,
$ helm repo add nfs-subdir-external-provisioner https://kubernetes-sigs.github.io/nfs-subdir-external-provisioner
Deploy provisioner using following helm command
$ helm install -n nfs-provisioning --create-namespace nfs-subdir-external-provisioner nfs-subdir-external-provisioner/nfs-subdir-external-provisioner --set nfs.server=192.168.1.139 --set nfs.path=/opt/dynamic-storage

Above helm command will automatically create nfs-provisioning namespace and will install nfs provisioner pod/deployment, storage class with name (nfs-client) and will created the required rbac.
$ kubectl get all -n nfs-provisioning
$ kubectl get sc -n nfs-provisioning
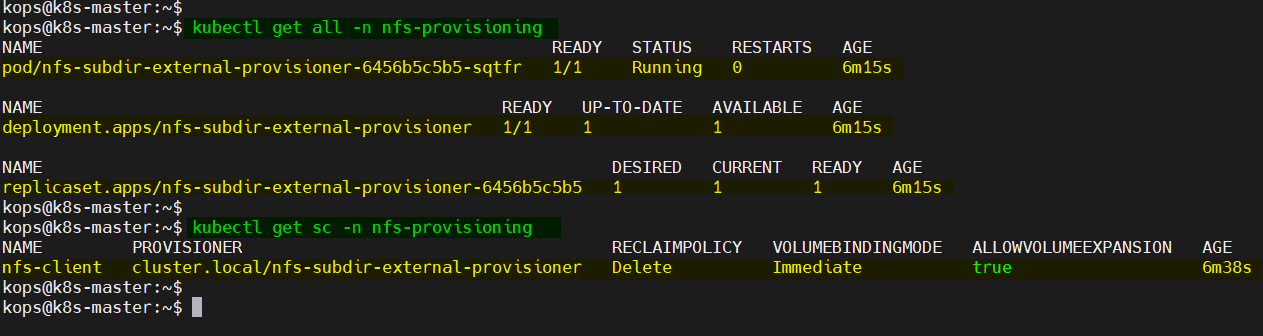
Perfect, output above confirms that provisioner pod and storage class is created successfully.
Step 3) Create Persistent Volume Claims (PVCs)
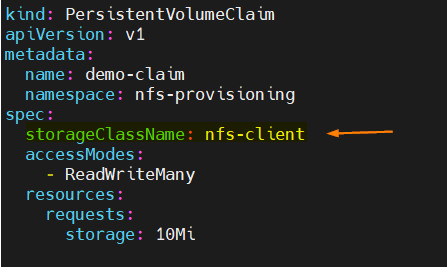
Let’s a create PVC to request storage for your pod or deployment. PVC will request for a specific amount of storage from a StorageClass (nfs-client).
$ vi demo-pvc.yml
kind: PersistentVolumeClaim
apiVersion: v1
metadata:
  name: demo-claim
  namespace: nfs-provisioning
spec:
  storageClassName: nfs-client
  accessModes:
    - ReadWriteMany
  resources:
    requests:
      storage: 10Mi
save & close the file.
Run following kubectl command to create pvc using above created yml file,
$ kubectl create -f demo-pvc.yml
Verify whether PVC and PV are created or not,
$ kubectl get pv,pvc -n nfs-provisioning

Great, above output shows that pv and pvc are created successfully.
Step 4) Test and Verify Dynamic NFS Provisioning
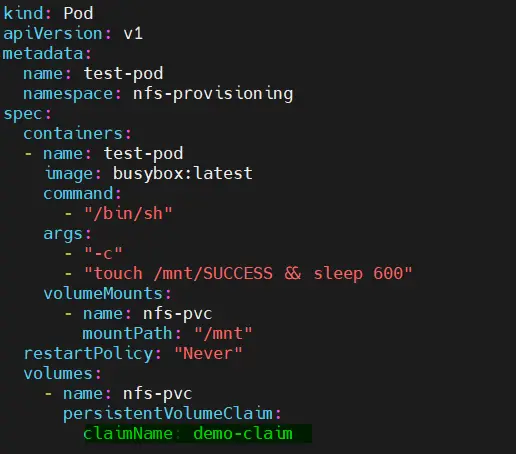
In order to test and verify dynamic nfs provisioning, spin up a test pod using following yml file,
$ vi test-pod.yml
kind: Pod
apiVersion: v1
metadata:
  name: test-pod
  namespace: nfs-provisioning
spec:
  containers:
  - name: test-pod
    image: busybox:latest
    command:
      - "/bin/sh"
    args:
      - "-c"
      - "touch /mnt/SUCCESS && sleep 600"
    volumeMounts:
      - name: nfs-pvc
        mountPath: "/mnt"
  restartPolicy: "Never"
  volumes:
    - name: nfs-pvc
      persistentVolumeClaim:
        claimName: demo-claim
Deploy the pod using following kubectl command,
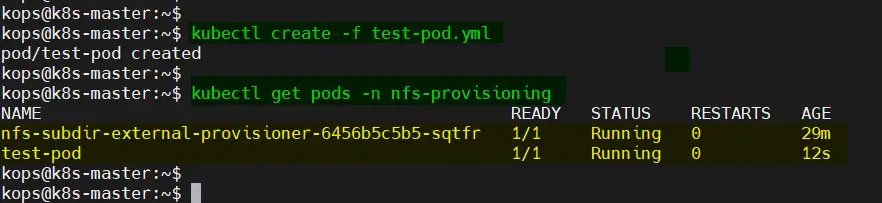
$ kubectl create -f test-pod.yml
Verify the status of test-pod,
$ kubectl get pods -n nfs-provisioning
Login to the pod and verify that nfs volume is mounted or not.
$ kubectl exec -it test-pod -n nfs-provisioning /bin/sh

Great, above output from the pod confirms that dynamic NFS volume is mounted and accessible.
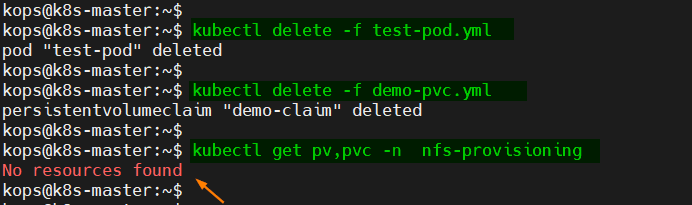
In the last, delete the pod and PVC and check whether pv is deleted automatically or not.
$ kubectl delete -f test-pod.yml
$ kubectl delete -f demo-pvc.yml
$ kubectl get pv,pvc -n  nfs-provisioning
That’s all from this post, I hope you have found it informative. Feel free to post your queries and feedback in below comments section.
That’s a great how-to, many thanks!
Just would like to add a consideration about permissions. The NFS directory that we’re using here to share the content, so /opt/dynamic-storage, gets the number of the beast (at least in Linux): 777.
This can’t possibly be right. Those kind of permissions are too wide and a security risk, it can simply be avoided by using something like:
> sudo chown -R nobody:nogroup /storage
> sudo chmod 2770 /storage
The setgid does the trick here, and you don’t have a directory opened for rwx to the world.
With that said, the resources that get created by the provisioner are in any case 777:
> sudo ls -la /storage/
total 12
drwxrws— 3 nobody nogroup 4096 giu 9 12:24 .
drwxr-xr-x 22 root root 4096 giu 9 12:20 ..
drwxrwxrwx 2 nobody nogroup 4096 giu 9 12:25 nfs-provisioning-demo-claim-pvc-3483691c-492f-4a84-875d-897efe855978
But that’s how the provisioner work, and so should be explored there (the project doesn’t seem to be maintained anymore ‘https://github.com/kubernetes-sigs/nfs-subdir-external-provisioner/issues/286’ ).
Great work, btw!