A dual boot setup is a setup that allows users to have multiple operating systems installed on a single hard drive, each independent of each other. Each operating system has its own set of software and drivers which allows it to access the hardware components of the PC and other peripheral devices. During the booting process, users can select the operating system they’d like to boot into without affecting the other.
In this topic, you will learn how to dual boot Ubuntu 20.04 LTS (Focal Fossa) along with Windows 10.
Requirements for Dual Boot:
Before getting started, ensure you have the following:
- A bootable USB / DVD medium of Ubuntu 20.04 LTS
- A fast and stable internet connection
This article also assumes that you have a copy of Windows 10 already installed locally on your PC.
Step 1) Create a free partition on Windows 10
Before proceeding to install Ubuntu, we are going to create a free partition which we shall use later in this guide to install Ubuntu 20.04. We need to access the “Device Manager” in Windows to create a new partition.
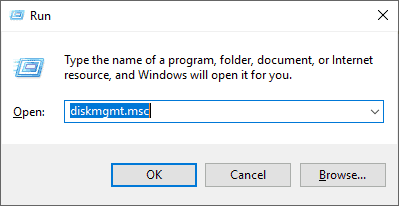
So, open the ‘Run’ dialogue by pressing Windows Key + R. Type diskmgmt.msc and hit ENTER.
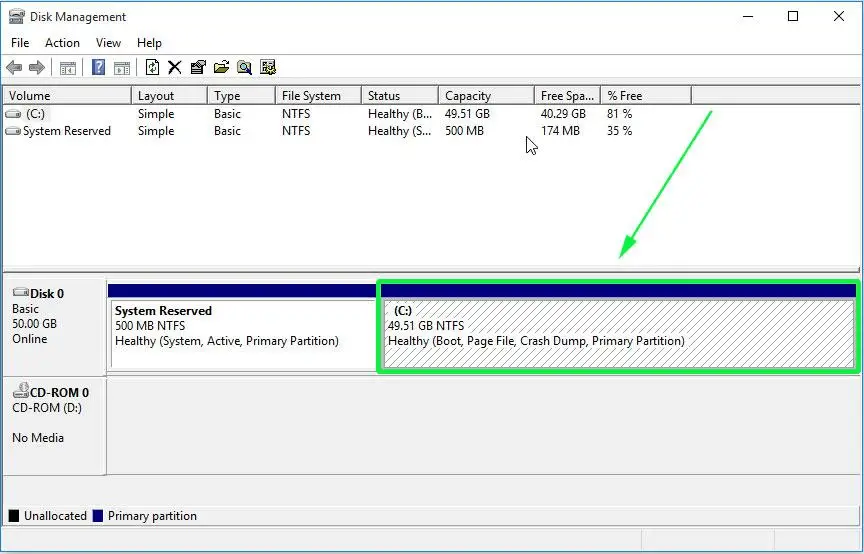
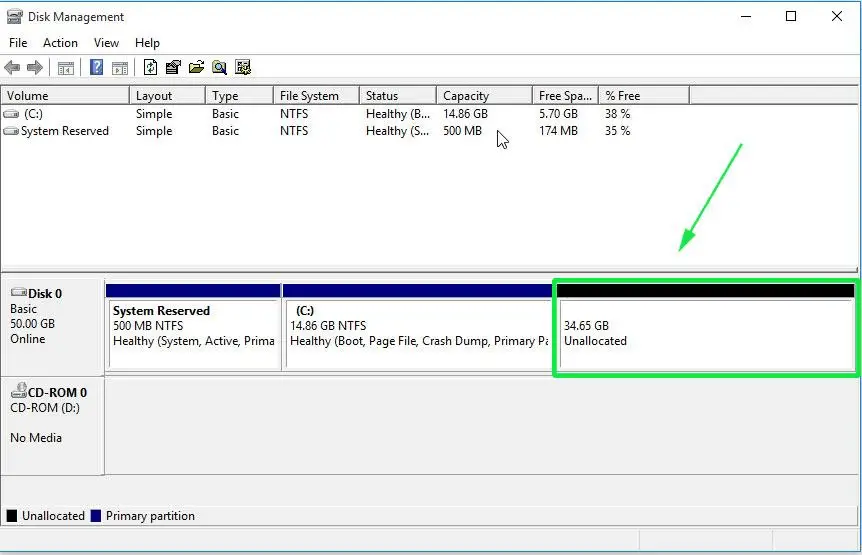
This opens the ‘Disk management’ window that displays all the disks attached to the PC and partitioned volumes. From the image below, you can clearly see that we have 1 hard disk with 1 partition labelled (C:)
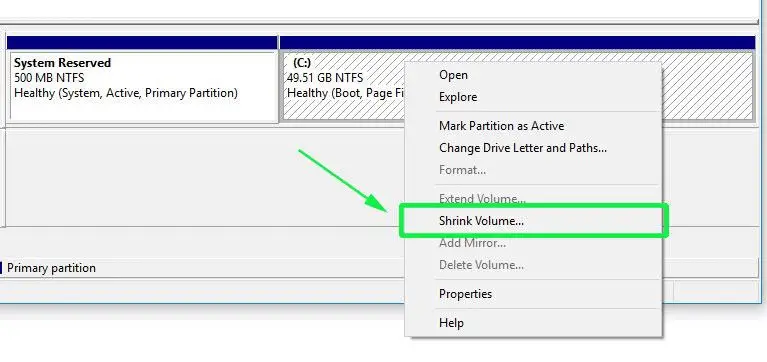
To create a separate partition for Ubuntu, we need to shrink this volume and create an unallocated space. So, right click on the volume and select ‘Shrink’ as shown:
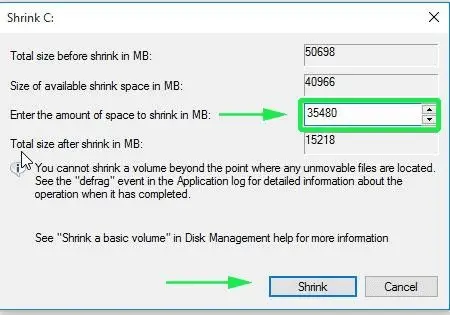
From the pop-up window, provide the amount of space in MB that you need to create for the free partition and click on the ‘Shrink’ button. Here, we have defined 35480 MB which is roughly 35 GB.
Give Windows a few seconds to create an unallocated space. After it’s finished, the partition will be displayed as shown below. This is the partition that we are going to install Ubuntu 20.04 LTS on it.
With the ‘unallocated’ partition in place, plug your bootable flash drive or insert the DVD installation medium into your PC and restart your system.
Step 2) Begin the booting process
It’s prudent to pop into the BIOS settings and reorder the boot priority settings so that the system boots into your installation medium first. Depending on the vendor, the BIOS settings can be accessed by pressing F10, F9, F12 , or by hitting the ESC key. Once you are done making changes to the boot priority, save and exit the BIOS settings.
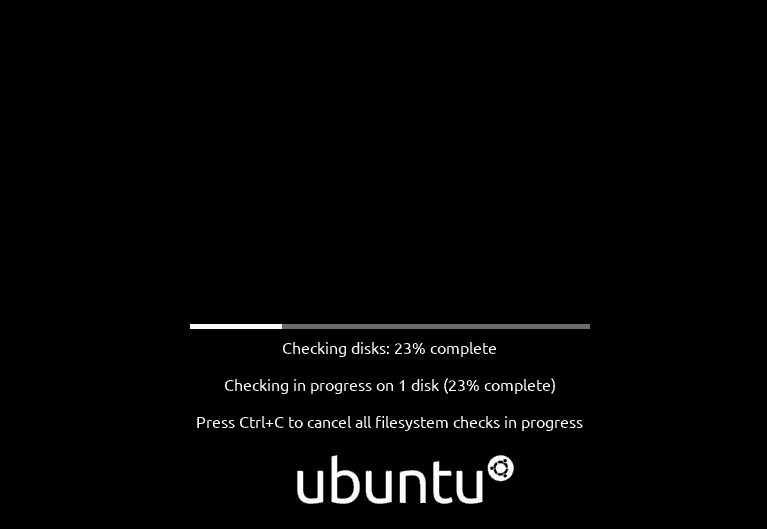
Upon booting, Ubuntu 20.04 LTS will scan your hard drive and start performing file system integrity checks as shown.
Once the filesystem checks are completed, you’ll be presented with 2 options below. The first option – Try Ubuntu – allows you to give Ubuntu 20.04 a test run and explore its features. Since we are interested in installing it in the system, click on the second option – Install Ubuntu.

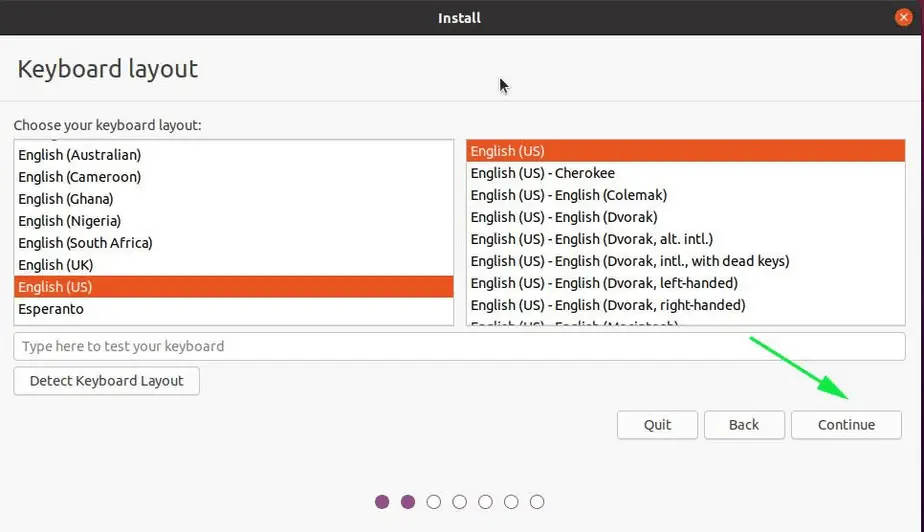
Step 3) Select the keyboard layout for your Ubuntu 20.04 LTS
Next, select the preferred Keyboard Layout and click on ‘Continue’
Step 4) Install updates and third-party applications
This step requires one to select either a ‘Normal installation’ or a ‘Minimal installation’. A Normal installation ships with a GUI (Graphical User interface) that allows you to interact with your system graphically. A GUI comprises features such as windows, icons, buttons, check-boxes and many more. A minimal installation offers a desktop environment (GUI) but limited number of applications and software like Web browser and other basic tools.
Furthermore, you can select to install Update and other third-party software during the installation. Be advised that selecting the option to install third-party applications will cause the installation to take much longer to complete. In this case, we have decided to select all the options.
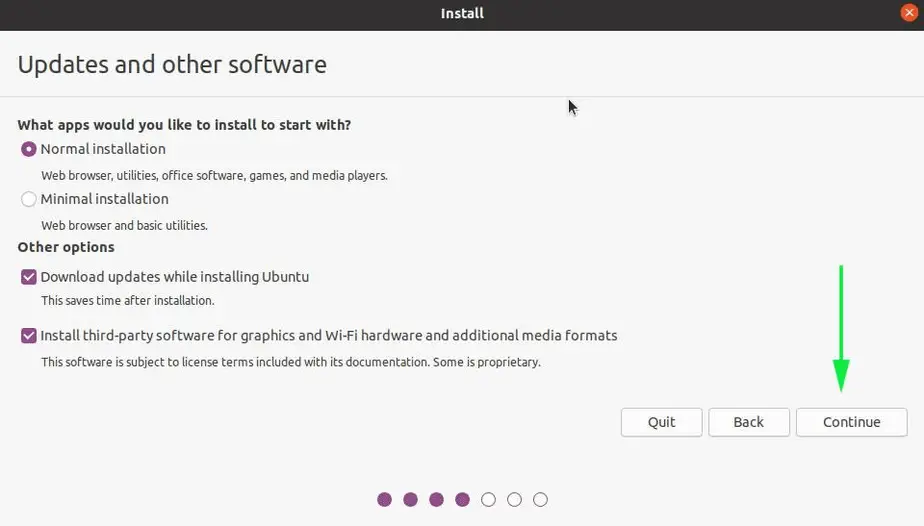
Upon making your preferred selection, click on ‘Continue’.
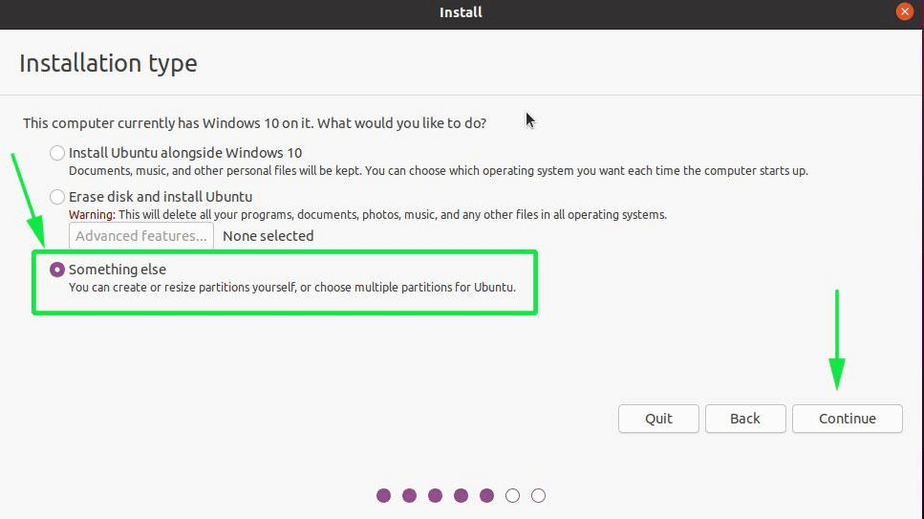
Step 5) Select the installation type
The next step requires you to select the installation type. You are presented with 3 options:
- Install Ubuntu alongside Windows 10
- Erase disk and Install Ubuntu
- Something else
The first option takes care of everything. The installer intelligently configures all the partitions that will be required by the Ubuntu system. Select this selection, if you don’t necessarily mind about the auto partitioning of the hard drive.
The second partition is usually when you want to entirely wipe out the present operating system (In this case Windows 10) and install Ubuntu. Because we don’t want to do that, we will steer clear of this option.
Lastly, we have the ‘Something else’ option. The option hands you the steering wheel and lets you manually configure the partitions according to your own preference.
Here, we will demonstrate how to create and configure the partitions. So click on the ‘Something else’ option.
The window below will be displayed as shown. As you will notice, there is the free space that we created back on our Windows 10 operating system.
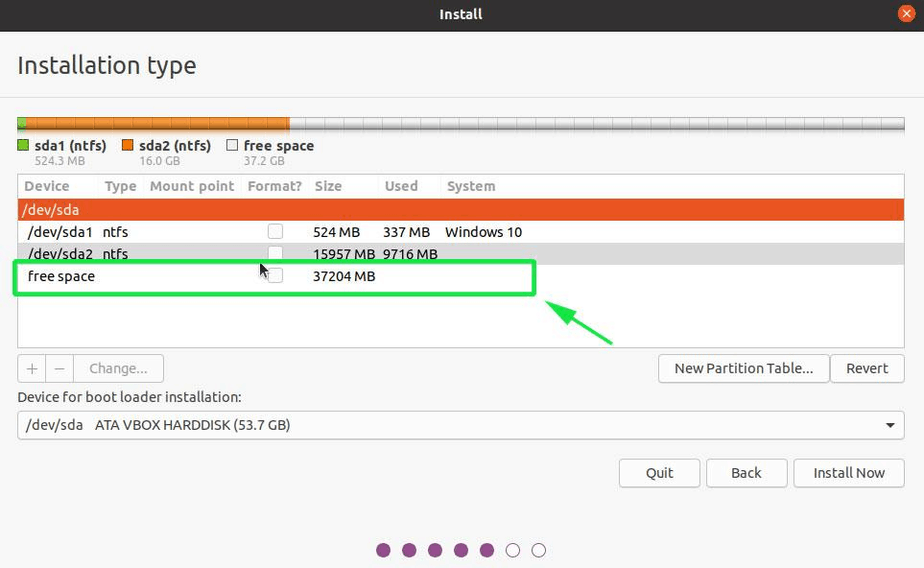
This is the space from which we shall create the partitions on which Ubuntu will occupy. We will create the following essential partitions.
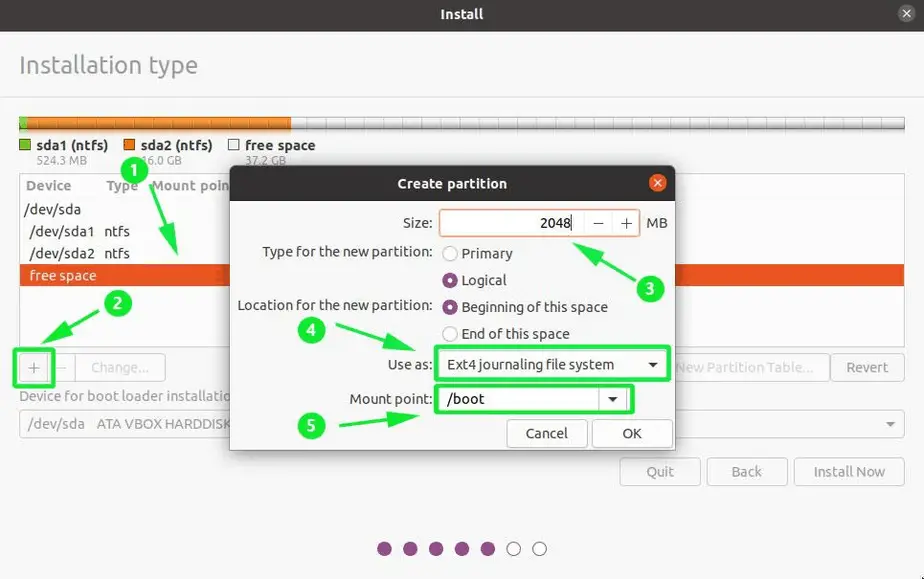
- /boot – 2048MB
- / – 30000MB
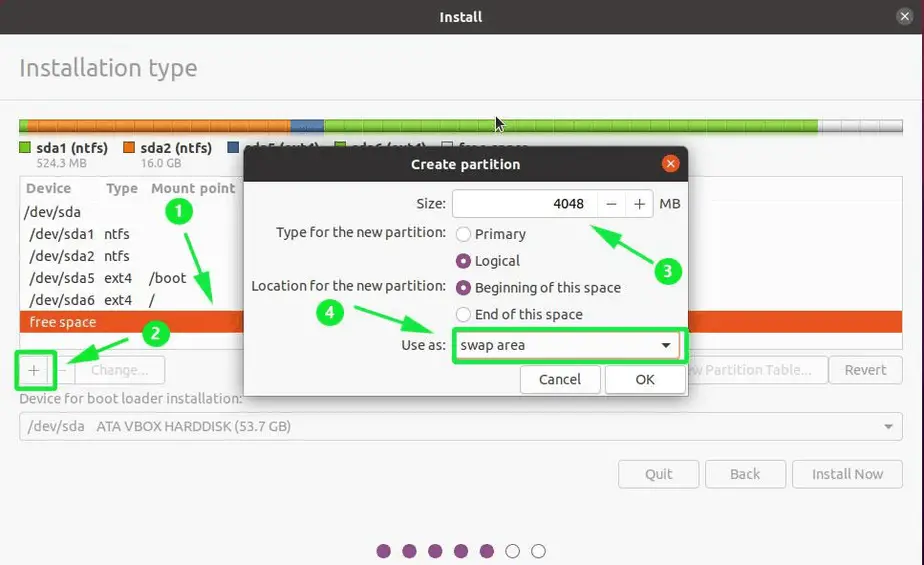
- Swap – 4048MB
To create the boot partition, click on the free space partition and click on the plus (+) sign button located directly below.
On the pop-up box define the size of the boot partition (2048MB in this case), select the ‘Ext4 Journaling file system‘ and select the mount point as /boot. Then click the Ok button.
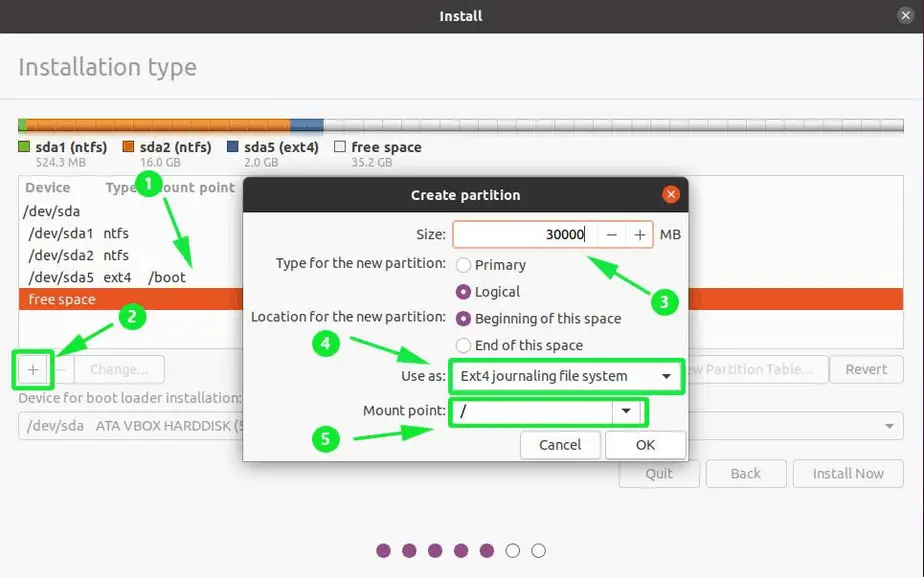
To create the root partition, again, click on the remaining free space partition after the root partition was created and click on the plus (+) sign button. On the pop-up box, type in the size of the root partition, (In this case 30000MB) select the ‘Ext4 Journaling file system’ and thereafter, select the mount point as / (forward slash symbol)
And finally to create the swap partition, repeat the steps as previously mentioned, only this time, select ‘swap area’ instead of ‘Ext4 Journaling file system’ and click Ok.
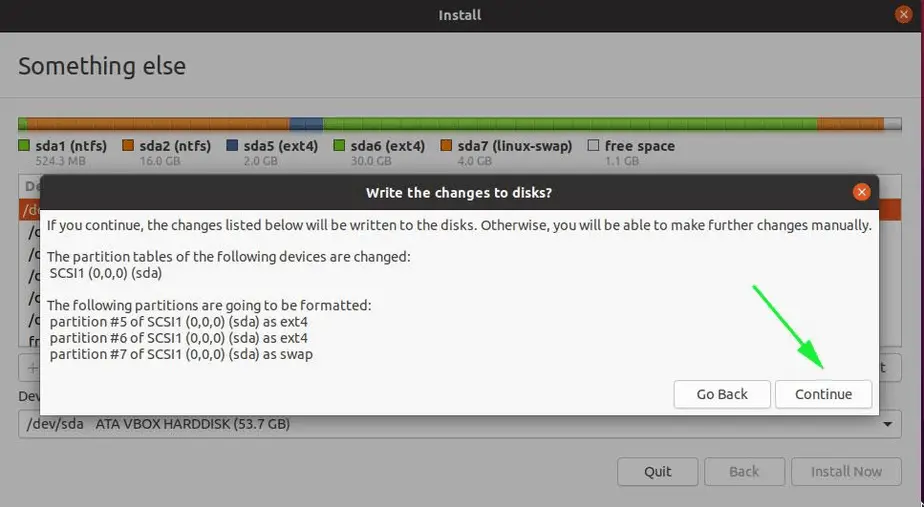
Finally, the partition table now looks as shown below. Notice the presence of both the NTFS file system for Windows and Ext4 for Linux.

Once you are satisfied, click on ‘Install now’.
A pop-up will be displayed asking you to confirm writing the changes that you’ve made to the disk. Click ‘Continue’ to get ahead with the installation process.
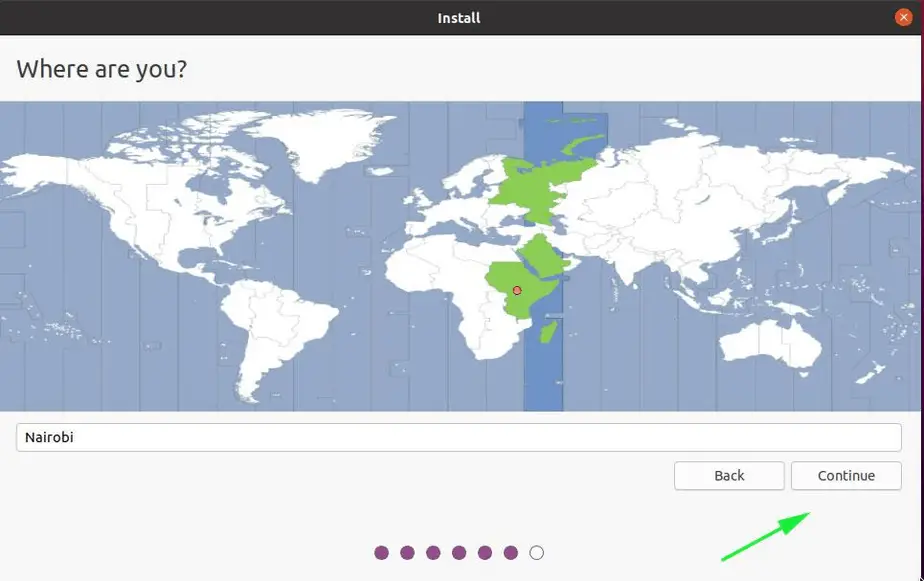
Step 6) Select your preferred time zone
In the next window, select your preferred time zone and click on the ‘Continue’ button.
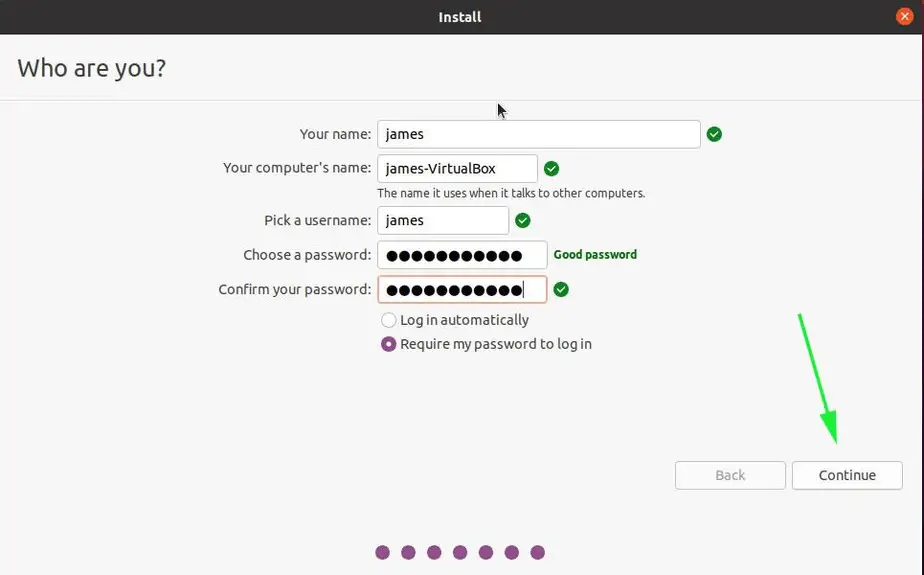
Step 7 ) Enter Hostname & your username credentials
Next, provide your name, username, and password and click on the ‘Continue’ button.
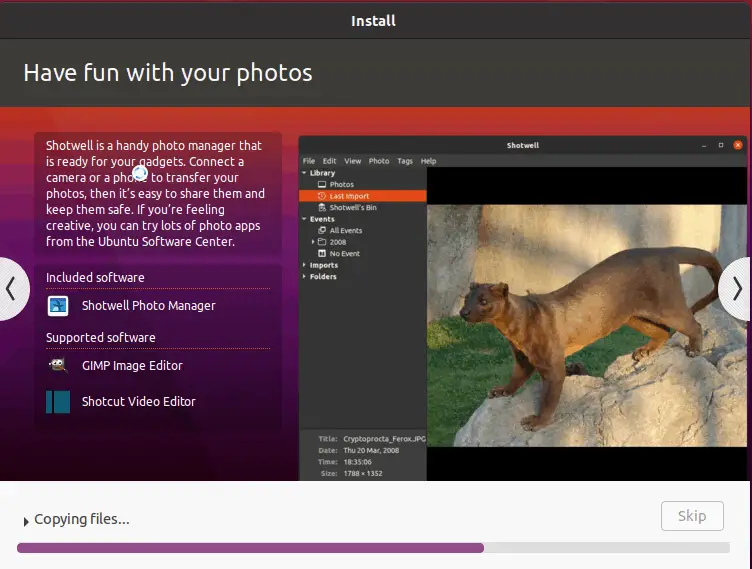
Step 8 ) Installation gets underway
The installation will begin, copying files and installing all the software packages and dependencies that are required. This takes quite a while, and what a better time to take a break and sip some coffee 🙂
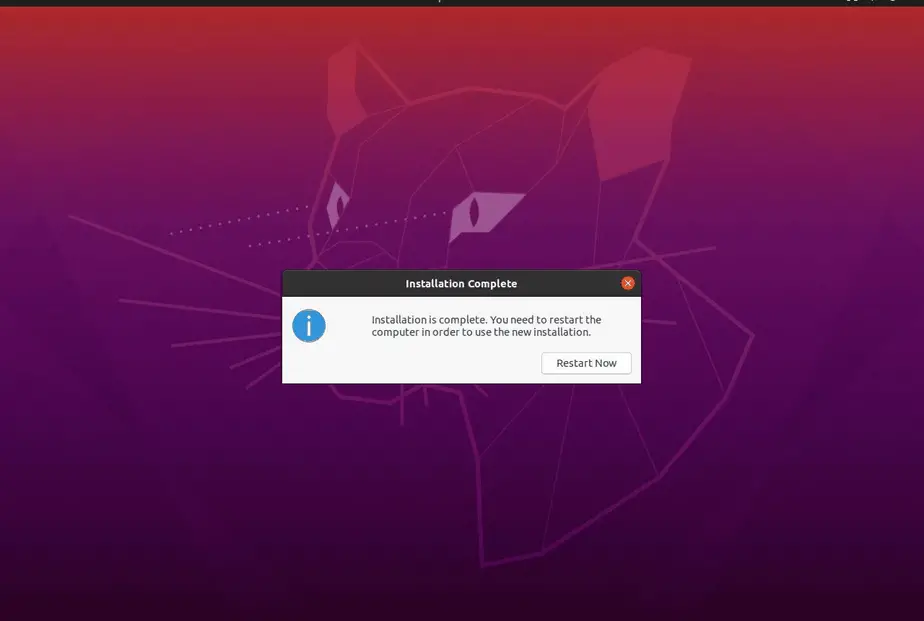
When the installation is complete, the installer will prompt you to reboot the system as shown. Click on Restart.
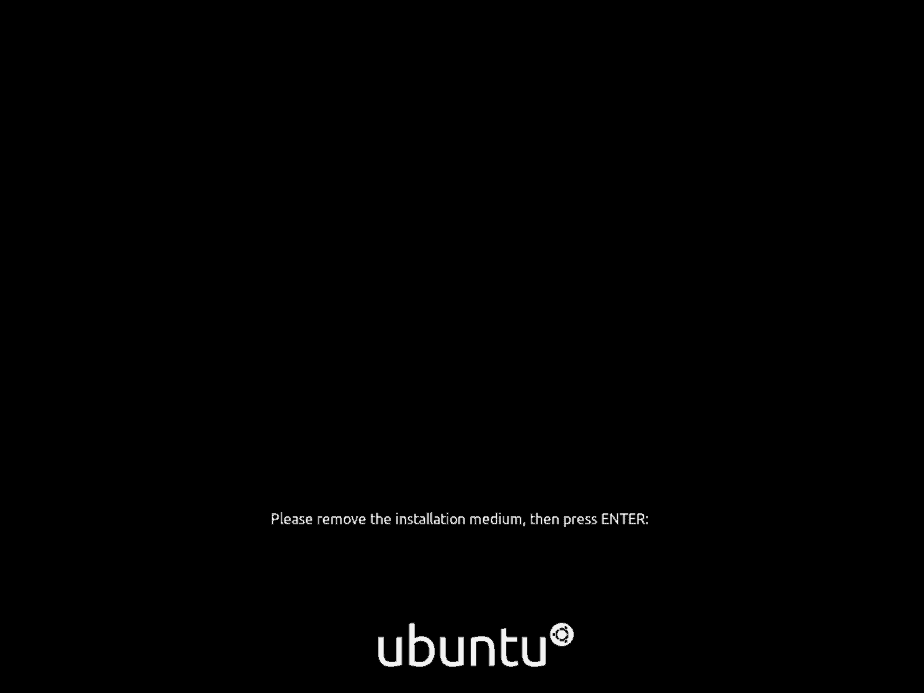
Remove the installation medium and hit ENTER
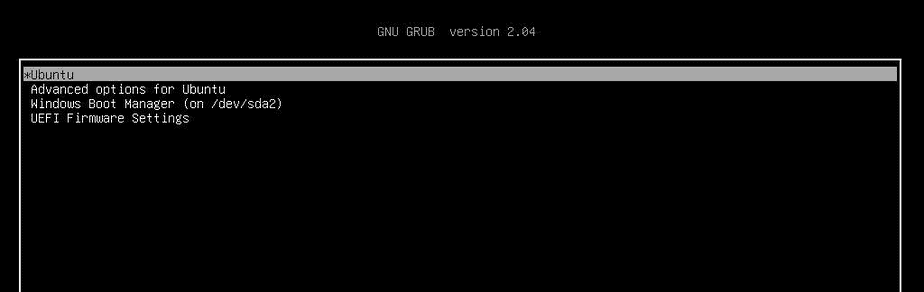
Step 9 ) Choose OS to boot and Log in
Upon rebooting, you will get a below Grub bootloader screen with the various options from there you can choose to boot into either ‘Ubuntu’ as the first option or ‘Windows Boot Manager‘. To boot into Ubuntu select the first option as shown,
At the login screen, provide your password and hit ENTER.
This concludes the topic on how you can dual boot Ubuntu 20.04 LTS along with Windows 10. You are most welcome to share your feedback and comments in the comments section below.


Great article, my 20.04 installer kept wanting to either erase window or if I told it something else I would get root file error message, I’m 72 and don’t have much hair to pull out. Your article saved my barbers job, thanks much.
ubuntu failed to boot
what now?!
labtop cant boot into windows there is no bootable
Thanks for the sparing and sharing.
I have a laptop with ubuntu 20.04 LTS and want to add a win10 OS to it. I need to shrink the ext4 partition as it is the full 120GB disk. Would you be able to cover how to that.
Thank you for this info. ! You have crystal clearly explained everything to do
“Give Windows a few seconds to create an unallocated space”
I partitioned 50GB from my 1TB HDD and that took me more than 15 mins. I thought there’s something wrong with my system since it’s taking so long cause you mentioned “seconds”