Ubuntu 18.04 LTS aka Bionic Beaver was released on April 26th, 2018 with a lot of changes on front end as well as on backend. Major change that anybody who has ever used Ubuntu, will notice the new Desktop Environment.
You should start noticing the changes beginning with the Ubuntu Installation, we now have a new wallpaper when we boot into Ubuntu & during installation, we now get option to have a minimal installation, that gives you a web browser & some basic utilities.
The Unity Desktop environment has been replaced with GNOME, as Ubuntu has ended development on Unity. LightDM login manager has been swapped with Gnome’s GDM login manager. Ubuntu 18.04 still uses XORG display server by default, which was replaced to Wayland display server in Ubuntu 17.10. Ubuntu 18.04 now has support for color emoji icons, also Ubuntu now allows us to live patch our systems i.e. we can now patch our kernels without having to restart our systems.
On the software front, most of the defaults remains the same. We have usual thunderbird, libre office, Firefox , Nautilus file manager etc at our disposal, their versions have been upgraded. Also, you should not worry about Spectre & Meltdown attacks with Ubuntu 18.04.
So that was something brief about Ubuntu 18.04, let’s now get to our main topic, which is how to dual boot Ubuntu with Windows 10 system. So let’s get starting,
Dual boot Ubuntu 18.04 LTS with Windows 10
For purpose of this tutorial, we assume that you have Windows 10 system with at least 25 Gb free HDD space. If you have then move onto the article,
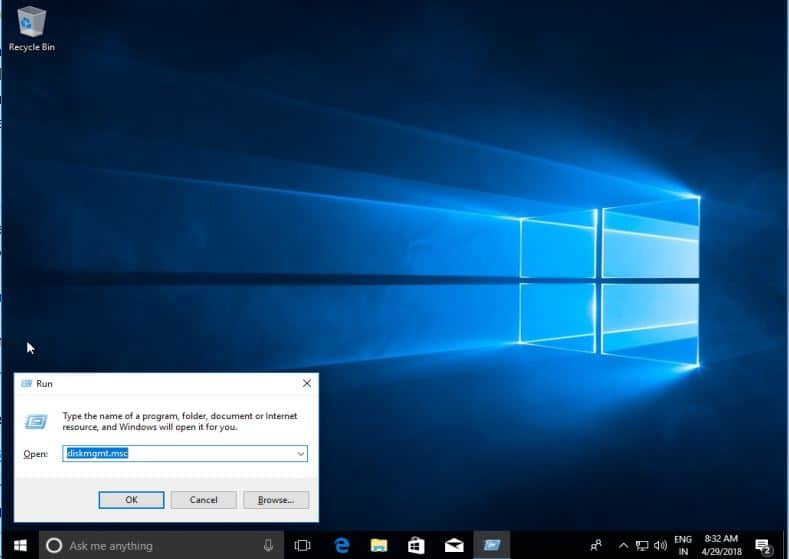
Step:1) Login into your Windows 10 system. Once done, we need to open Disk Management Console. To open Disk Management console, open run prompt (by pressing Windows Key + R or by typing ‘run’ in search bar) & type ‘diskmgmt.msc‘
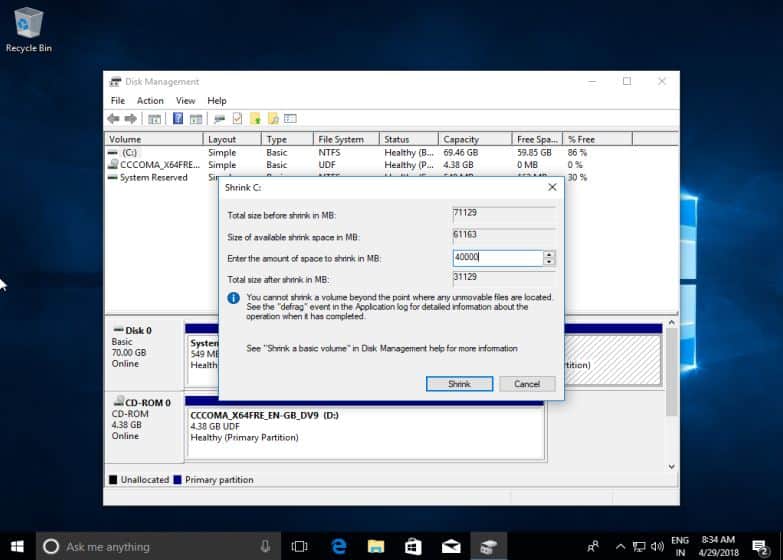
Step:2) We need to free up some space from our HDD, we will do it by shrinking the volume that has some free space. Select the partition with some free space (at least 25 Gb), right click & select ‘Shrink Volume‘

Step:3) On next screen, select the amount you want to shrink and press ‘Shrink’. For our tutorial, we will be using 40 GB,
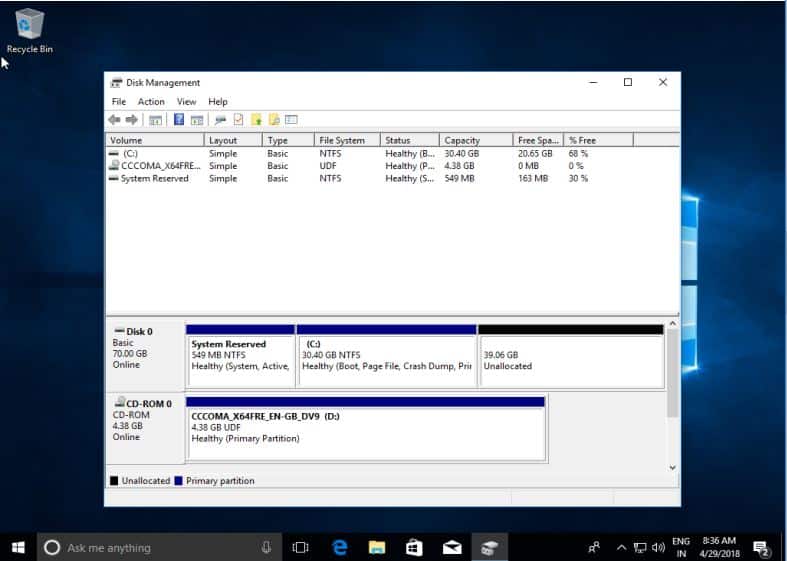
Step:4) As shown is the screenshot below, we now have 40 GB of unallocated space that will be used for Ubuntu 18.04 installation
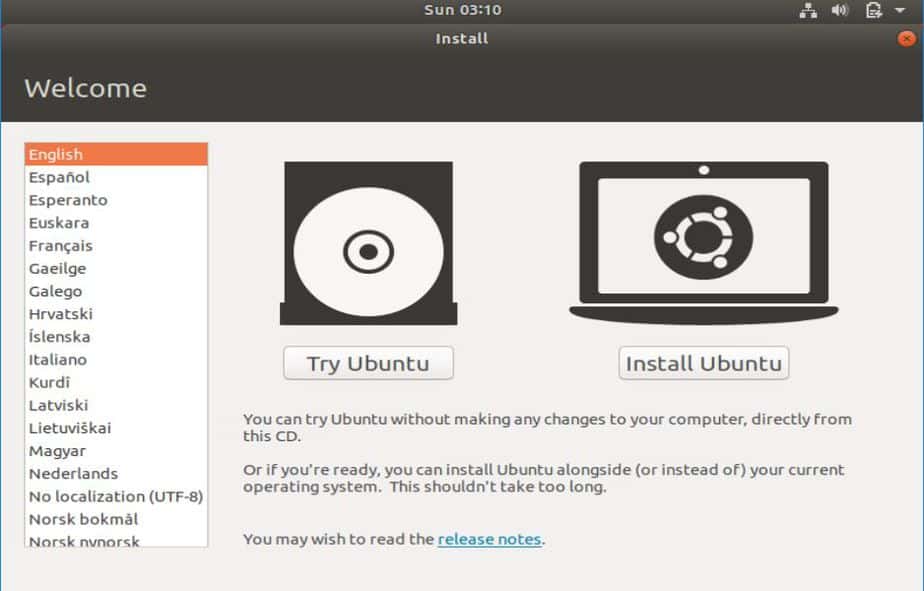
Step:5) Next step is to shutdown your system & insert a bootable USB or a Live DVD for Ubuntu 18.04 onto the system & than boot the system into the Ubuntu image,

Step:6) Once the Ubuntu image has been booted up, we should see the following options. Select ‘Install Ubuntu’,
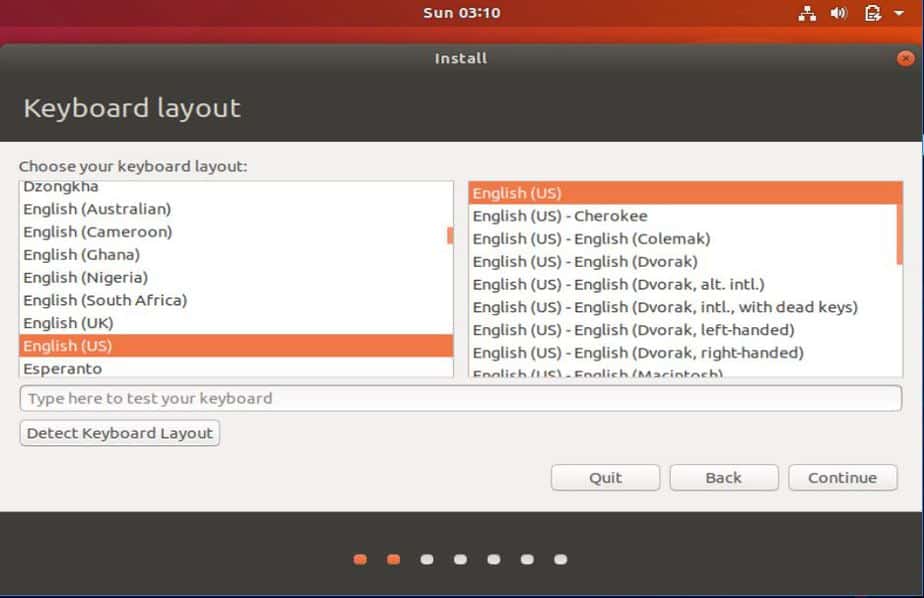
Step:7) On next screen, we will be asked for ‘Keyboard Layout’, I am leaving it at default, modify it as per your needs & press Continue,
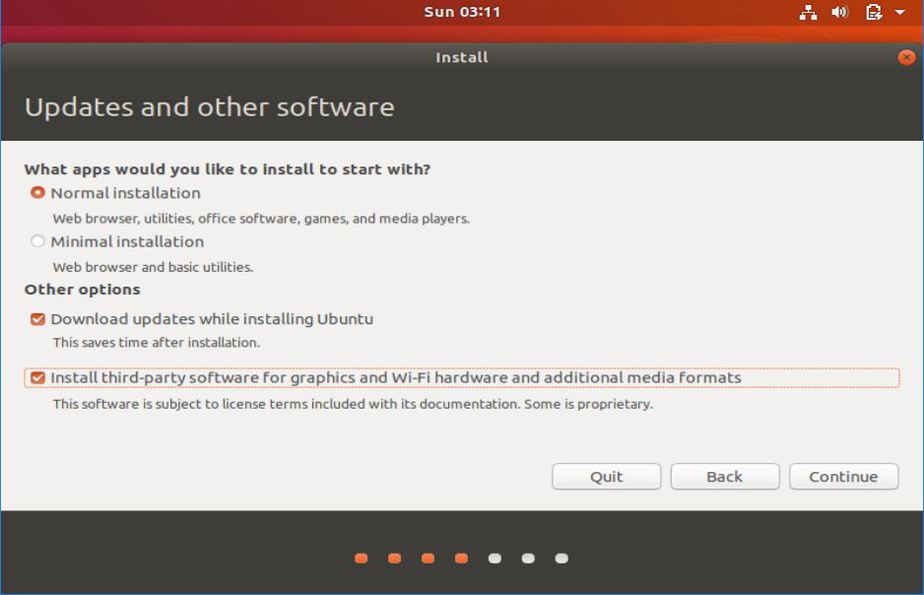
Step:8) On the next screen we are introduced to a little change, we have an extra option to select what apps we need to install on our system & we can either select Normal installation with all the default applications or we can also select Minimal Installation with only a web browser & some basic utilities. Select the option, you see fit & press Continue,
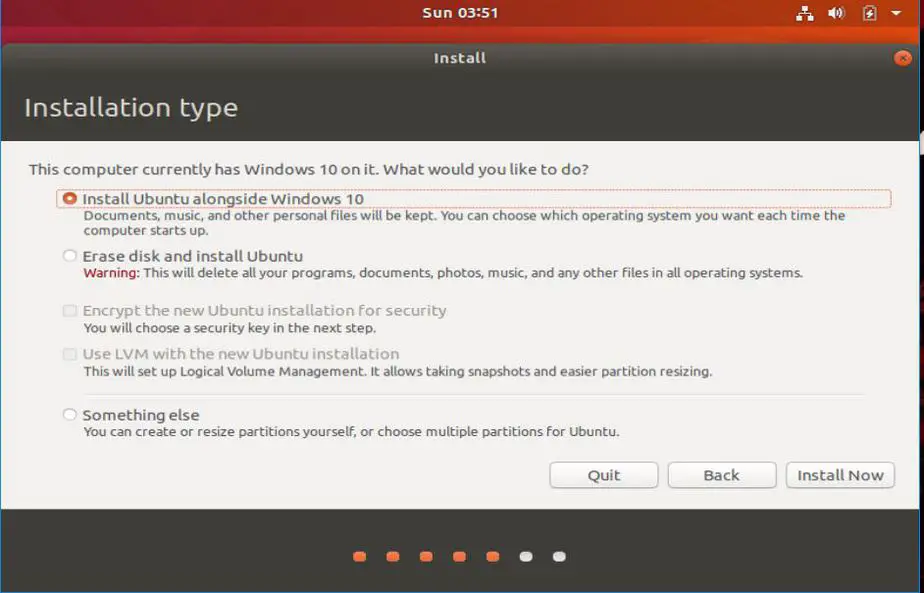
Step:9) On the next screen, we will select the installation type. Since we are dual booting with Window 10, we will select the first option ‘Install Ubuntu alongside Windows 10′, rest options can be choosen when we are installing Ubuntu afresh,
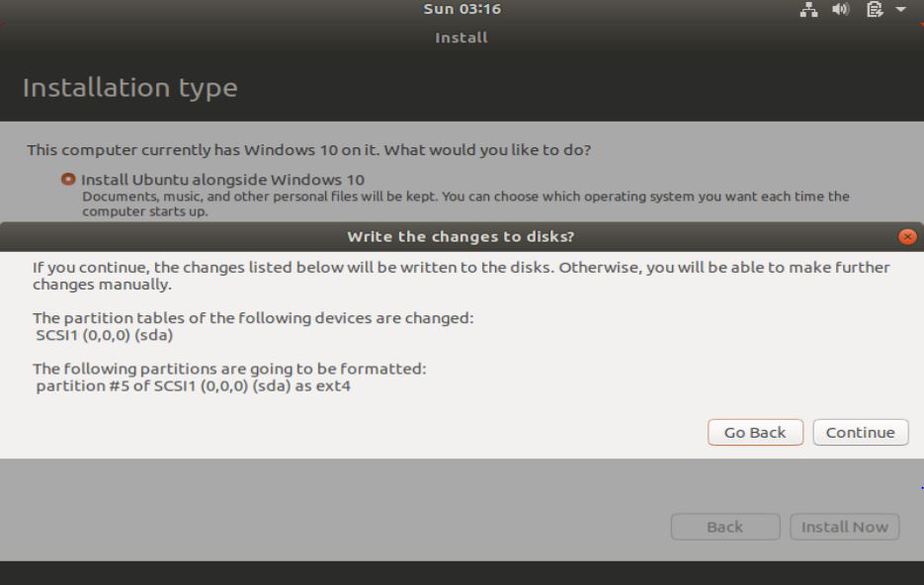
Step:10) On the following screen, press ‘Write changes to disk‘ to proceed further with the installation,
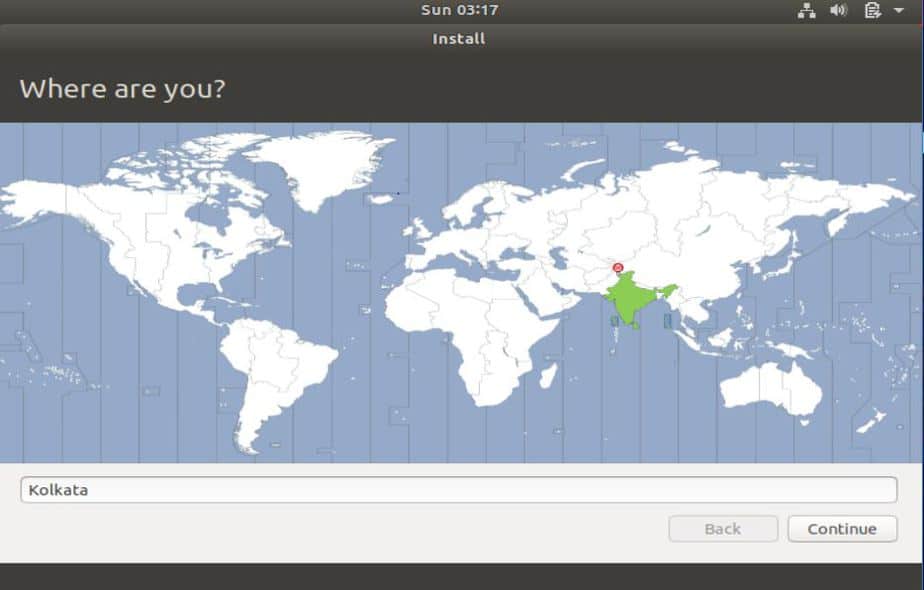
Step:11) Now we would be asked about our Geographical location, select your country & proceed by clicking on the Continue button,
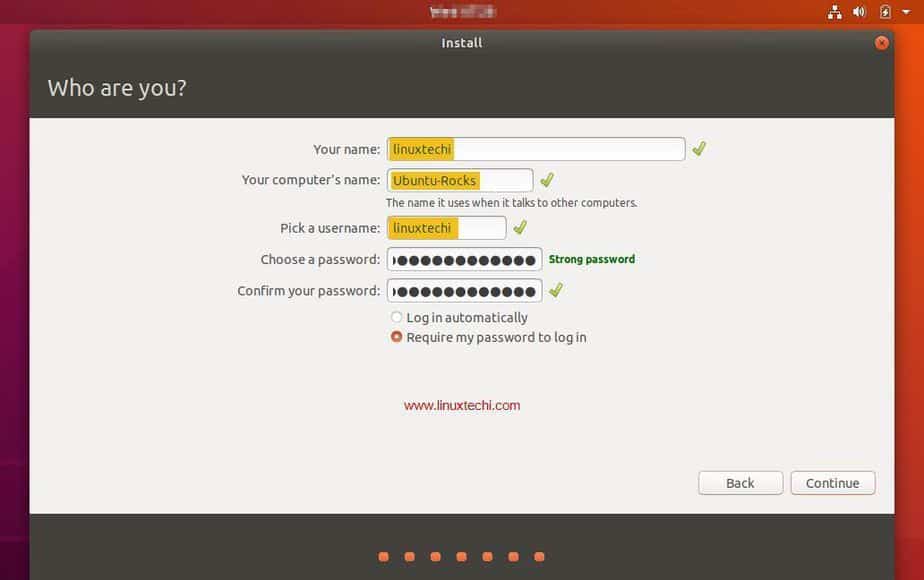
Step:12) Now comes the part of installation, where we need to create information about our User, our computer name & password etc. Enter all the requested information & once done, press Continue,
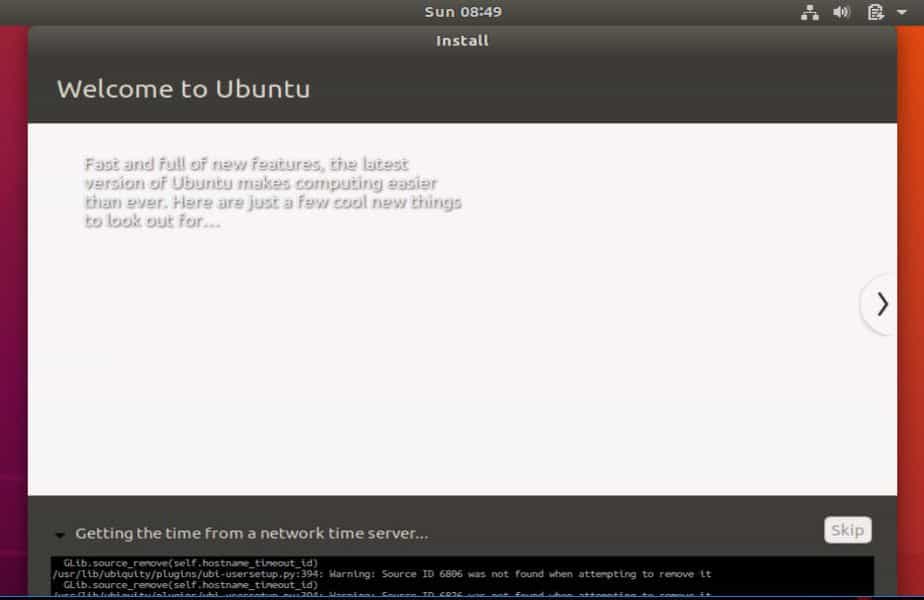
Step:13) We have now entered all the needed information, Ubuntu will now proceed with the installation & depending on the allocated system resources it can take anywhere between 5 to 20 mins,
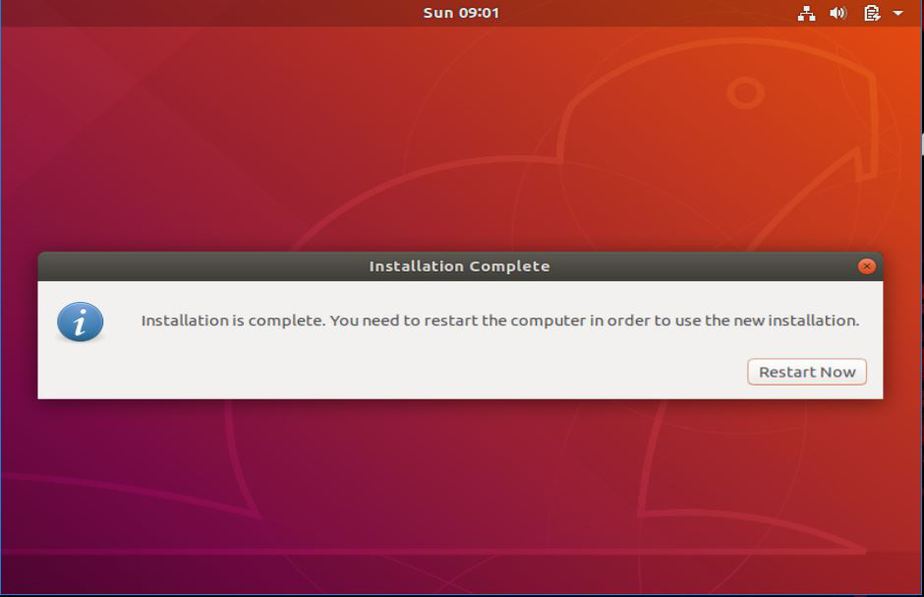
Step:14) Once the installation has been completed, we will be asked to restart our system. Press on ‘Restart Now’. Also remove the installation media from system before restarting the system,
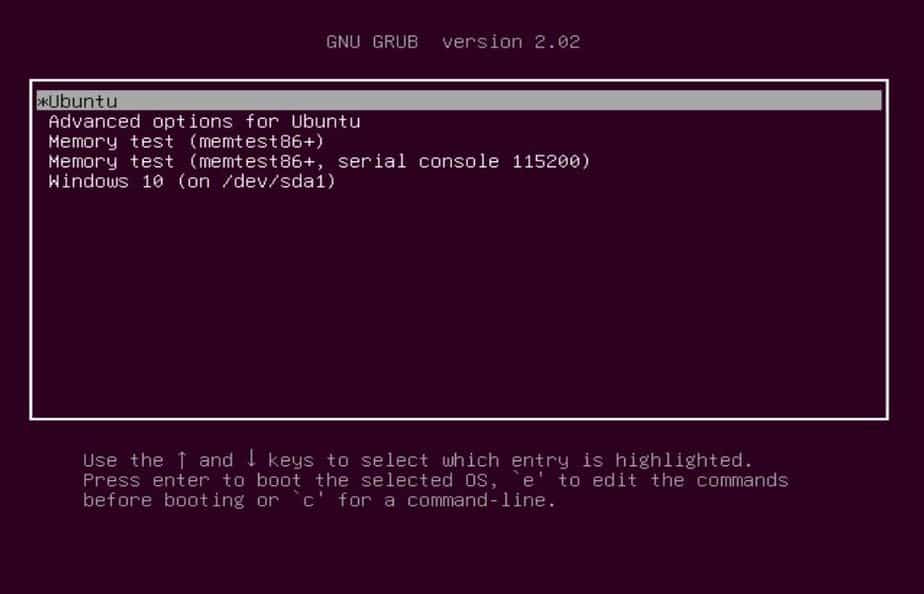
Step:15) Now when the system is restarted, we will see the following boot menu first. Here we can either opt to login to Ubuntu by selecting the first option or we can also boot into Windows 10 by selecting the last option. We will boot into Ubuntu,
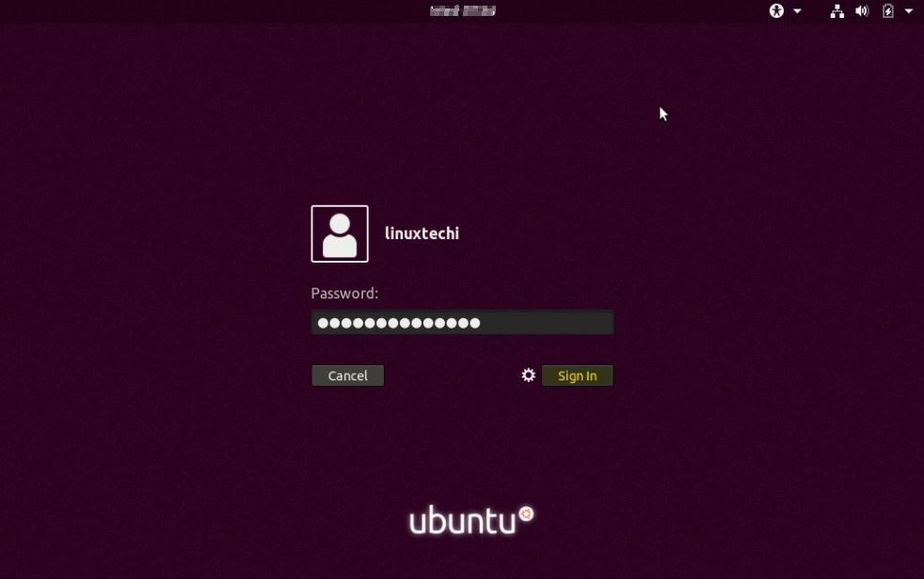
Step:16) Now after completing the bootup process, we will see the login screen. Select the created user & enter the password to login,
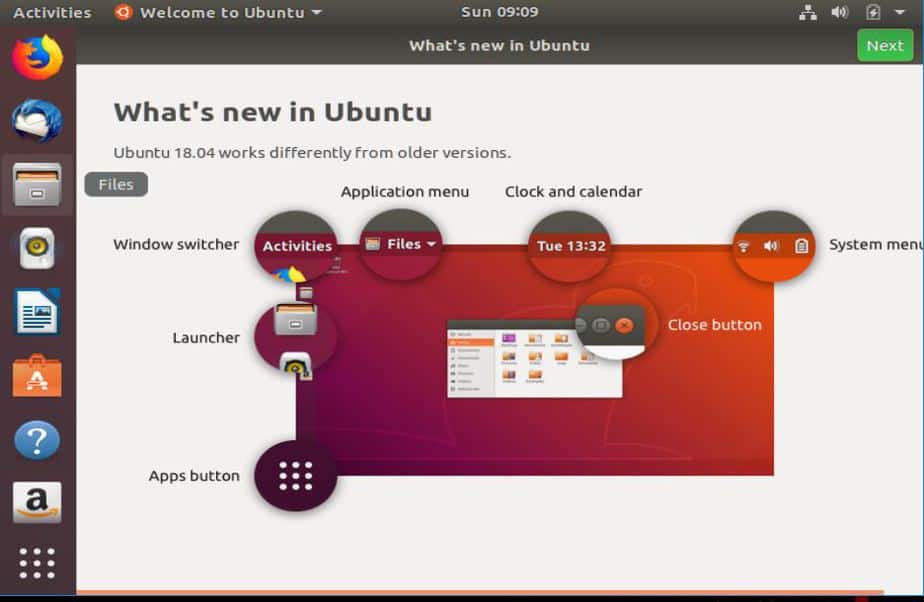
Step:17) That’s it guys, we have successfully installed Ubuntu along with Windows 10 & can now use both the operating systems without an issue,
This completes our tutorial on how to dual boot Ubuntu with Windows 10. Hope the tutorial was clear enough. If have any questions or queries, please let us know using the comment box below.


what aboutif i want to use partion which on windows???
HI,
I DID EVERYTHING THAT MENTIONED ABOVE, BUT MY PC (HP) STILL BOOT SRAIGHT INTO WINDOWS 10.
I have the same issue. All installed fine, but my HP laptop still boots straight in to W10, unless I hit escape on bootup. How do you get it to default to the choice screen on bootup?
Same Issue. How did you resolve it?
I’m trying with ubuntu 18.10 instead but I don’t have that “install alongside windows 10” option… it doesn’t detect w10, says there´s no OS installed in the machine and gives me the option to erase the disk or create partitions manually, which I don’t want to do.
I have installed deepin and others before and always had that option to install alongside windows 10, never needed to create manually.
I did the steps 1-13 in my ph pc core i5 6th generation but in step 10 I don’t have the option install alongside Ubuntu with window 10, also in step 13 it says boot loader cant install .please any one who can help me since I am new user for Ubuntu 18.04
Installed Xubuntu 19.04 alongside Windows 10. It was easy and worked fine. No problems at all.
I have Ubuntu 18.04LTS but want to have win10 or win 7 for dual boot. How can I achieve this? Thanks