Debian Project has released its latest and stable operating system as Debian 10, code name for Debian 10 is “Buster“, this release will get 5 years of support. Debian 10 is available for both 32-bit and 64-bit systems. This release comes with lot of new features, some of them are listed below:
- Introduction of new Debian 10 theme known as “FuturePrototype”
- Updated Desktop GNOME 3.30, Cinnamon 3.8, KDE Plasma 5.14, MATE 1.20 & Xfce 4.12
- LTS kernel 4.19.0-4
- New Python 3 (3.7.2), Perl 5.28 & PHP 7.3
- Iptables are replaced by nftables
- Updated LibreOffice 6.1 & GIMP 2.10.8
- Updated OpenJDK 11, MariaDB 10.3 and Apache 2.4.38
- Updated Chromium 73.0 & Firefox 60.7
- Improved support for UEFI (Unified Extensible Firmware Interface)
In this article we will demonstrate how to install Debian 10 “Buster” workstation on your Laptop & Desktop.
Recommended System Requirements for Debian 10
- 2 GB RAM
- 2 GHz Dual Core Processor
- 10 GB Free Hard disk space
- Bootable Installation Media (USB/ DVD)
- Internet connectivity (Optional)
Let’s jump into the installation steps of Debian 10
Step:1) Download Debian 10 ISO file
Download the Debian 10 ISO file from its official portal,
https://www.debian.org/releases/buster/debian-installer/
Once the ISO file is downloaded, burn it either into USB or DVD and make it bootable.
Step:2) Boot Your System with Installation Bootable Media (USB / DVD)
Reboot your system in which you will be installing Debian 10 and go to bios settings and set the boot medium as USB or DVD. Once the system is booted with installation bootable media then we will get the following screen.
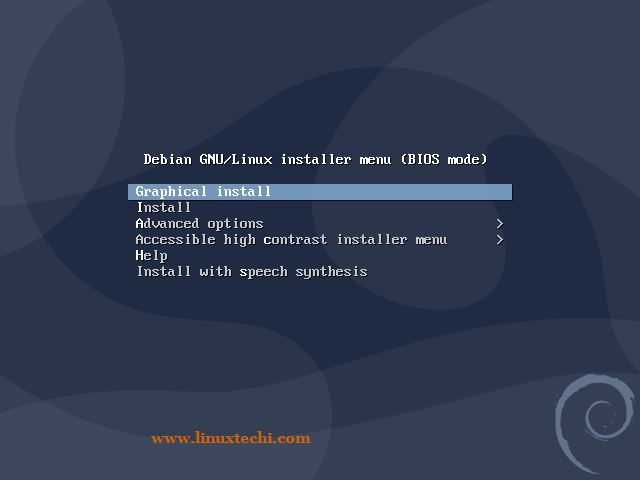
Choose the First option “Graphical Install”
Step:3) Choose Your preferred Language, Location and Keyboard Layout
In this step you will be asked to choose your preferred language
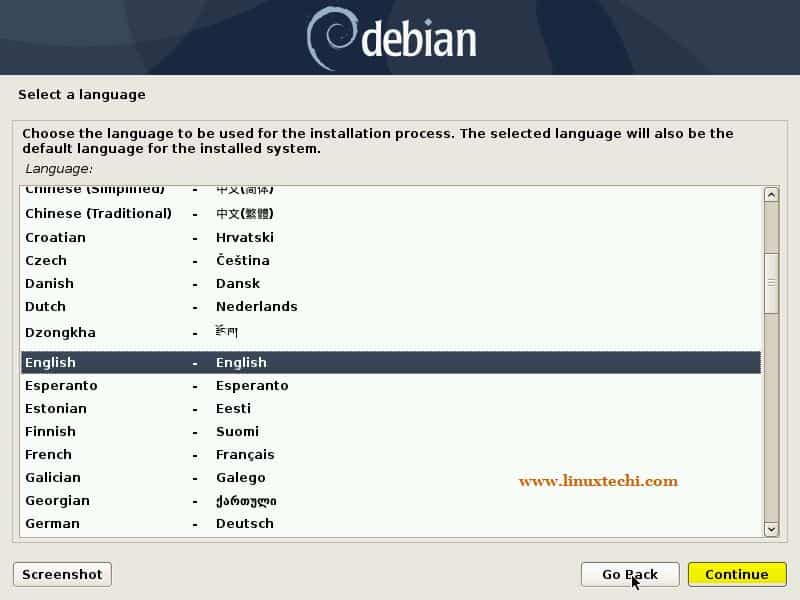
Click on Continue
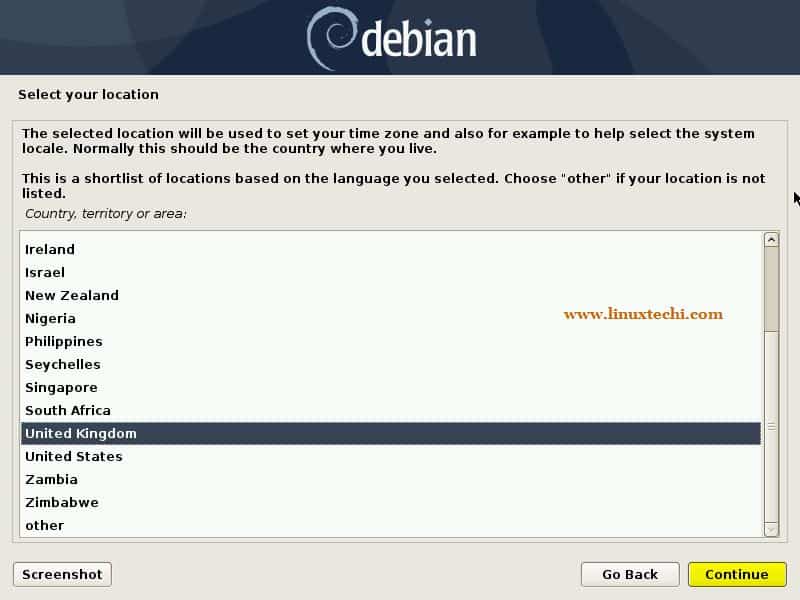
Select your preferred location, based on location, time zone will be automatically set for your system.
Now Choose your keyboard layout that suits to your installation,
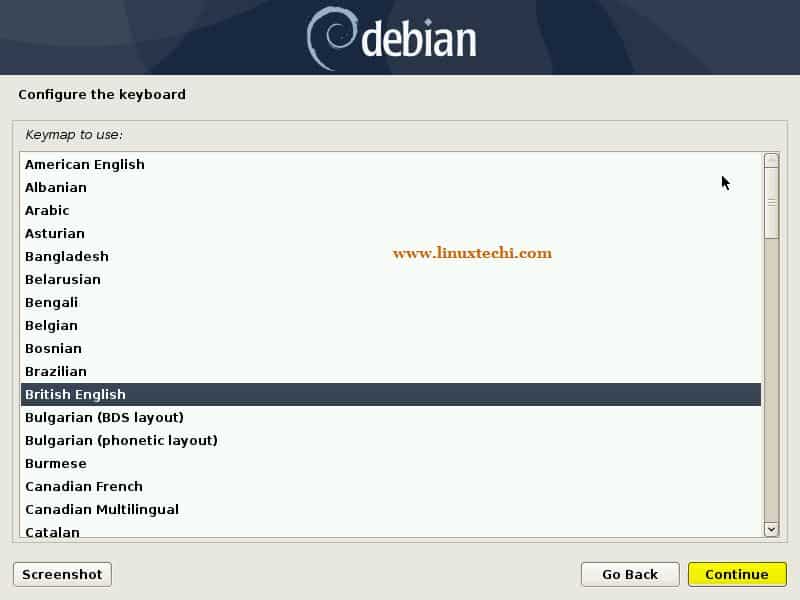
Click on Continue to proceed further,
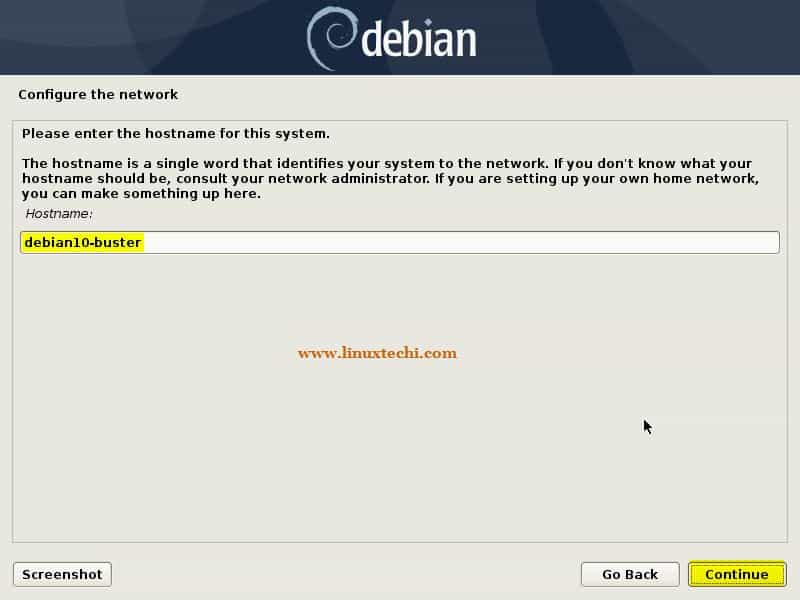
Step:4) Set Host name and Domain Name for Debian 10 System
Set the hostname that suits to your environment and then click on Continue, in my case I am specifying the hostname as “debian10-buster”
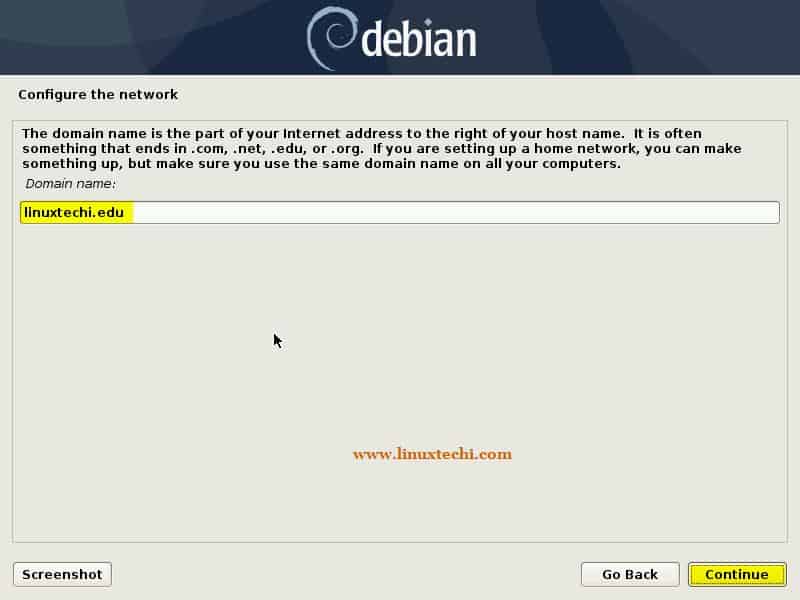
Specify the domain name that suits to environment and installation and then click on Continue
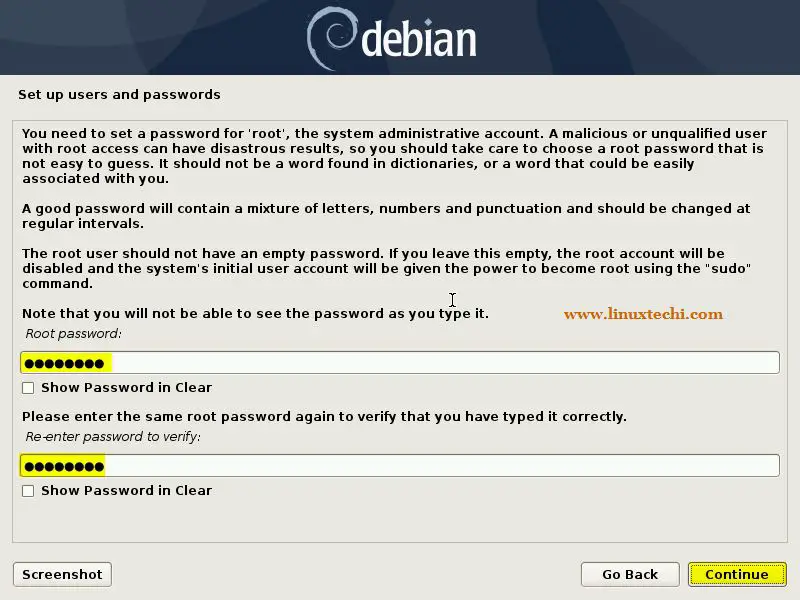
Step:5) Specify the root user’s password
Specify the root password in the screen below and then click on Continue
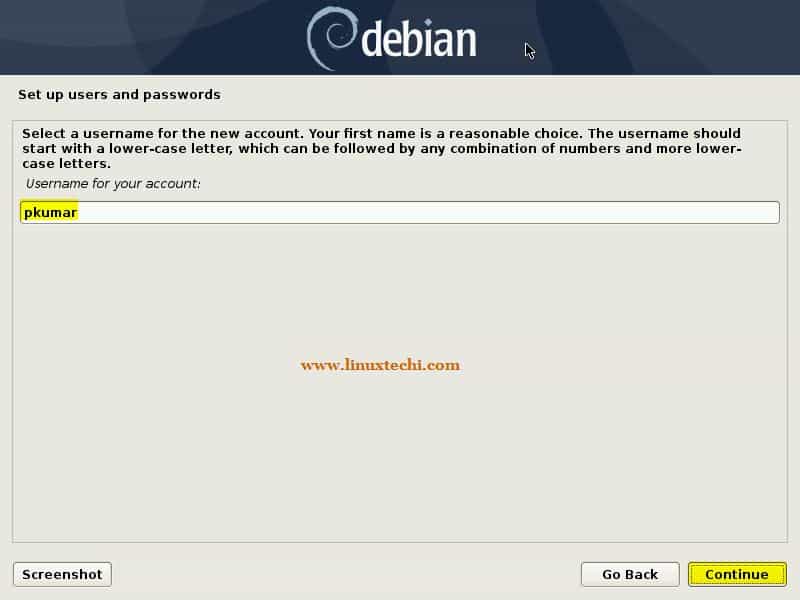
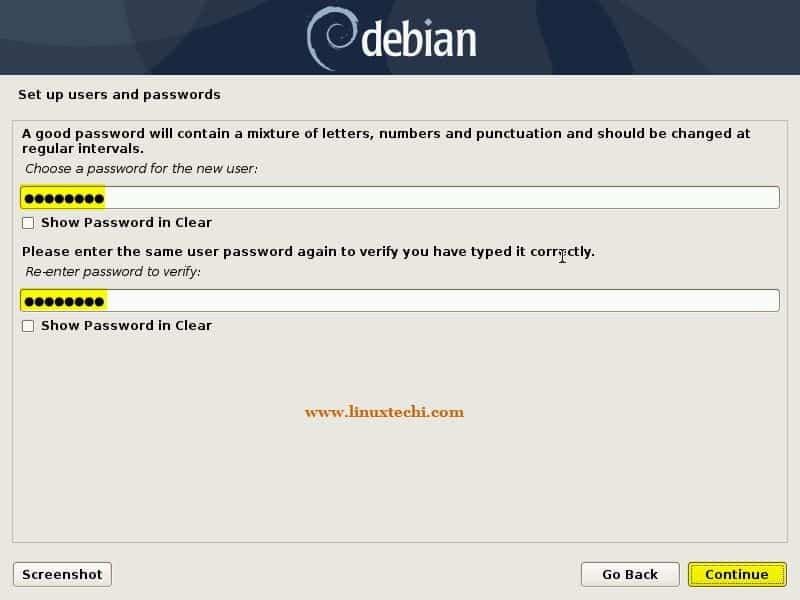
Step:6) Create Local User and its password
In this step you will be prompted to specify local user details like full name, user name and its password,
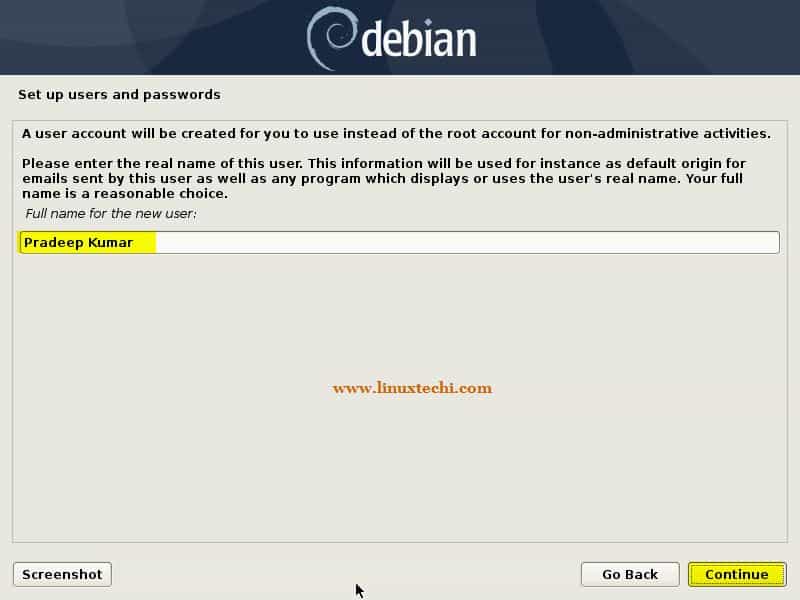
Click on Continue
Click on Continue and specify the password in the next window
Step:7) Choose Hard Disk Partitioning Scheme for Debian 10
In this step, select partitioning scheme for Debian 10, in my case I have 40 GB hard disk available for OS installation. Partitioning scheme is of two types:
- Guided Partitioning (Installer will automatically create required partitions)
- Manual Partitioning (As name suggests using this we can create manual partitions scheme)
In this tutorial we will use guided partitions with LVM on my 42 GB hard drive,
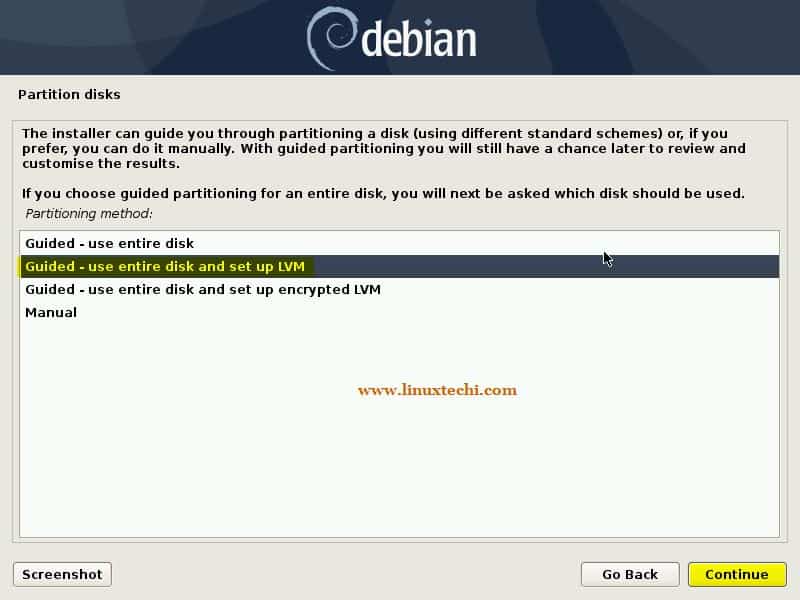
Click on Continue to proceed further,
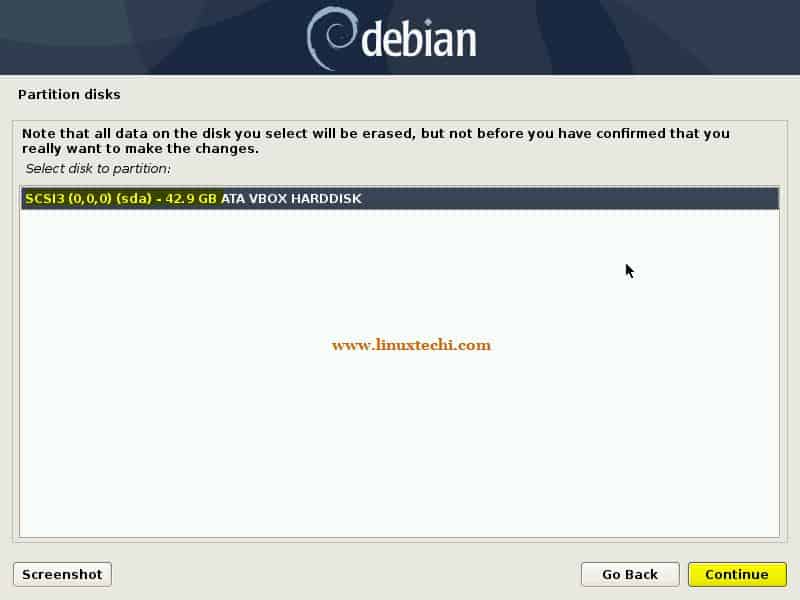
As we can see I have around 42 GB hard disk space, so choose Continue
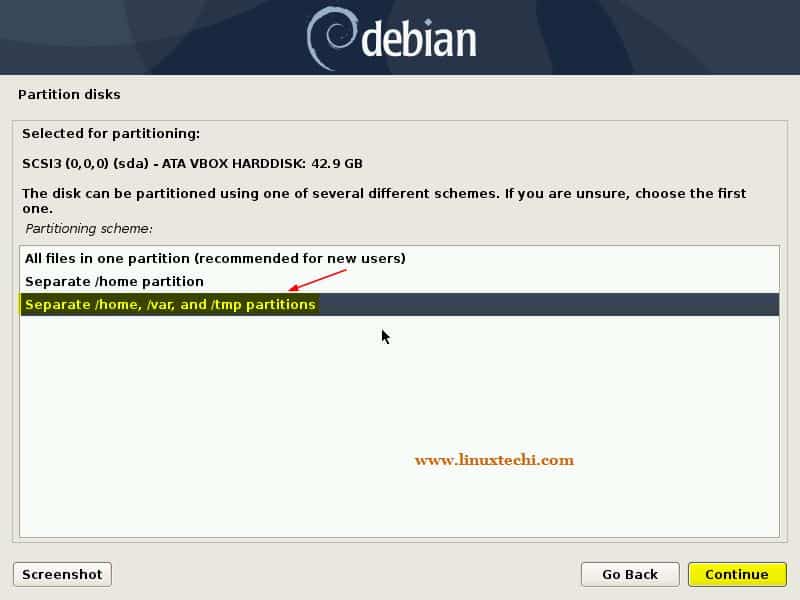
In the next screen, you will be asked to choose partitions, if are a new Linux user then choose the first option and in case you want a separate home partition then choose second option and else third option, which will create a separate partition for /home, /var and /tmp.
In my case I am going to create separate partition for /home, /var and /tmp by choosing the third option.
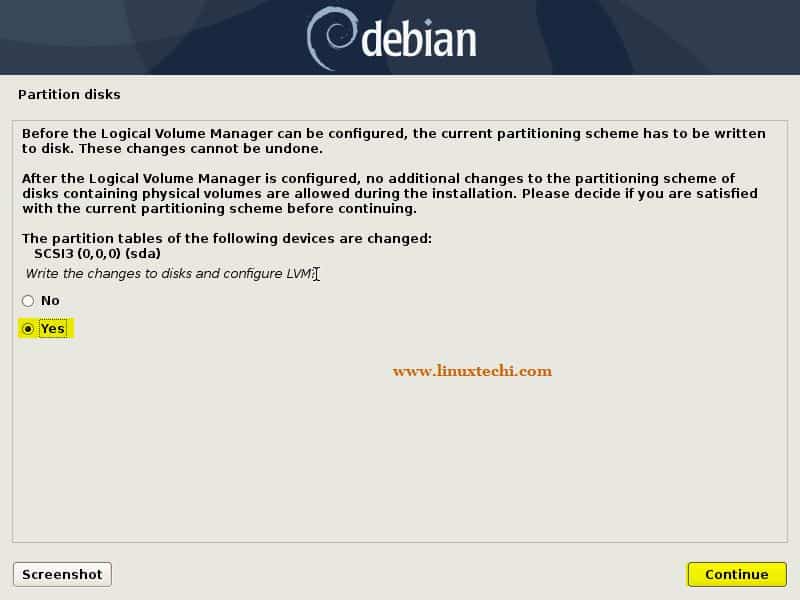
In the next screen select “yes” to write changes to disk and Configure LVM and then click on Continue
In the next screen, partition table will be displayed, cross verify the partitions size, file system type and mount point.
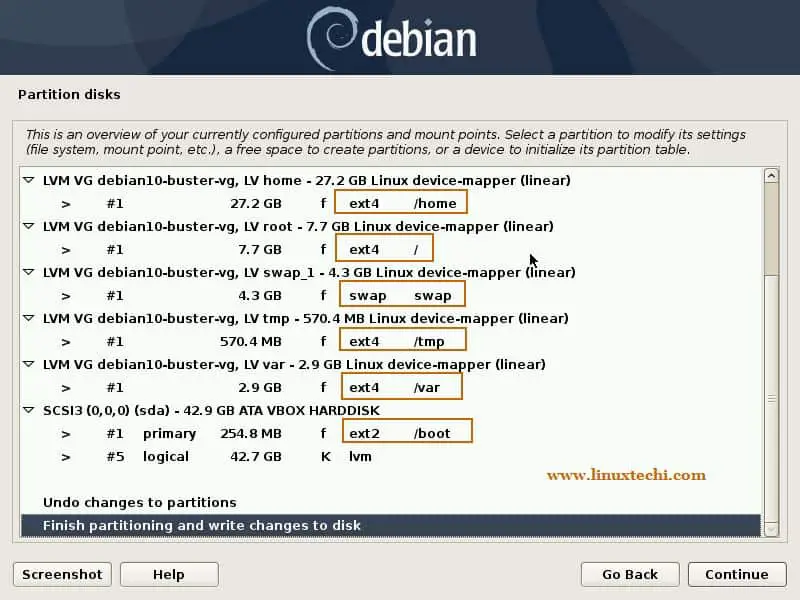
Click on Continue to proceed further,
In the next screen, choose “yes” to write changes to disk,
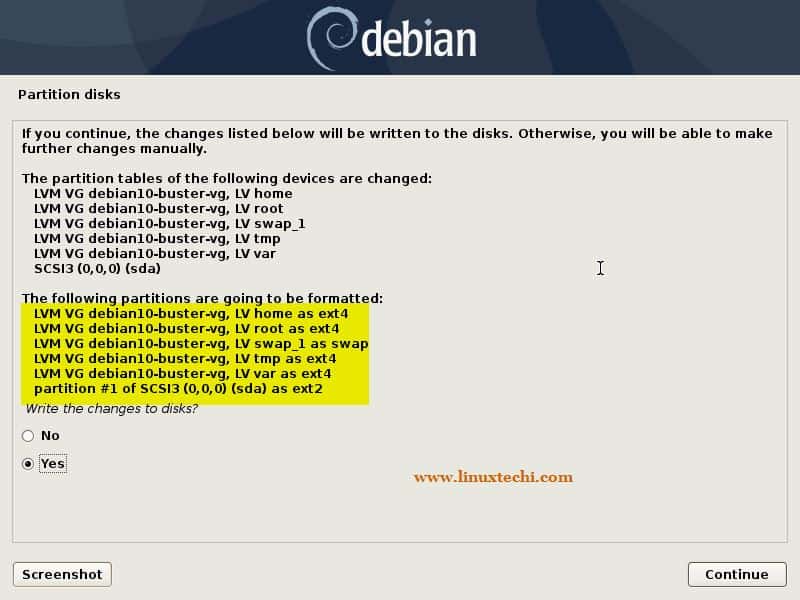
Click on Continue to proceed with installation,
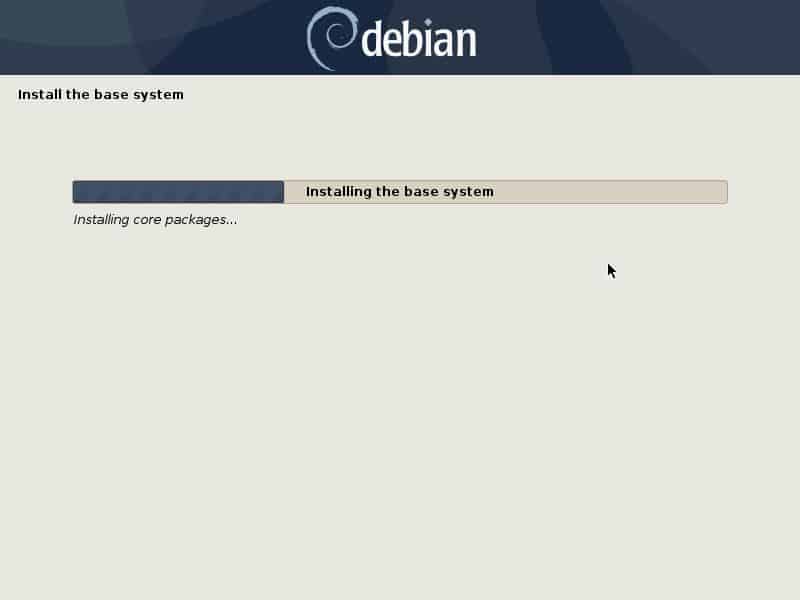
Step:7) Debian 10 Installation Started
In this step, Installation of Debian 10 has been started and is in progress,
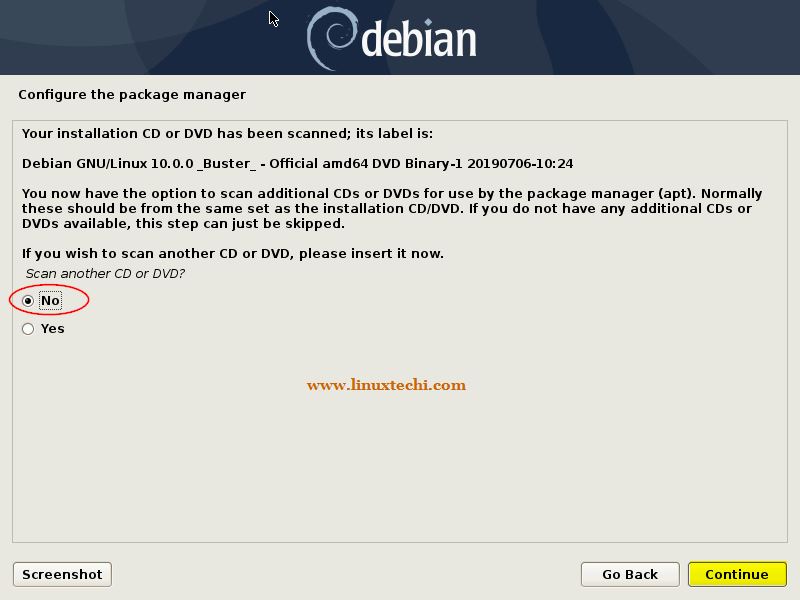
During the installation, installer will prompt you to scan CD/DVD for configuring package manager, Choose No and then click on Continue
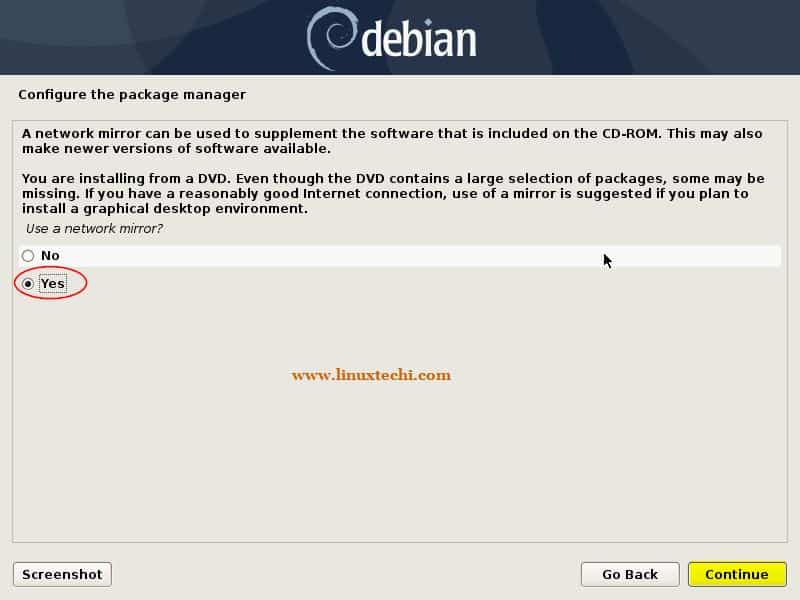
In the next screen choose “yes” if you want to configure Package Manager based on Network but for this to work, make sure your system is connected to Internet, else Choose No
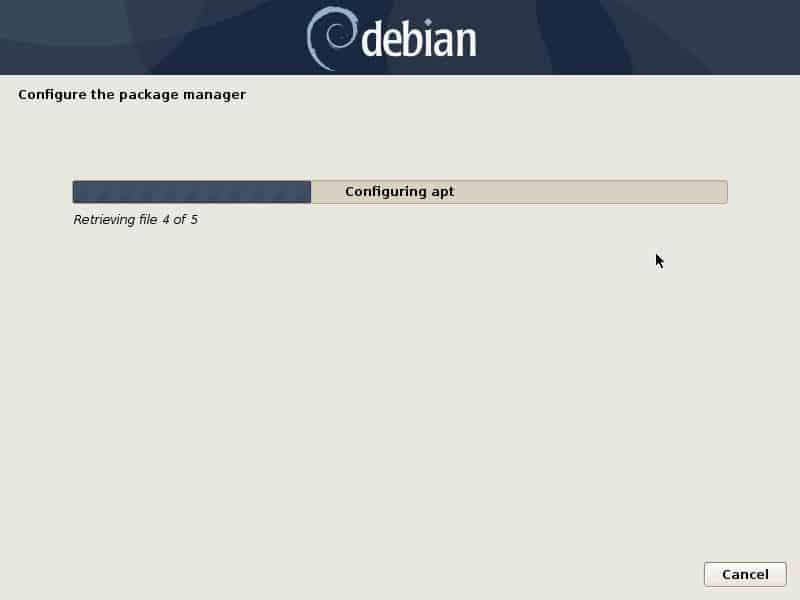
Click on continue to configure package manager based on your location, In next couple of screens you will be prompted to choose location and Debian package repository URL, then you will get below screen
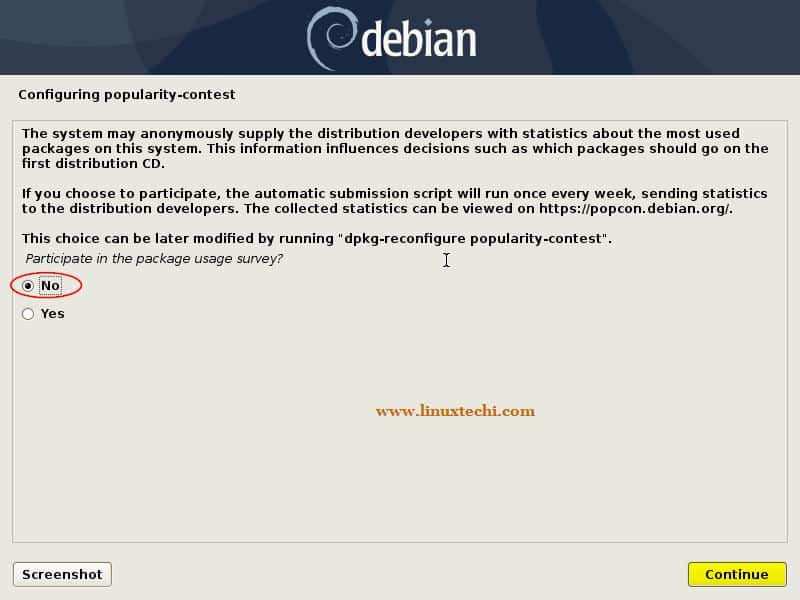
Choose “No” to skip package survey step and then click on Continue
In the next window, you will be prompted to choose Desktop environment and other packages, in my case I am selecting Gnome Desktop, SSH Server and Standard System utilities
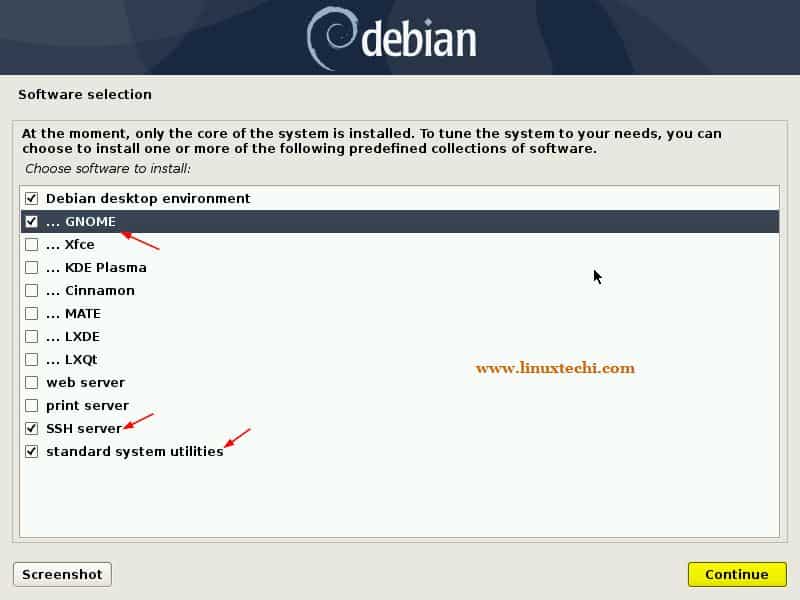
Click on Continue to proceed with Installation,
Choose the option “yes” to install Grub Boot Loader
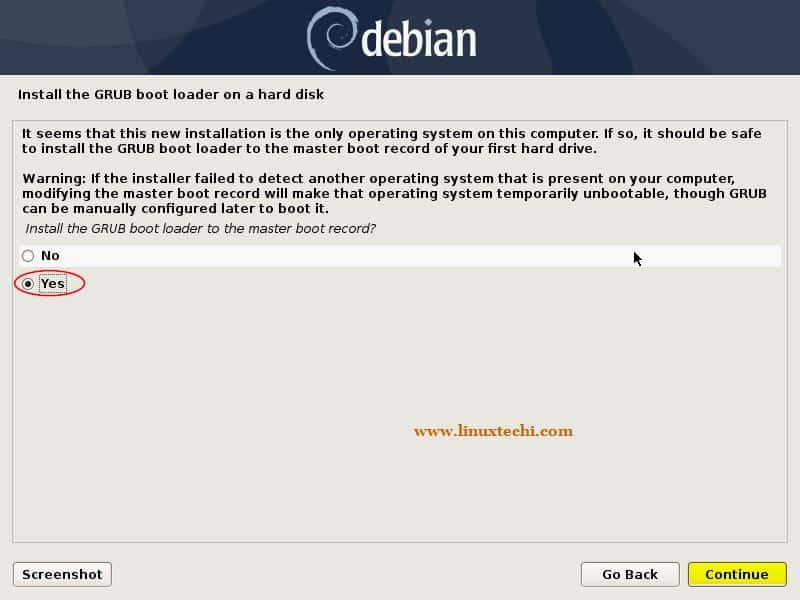
Click on Continue to proceed further, then in the next window choose the disk (/dev/sda) on which bootloader will be installed
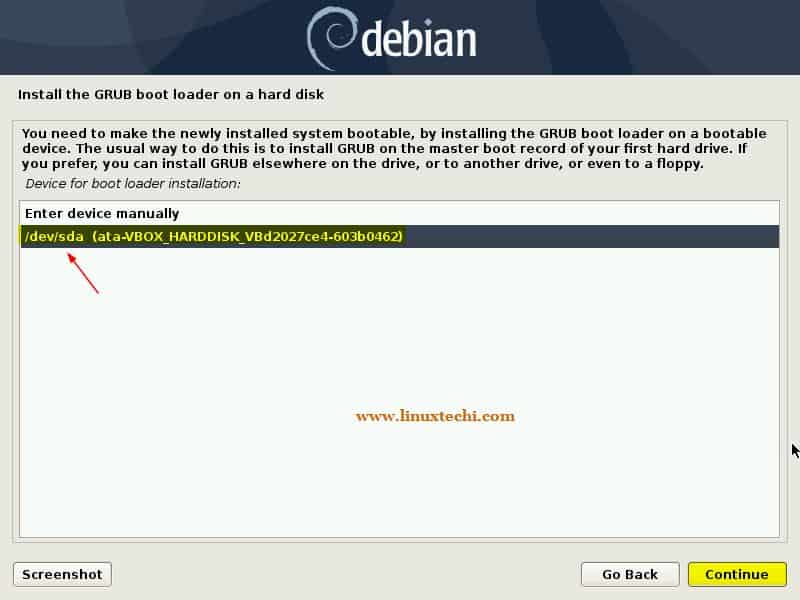
Click on Continue to proceed with installation, Once the installation is completed then installer will prompt us to reboot the system,
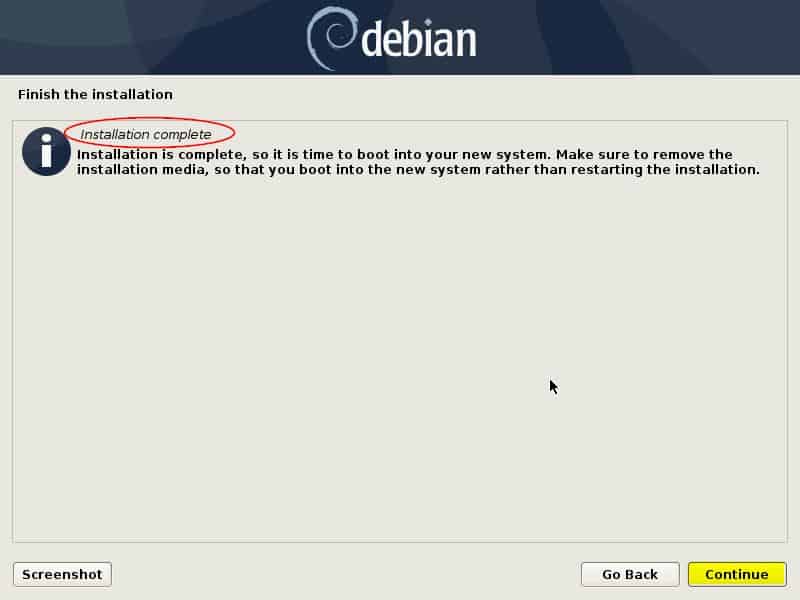
Click on Continue to reboot your system and don’t forget to change boot medium from Bios settings so that system boots up with hard disk on which we have installed Debian 10 OS.
Step:8) Boot your newly installed system with Debian 10
Once we reboot the system after the successful installation we will get below bootloader screen
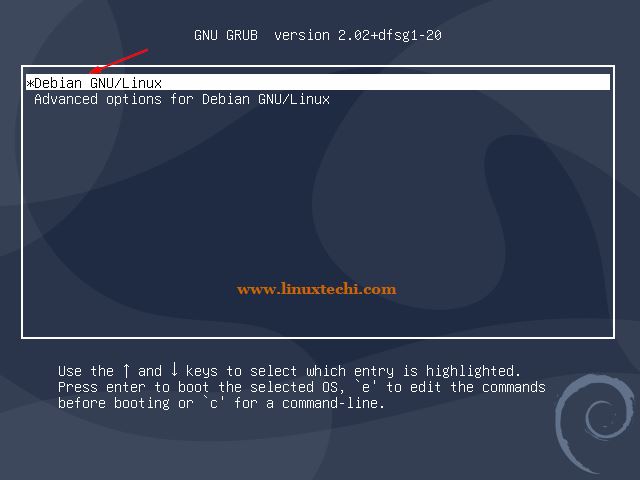
Choose the first option “Debian GNU/Linux” and hit enter,
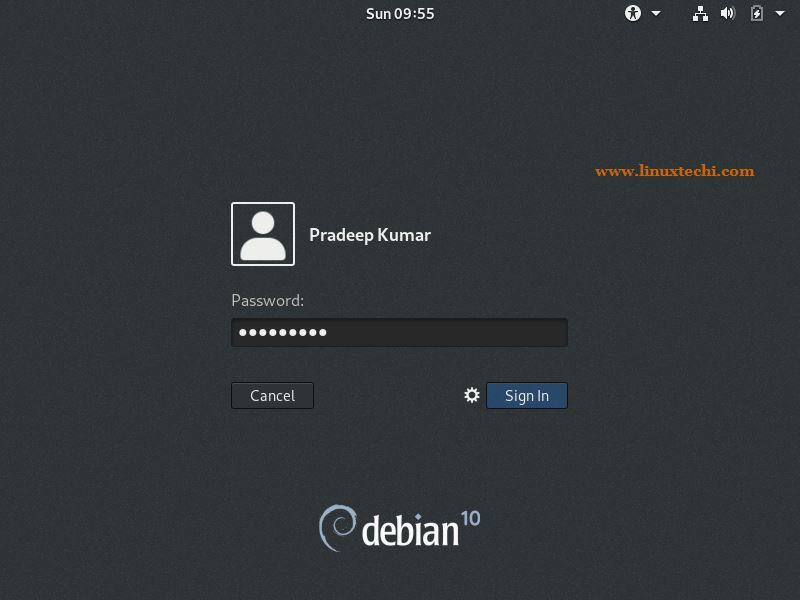
Once the system boots up, use the same local user and its password that we have created during the installation,
Following will be Desktop screen after successful login,
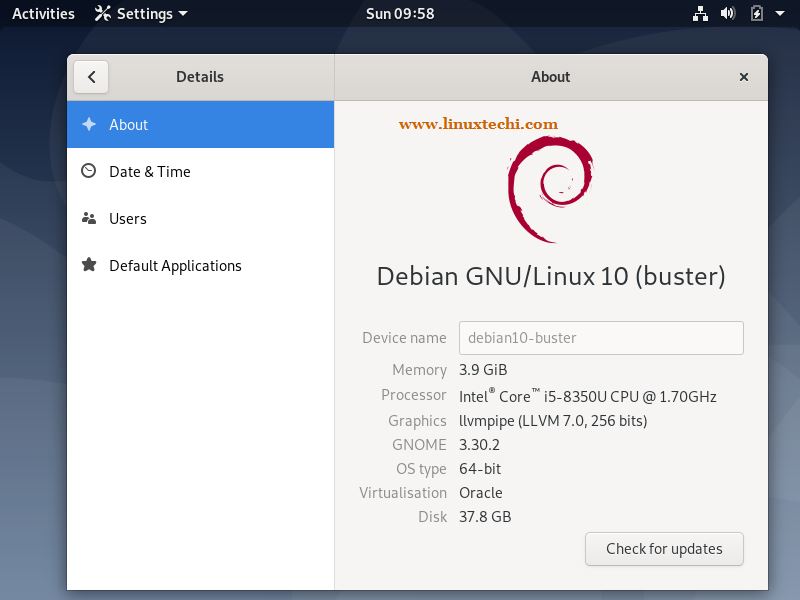
This confirms that Debian 10 has been installed successfully, that’s all from this article, explore this exciting Linux Distribution and have fun ?
Read More on : How to dual boot Windows 10 and Debian 10
Read Also : Top 8 Things to do after Installing Debian 10 (Buster)
Dear Mr. Pradeep Kumar:
1. Thank you very much for the description of the installation procedure for Debian 10.
2. There are numerous ISO files. Which one(s) should be downloaded? For example, I have downloaded the following ISO file which seems applicable to the KDE desktop:
2.1. debian-live-10.0.0-amd64-kde.iso
3. There seem to be numerous ISO files that could be downloaded.
4. Kindly clarify.
Yours truly,
Kabeer Sayeed
Hi Kabeer,
You can download DVD ISO file which will have all Desktops environments and all other required packages. Below is the url
‘https://cdimage.debian.org/debian-cd/current/amd64/iso-dvd/’
Thank you very much, your installation procedure for Debian 10 was very helpful.
Thank you very much for this guide, especially setting up LVM. I have not been able to set up LVM manually and wonder if you have any insight. Manual setup is needed since I have a Windows system partition as the first partition on the drive. The problem/error that occurs, is that the installer finds “no root” defined. Indeed the list of LVs show no root. I do not know how to specify a root either inside or outside of the LG. Your advice will be greatly appreciated.
Thanks for the great tutorial, I was stuck on the CD/DVD screen and I was looking for what kind of file it is looking for, but your step-by-step guide helped me a lot. Once again thanks for the detailed article.