Are you looking for an easy guide for setting up Static IP on Ubuntu Desktop ?
The detailed steps on this guide will show you how to configure static ip address on Ubuntu 22.04 LTS system.
It is recommended to have a static IP address on a Linux system as it will be persistent across the reboot. In Ubuntu 22.04 LTS desktop, networking is controlled and managed by Network Manager.
Prerequisites
- Regular User with sudo rights
- Pre-Installed Ubuntu 22.04 LTS system.
Configure Static IP via desktop environment
First method to configure static ip address from the desktop environment. Login to your system, from the desktop screen, Click on Network icon and then click on wired settings, example is shown below
![]()
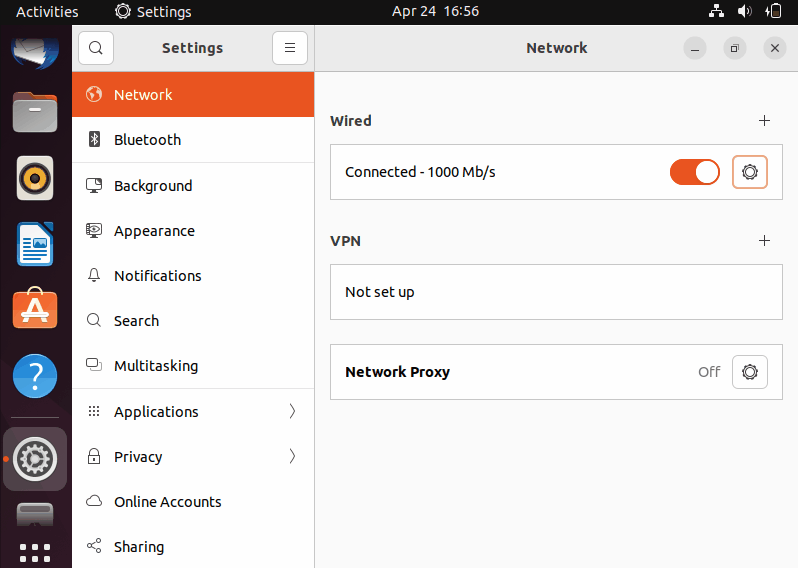
In the next screen, click on ‘gearbox’ icon under wired section.
![]()
In the following window, choose IPV4 tab,
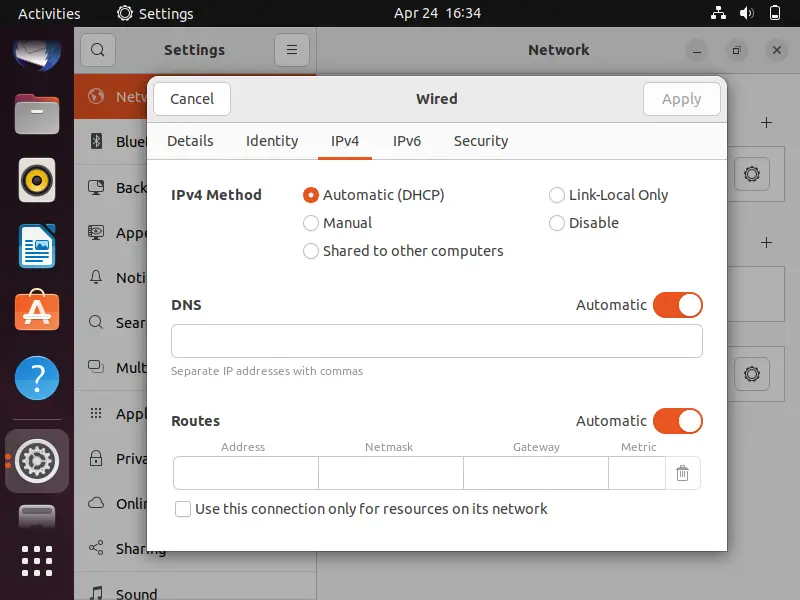
As we can see, Automatic (or DHCP) is enabled. It means, it will get IP address automatically from DHCP server.
So, to configure static IP address, choose Manual and specify the IP details like IP address, netmask, gateway and dns ip.
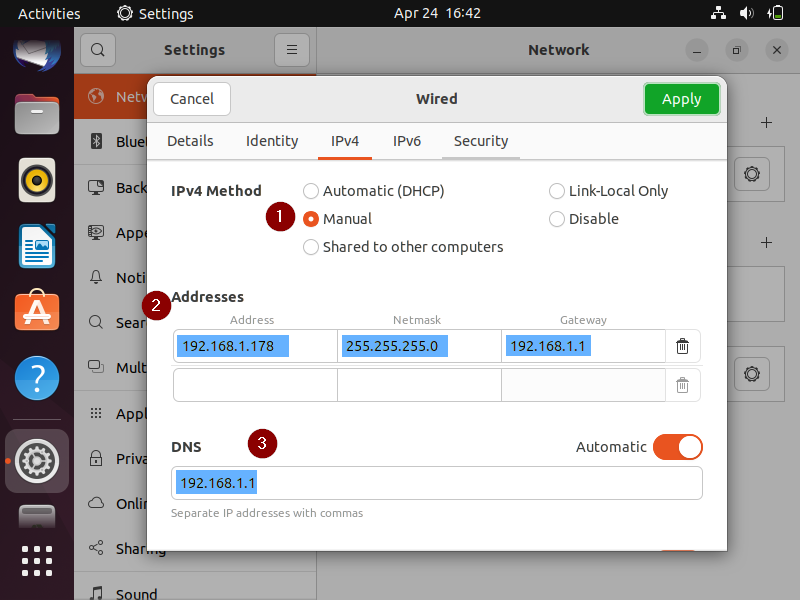
Click on Apply to save changes.
To make above IP address assigned to interface (or NIC), we must disable and enable the interface.
Once you disable and enable the interface, close the window, and verify the IP from command line using ip command.
$ ip a s
$ ip route show
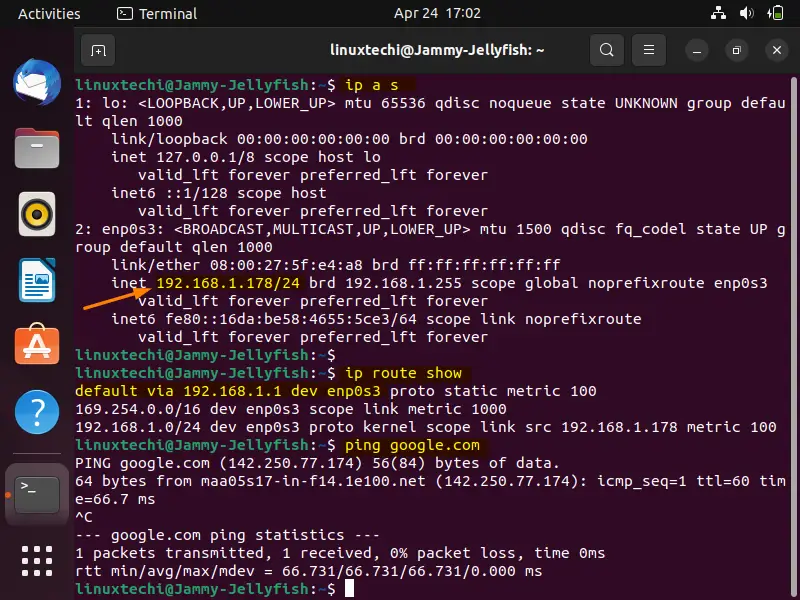
Perfect, above output confirms that Static IP address has been assigned to the NIC enp0s3 interface.
Another way to configure static ip address from command line using nmcli command.
Configure Static IP from the command line
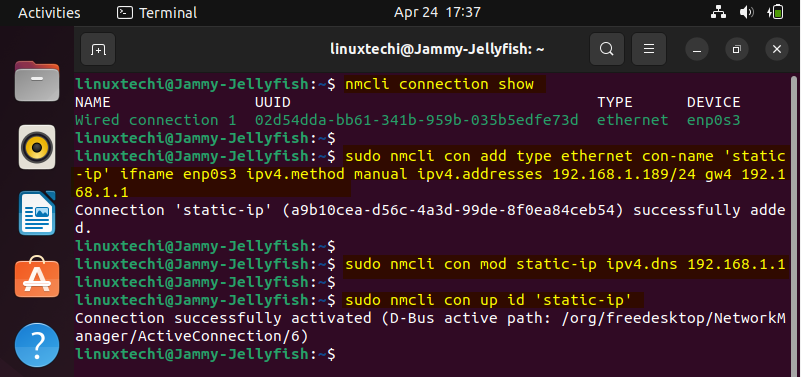
Using nmcli command line utility, we can configure static ip on ubuntu 22.04. Procedure and commands are listed below,
Run below command to identify the device name,
$ nmcli connection show
To assign the static IP address, create a connection with name ‘static ip’ and use interface as ‘enp0s3’, run beneath command
$ sudo nmcli con add type ethernet con-name 'static-ip' ifname enp0s3 ipv4.method manual ipv4.addresses 192.168.1.189/24 gw4 192.168.1.1
Add the DNS IP to the ‘static-ip’ connection, run
$ sudo nmcli con mod static-ip ipv4.dns 192.168.1.1
To make the connection active, run following nmcli command
$ sudo nmcli con up id 'static-ip'
Output of above nmcli commands would look like below:
Verify whether IP is assigned to the interface and also verify internet connectivity. Run the following ip commands one after the another.
$ ip a s
$ ip route show
$ ping google.com
Output,
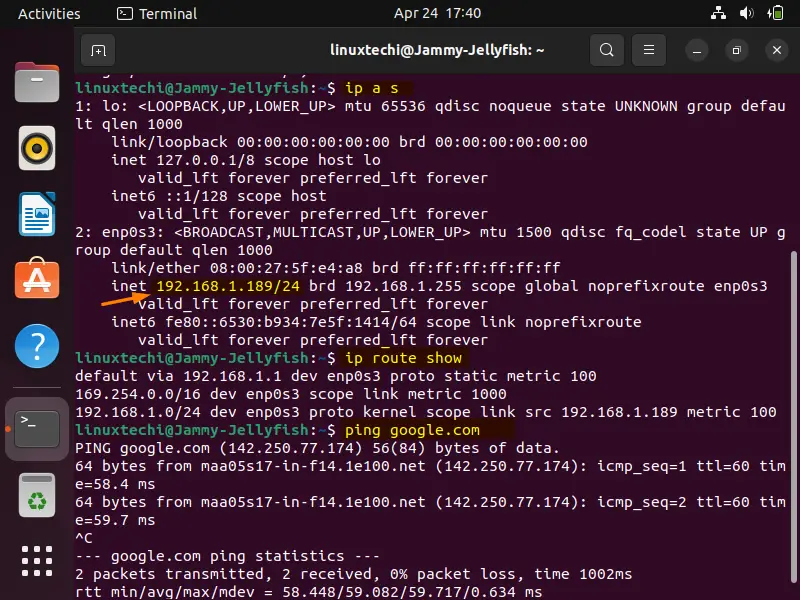
Great, above confirms that static ip address has been assigned to the interface enp0s3.
That’s all from this guide, please do post your queries and comments in below comments section.