In this post, we will show you how to install and configure FreeIPA client on RHEL, Rocky Linux or AlmaLinux.
For the demonstration purpose, we will integrate a RHEL system with FreeIPA server using FreeIPA client for centralize authentication.
FreeIPA server is an open-source identity management solution that provides centralized authentication, authorization, and account information for Linux systems.
Prerequisites
- Pre-Installed RHEL-9/8 or Rocky Linux9/8 or AlmaLinux 9/8
- Regular user with sudo rights
- Valid subscription for RHEL system.
- Internet Connectivity
Also Read: How to Install FreeIPA Server on RHEL 8 | Rocky Linux 8 | AlmaLinux 8
Without any delay, let’s deep dive into FreeIPA client installation and configuration steps,
1) Create a User on FreeIPA Server
Login to FreeIPA server and create a user for centralize authentication, here I am creating a user with opsadm using following command.
$ sudo kinit admin
$ sudo ipa user-add opsadm --first=Ops --last=Admin --password
Password:
Enter Password again to verify:
-------------------
Added user "opsadm"
-------------------
  User login: opsadm
  First name: Ops
  Last name: Admin
  Full name: Ops Admin
  Display name: Ops Admin
  Initials: OA
  Home directory: /home/opsadm
  GECOS: Ops Admin
  Login shell: /bin/bash
  Principal name: [email protected]
  Principal alias: [email protected]
  User password expiration: 20230502010113Z
  Email address: [email protected]
  UID: 464600004
  GID: 464600004
  Password: True
  Member of groups: ipausers
  Kerberos keys available: True
$
2) Add DNS Record for RHEL, Rocky Linux or AlmaLinux
Next step is to add DNS record for machine which we want to integrate with FreeIPA server for centralize authentication. On FreeIPA Server, run following command
$ sudo ipa dnsrecord-add linuxtechi.lan rhel.linuxtechi.lan --a-rec 192.168.1.2
Note: Replace IP address and hostname in above commands that suits to your setup.

Now login to RHEL client and add following entries in /etc/hosts file
192.168.1.102 ipa.linuxtechi.lan ipa
192.168.1.2   rhel.linuxtechi.lan rhel
Save and exit the file.
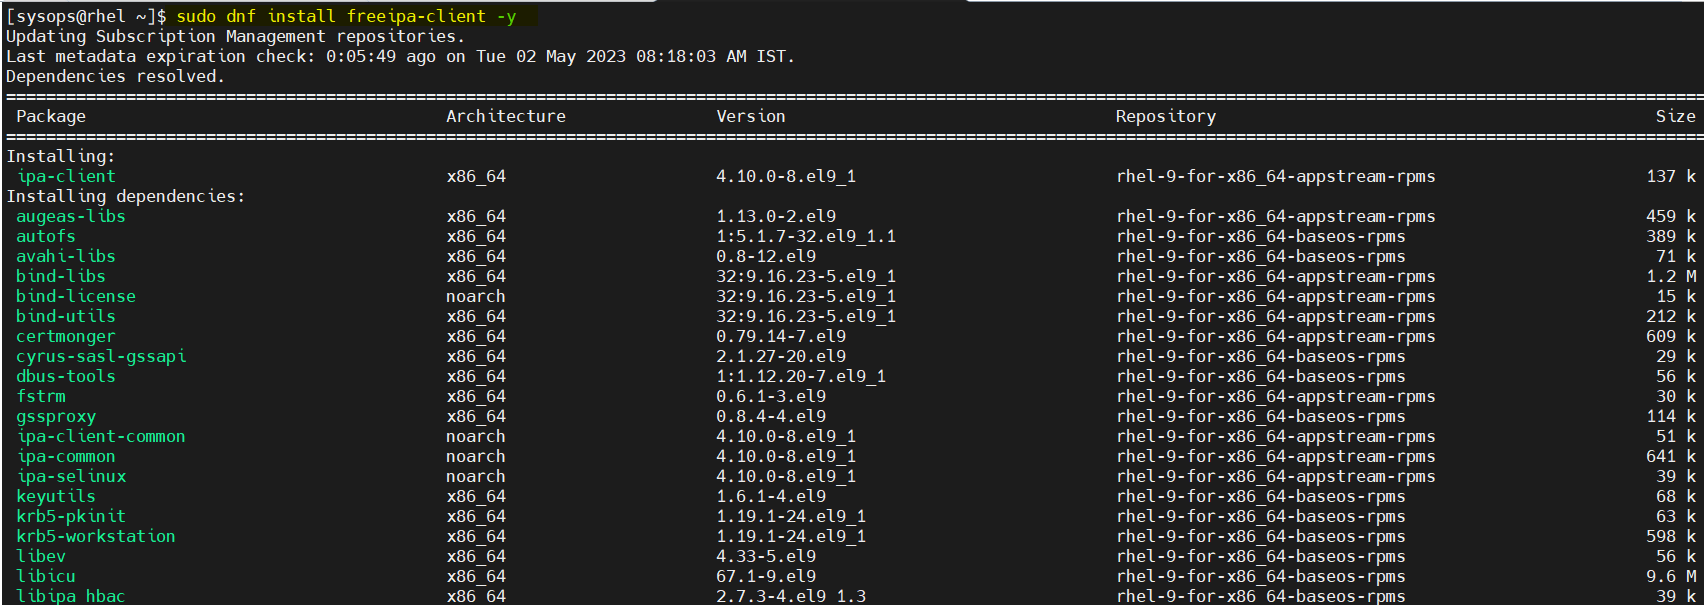
3) Install and configure FreeIPA client on RHEL, RockyLinux & AlmaLinux
FreeIPA client and its dependencies are available in the default package repositories (AppStream and BaseOS), so to install freeipa client, run
$ sudo dnf install freeipa-client -y
After the installation, configure the FreeIPA client, run following command
$ sudo ipa-client-install --hostname=`hostname -f` --mkhomedir --server=ipa.linuxtechi.lan --domain linuxtechi.lan --realm LINUXTECHI.LAN
// Replace freeipa server’s hostname, domain name and realm according to your setup.
Output ,
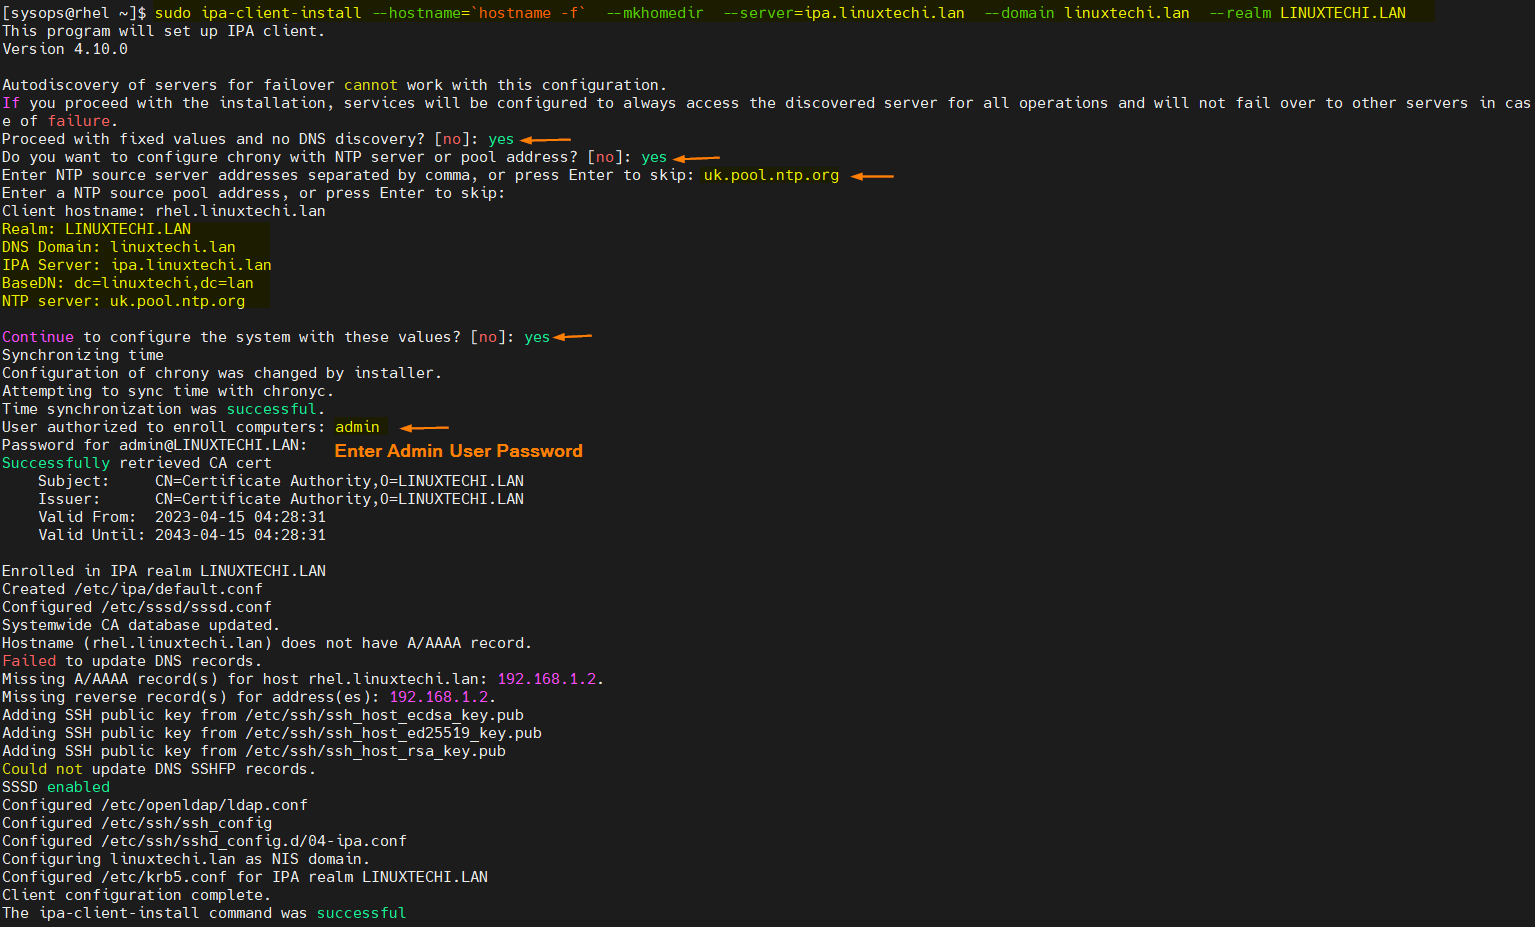
Perfect, output above confirms that freeipa-client command has been executed successfully. To test the freeipa client integration, logout from the current user and try to login as opsadm user that we had created on IPA server.
4) Test FreeIPA Client
Try to ssh the rhel system on which you have just configured FreeIPA client using opsadm user,
$ ssh opsadm@<IPAddress-RHEL>
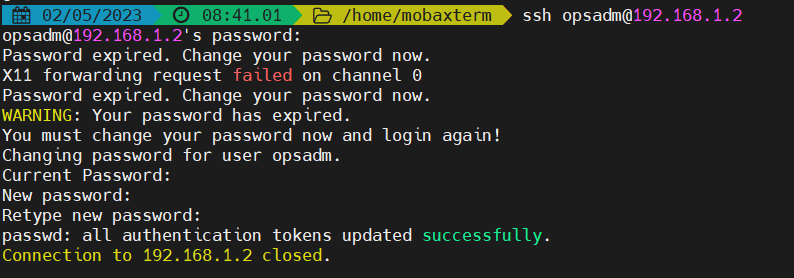
When we login to the system first time then it will prompt you to set new password because of password expiry policy.
After changing the password, try to login again. This time you should be able to login
$ ssh [email protected]

Great, output above confirms that we can login using opsadm user. This confirms that FreeIPA client installation and configuration is successful.
That’s all from this post, I hope you have found it informative, please do post your queries and feedback in below comments section.