In this blog post, we will cover how to install RHEL 10 step-by-step along with the screenshots.
Red Hat has released it’s most stable and long-awaited Operating system RHEL 10 in May 2025. It brings lots of improvements specially towards AI/ML workloads, hybrid-cloud automation, and image-based system management. Whether you are deploying servers on-prem or in virtual environments, RHEL 10 is solid and future-ready choice.
System Requirements
- Minimum 2GB RAM or more
- 64-bit x86 processor
- 2 CPUs or more
- At least 20 GB hard disk space
Without any further delay, let’s jump into RHEL 10 installation steps.
1 ) Download RHEL 10 and Create Bootable Media
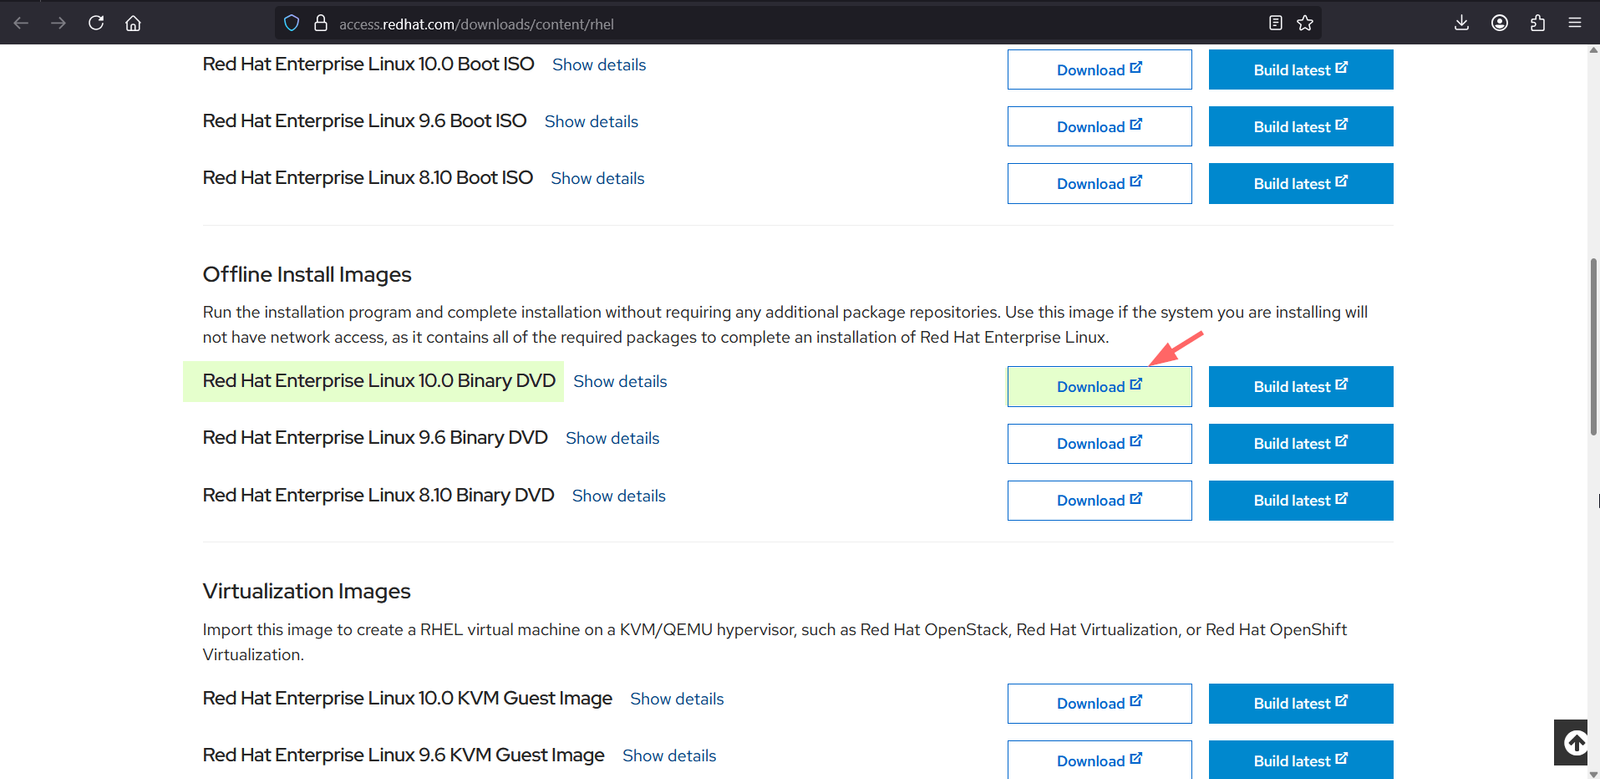
To download RHEL 10, visit its official portal , https://access.redhat.com/downloads/content/rhel
Login to portal using your Red Hat credentials and download RHEL 10 binary DVD as shown below:
Once the ISO file is downloaded, create the bootable installation media (USB drive). On Widows Operating system you can use Rufus to create bootable media and on Linux using following command.
sudo dd if=~/Downloads/rhel-10.iso of=/dev/sdX bs=4M status=progress
2) Boot from Installation Media
Now, go to the target system where you want to install Red Hat Enterprise Linux 10 (RHEL 10). Reboot the machine and enter the BIOS/UEFI settings. From there, change the boot order and set USB drive as the first boot medium instead of Disk.
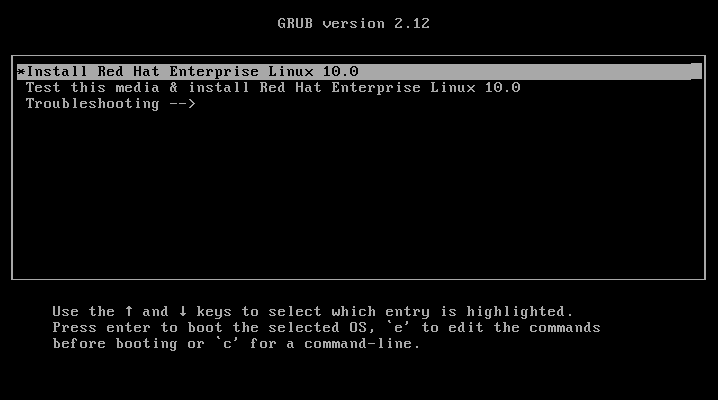
Once the system restarts, it will boot from the USB installation media. On the boot screen, select “Install Red Hat Enterprise Linux 10.0″ to begin the installation process, as shown in the screenshot below:
3) Choose Your Preferred Language
Choose your preferred language for RHEL 10 installation.
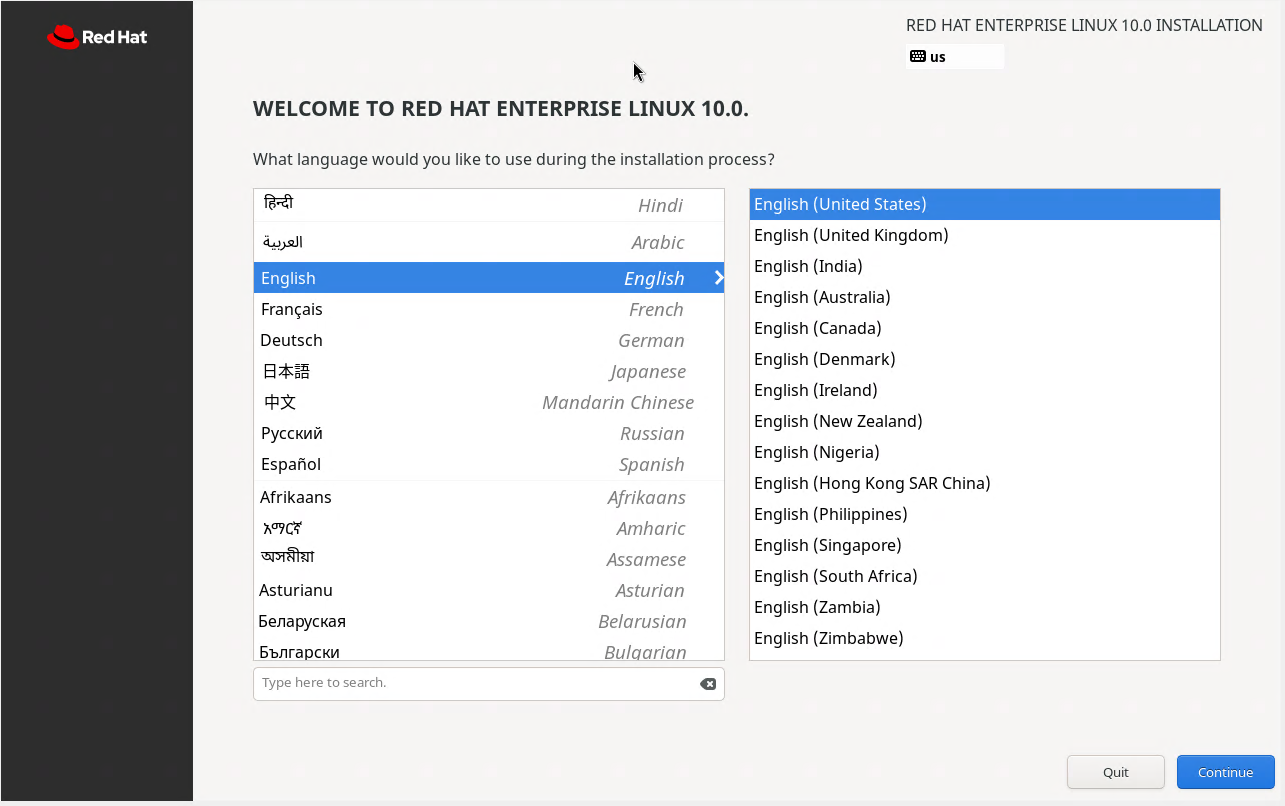
Click on Continue.
4) Installation Summary Screen
We will now land on the Installation Summary screen where you can configure:
- Date & Time
- Keyboard Layout
- Installation Source
- Software Selection
- Installation Destination (Storage)
- User Settings
- Network & Hostname
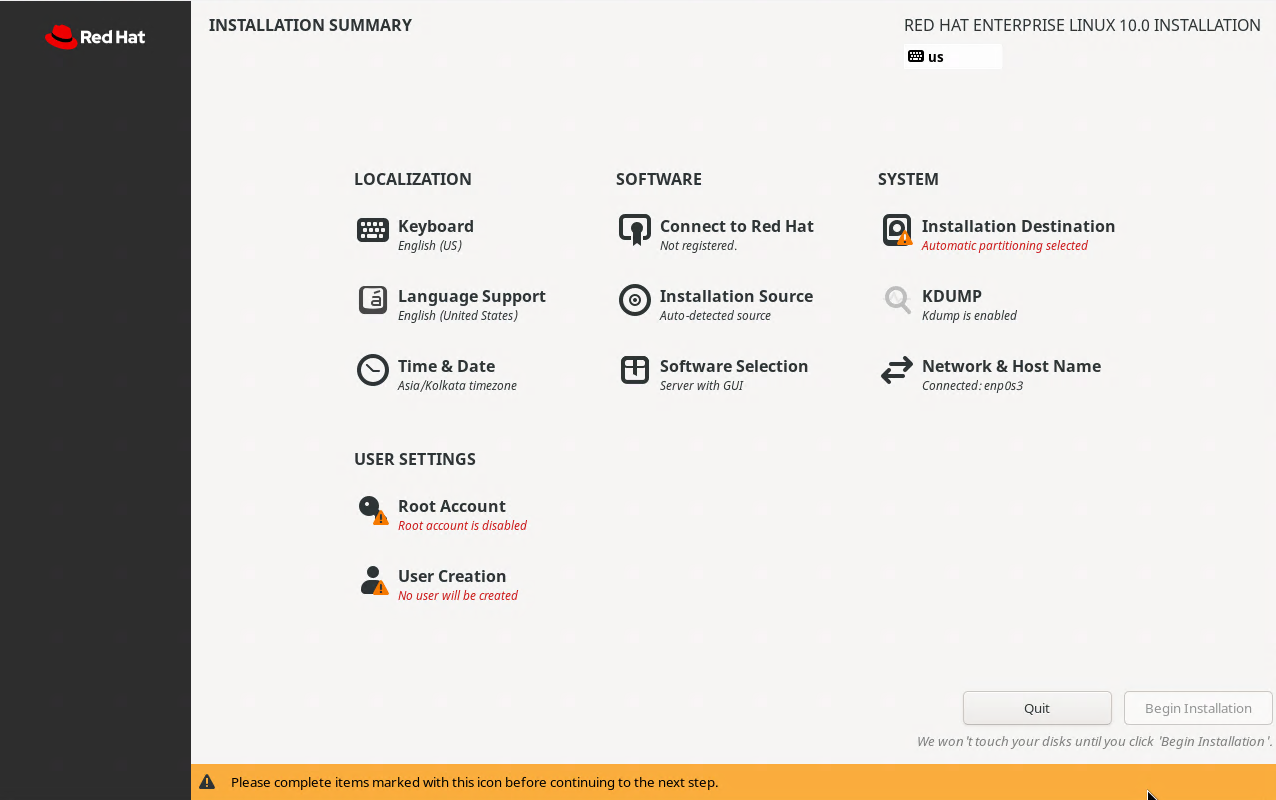
As we can see in above screen, we must first complete mandatory items like
- Installation Destination.
- User Settings
- Software Selection
- Time & Date
Click on Date & Time Item and select the correct time zone according to your location.
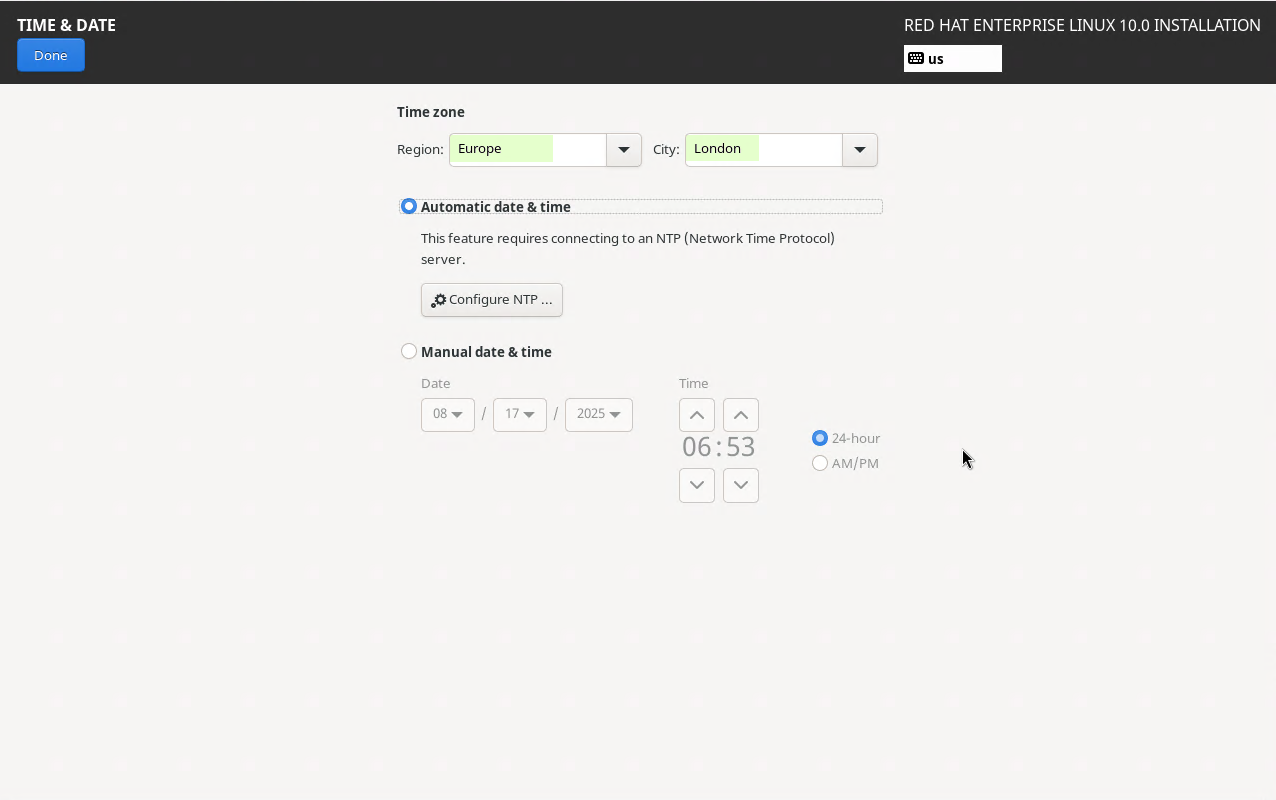
Click on Done, it will take us to Installation Summary screen.
Now move to Users Setting item. Set the root password and create local user and its credentials.
Select Root Account, Click on “Enable root account” and specify the root password as shown below:
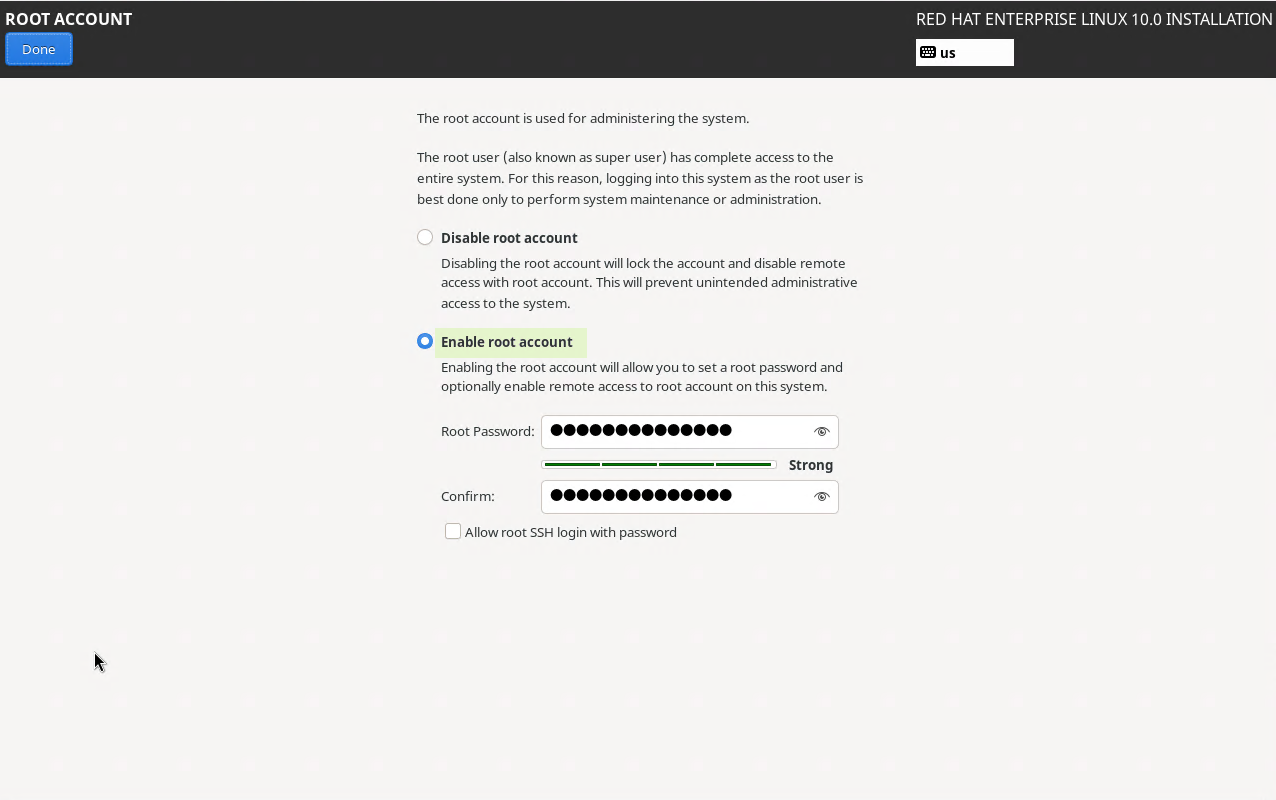
Click on Done.
From the Installation summary, select “User Creation”, specify Local user full name, username and it’s password.
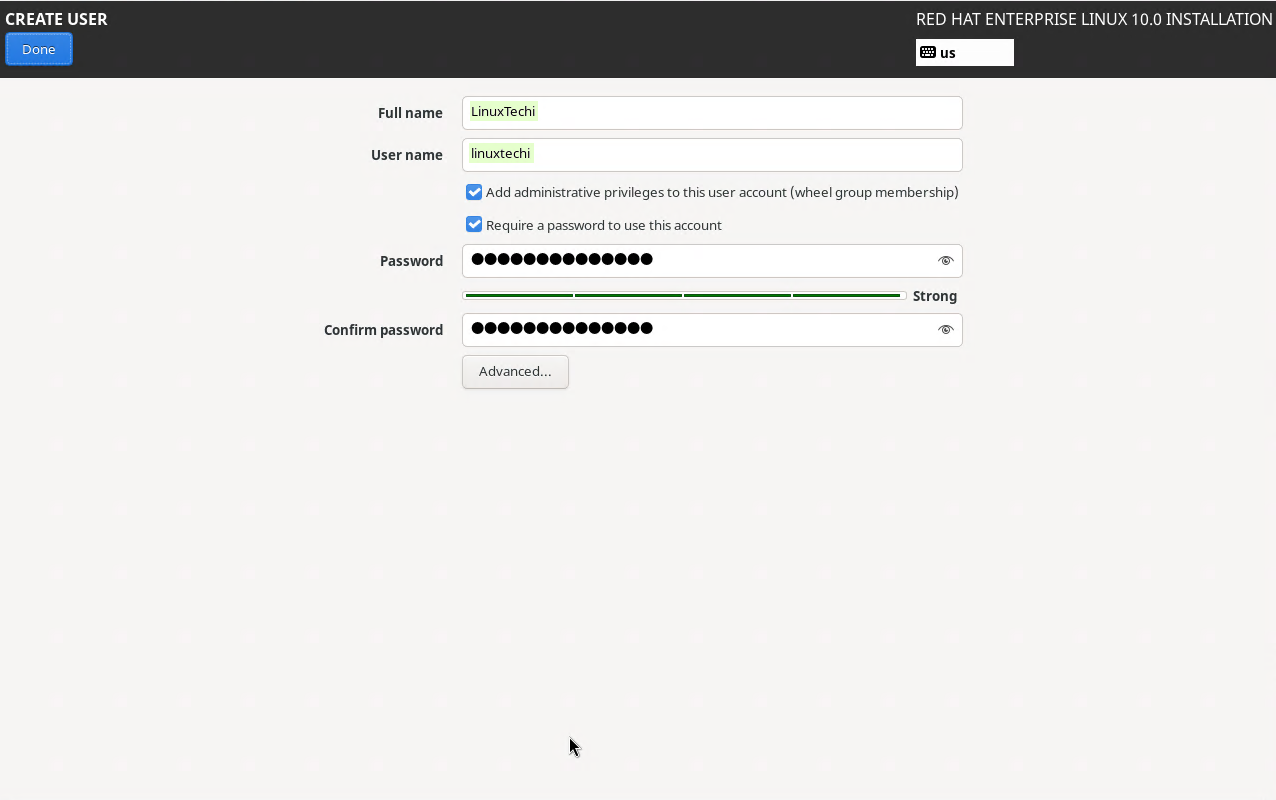
Click Done.
Once we are back on installation summary screen, click on Software Selection item,
Here you will get the options to selection software as per your need. In this demonstration, I will select “Server” under the Base environment and leave other options as it is.
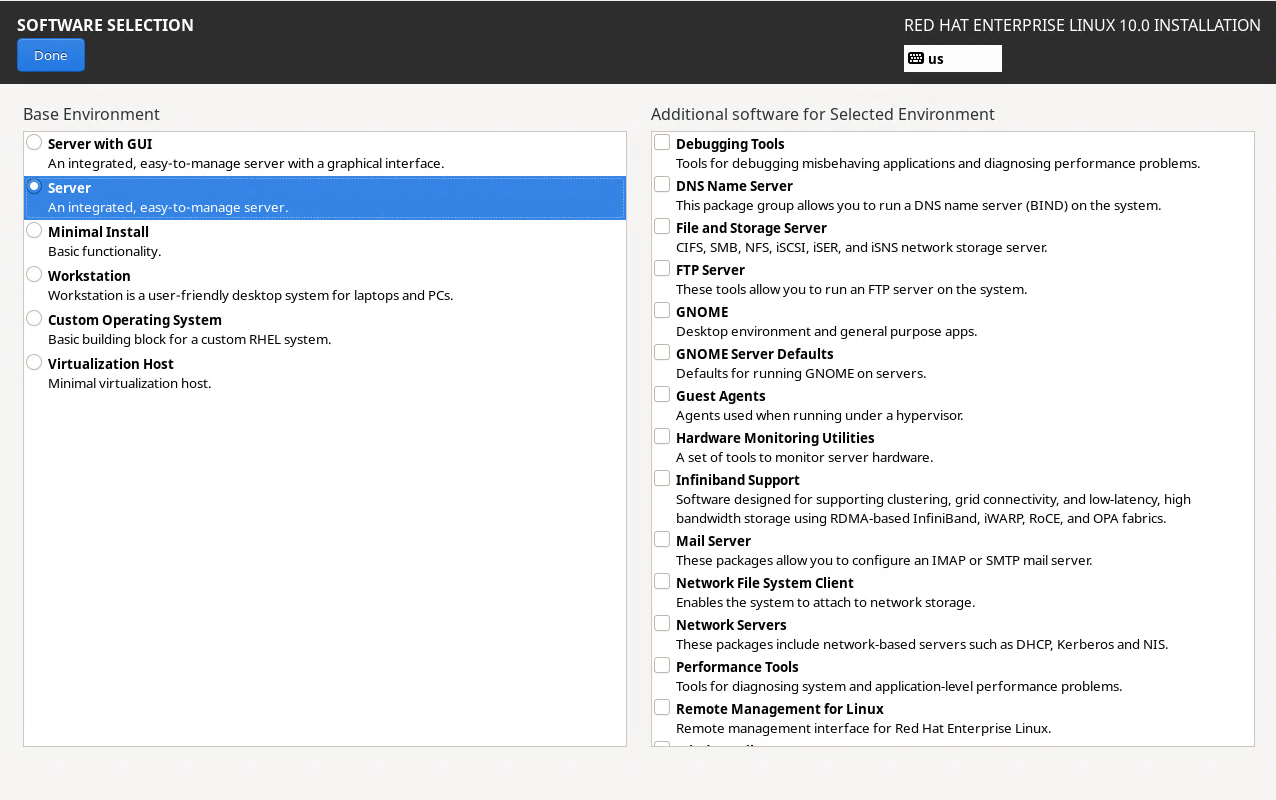
Click on Done.
Now, select Installation Destination. Here you will see the following options for creating partitions on the disk:
- Automatic – The installer will create the partitions automatically.
- Custom – Allows you to create your own custom partitions.
In my case, I have 60 GB of disk space, and I will create the following custom partitions on it.
- /boot = 2 GB (xfs file system)
- /root = 25GB (xfs file system)
- /home = 20 GB (xfs file system)
- /var = 10 GB (xfs file system)
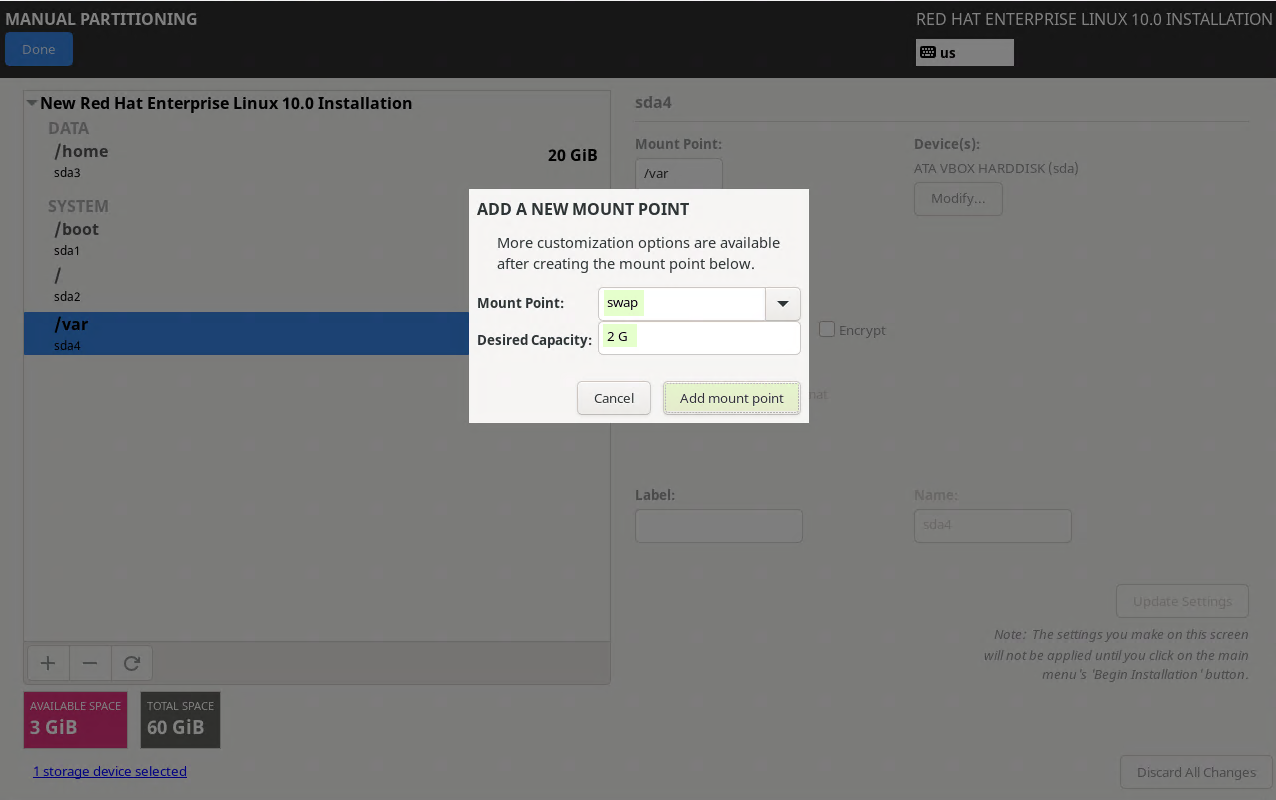
- /swap = 2 GB
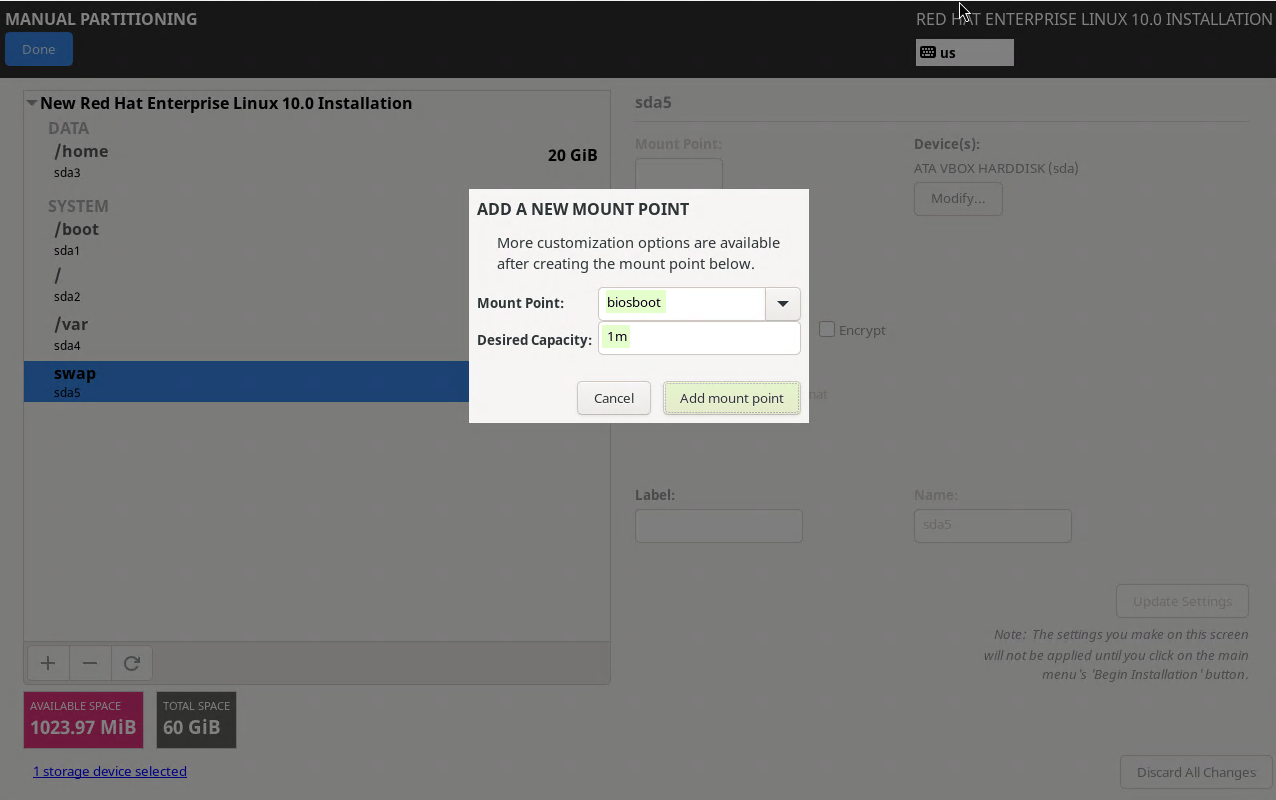
- biosboot = 1MB
Note: This partition scheme ensures proper separation of system files, logs, and user data. Adjust sizes if your environment needs are different.
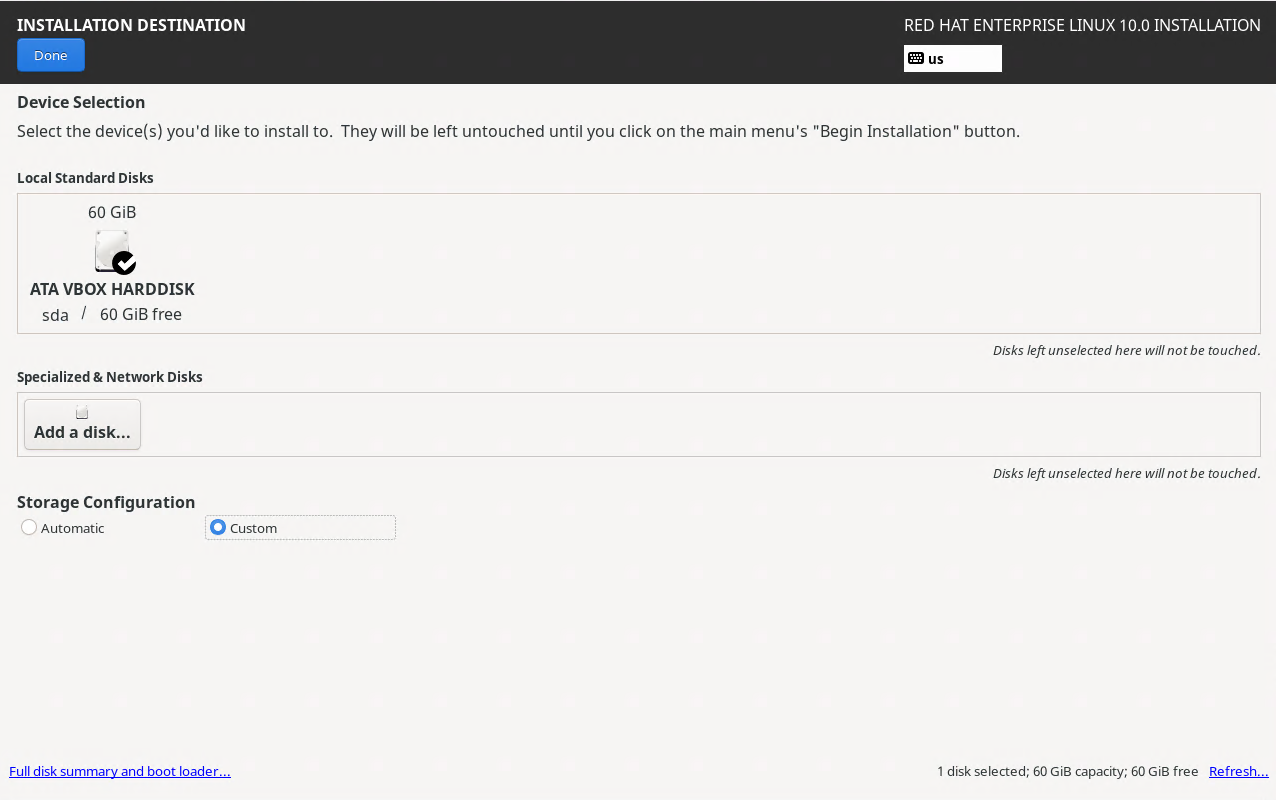
Choose ‘Custom’ option Under Storage Configuration and click on Done, it will take us to the following screen.
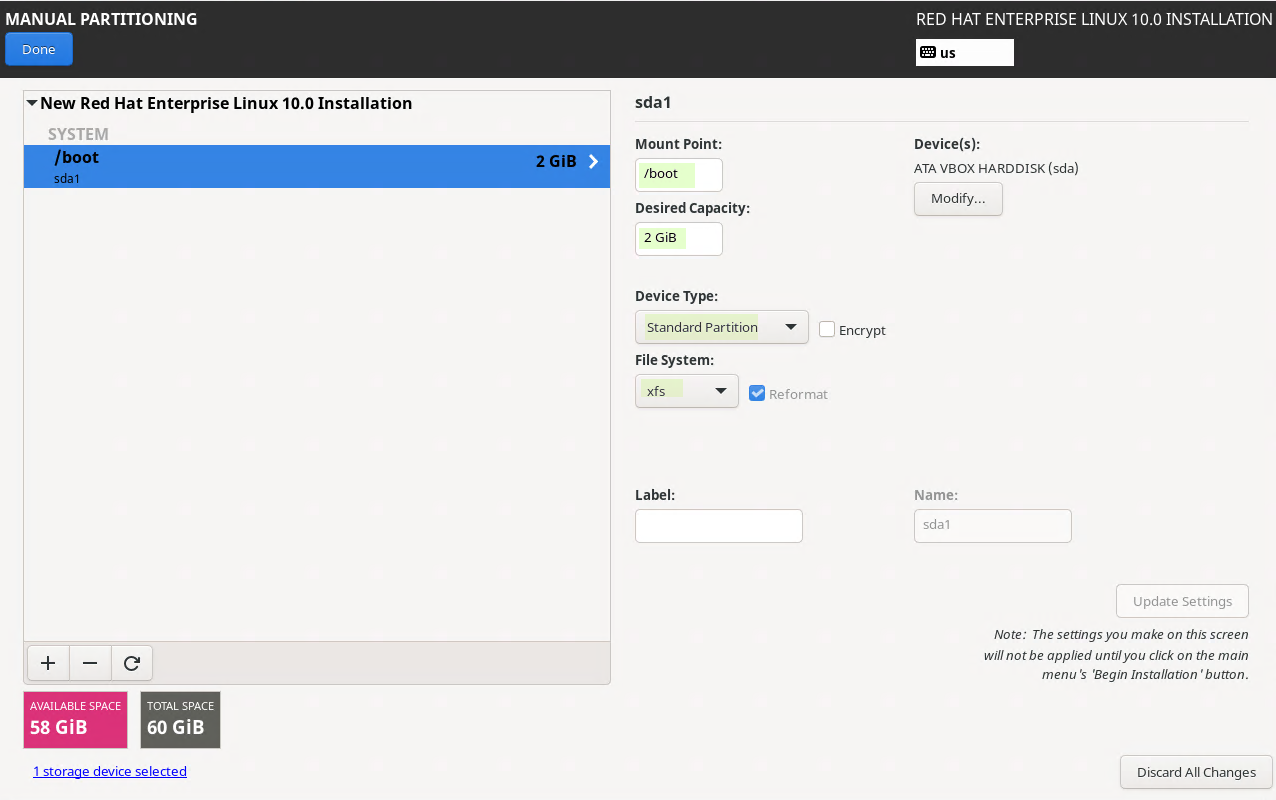
Create your first partition as boot of size 2 GB. Steps are shown below:
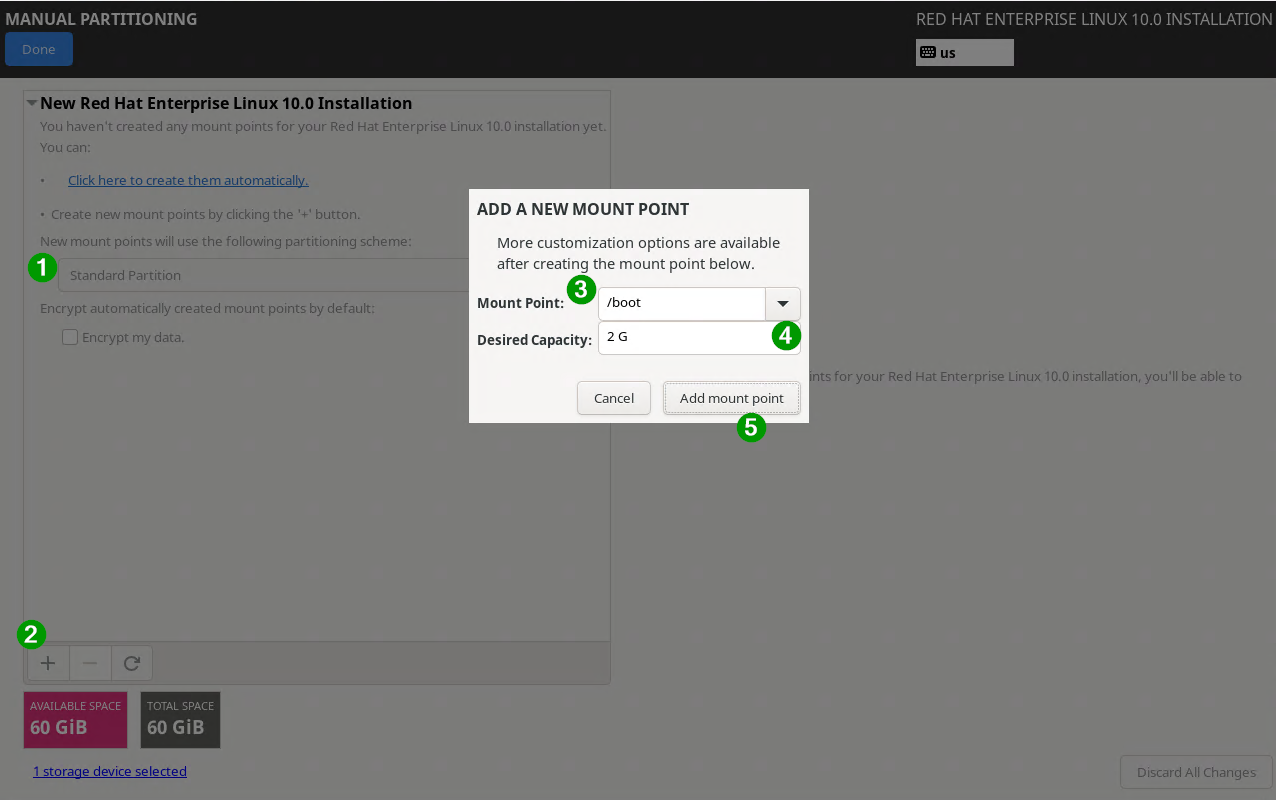
Click on ‘Add mount point‘
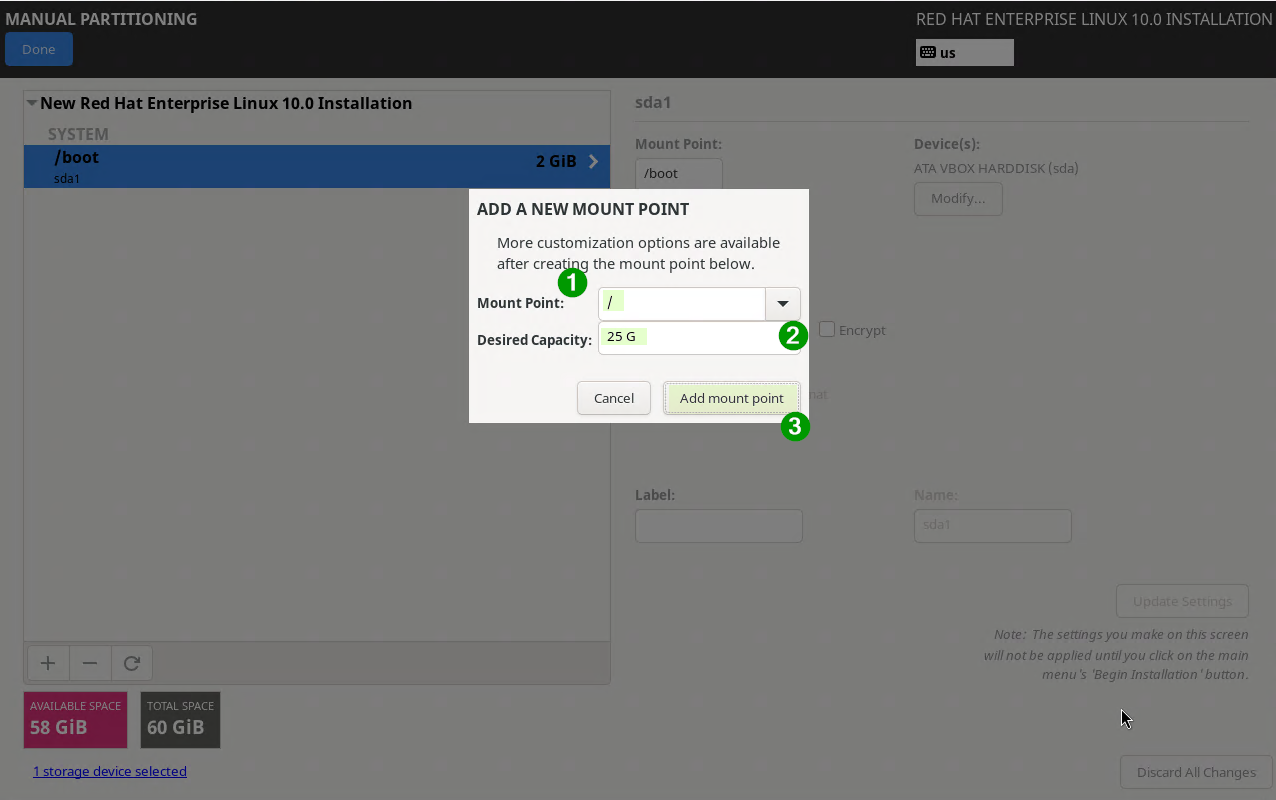
In order to create further partitions, click on plus (+) symbol.
Create / partition of size 25 GB,
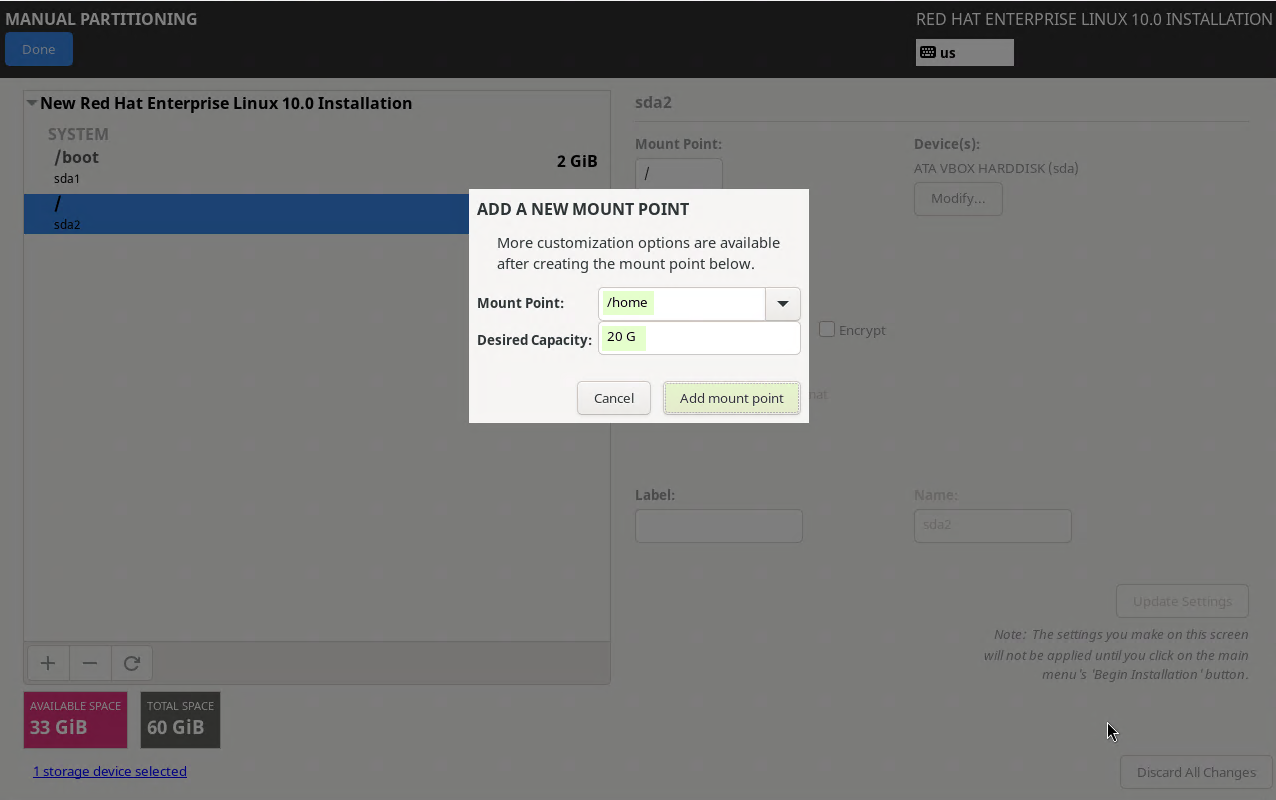
Similarly create rest of partitions. /home partition of size 20 GB.
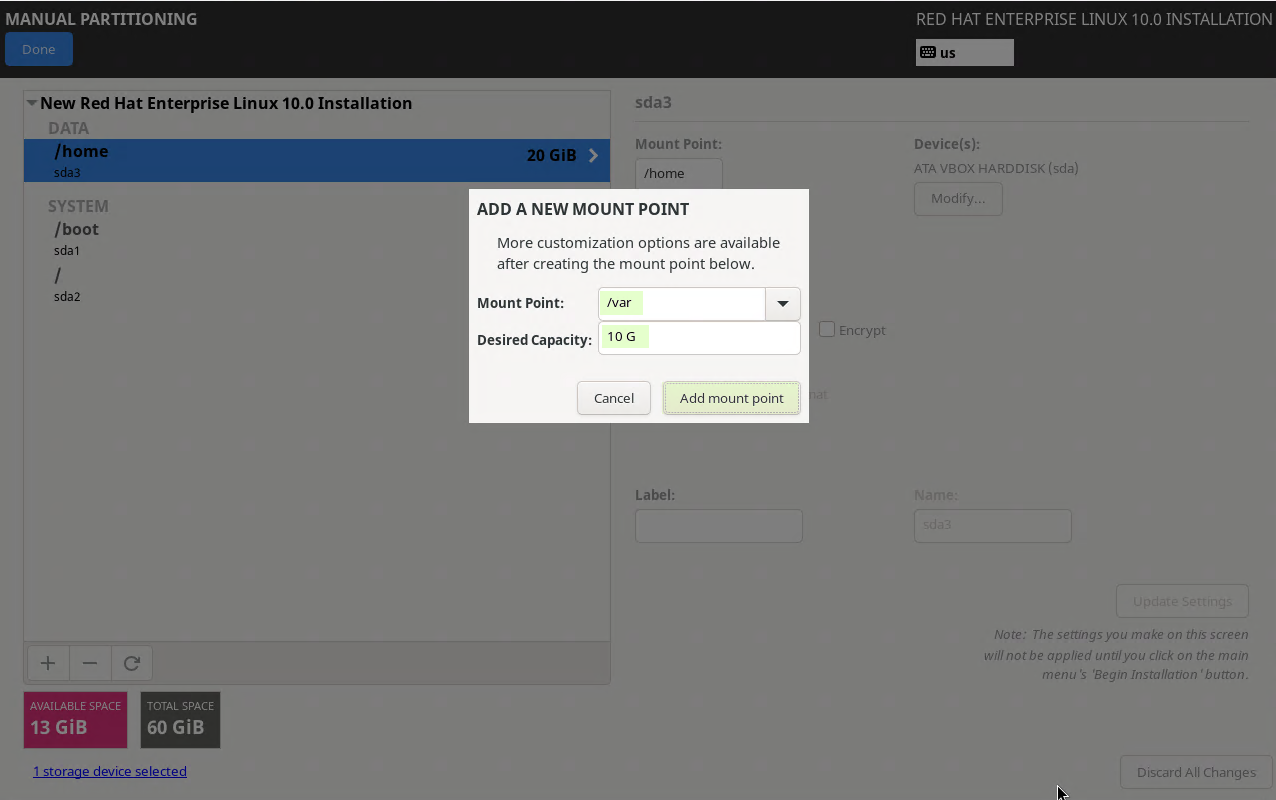
/var partition of size 10 GB
Now create last two partitions, swap of size 2 GB and bioboot fo 1 MB
Biosboot partition
It is needed when your system is using a GPT (GUID Partition Table) disk layout and the system firmware is legacy BIOS (not UEFI).
Click on Add mount point and then Click on Done from manual partition screen.

In following screen, click on “Accept Changes”
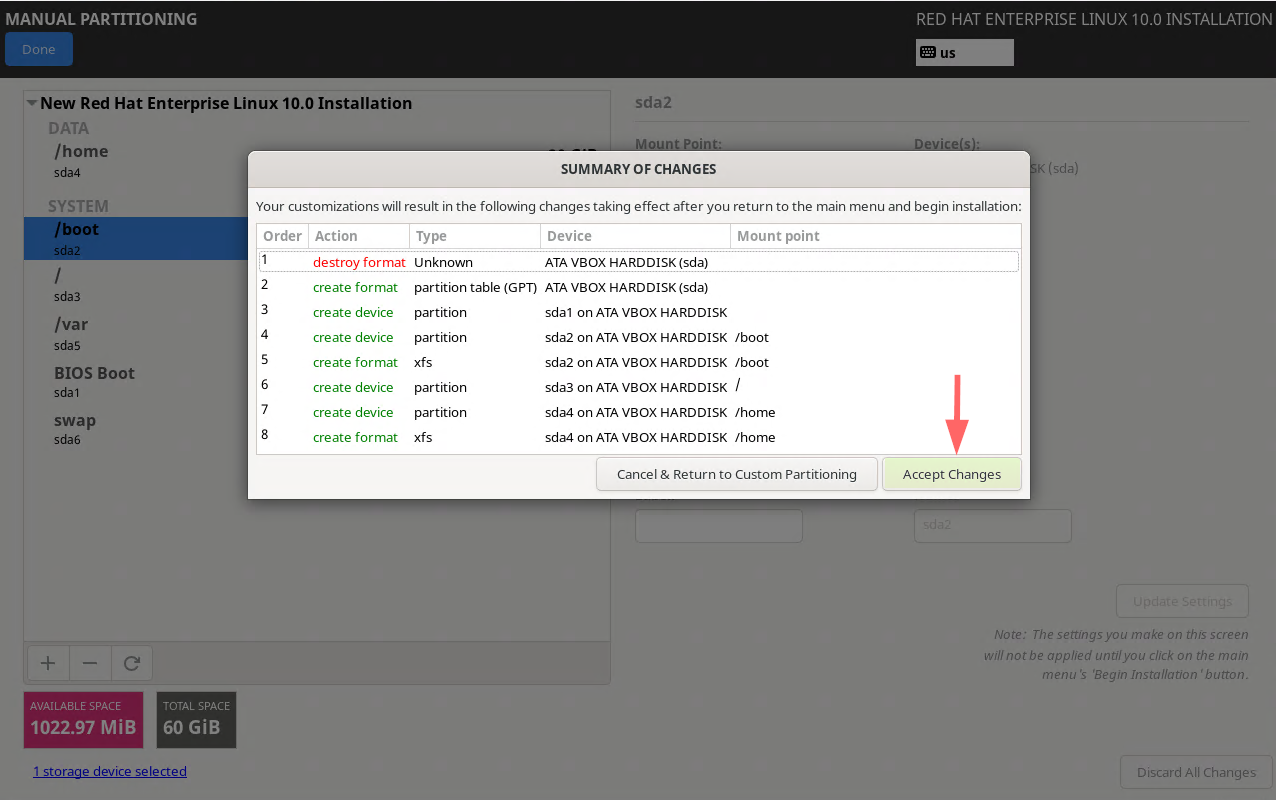
It will take us to installation summary screen, click on “Begin Installation“

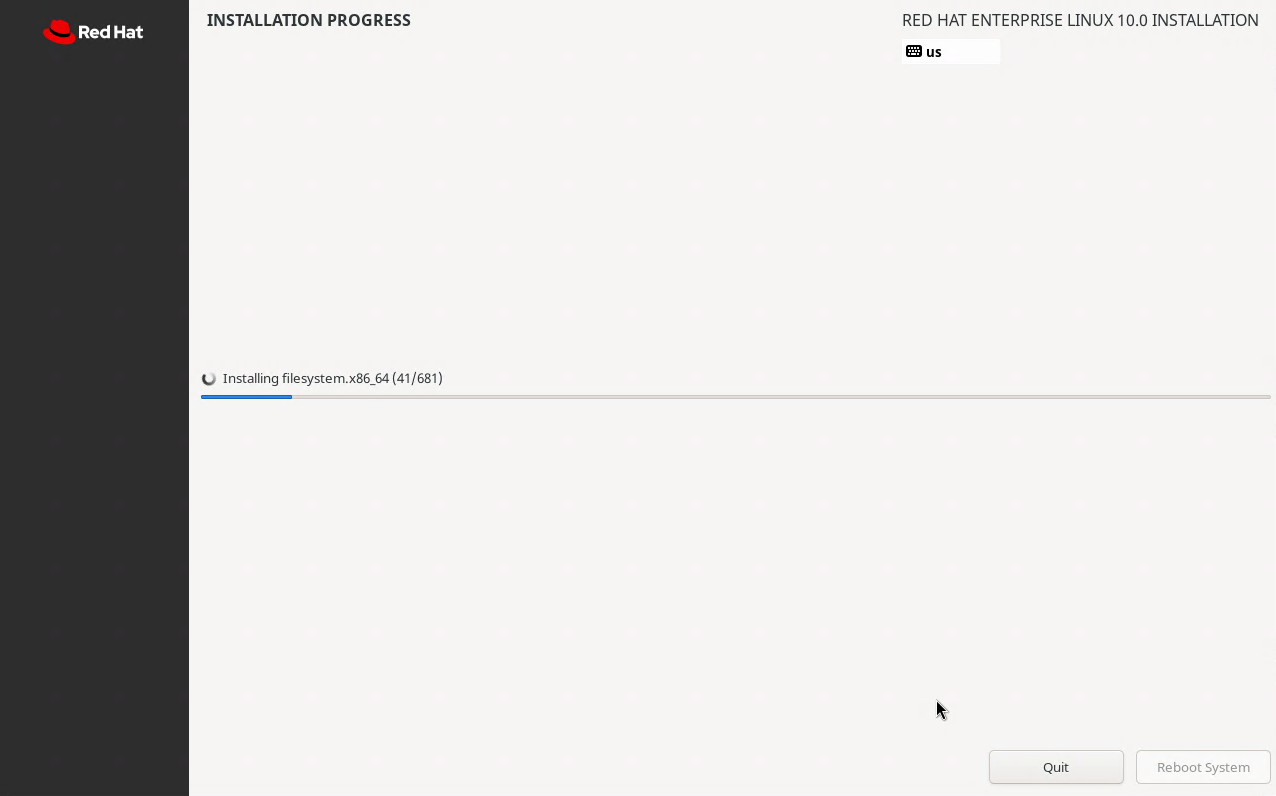
5) Installation Progress
Below screen confirms that installation has started and is in progress.
Once the installation is completed, installer will prompt to reboot the system.
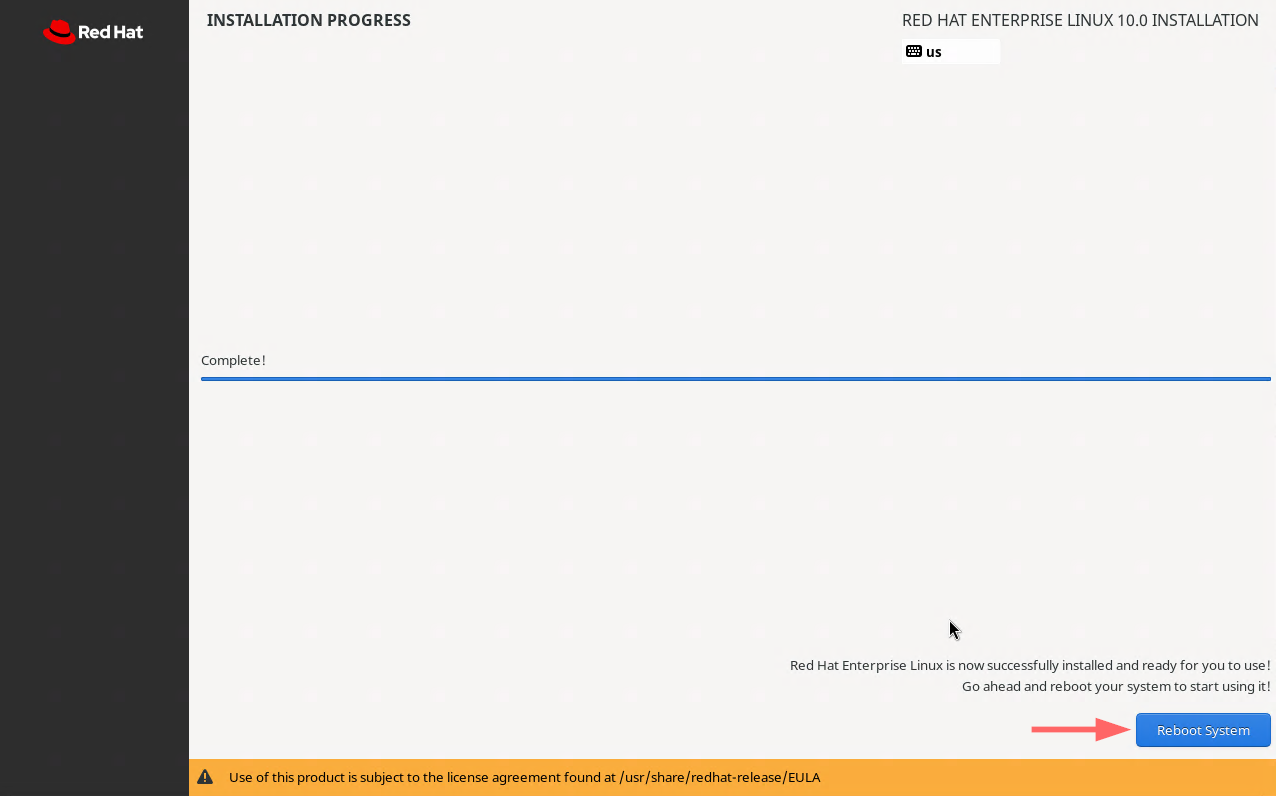
Click on Reboot System don’t forget to change boot medium from bios settings. So that the system boots up with hard disk.
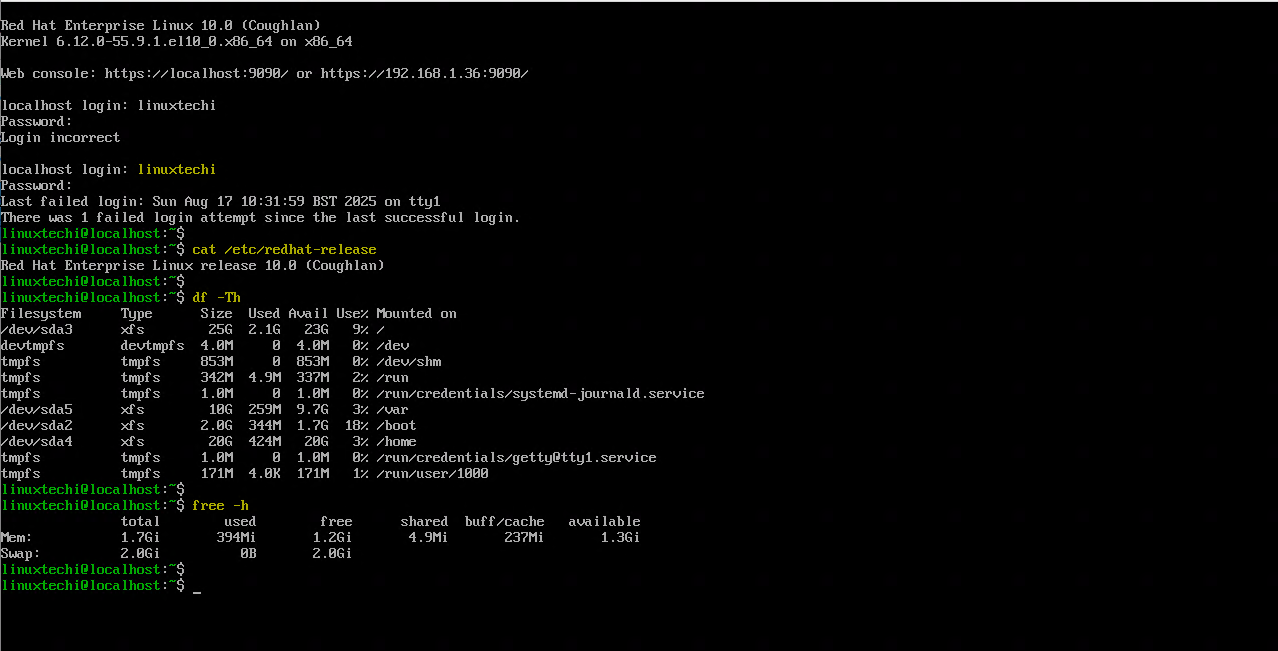
6) Login to RHEL 10 System After Reboot
Once the system is back online after the reboot, we will get the following login screen. Use the same local user and its credentials that we have created during the installation.
If your RHEL 10 system is connected to network and got the IP from DHCP server then you can access RHEL 10 server’s web console using following URL:
https://<RHEL10-System-IP>:9090
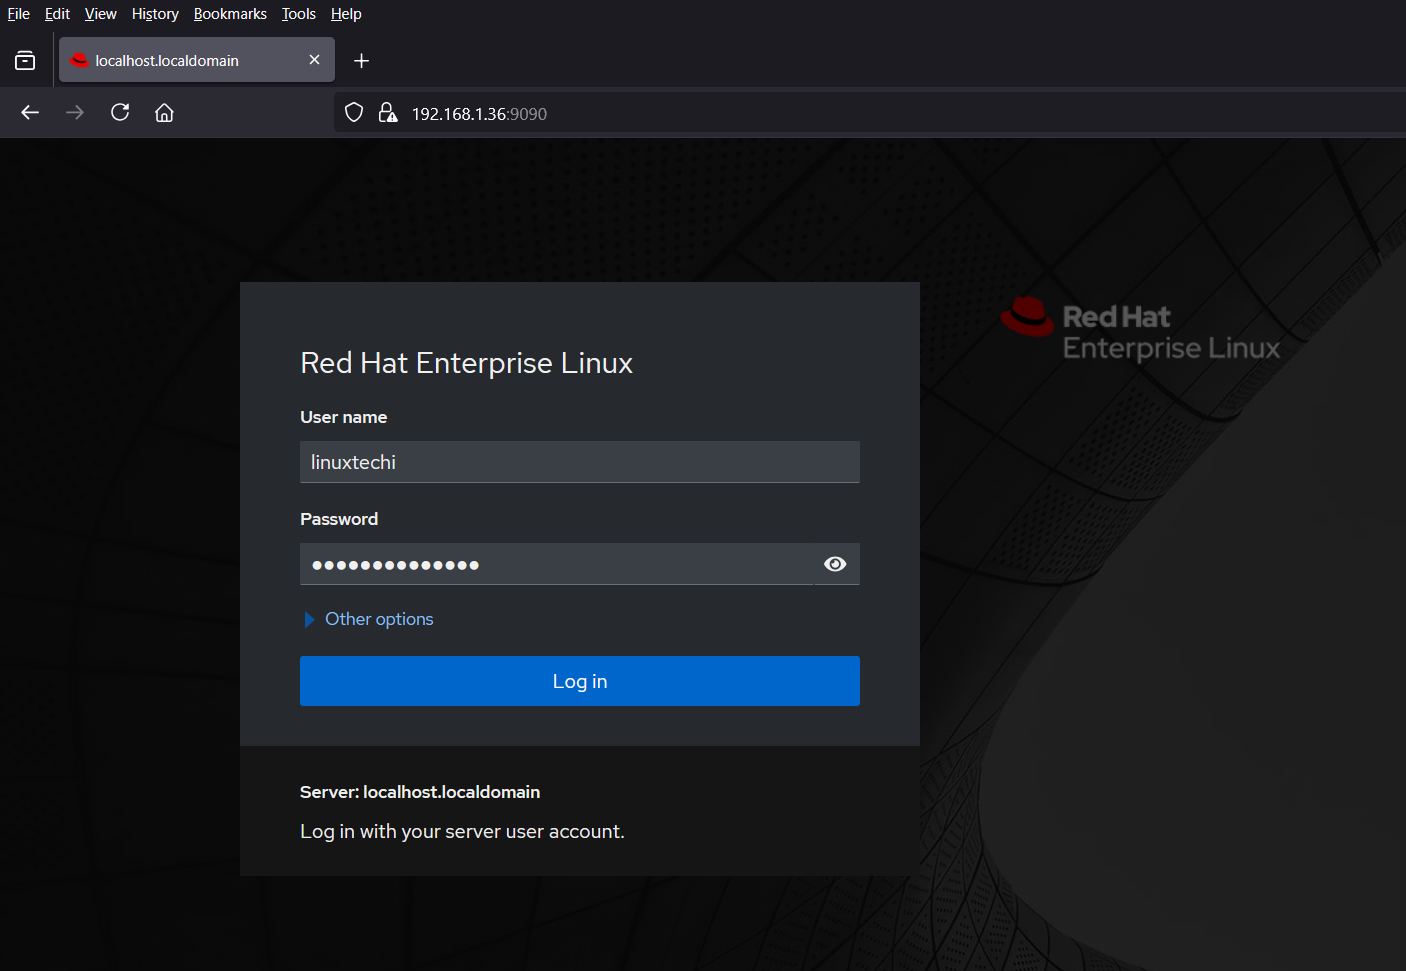
Use the same local user credentials that were created during the installation.
Click on “Log in“, it will take us to following console.
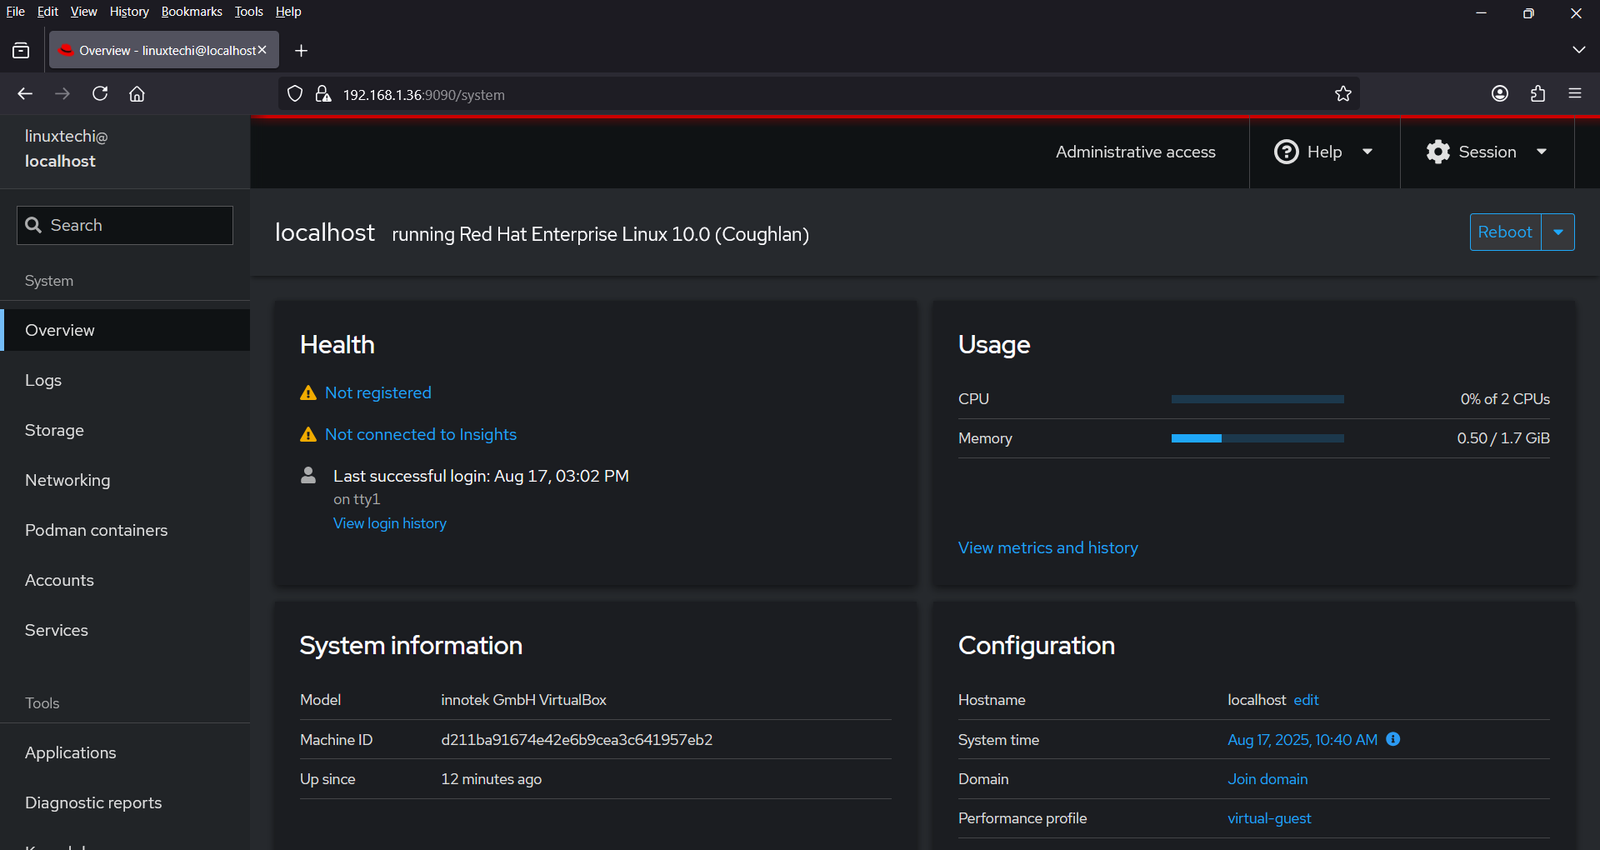
From this console, one can perform day to day administrative tasks without login to CLI.
That’s all from this blog post, I hope you have found it informative and useful. Kindly do post your comments and queries in below comments section.
Also Read : How to Make Your Linux Terminal Talk Using espeak-ng