In this guide, we will cover how to install KVM on RHEL 9 step-by-step.
Kernel-based Virtual Machine, or KVM in short, is an opensource virtualization solution for the Linux kernel. It supports both Intel and AMD CPUs and allows users to create and manage virtual machines on a Linux system. The kernel functions as a hypervisor and allows you to virtualize your entire dedicated server and create multiple VMs.
Prerequisites
- Minimal Installed RHEL 9 with Desktop Environment
- Sudo user with admin rights
- Local Yum Repository or Red Hat Subscription
- Internet Connectivity (for Red Hat Subscription)
Once the prerequisites are met then jump into installation steps of KVM.
1) Check Whether Virtualization is Enabled or not
To get off the ground, you need to verify if your system supports Virtualization. By default, this is usually enabled in the BIOS. Therefore, to verify if Virtualization is enabled on your system, run the following commands:
For Intel CPUs
$ grep -e 'vmx' /proc/cpuinfo
For AMD CPUs
$ grep -e 'svm' /proc/cpuinfo
We are running an Intel CPU and the output of the command confirms that virtualization is already enabled.

Alternatively, you can run the following command. VT-x is Intel’s virtualization technology and this is yet another confirmation that Virtualization is enabled in the BIOS.
$ lscpu | grep Virtualization

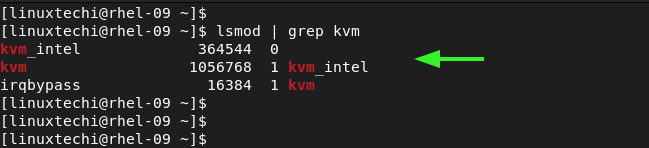
Also, you might want to check if KVM modules are loaded.
$ lsmod | grep kvm
2) Install Virtualization Packages
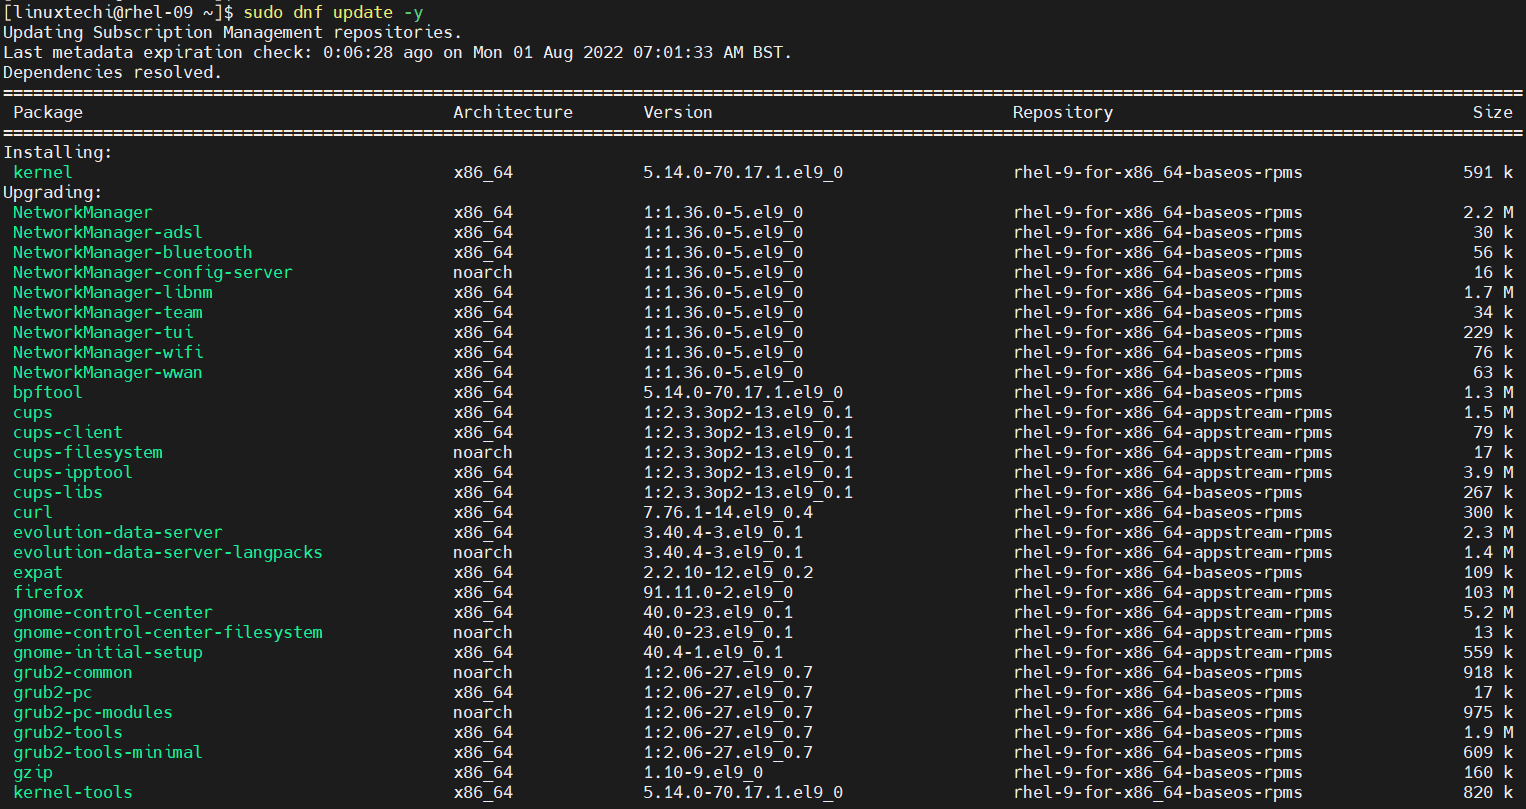
The second step is to install the required virtualization packages on your system. But first, consider refreshing the repositories and install all available updates.
$ sudo dnf update -y
Once all the updates are installed successfully then reboot the system once
$ sudo reboot
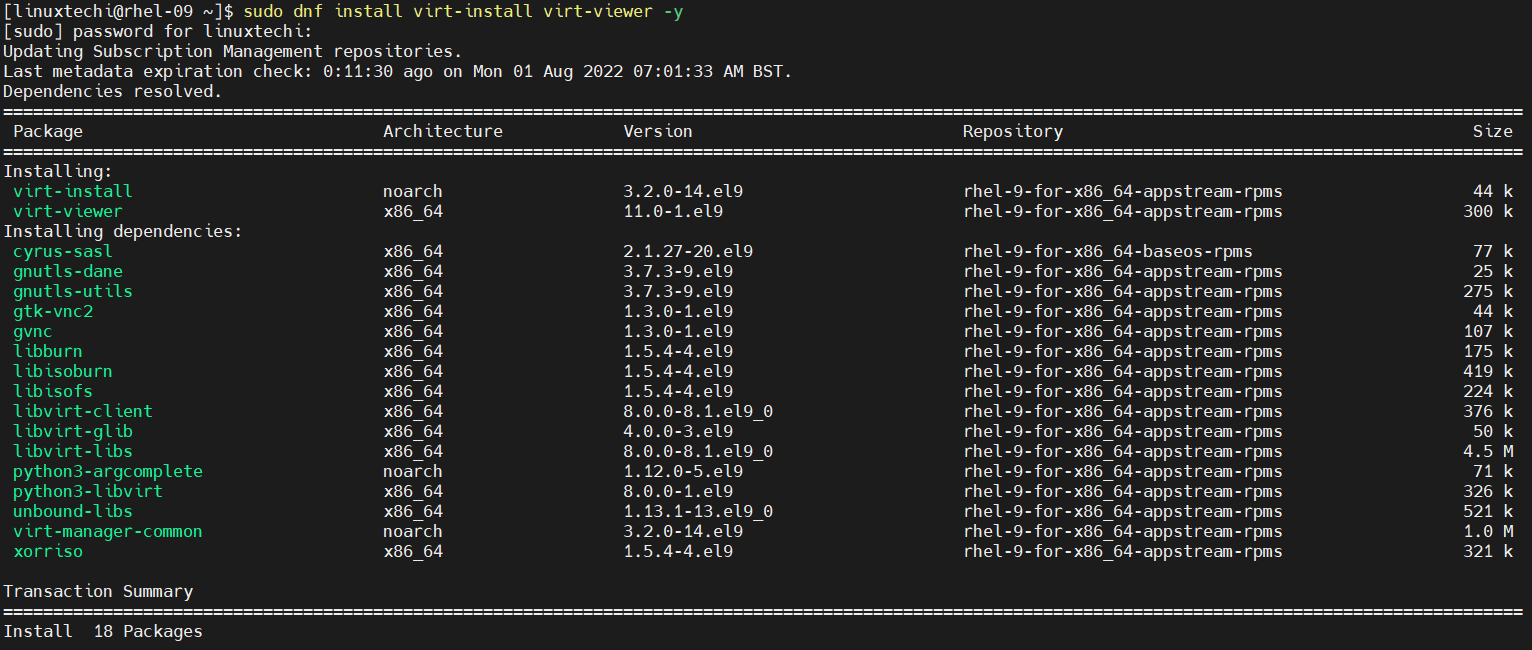
Next, install the virt-install and virt-viewer packages using the following command.
$ sudo dnf install virt-install virt-viewer -y
virt-install is a command-line tool for creating virtual machines from the command line.
The virt-viewer application is a lightweight UI interface that enables you to interact with the KVM virtual machine using VNC or SPICE remote desktop protocol.
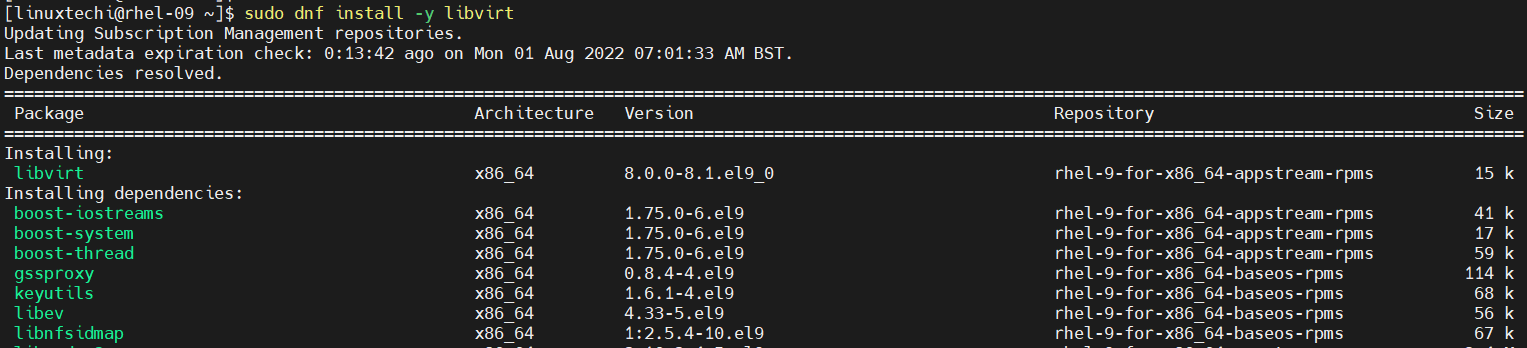
Next, install the libvirt virtualization daemon.
$ sudo dnf install -y libvirt
Once the virtualization daemon has been installed, proceed and install virt-manager. This is a Qt-based graphical interface for managing virtual machines using the libvirt daemon.
$ sudo dnf install virt-manager -y

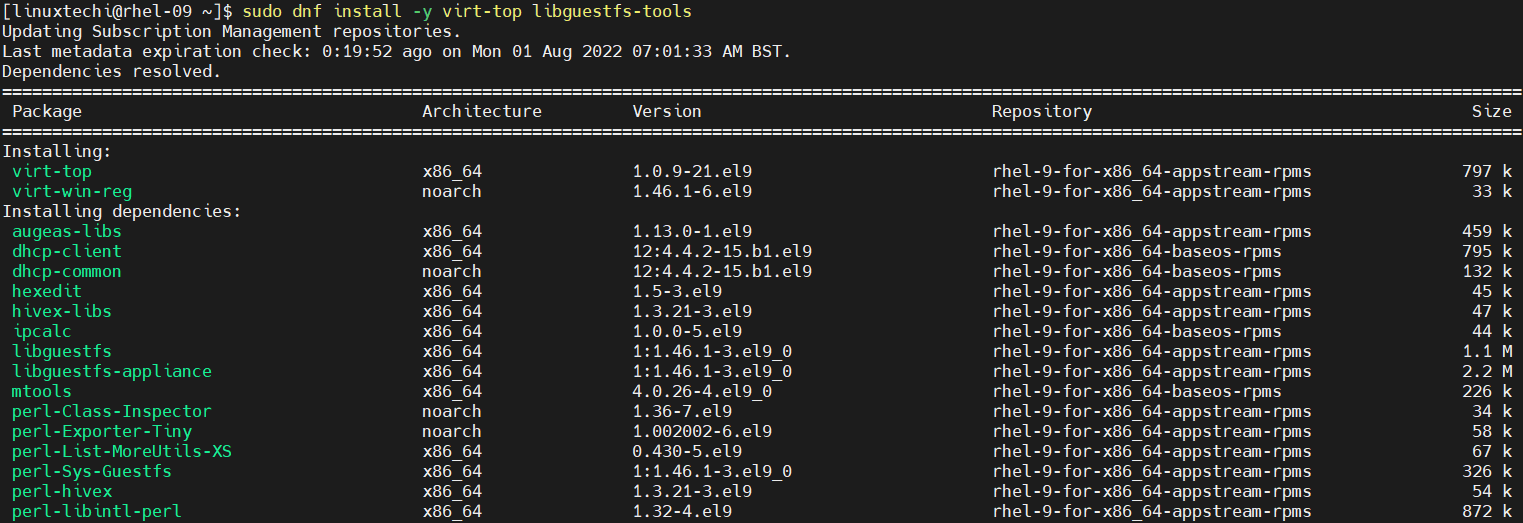
Finally, install additional virtualization tools to provide a seamless user experience.
$ sudo dnf install -y virt-top libguestfs-tools
3) Start and Enable Libvirtd Virtualization Daemon
Once you have installed all the required virtualization packages, be sure to start and enable the virtualization daemon as follows.
$ sudo systemctl start libvirtd
$ sudo systemctl enable libvirtd
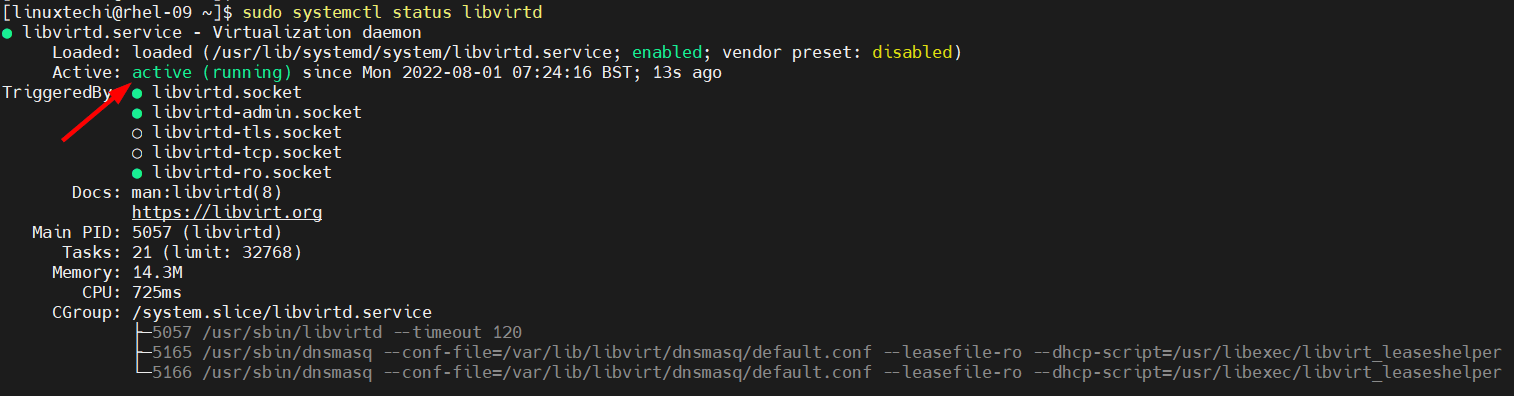
Then verify if the daemon is running.
$ sudo systemctl status libvirtd
4) Configure Network Bridge for KVM
If you want to access your kvm virtual machines outside of your KVM hypervisor then you must configure a network bridge (kvmbr0) and attach physical interface to it.
Note: Virtual Bridge ‘vbr0’ automatically created when we install KVM packages. But this is used only for testing purpose. VMs will get the nated IP address via this bridge.
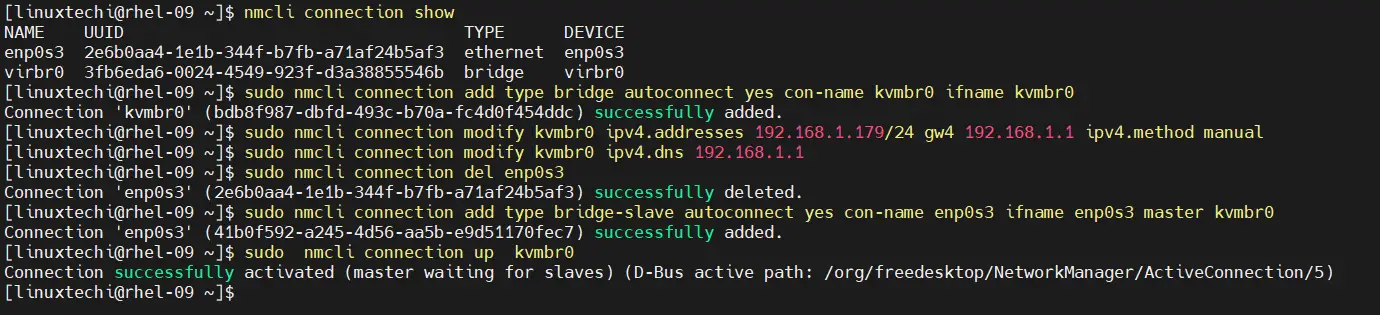
To create a network bridge kvmbr0, run following commands from the terminal,
$ nmcli connection show
$ sudo nmcli connection add type bridge autoconnect yes con-name kvmbr0 ifname kvmbr0
$ sudo nmcli connection modify kvmbr0 ipv4.addresses 192.168.1.179/24 gw4 192.168.1.1 ipv4.method manual
$ sudo nmcli connection modify kvmbr0 ipv4.dns 192.168.1.1
$ sudo nmcli connection del enp0s3
$ sudo nmcli connection add type bridge-slave autoconnect yes con-name enp0s3 ifname enp0s3 master kvmbr0
$ sudo nmcli connection up kvmbr0
Note: Replace the interface name and ip address details as per you setup.
Output of above commands,
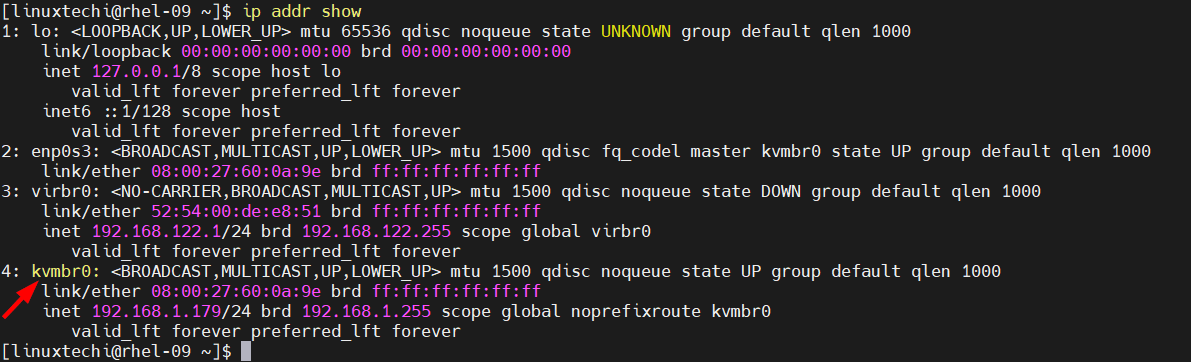
Check network bridge (kvmbro) status using ip command,
$ ip addr show
5) Create Virtual Machine using Virt-Manager GUI
With all the packages required by KVM already installed along with network bridge configuration. we will now launch a virtual machine using the Virtual Machine Manager GUI utility.
Using the GNOME search tool, search and launch the Virtual Machine Manager.
![]()
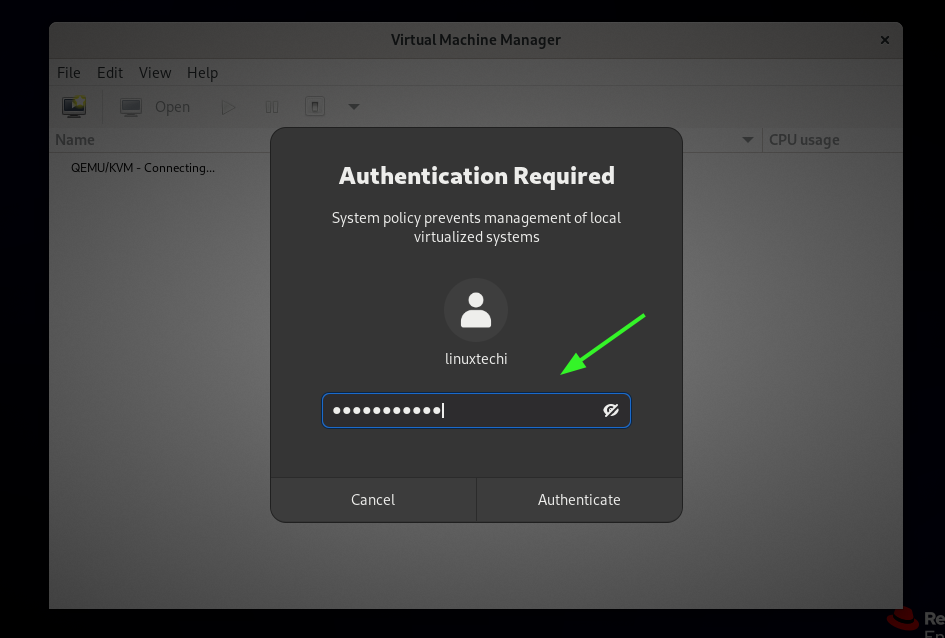
Next, you will be required to authenticate in order to start using the Virtual machine manager. So, provide your password and hit ‘ENTER’ or click the ‘Authenticate’ button.
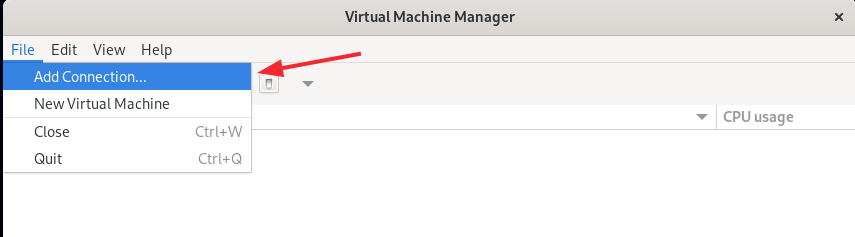
On the Virtual Machine Manager, click on File > Add Connection.
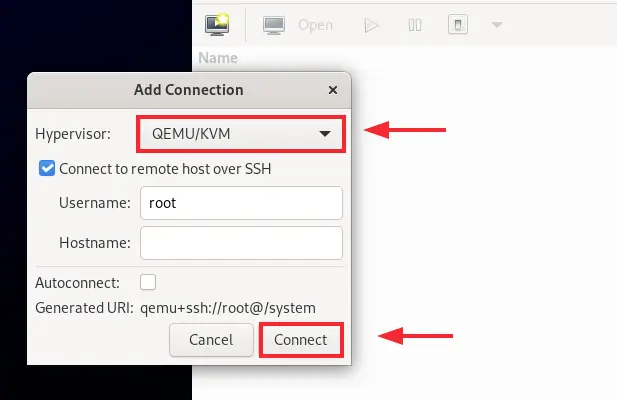
Set ‘QEMU/KVM’ as the default Hypervisor and click ‘Connect’.
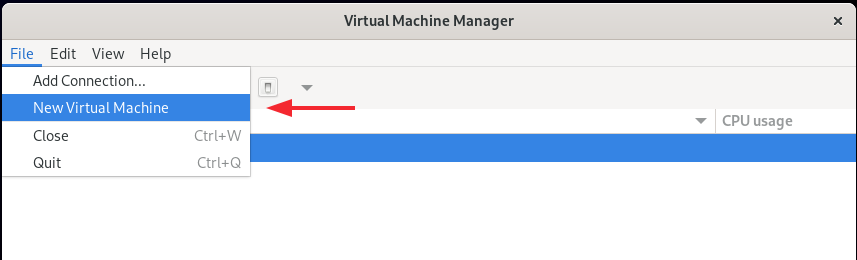
To start creating a virtual machine, click on File > New Virtual Machine
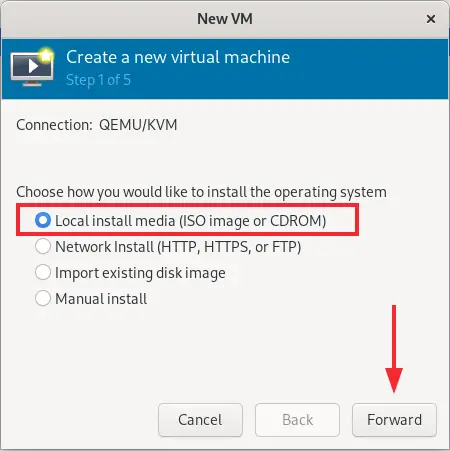
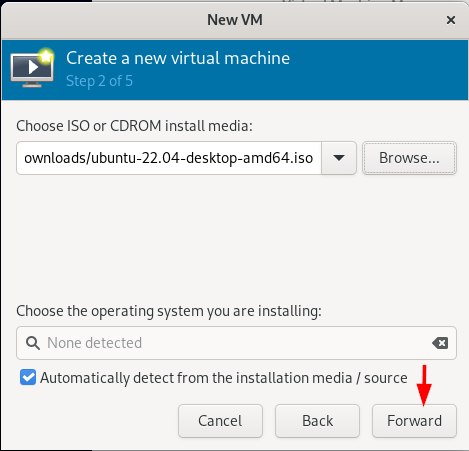
This opens the Virtual machine creation wizard. The first step will present you with a list of options for creating a virtual machine. In our case, we already have a Ubuntu 22.04 ISO image in place, and therefore, we will go with the first option – ‘Local install media (ISO image or CDROM’.
Once you have chosen your preferred choice, click ‘Forward’.
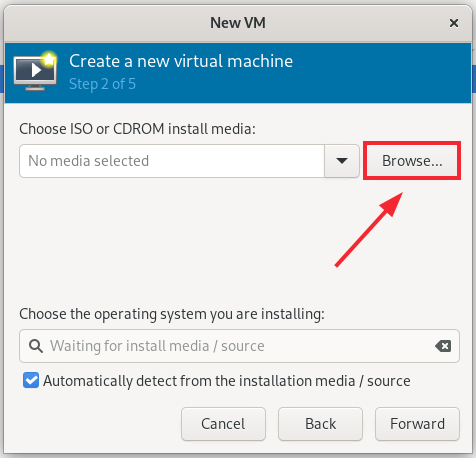
Next, click on ‘Browse’ to navigate to the directory containing the ISO file.
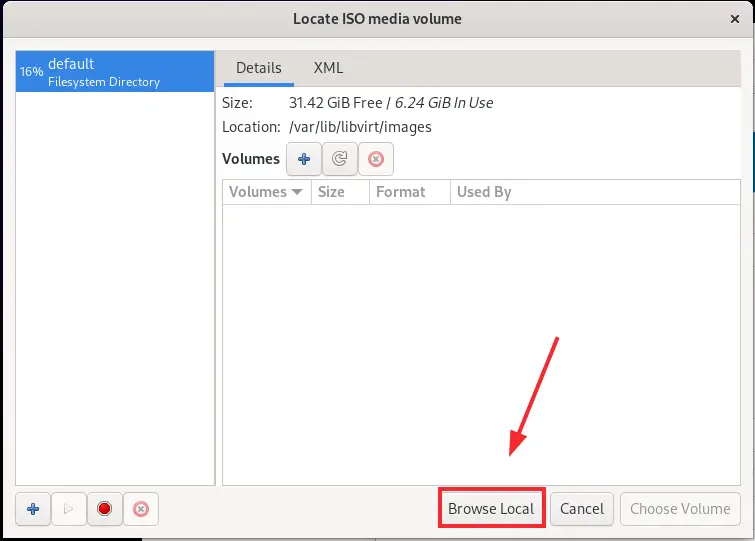
Since the ISO file is located on our local system, we will click on ‘Browse local’.
Navigate to the destination directory and select the ISO image file and click ‘Open’.
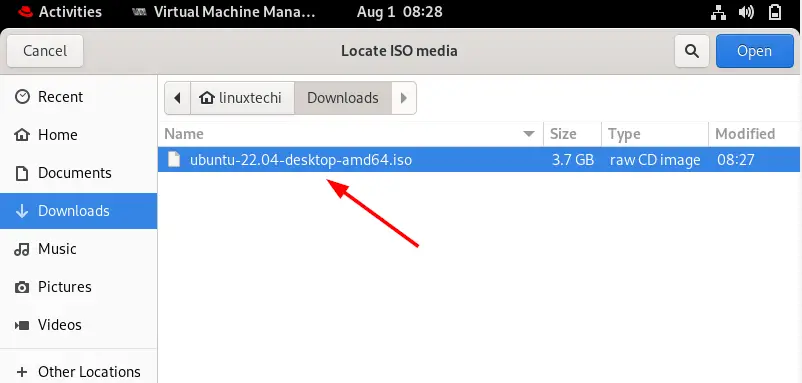
Having selected the ISO image file, click ‘Forward’ to move to the next step.
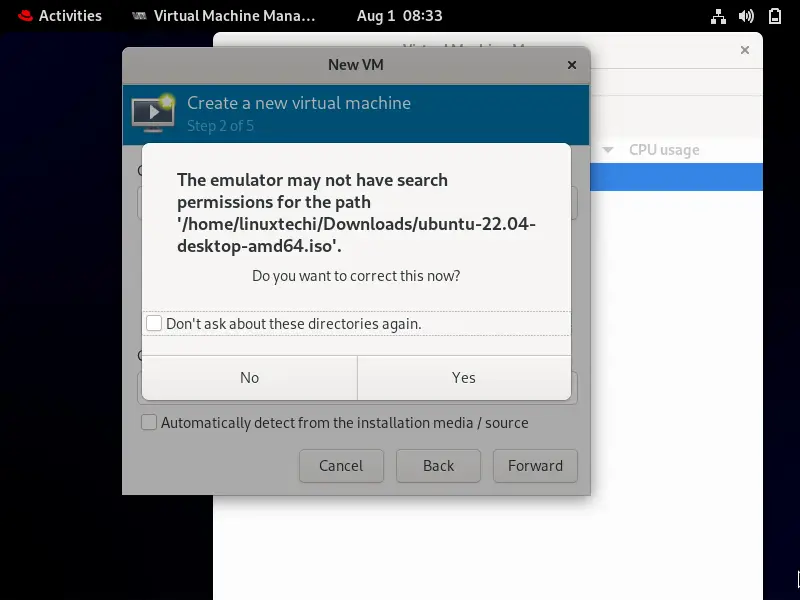
Next, click ‘Yes’ to grant the emulator permissions to access the path of the ISO image file.
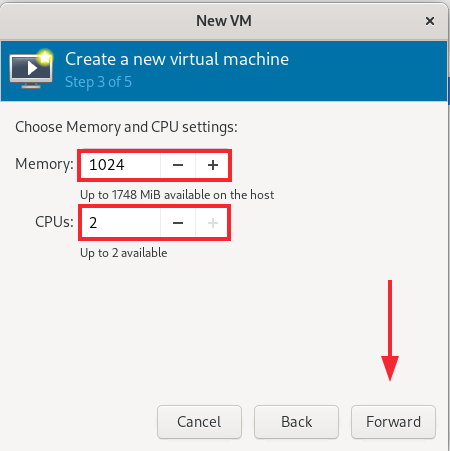
Next, select RAM size and the number of CPUs and then click ‘Forward’.
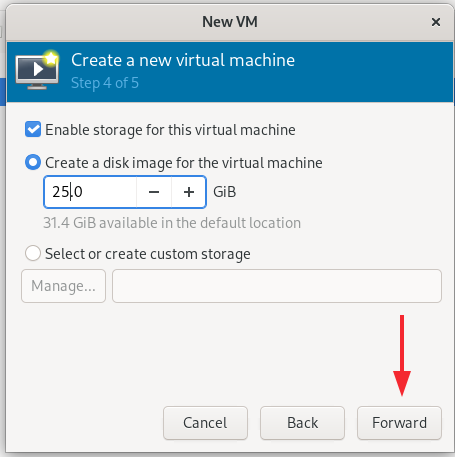
Next, specify the storage size for your virtual hard disk and click ‘Forward’.
On the next screen, Specify the name of virtual machine and then click on Network Selection and Choose ‘kvmbro’
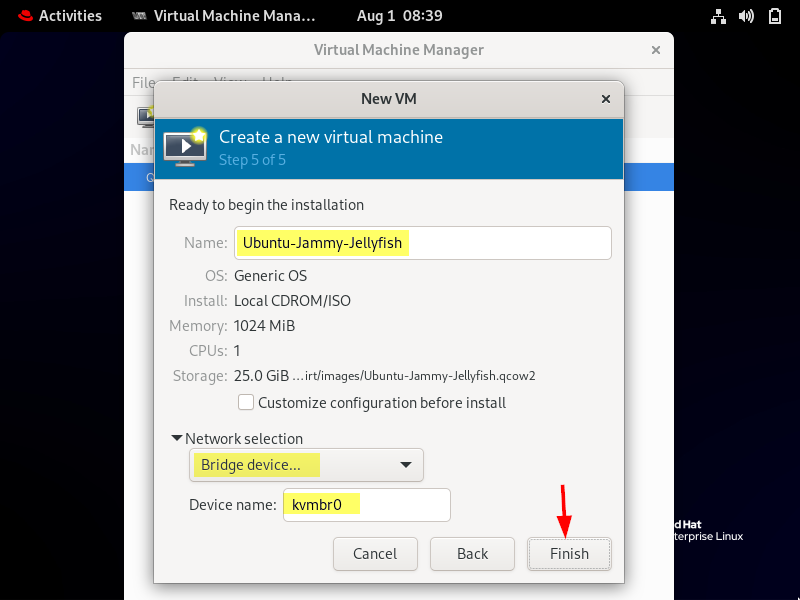
click ‘Finish’ to begin OS installation.
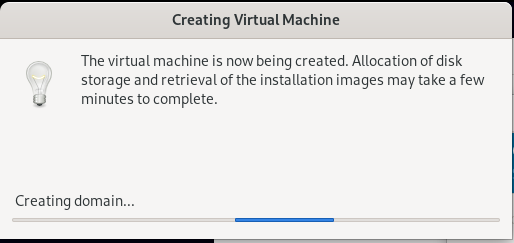
The Virtual Machine Manager will start creating the VM.
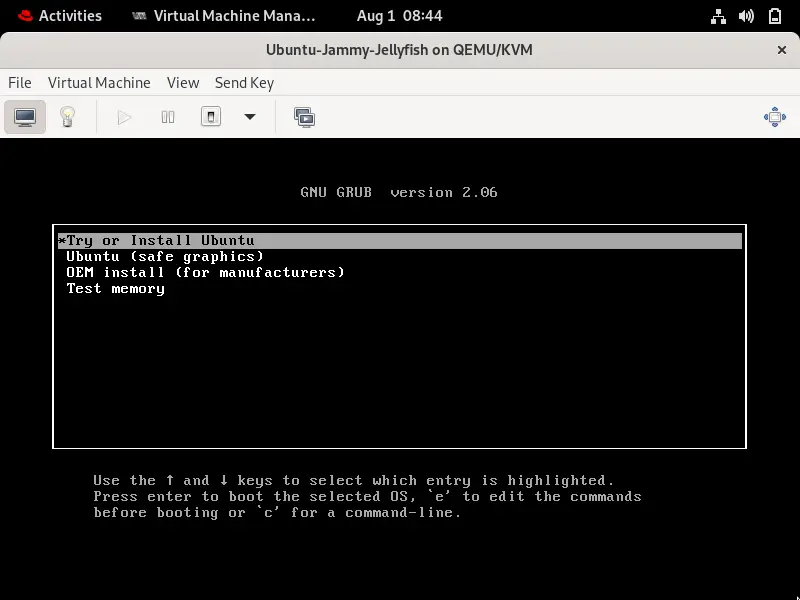
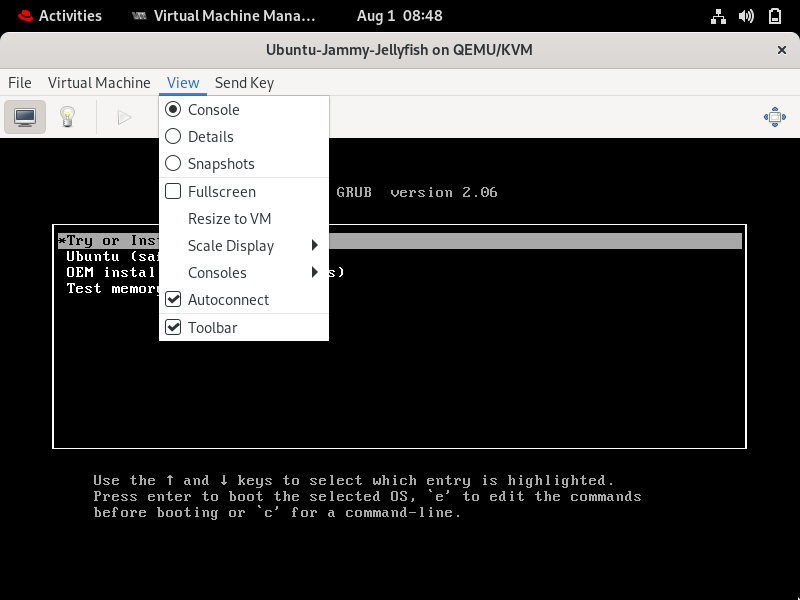
Finally, the virtual machine will be launched and you will see the GRUB menu options listed for installing your virtual machine. From here, you can proceed to install your virtual machine.
The menu bar provides a couple of options for managing the virtual machine. Under the ‘Virtual Machine’ option you find options that allow you to pause, shutdown, migrate, delete or take a screenshot of the virtual machine.
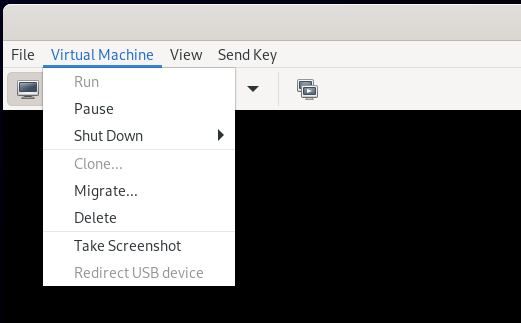
The view option provides options for scaling or resizing the screen dimensions of the virtual machine.
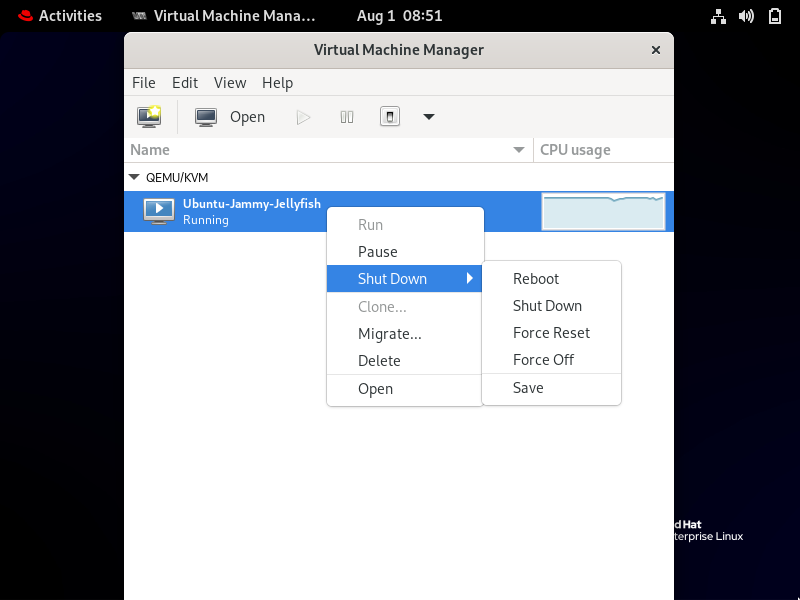
Alternatively, you can right-click on the virtual machine on the Virtual Machine Manager and select your preferred options.
Conclusion
And there you have it. In this guide, we have illustrated how to install KVM on RHEL 9. We are glad to have your feedback on this guide.
Is this method considered as Type 2 (Hosted) Hypervior.
Its considered a Type-1 hypervisor.
reference: ‘https://www.redhat.com/en/topics/virtualization/what-is-KVM’