Short for kernel-based Virtual Machine, KVM is an opensource virtualization platform for the Linux kernel. In this tutorial, we will show you how to install KVM on Fedora 37/36 step by step.
KVM allows users to create virtual machines on a Linux system and provides a wealth of tools and options to achieve this. The kernel functions as a hypervisor and you can virtualize your entire dedicated server and create multiple VMs.
Minimum System Requirements for KVM
- An Intel processor with virtualization extension Intel VT-x or an AMD processor with the AMD-V
- Already Installed Fedora 37 / 36 (Workstation or Server)
- Sudo User with admin right
- Stable Internet Connection
- At least One NIC (Lan Card)
Without any further delay, head to the target system and refer the following KVM installations steps.
Step 1) Check if Virtualization is enabled or not
KVM requires your system to have Intel-VT or AMD-V virtualization technology enabled on your system. The first step is to check if Intel-VT or AMD-V is enabled.
To do so, run the following grep command to verify if either of the virtualization technologies is enabled.
$ grep -E --color '(vmx|svm)' /proc/cpuinfo
The vmx extension is the Intel processor flag while svm is the AMD flag.
You should get output that resembles what we have here.
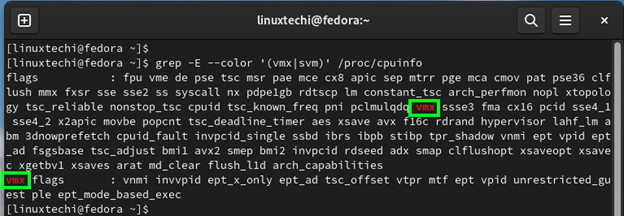
From the output, we can see that Intel-VT virtualization is enabled, and so we are good to go!
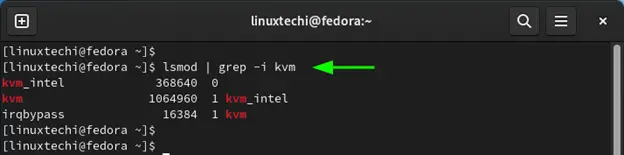
Additionally, check if the KVM kernel module is loaded using lsmod command,
$ lsmod | grep -i kvm
Step 2) Install Virtualization Packages
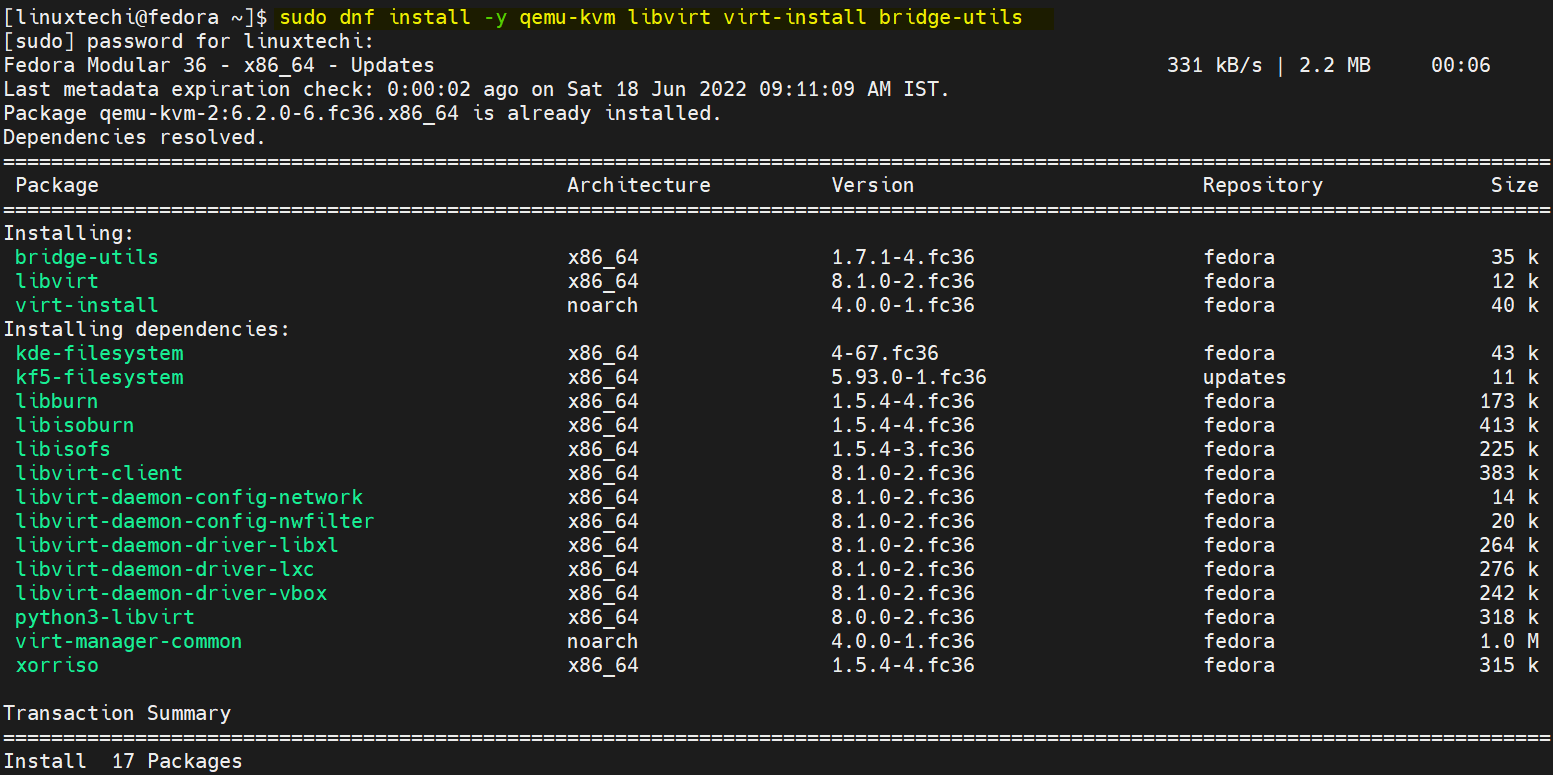
The next step is to install the main virtualization packages So, run the following command.
$ sudo dnf install -y qemu-kvm libvirt virt-install bridge-utils
- qemu-kvm – An opensource emulator and virtualization package that provides hardware emulation.
- libvirt – A package that provides configuration files required to run the libvirt daemon.
- virtinst – A set of command-line utilities for provisioning and modifying virtual machines.
- Virt-install – A command-line tool for creating virtual machines from the command-line.
- bridge-utils – A set of tools for creating and managing bridge devices.
Also, install virt-manager which is a Qt-based graphical interface for managing virtual machine via the libvirt daemon.
$ sudo dnf install -y virt-manager
Aside from that, install additional virtualization modules.
$ sudo dnf install -y libvirt-devel virt-top libguestfs-tools guestfs-tools
Step 3) Start and enable Virtualization Daemon
Once all packages are installed, be certain to start the libvirtd virtualization daemon.
$ sudo systemctl start libvirtd
It’s also a good practice to set the service to start on boot time.
$ sudo systemctl enable libvirtd
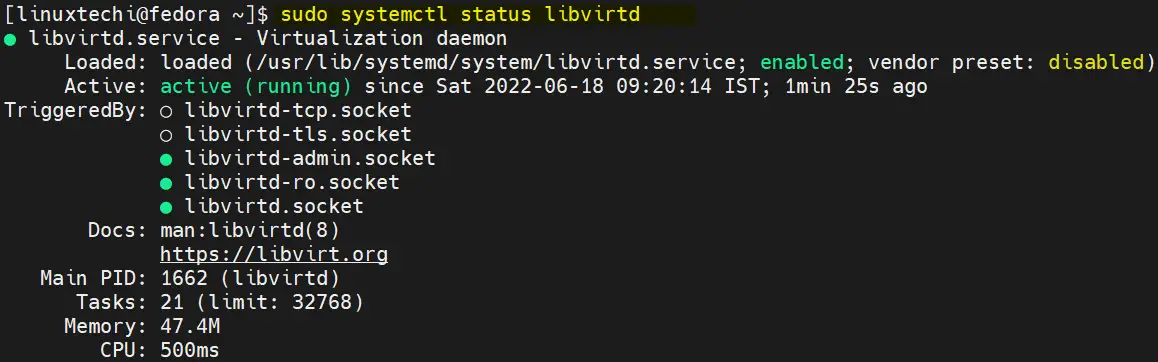
You can check that the service is running by executing the command:
$ sudo systemctl status libvirtd
Step 4) Create Network Bridge (br0) for KVM VMs
Whenever we install KVM then a virtual bridge with name ‘virbr0’ is created automatically. It is used for providing NAT (Network Address Translation). So, when VM’s NIC is attached to virtual bridge virbr0, then VMs will get the IP from DHCP and will be able to connect outside (Internet).
But that VM can not be accessed from outside. So, overcome this issue, we must create network bridge and that bridge must be connected to physical NIC of KVM machine.
To create network bridge, run following nmcli commands,
Note: Change interface name and IP details as per your environment
$ nmcli connection show
$ sudo nmcli connection add type bridge autoconnect yes con-name br0 ifname br0
$ sudo nmcli connection modify br0 ipv4.addresses 192.168.1.189/24 gw4 192.168.1.1 ipv4.method manual
$ sudo nmcli connection modify br0 ipv4.dns 192.168.1.1
$ sudo nmcli connection del static-fedora
$ sudo nmcli connection add type bridge-slave autoconnect yes con-name enp0s3 ifname enp0s3 master br0
$ sudo nmcli connection up br0
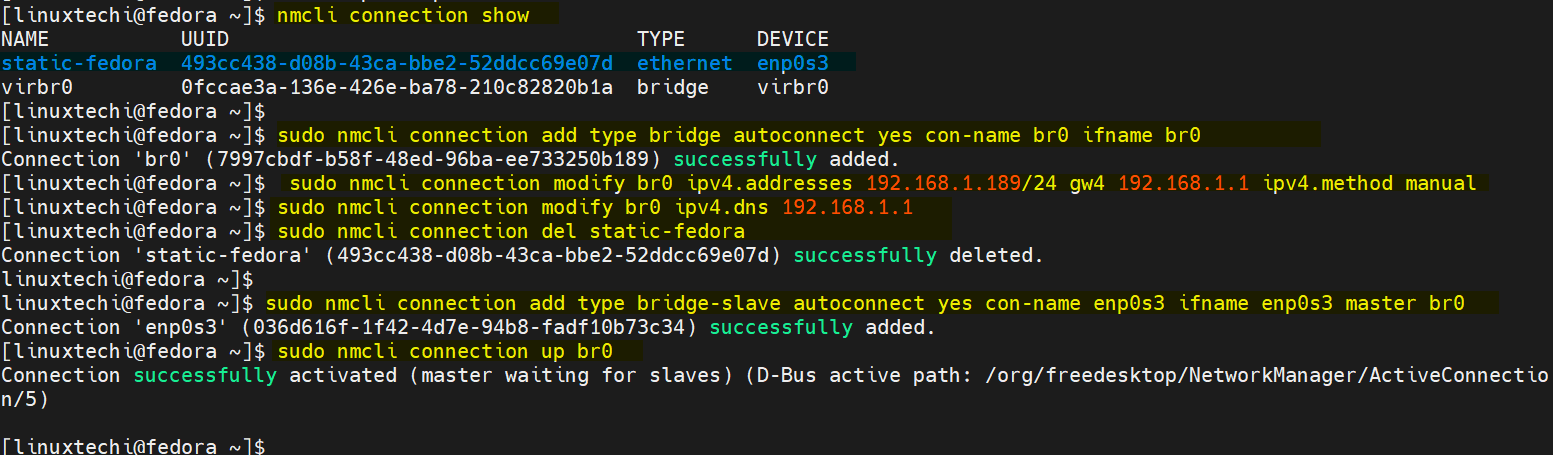
Verify the connection and bridge using following commands
$ nmcli connection show br0
$ ip add show br0
Step 5) Launch Virt Manager and Create Virtual Machine
There are two ways of creating a virtual machine on KVM. You can do it on command line using the virt-install command-line tool or using the virt-manager GUI utility.
The most straight forward way of creating a VM is using the virt-manager utility. To launch it, use the GNOME search tool as shown below.
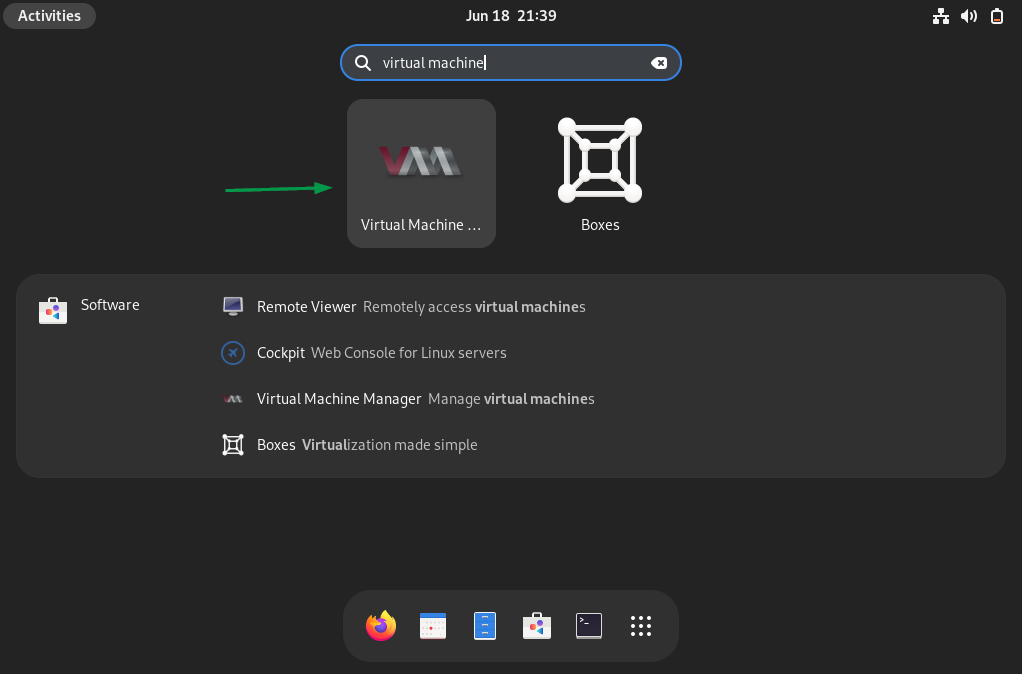
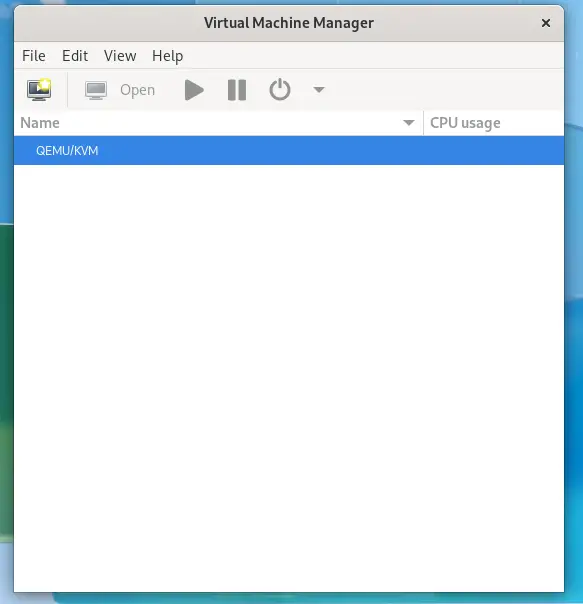
Click on Virtual Machine icon, this will open Virt-Manager GUI,
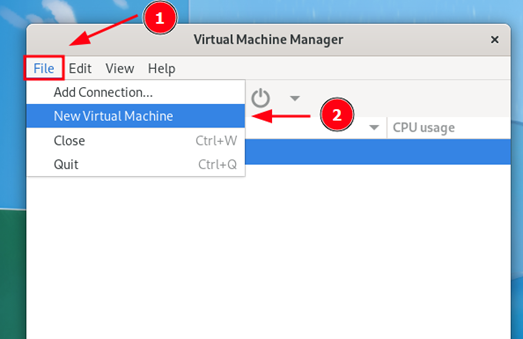
To begin creating a virtual machine click on File –> New Virtual Machine
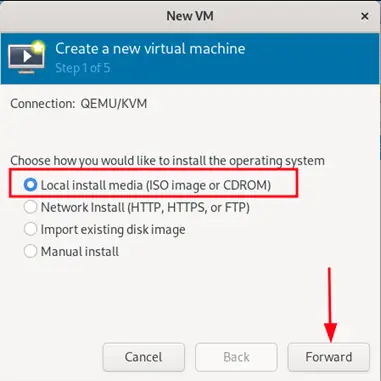
In the next step, select how you would like to install your operating system. We already have an ISO image of AlmaLinux 9 in place and so we will go with the first option.
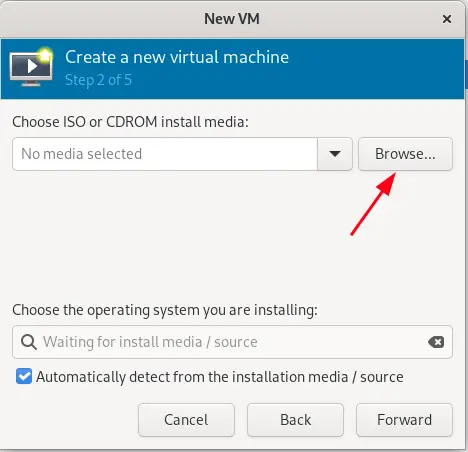
Next, click on the ‘Browse’ button to navigate to the ISO image.
Next, click on ‘Browse Local’
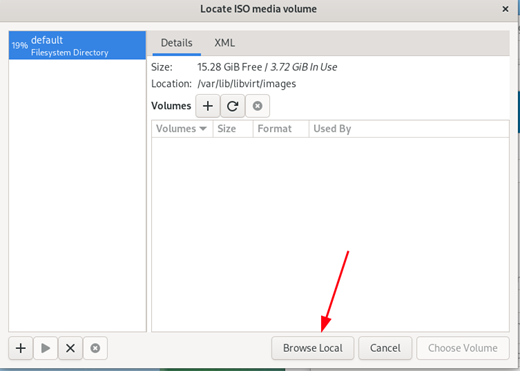
Then navigate to the location of your ISO image. Click on the ISO image and then click on ‘Open’.

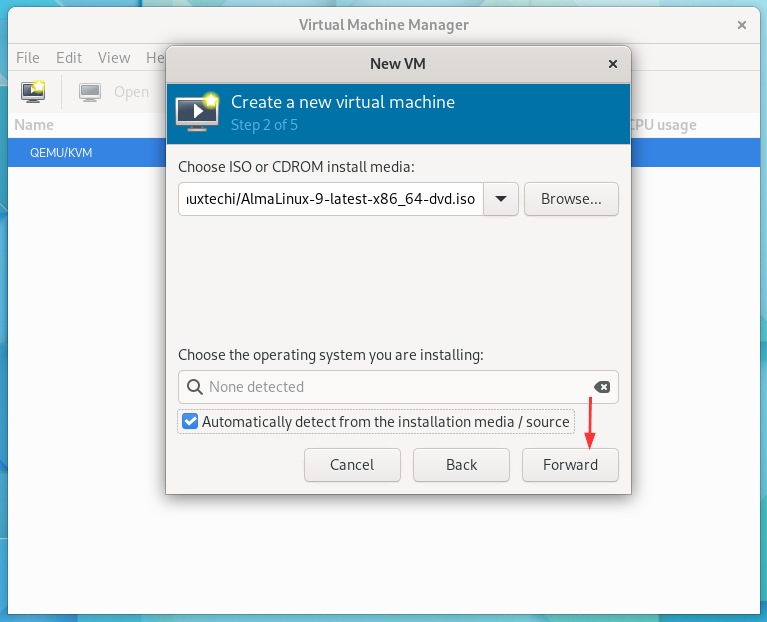
Back to the Virtual Machine Manager Wizard. Click ‘Forward’ to proceed with the installation.
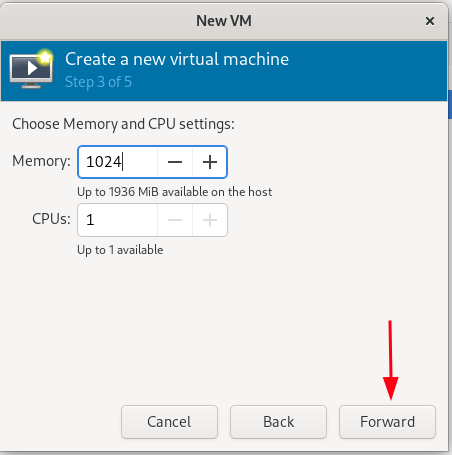
Next, choose RAM and CPU settings and click ‘Forward’.
In the next step, adjust the disk image size according to your preference and click ‘Forward’.

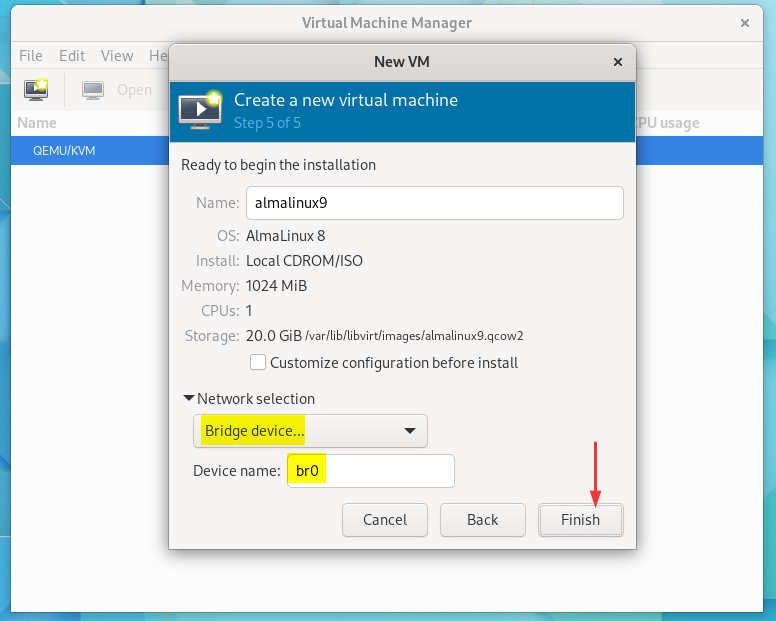
In the following window, choose ‘Bridge Device’ and type ‘br0’and then click ‘Finish’ to wind up and launch the virtual machine.
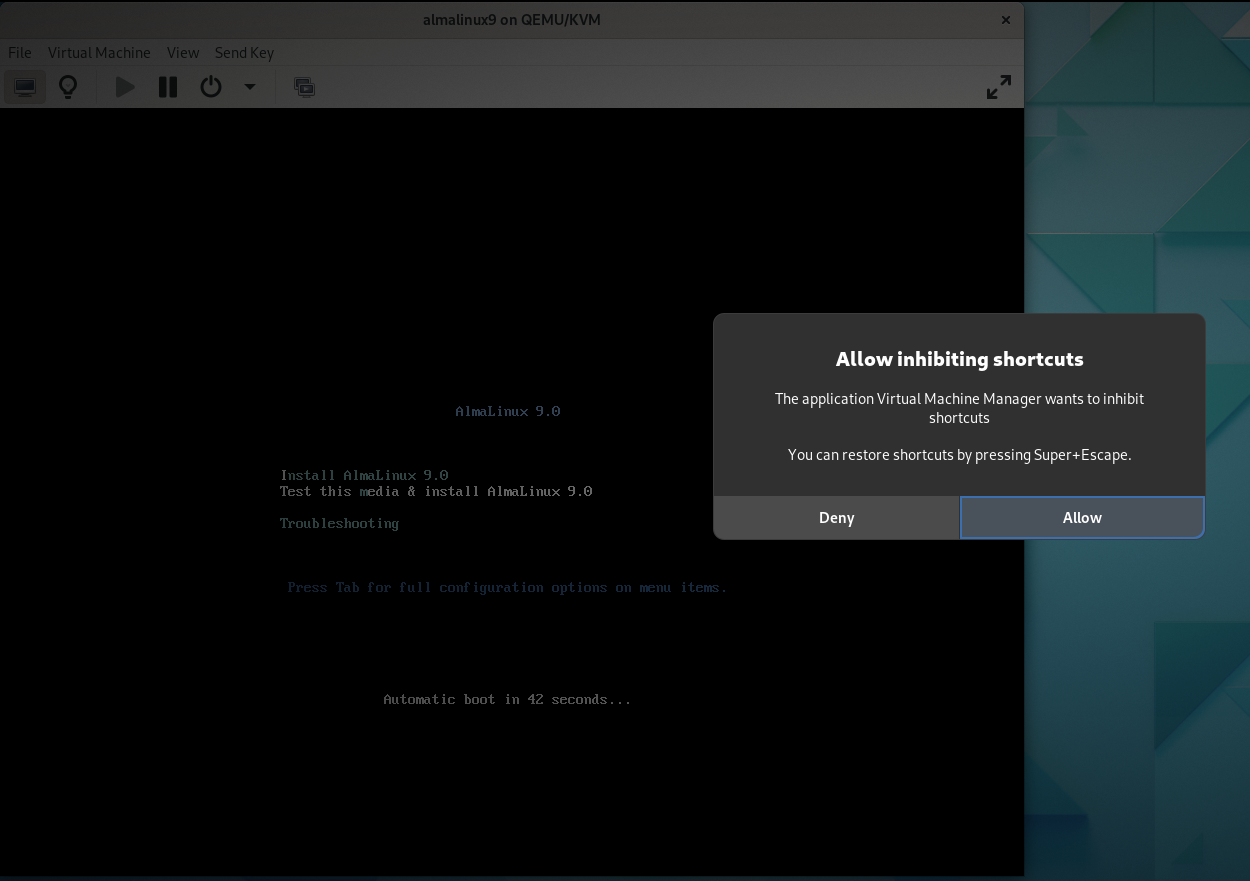
This launches the Virtual machine as shown. Click on ‘Allow’ to allow inhibiting shortcuts.
From here you can continue with the installation of the operating system on your VM.

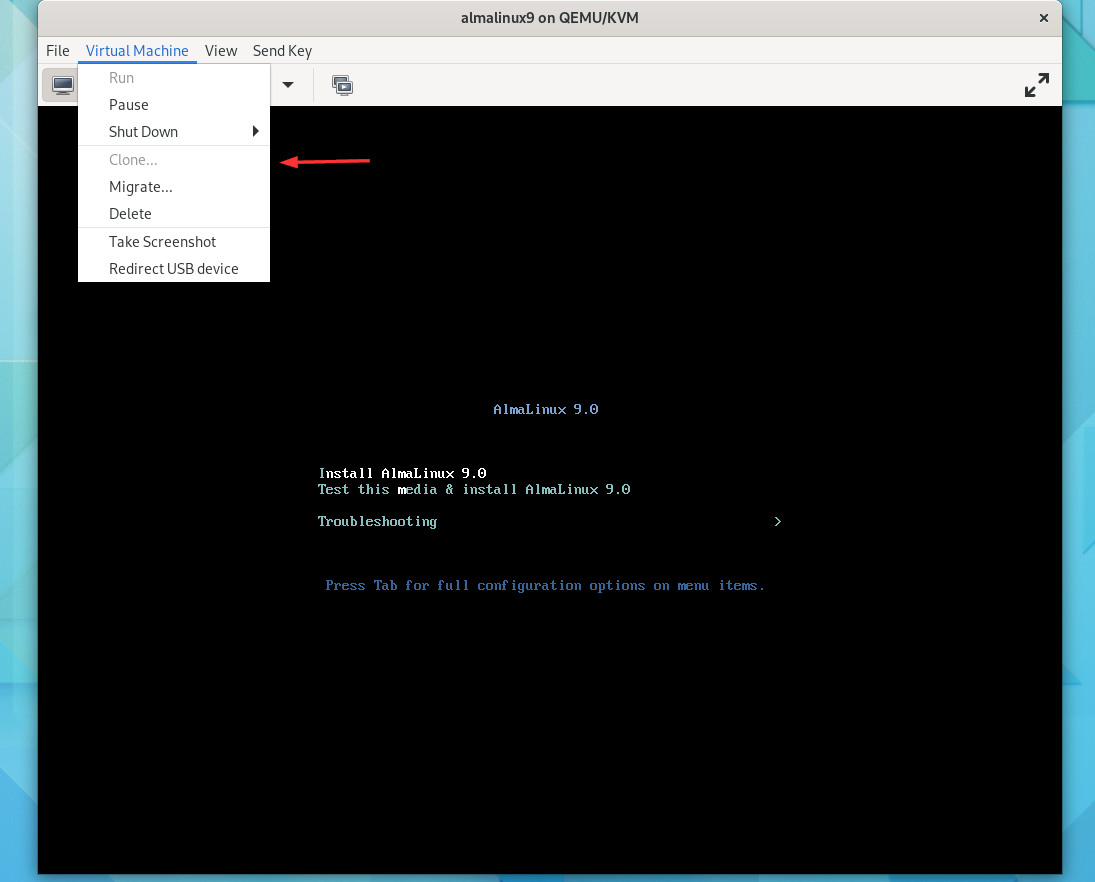
The Virtual Machine Manager also provides a couple of options for managing your VM. Click on ‘Virtual Machine’ to reveal a list of options for controlling the running of your VM such as ‘Pause’, ‘Shutdown’ , ‘Migrate’, and ‘Delete’ to mention a few.
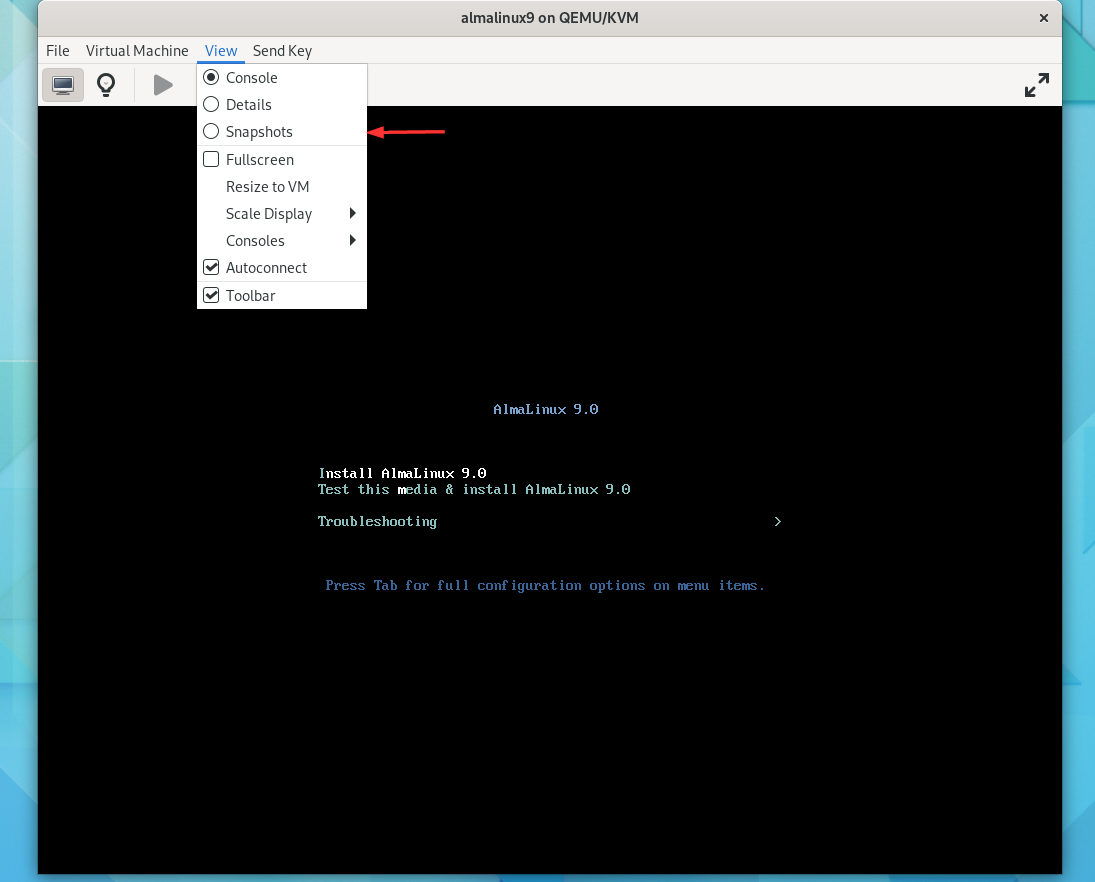
In addition, you can resize the screen size and scale the display among other options by clicking on ‘View’ and selecting any of the options listed.
Conclusion
This wraps up our guide on the installation of KVM on Fedora 37/36. Your thoughts and feedback are most welcome.
Great work mate, very helpful and comprehensive!
Thank you very much, this is so useful.