If you are entering the world of Kubernetes, kubectl is your Swiss Army knife. It’s the primary CLI tool for communicating with your cluster. It allows you to deploy pods, debug services, scale workloads, and manage virtually every aspect of your cluster.
But the truth is, kubectl can be intimidating at first. The syntax is long, the flags are too numerous to count, and even basic tasks seem to be buried under layers of abstraction.
That’s why this guide exists.
In this article, we’re not going to throw all the obscure commands at you. Instead, we’re going to introduce you to 20 kubectl commands that are the backbone of actually using Kubernetes. Whether you’re deploying your first microservice or troubleshooting a stuck Pod, these are the tools you use every day.
More than just a reference, this is a practical toolkit to make you faster, smarter, and more confident with Kubernetes.
So fire up your terminal and let’s get started using these commands.
Prerequisites
- A running Kubernetes cluster. You can use minikube, k3s or kind to spin up a local Kubernetes cluster.
- (Optional) If your Kubernetes cluster doesn’t have any applications or services running, you can deploy this YAML manifest first and then work with all of these commands.
---
apiVersion: apps/v1
kind: Deployment
metadata:
  name: nginx-deployment
spec:
  replicas: 1
  selector:
    matchLabels:
      app: nginx
  template:
    metadata:
      labels:
        app: nginx
    spec:
      containers:
      - name: nginx
        image: nginx
        ports:
        - containerPort: 80
---
apiVersion: apps/v1
kind: Deployment
metadata:
  name: apache-deployment
spec:
  replicas: 1
  selector:
    matchLabels:
      app: apache
  template:
    metadata:
      labels:
        app: apache
    spec:
      containers:
      - name: apache
        image: httpd
        ports:
        - containerPort: 80
---
apiVersion: apps/v1
kind: Deployment
metadata:
  name: redis-deployment
spec:
  replicas: 1
  selector:
    matchLabels:
      app: redis
  template:
    metadata:
      labels:
        app: redis
    spec:
      containers:
      - name: redis
        image: redis
        ports:
        - containerPort: 6379
---
apiVersion: apps/v1
kind: Deployment
metadata:
  name: mysql-deployment
spec:
  replicas: 1
  selector:
    matchLabels:
      app: mysql
  template:
    metadata:
      labels:
        app: mysql
    spec:
      containers:
      - name: mysql
        image: mysql
        env:
        - name: MYSQL_ROOT_PASSWORD
          value: rootpassword
        ports:
        - containerPort: 3306
---
apiVersion: apps/v1
kind: Deployment
metadata:
  name: hello-deployment
spec:
  replicas: 1
  selector:
    matchLabels:
      app: hello
  template:
    metadata:
      labels:
        app: hello
    spec:
      containers:
      - name: hello
        image: hashicorp/http-echo
        args:
        - "-text=Hello from K3s!"
        ports:
        - containerPort: 5678
1) kubectl get
The kubectl get command is one of the most commonly used tools in the Kubernetes CLI toolkit. Its core function is to retrieve and display information about Kubernetes resources such as Pods, Services, Deployments, Nodes, etc.
kubectl get pods: List all pods in the current namespace.
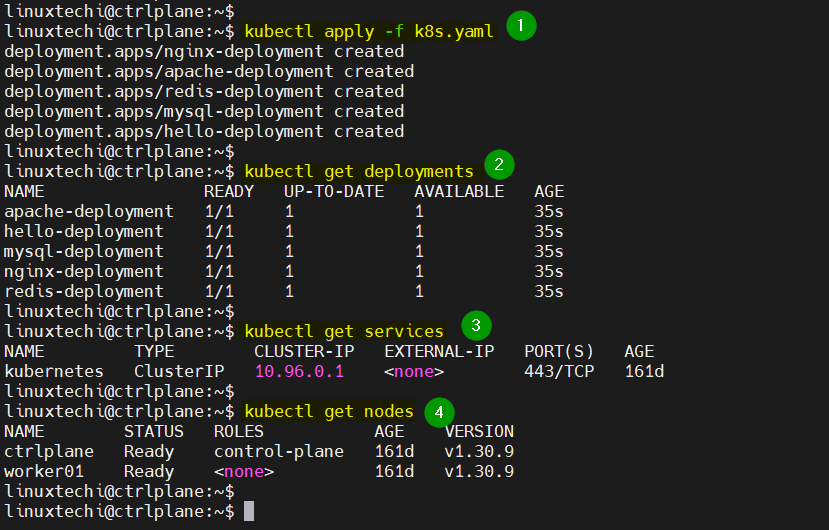
kubectl get deployments: List all deployments.
kubectl get services: List all services.
kubectl get nodes: List all nodes in the cluster.
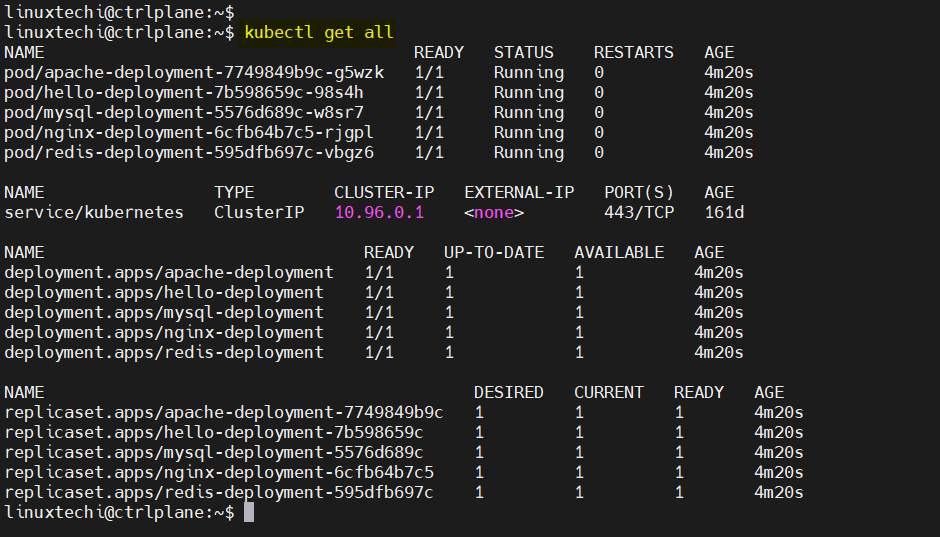
kubectl get all: Get all common resources (pods, deployments, services, replicasets) in the current namespace.
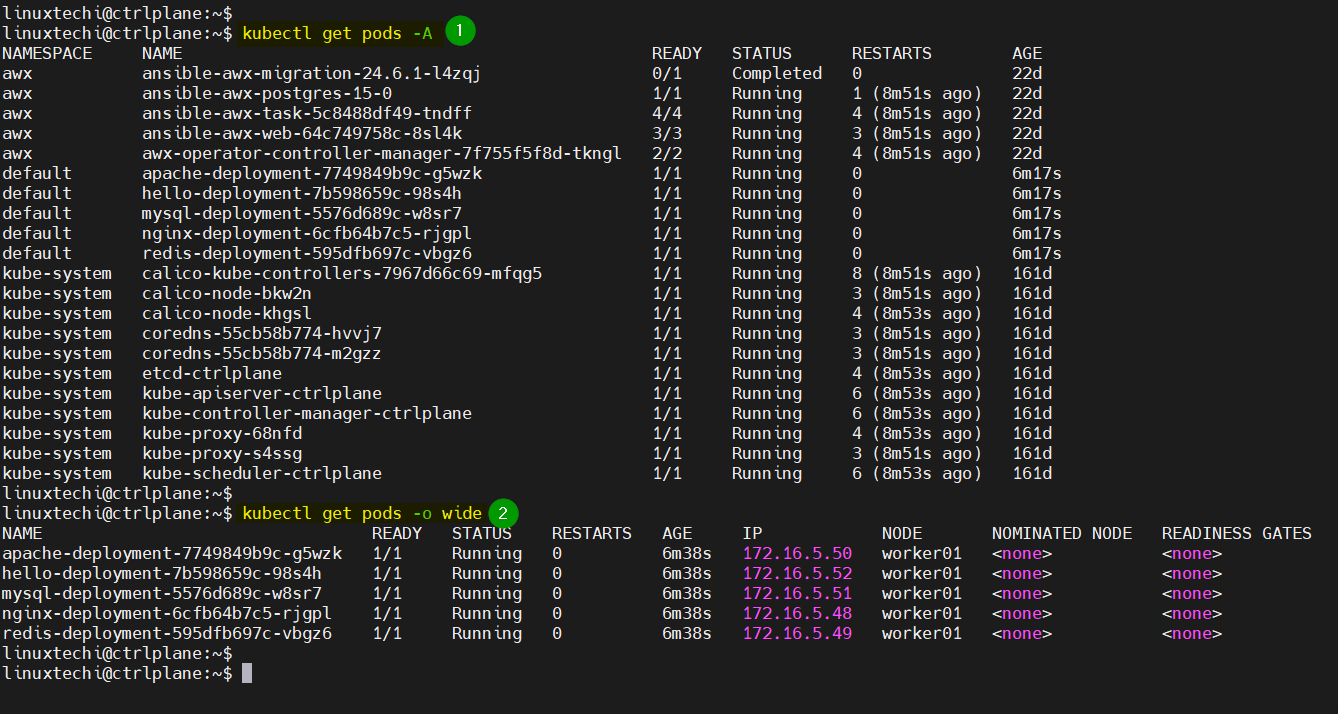
kubectl get pods -A or kubectl get pods –all-namespaces: List pods across all namespaces.
kubectl get pods -o wide: Get more detailed output for pods, including node IP and internal IP.
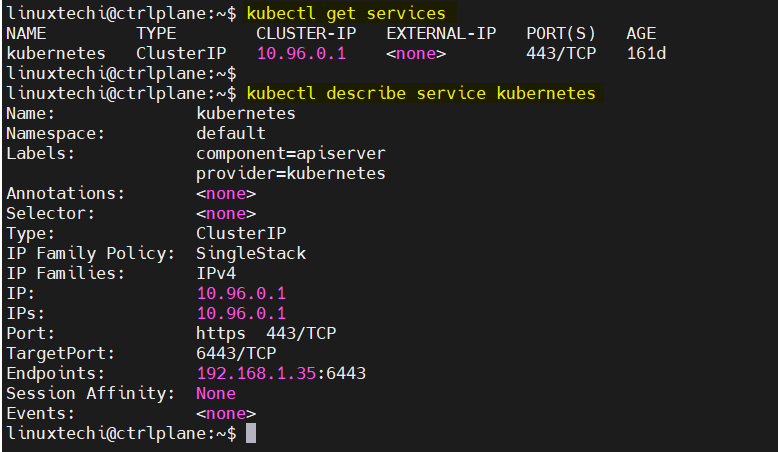
2) kubectl describe <resource_type> <resource_name>
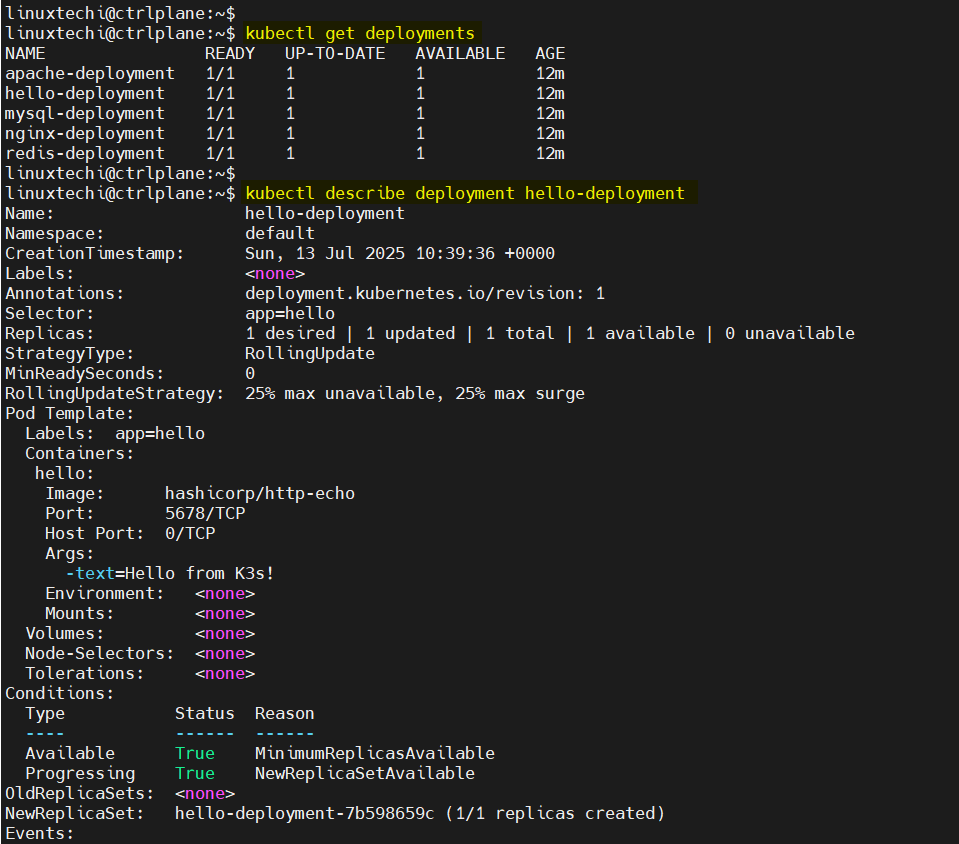
While kubectl get provides a high-level snapshot of a Kubernetes resource, kubectl describe takes you behind the scenes. It provides details about the current state of the resource, including events, status, container specifications, mounted volumes, network details, and more.
You will often use kubectl describe in situations where something is wrong, such as when a Pod is CrashLoopBackOff, Pending, or ImagePullBackOff.
kubectl describe pod <pod-name>

kubectl describe deployment <deployment-name>
kubectl describe service <service-name>
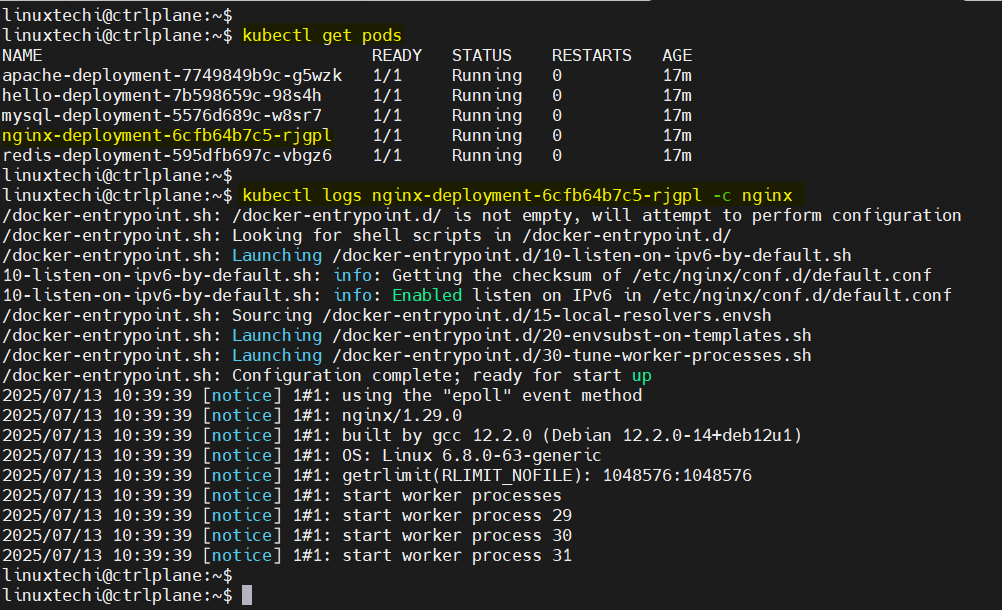
3) kubectl logs <pod-name>
The kubectl logs <pod-name> is your go-to command when troubleshooting pod behavior, especially at the application level. Whether it’s a stack trace, a failed database connection, or a lost environment variable, logs often provide the fastest clue as to what’s going on inside your container.
kubectl logs <pod-name> -c <container-name>
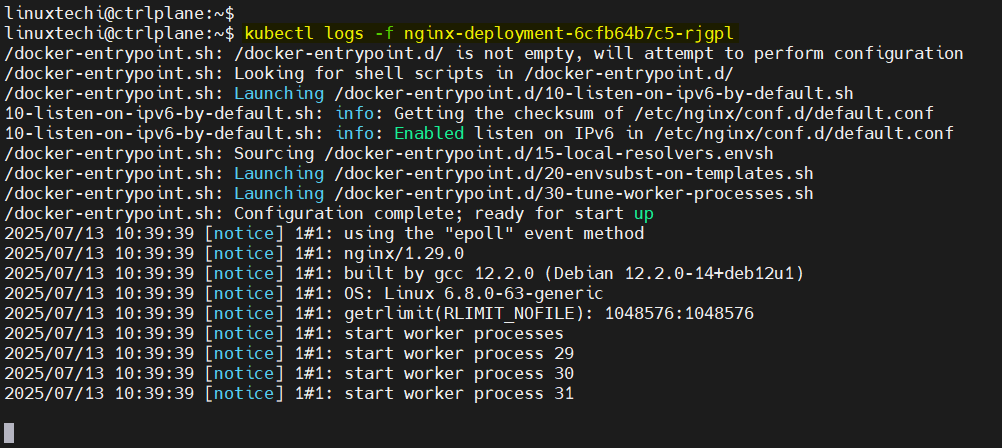
You can also stream logs in real time by adding the -f (follow) flag:
kubectl logs -f <pod-name>
4) kubectl exec -it <pod-name>
Sometimes it’s not enough to just log it, you need to get inside the container and see what’s really going on. That’s where kubectl exec comes in. This command lets you run any command inside a running pod, effectively giving you shell-level access to the container’s environment.
kubectl exec -it <pod-name> -c <container-name> -- /bin/bash
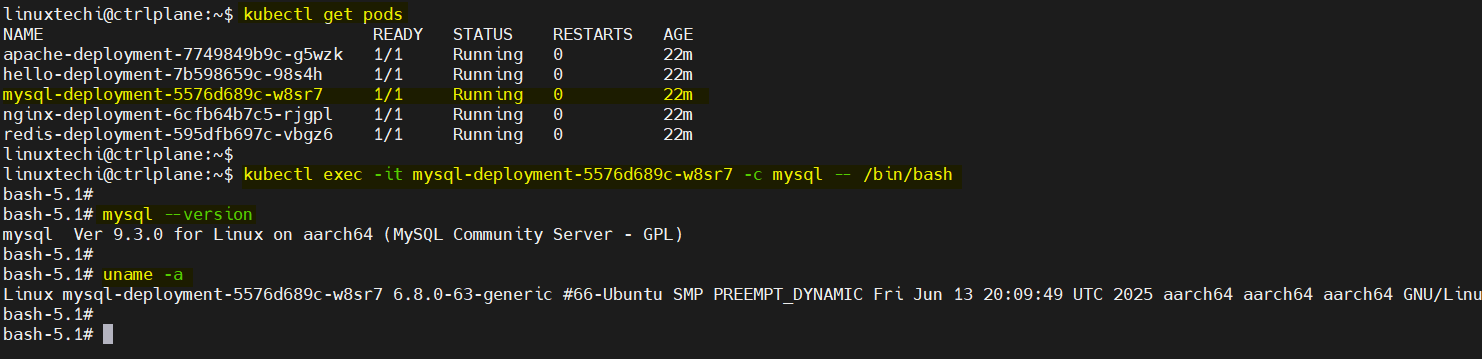
If the container doesn’t have Bash, try /bin/sh instead.
5) kubectl apply -f <file.yaml>
It reads a manifest file written in YAML or JSON and applies the defined configuration to the cluster. kubectl create fails if the resource already exists, unlike apply, which creates the resource if it doesn’t exist or patches it if it already exists, making it ideal for iterative development and GitOps workflows.
kubectl apply -f k8s.yaml
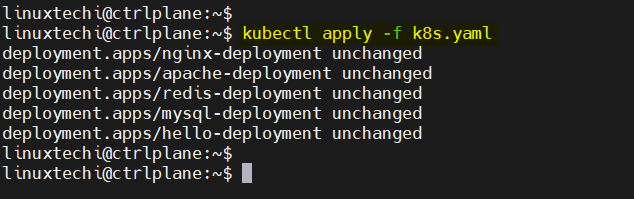
This command will create or update the deployment as defined in your k8s.yaml file. You can also apply directories of files:
kubectl apply -f ./k8s/
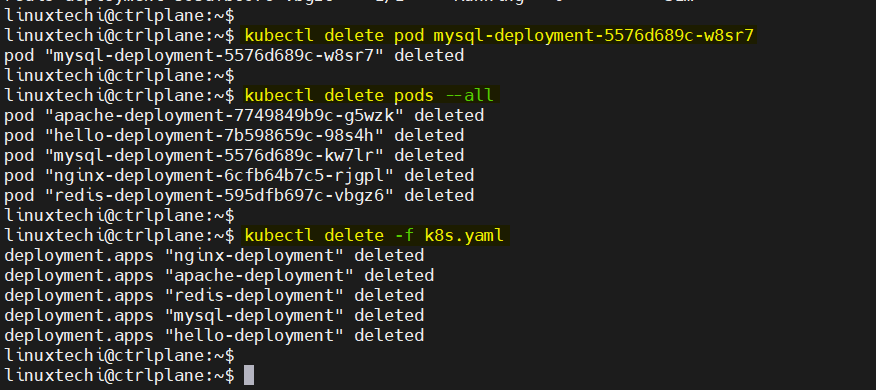
6) kubectl delete resource
When it’s time to clean up or remove resources from your cluster, kubectl delete is the command to reach for. It lets you explicitly delete any Kubernetes object by specifying its type and name:
kubectl delete pod <pod name>
You can also delete resources defined in YAML files with:
kubectl delete pods --all
kubectl delete -f k8s.yaml
7) kubectl port-forward
Sometimes you need to interact with a service or application running in a cluster that is not open to the public. This is where the kubectl port-forward comes in handy. It allows you to forward a local port to a specific pod or service within the cluster, allowing you to access it directly without having to expose it through a NodePort or LoadBalancer.
kubectl port-forward my-pod 8080:80
kubectl port-forward svc/my-service 9090:80
This means you can open http://localhost:8080 in your browser or send API requests to it, and they will be forwarded to port 80 inside the my-pod container. It’s especially useful for debugging internal microservices, accessing admin UIs, or testing APIs that are only available within the cluster.
8) kubectl scale deployment
When you need to quickly adjust the number of running pods in a deployment, kubectl scale is the command that gets the job done. It allows you to manually adjust the number of replicas in a deployment, ReplicaSet, or StatefulSet without modifying the YAML file.
kubectl scale deployment <deployment name> --replicas=5
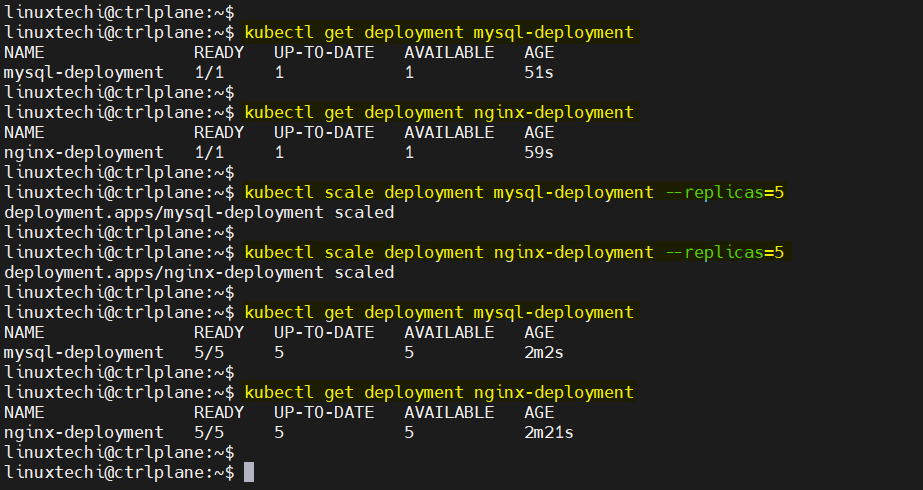
This directive instructs the Kubernetes controller to ensure that the five Pod entities for the Web-app deployment are running.
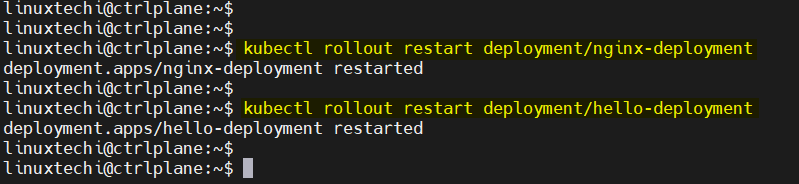
9) kubectl rollout restart deployment
This is especially useful when you’ve made changes to external resources like ConfigMaps or Secrets (which don’t automatically trigger rollouts).
kubectl rollout restart deployment/nginx-deployment
10) kubectl cluster-info
Before entering a workload or debugging, it is often helpful to verify that your CLI is connected to the correct Kubernetes cluster and that the control plane components are responding. This is what kubectl cluster-info is designed to do.
This directive displays basic but important information about the current cluster context, including the URL of the Kubernetes API server, as well as the URLs of key services such as DNS and dashboards (if deployed).
kubectl cluster-info

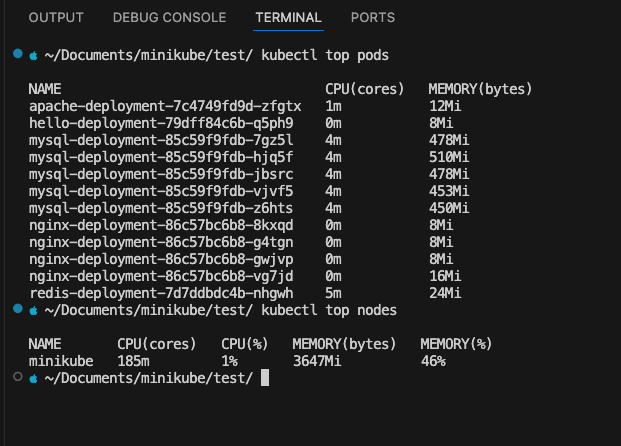
11) kubectl top pods
When performance is an issue, or you just want to monitor resource usage across your entire workload, kubectl top is the fastest way to get real-time CPU and memory statistics.
kubectl top pods
kubectl top nodes
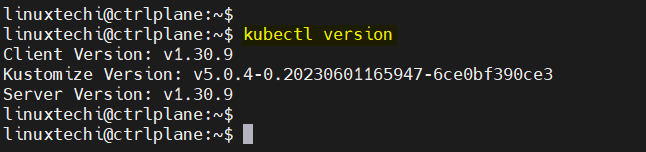
12) kubectl version
Knowing the version of kubectl and the Kubernetes cluster is important to ensure compatibility, especially when troubleshooting issues, using version-specific functionality, or following up on API changes. The kubectl version directive provides both client and server versions:
kubectl version
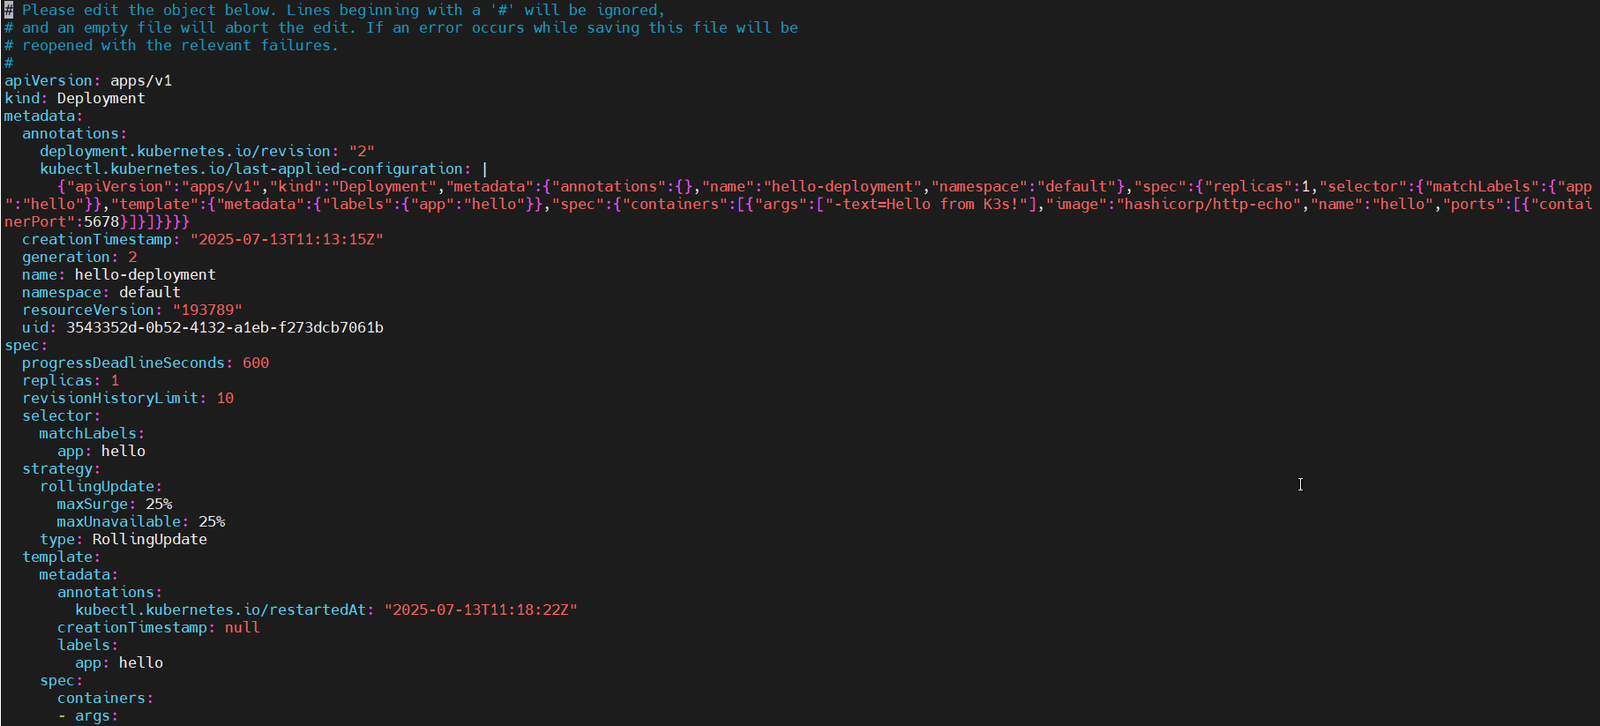
13) kubectl edit <resource_type>/<resource_name>
When you need to make a quick change to a live Kubernetes resource without going through your YAML files or CI pipeline, kubectl edit is your best friend. This command opens the resource definition directly in your default text editor (like vi or nano), allowing you to make on-the-fly modifications.
kubectl edit deployment/hello-deployment
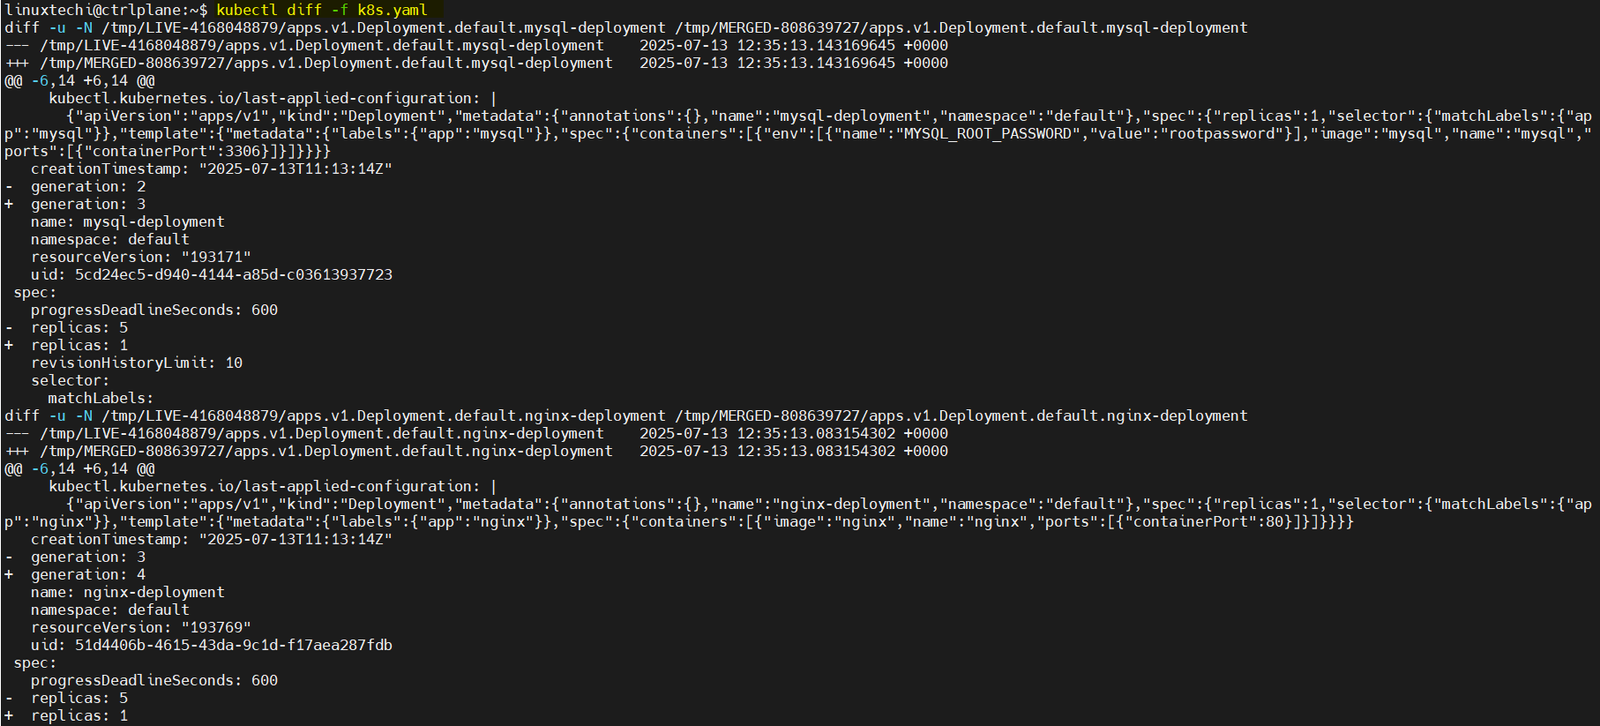
14) kubectl diff
The command shows a line-by-line comparison between your local manifest and the current state of the resource in the cluster:
kubectl diff -f k8s.yaml
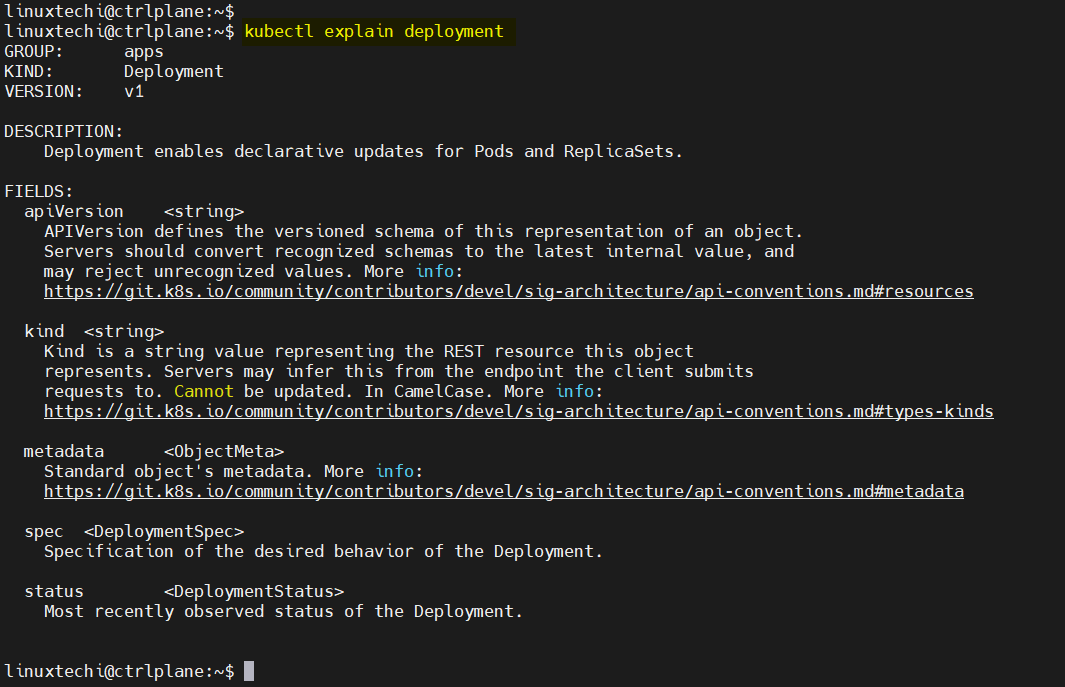
15) kubectl explain
When you are writing or reviewing a Kubernetes manifest and need to know exactly what a field does, kubectl explain is your built-in documentation tool. It allows you to query the structure and description of any Kubernetes resource or field directly from the CLI.
This shows a high-level overview of the Deployment resource.
kubectl explain deployment
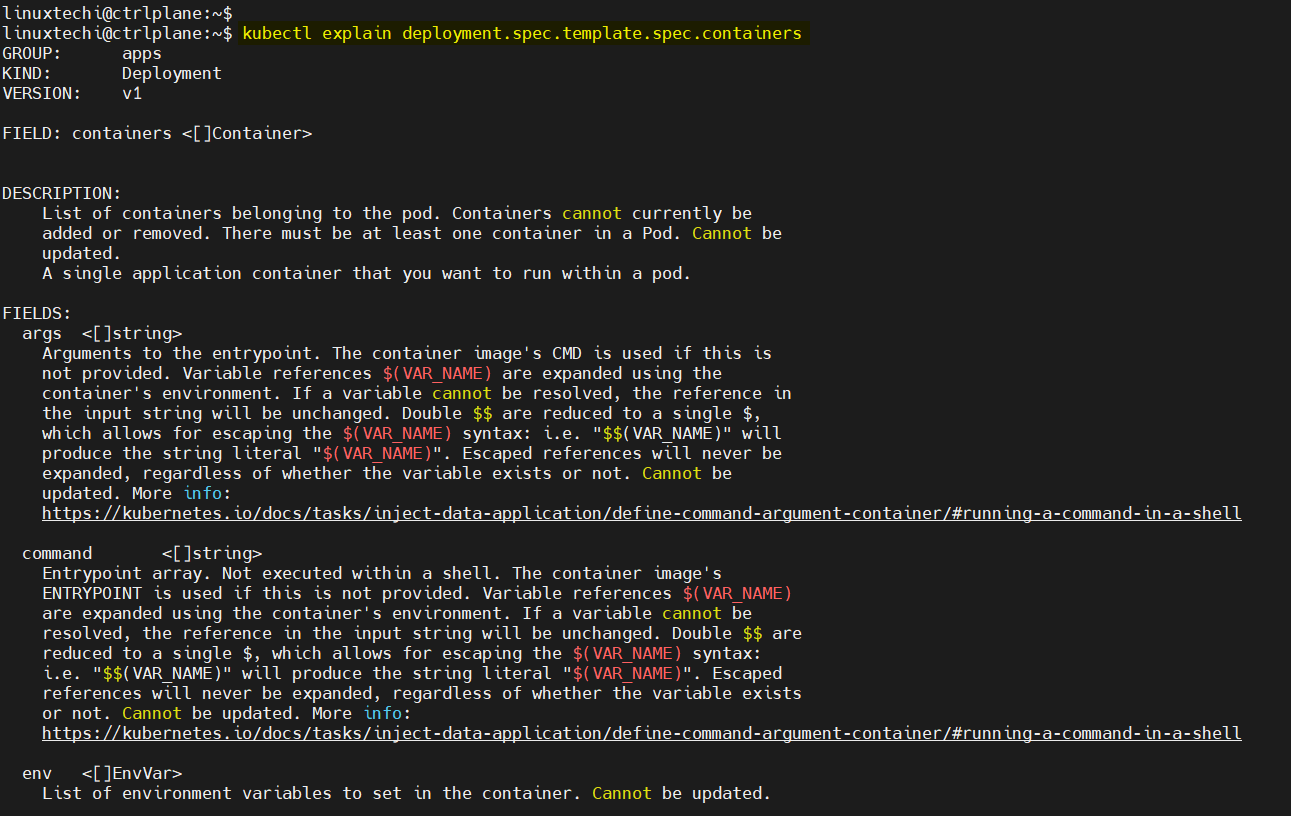
This reveals the purpose, type, and structure of the containers field within a Deployment’s Pod template.
kubectl explain deployment.spec.template.spec.containers
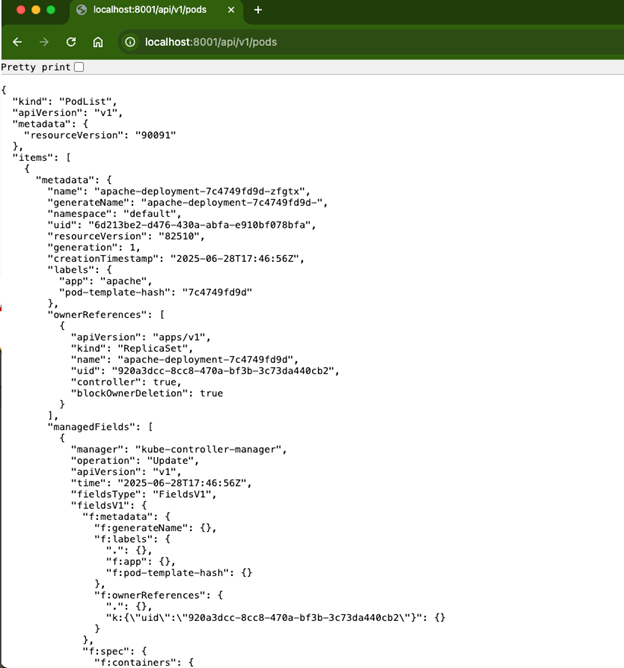
16) kubectl proxy
This allows you to access the Kubernetes API directly from your local machine, typically used for developing or testing custom tools.
kubectl proxy --port=8001

Then navigate to http://localhost:8001/api/v1/pods in your browser.
17) kubectl autoscale deployment
With this command, Kubernetes can dynamically adjust the number of replicas to meet workload demands without manual intervention.
kubectl autoscale deployment web-api --min=2 --max=10 --cpu-percent=70
This sets up an autoscaler that maintains between 2 and 10 pods, trying to keep the average CPU usage per pod around 70%.
Kubernetes continuously monitors pod metrics (via Metrics Server) and increases the number of replicas if utilization exceeds a threshold, or scales down if utilization drops. This command creates an HPA resource under the hood that you can use later to check in.
kubectl get hpa

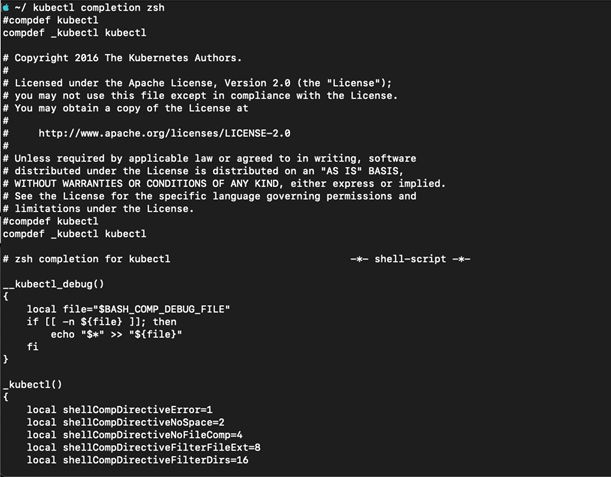
18) kubectl completion
Generate shell completion scripts for your chosen shell (e.g., bash, zsh, fish). This greatly enhances productivity by allowing tab-completion for kubectl commands and resources.
kubectl completion bash >> .kubectl_completion
kubectl completion zsh >> .kubectl_completion
You need to source the .kubectl_completion file in your .bashrc or .zshrc file.
source ~/.kubectl_completion
With zsh, you might receive error like the compdef not defined function. To resolve this, add these two lines to top of your ~/.kubectl_completion file:
autoload -Uz compinit
compinit
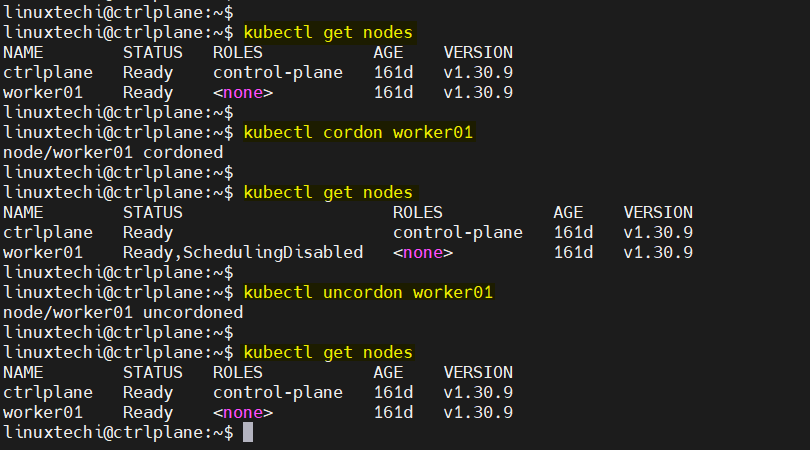
19) kubectl cordon/uncordon <node-name>
cordon simply marks a node as unschedulable. New pods won’t land on it, but existing pods remain. uncordon reverses this.
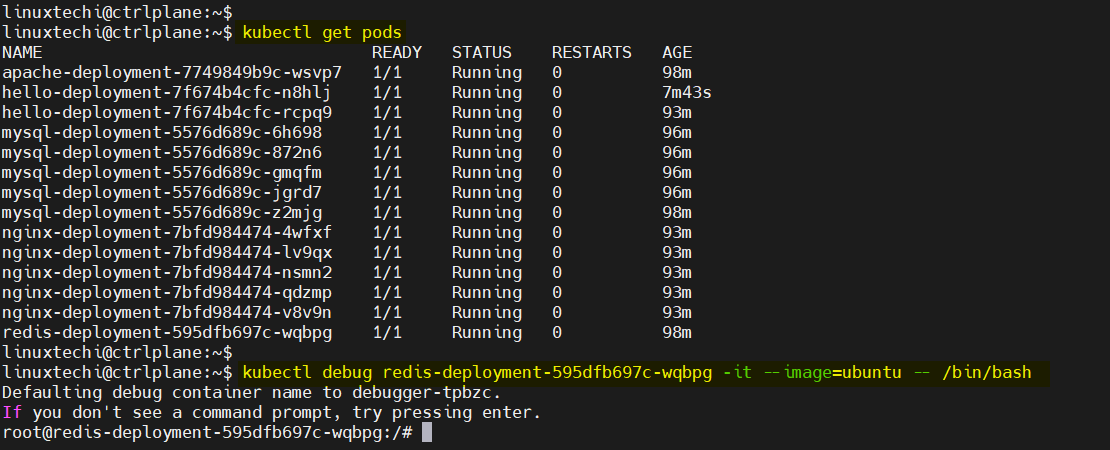
20) kubectl debug
This command was introduced in Kubernetes 1.18 and allows you to create an ephemeral container in a running pod.
kubectl debug <pod-name> -it --image=ubuntu -- /bin/bash
Attach a debug container with an ubuntu image to my-pod and get a bash shell. Example is shown below:
kubectl debug redis-deployment-595dfb697c-wqbpg -it --image=ubuntu -- /bin/bash
Conclusion
Whether you’re launching a new workload, debugging a crashed pod, or managing nodes like a pro, these commands will soon become second nature to you.
But remember, the real power comes from combining these commands into workflows that fit into your development, DevOps, or SRE day-to-day work. So don’t stop there – try, break, fix, and keep growing.
If this guide was helpful to you, please share it with cloud-native enthusiasts. Have a favorite kubectl trick or command we missed? Leave it in the comments, we’d love to hear from you!