In this post, we will explain how install MySQL database server on RHEL 9 or Rocky Linux 9. We will cover installation steps of both MySQL 8.0 and latest version of MySQL 8.3.0.
MySQL is a popular open-source relational database management system (RDBMS) developed and maintained by Oracle Corporation. It provides SQL ( Structured Query Language ) syntax and is used in both small and large-scale enterprises to handle databases.
Prerequisites
- Pre-Install RHEL 9 or Rocky Linux 9 system
- RHEL 9 Subscription or Local Yum Repository
- Sudo User with admin rights
- Internet Connectivity
Without any further delay, lets quickly jump into installation steps of MySQL.
1. Install MySQL on RHEL 9 / Rocky Linux 9
On RHEL 9 / Rocky 9, MySQL version 8 is available from the Appstream repository. Before installing the MySQL database server, first, be sure to update the system. Therefore, log into your server and update the system packages to their current versions:
$ sudo dnf update
Once updated, proceed and install the mysql-server package as follows.
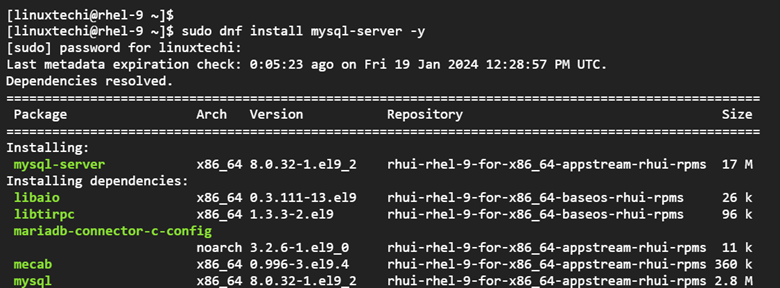
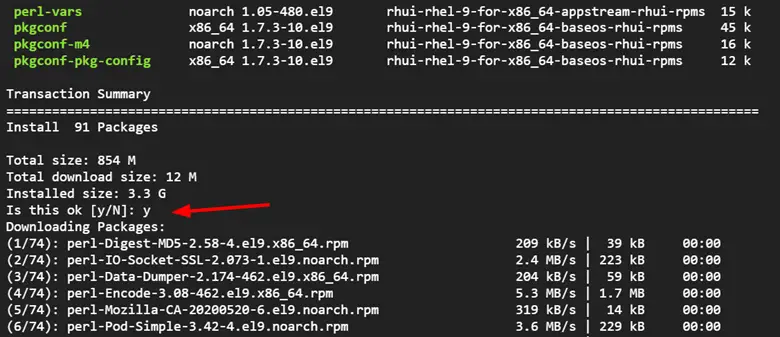
$ sudo dnf install mysql-server -y
The command installs the MySQL database server alongside other dependencies, as shown below.
Once installed, you can check the version installed by running the following command:
$ mysql --version

The output above confirms that we have successfully installed MySQL version 8.0.
For MySQL 8.3.0
To install MySQL 8.3.0, follow the steps outlined.
To install the latest MySQL version, you need to download the RPM bundle. This comes as a compressed file that includes all the MySQL files required for the installation of MySQL. So, head over to the MySQL Community Downloads page and select version 8.3 as shown.
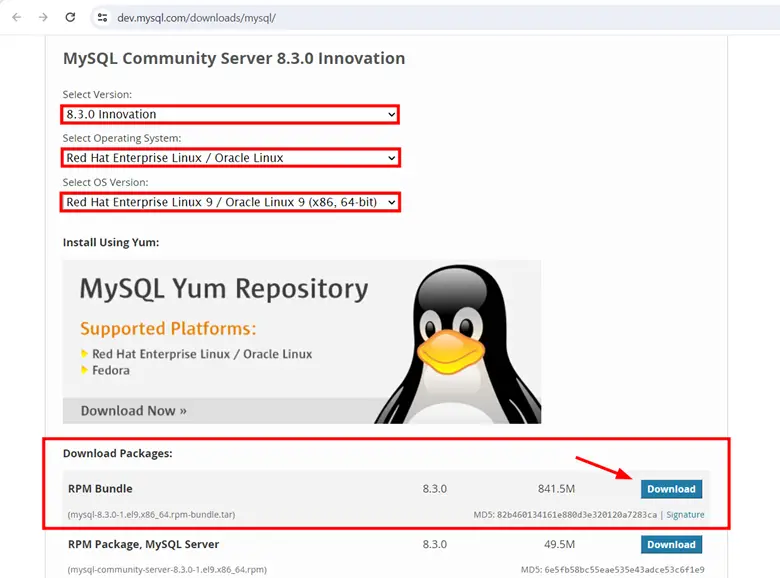
Be sure to click `Download` on the first option which will download the MySQL bundle in a tarball format. This leads you to the login page where you will be expected to log in to your Oracle account.
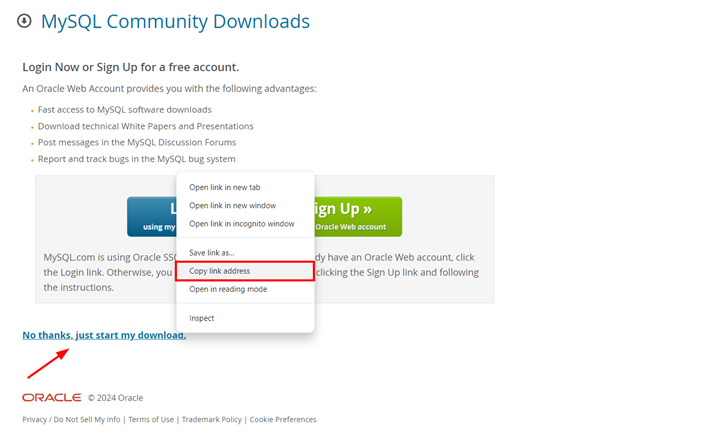
Instead of logging in, simply right-click on the `No thanks, just start my Download` and click `copy link address`.
On your terminal, use the wget command to download the RPM bundle using the link you’ve copied.
$ wget https://dev.mysql.com/get/Downloads/MySQL-8.3/mysql-8.3.0-1.el9.x86_64.rpm-bundle.tar

Once downloaded, extract the tarball file using tar command.
$ tar -xvf mysql*.el9.x86_64.rpm-bundle.tar
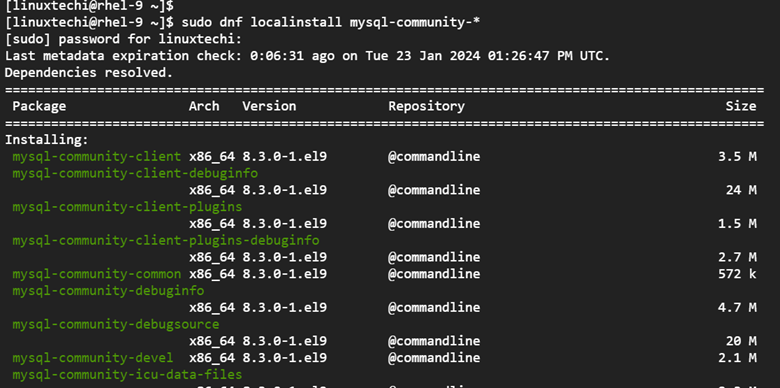
Next, run the command below to install MySQL 8.3
$ sudo dnf localinstall mysql-community-*
When prompted, press ‘Y’ to proceed with the installation.
To verify the installation, run the command:
$ mysql --version

Output above confirms that we have successfully installed MySQL 8.3
2. Start and Enable MySQL Server
At this point, MySQL is fully installed, but not yet running. To use MySQL, you need to start it as a systemd service with the following command:
$ sudo systemctl start mysqld.service
Once you have executed the command, you might want to confirm if the service is running as shown.
$ sudo systemctl status mysqld.service

From the output, you can see that the database server is up and running. Additionally, you might consider enabling the database server to start on boot using the following command:
$ sudo systemctl enable mysqld
So far, we have installed, started, and ensured that MySQL is running and set to auto-start upon boot. In the next step, we will harden the database server’s security using a pre-installed shell script.
3. Secure MySQL on RHEL 9 / Rocky Linux 9
The default MySQL security settings are not secure and pose potential flaws that an attacker can leverage to breach the database server. MySQL comes with the mysql_secure_installation security script that helps modify the default options and strengthen your database server.
To run the script, run the following command on your shell.
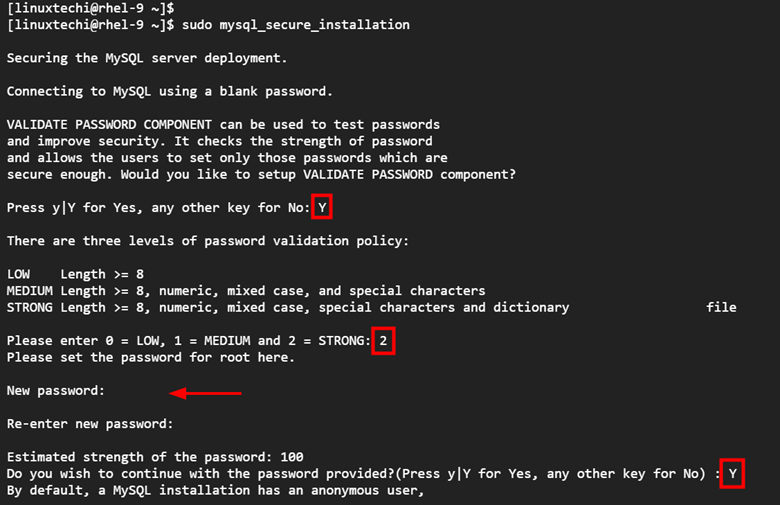
$ sudo mysql_secure_installation
The script walks you through a couple of prompts asking whether you want to make changes or not to the default MySQL installation’s security options.
First on the list, you will be required to configure the Validate Password Plugin. This lets you test desired MySQL password strength and improve security. The plugin checks the strength of the password and allows you to configure strong passwords.
So, press `Y` to use the VALIDATE PASSWORD component provided by the plugin.
Thereafter, you will be presented with three levels of password validation policies: `LOW`, `MEDIUM`, and `STRONG` each with their complexity levels. It’s highly recommended to select the `STRONG` level. This enforces the password to have a mix of numeric, mixed case, special characters, and dictionary.
So type `2` and hit ENTER.
Next, set your preferred password for the MySQL root user and confirm it. Following that, you will be asked if you wish to continue with the password you provided. Press `Y` and hit ENTER to continue.
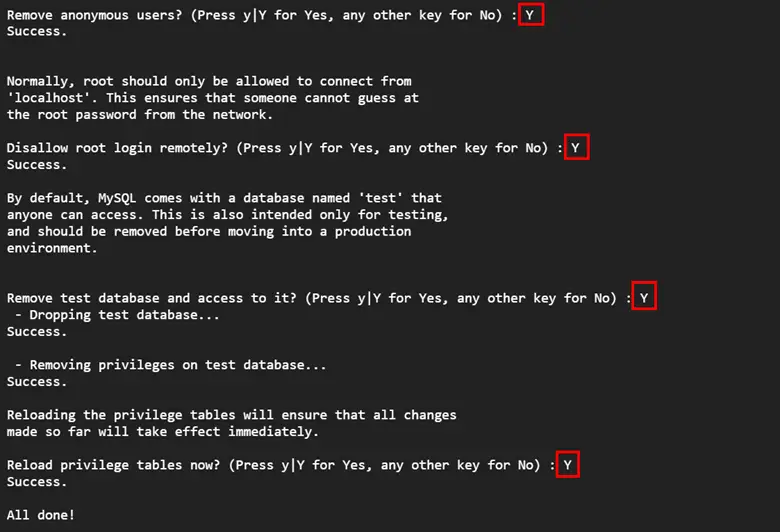
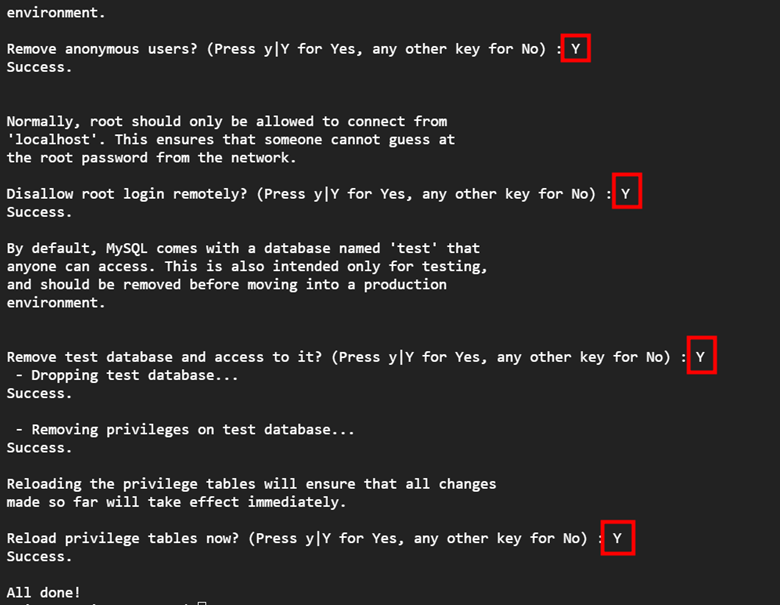
Thereafter, press `Y` and hit ENTER for the remaining prompts to set the recommended security options. This removes anonymous users, disallows remote root login, removes the test database, and reloads the privilege tables to save the changes made.
For MySQL 8.3
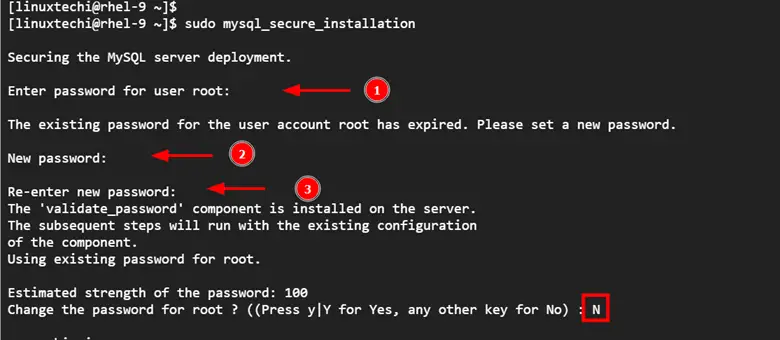
Securing the database server with MySQL 8.3 is slightly different. The root account usually comes with a temporary password assigned to it. You can retrieve it from the MySQL log file as follows.
$ sudo grep 'A temporary password is generated' /var/log/mysqld.log | tail -1
The password will be displayed as shown. Copy and paste it somewhere.

Now run the mysql_secure_installation security script. When prompted for the user root, type in the password you copied from earlier on. Next, set a new password by providing your preferred password and confirming it. The script will indicate the password strength, in this case, 100. If you feel the name to set a different password, type `Y`. For our case, we are satisfied, and hence we’ll type `N` and hit ENTER.
As seen before, press `Y` and hit ENTER for the remaining prompts to set the recommended security options.
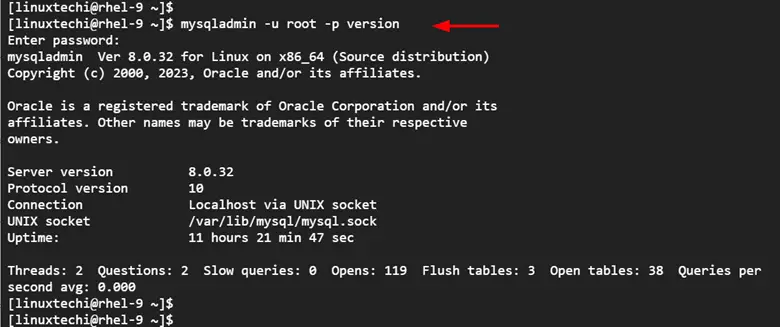
Your MySQL database server is now configured to use the recommended default security options. To derive more information about the database server, use the mysqladmin client tool as shown.
$ mysqladmin -u root -p version
The command provides system-wide information about the database including the server version, protocol version, connection type, uptime, and some query statistics.
In our next step, we will log in to the database server.
4. Access MySQL Database Server
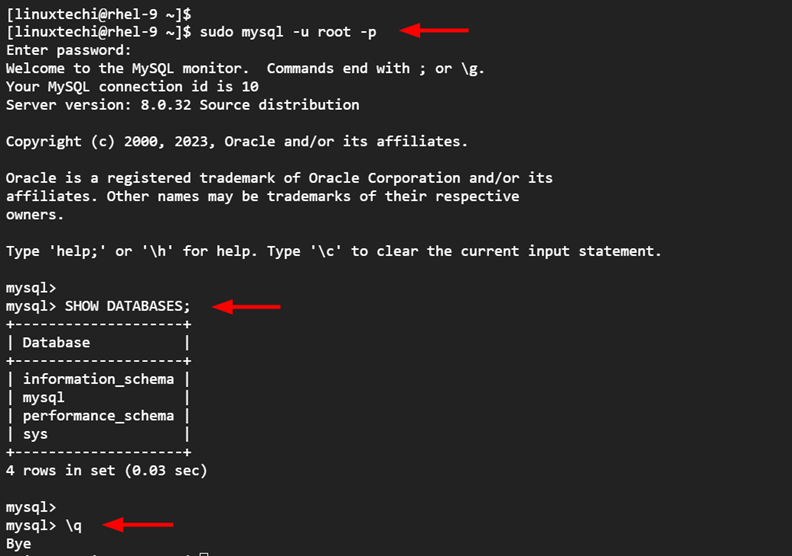
To log in to the MySQL server, run the following command as sudo user. The -u option specifies the user logging in, in this case, the root user, while the -p option prompts for the password.
$ sudo mysql -u root -p
Provide the MySQL root user’s password and hit ENTER. Immediately you will land on the MySQL prompt as shown below. Following that, you can now start running SQL queries. For example, to display existing databases, run the query:
SHOW DATABASES;
Once you are done running your queries, exit by running the `\q` query.
\q
Conclusion
In this post, we have walked you through the installation of MySQL server and further demonstrated how to secure mysql database installation and create a database. Feel free to post your queries and feedback in below comments section.