In this guide, we will walk you step-by-step on how you can install a Kubernetes (k8s) cluster on RHEL 8. We will demonstrate this using one Master and one worker node which we will add to our cluster.
Also known as k8s, Kubernetes is an opensource, and portable container orchestration platform for automating the deployment and management of containerized applications. Kubernetes was originally created by Google in the Go programming language. Currently, it is maintained by Cloud Native Computing Foundation.
Lab setup
- Master node: master-node-k8 192.168.1.130
- Worker node: worker-node-1-k8 192.168.1.140
NOTE: Steps 1 to 6 should be applied to both the Master and the worker node.
Step 1) Disable swap space
For best performance, Kubernetes requires that swap is disabled on the host system. This is because memory swapping can significantly lead to instability and performance degradation.
To disable swap space, run the command:
$ sudo swapoff -a
To make the changes persistent, run
$ sudo sed -i '/ swap / s/^\(.*\)$/#\1/g' /etc/fstab
Step 2) Disable SELinux
Additionally, we need to disable SELinux and set it to ‘permissive’ in order to allow smooth communication between the nodes and the pods.
To achieve this, open the SELinux configuration file.
$ sudo vi /etc/selinux/config
Change the SELINUX value from enforcing to permissive.
SELINUX=permissive
Alternatively, you use the sed command as follows.
$ sudo sed -i 's/^SELINUX=enforcing$/SELINUX=permissive/' /etc/selinux/config
Step 3) Configure networking in master and worker node
Some additional network configuration is required for your master and worker nodes to communicate effectively. On each node, edit the /etc/hosts file.
$ sudo vi /etc/hosts
Next, update the entries as shown
192.168.1.130 master-node-k8
192.168.1.140 worker-node-1-k8
Save and exit the configuration file. Next, install the traffic control utility package:
$ sudo dnf install -y iproute-tc
Step 4) Allow firewall rules for k8s
For seamless communication between the Master and worker node, you need to configure the firewall and allow some pertinent ports and services as outlined below.
On Master node, allow following ports,
$ sudo firewall-cmd --permanent --add-port=6443/tcp
$ sudo firewall-cmd --permanent --add-port=2379-2380/tcp
$ sudo firewall-cmd --permanent --add-port=10250/tcp
$ sudo firewall-cmd --permanent --add-port=10251/tcp
$ sudo firewall-cmd --permanent --add-port=10252/tcp
$ sudo firewall-cmd --reload
On Worker node, allow following ports,
$ sudo firewall-cmd --permanent --add-port=10250/tcp
$ sudo firewall-cmd --permanent --add-port=30000-32767/tcp
$ sudo firewall-cmd --reload
Step 5) Install CRI-O container runtime
Kubernetes requires a container runtime for pods to run. Kubernetes 1.23 and later versions require that you install a container runtime that confirms with the Container Runtime Interface.
A Container Runtime is an application that supports running containers. Kubernetes supports the following Container Runtime:
- Containerd
- CRI-O
- Docker Engine
- Mirantis Container Runtime
In this guide, we will install CRI-O which is a high-level container runtime. To do so, we need to enable two crucial kernel modules – overlay and br_netfilter modules.
To achieve this, we need to configure the prerequisites as follows:
First, create a modules configuration file for Kubernetes.
$ sudo vi /etc/modules-load.d/k8s.conf
Add these lines and save the changes
overlay
br_netfilter
Then load both modules using the modprobe command.
$ sudo modprobe overlay
$ sudo modprobe br_netfilter
Next, configure the required sysctl parameters as follows
$ sudo vi /etc/sysctl.d/k8s.conf
Add the following lines:
net.bridge.bridge-nf-call-iptables  = 1
net.ipv4.ip_forward                 = 1
net.bridge.bridge-nf-call-ip6tables = 1
Save the changes and exit. To confirm the changes have been applied, run the command:
$ sudo sysctl --system
To install CRI-O, set the $CRIO_VERSION environment variable to match your CRI-O version. For instance, to install CRI-O version 1.30 set the $CRIO_VERSION as shown:
$ export CRIO_VERSION=v1.30
Next, run the following command to add crio repository.
$ cat <<EOF | sudo tee /etc/yum.repos.d/cri-o.repo
[cri-o]
name=CRI-O
baseurl=https://pkgs.k8s.io/addons:/cri-o:/stable:/$CRIO_VERSION/rpm/
enabled=1
gpgcheck=1
gpgkey=https://pkgs.k8s.io/addons:/cri-o:/stable:/$CRIO_VERSION/rpm/repodata/repomd.xml.key
EOF
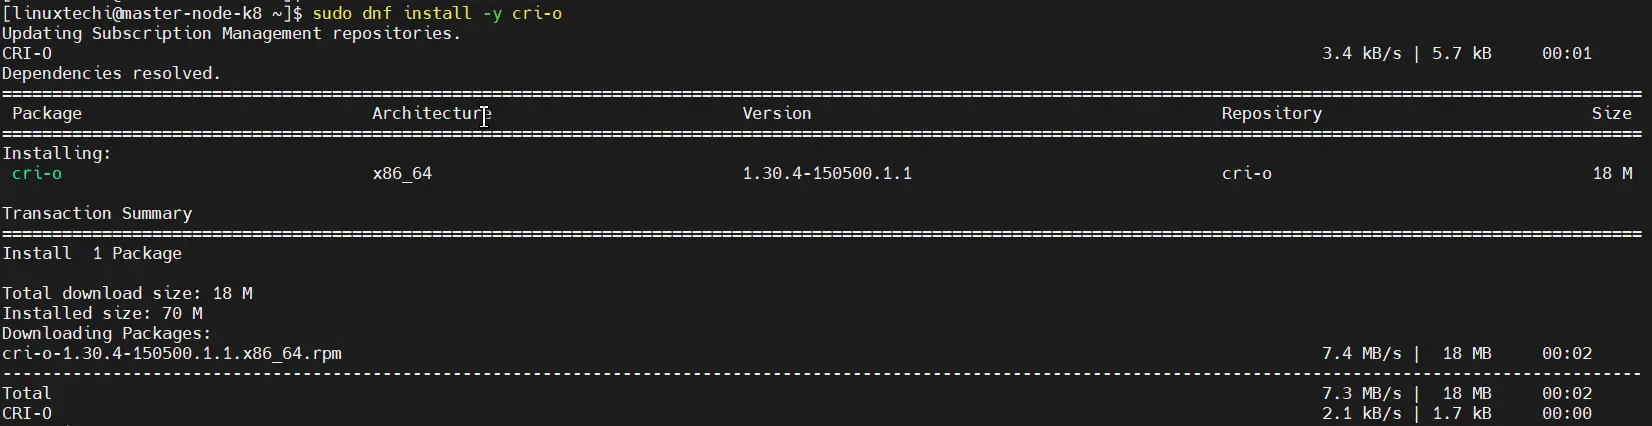
Then use the DNF package manager to install CRI-O:
$ sudo dnf install -y cri-o
Next, enable CRI-O on boot time and start it:
$ sudo systemctl enable crio
$ sudo systemctl start crio
Step 6) Install Kubernetes Packages
With everything required for Kubernetes to work installed, let us go ahead and install Kubernetes packages like kubelet, kubeadm and kubectl.
Set the Kubernetes version variable as shown below:
$ KUBERNETES_VERSION=v1.30
Next, create a Kubernetes repository file.
$ cat <<EOF | sudo tee /etc/yum.repos.d/kubernetes.repo
[kubernetes]
name=Kubernetes
baseurl=https://pkgs.k8s.io/core:/stable:/$KUBERNETES_VERSION/rpm/
enabled=1
gpgcheck=1
gpgkey=https://pkgs.k8s.io/core:/stable:/$KUBERNETES_VERSION/rpm/repodata/repomd.xml.key
EOF
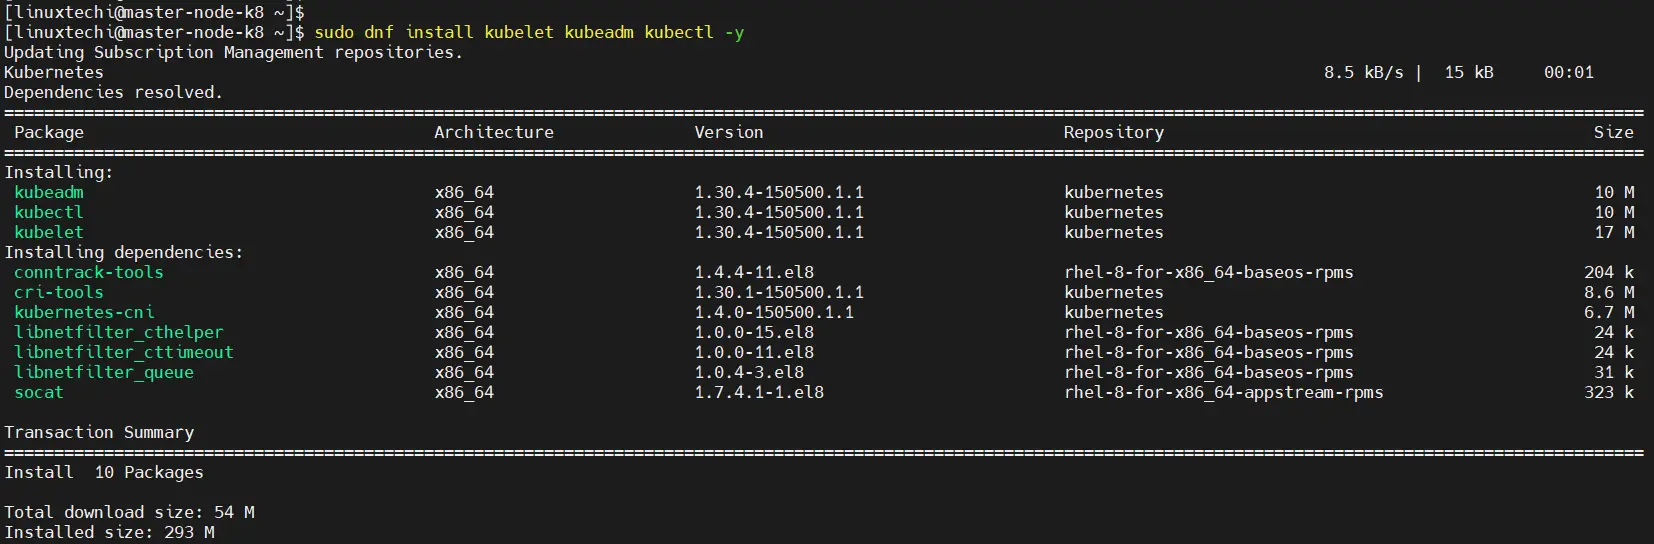
Save the changes and exit. Finally, install k8s package as follows. At time of writing this guide, Kubernetes version 1.30 is available.
$ sudo dnf install kubelet kubeadm kubectl -y
Once installed, be sure to enable and start Kubelet service.
$ sudo systemctl enable kubelet
$ sudo systemctl start kubelet
At this juncture, we are all set to install Kubernetes cluster.
Step 7) Create a Kubernetes cluster
We are going to initialize a Kubernetes cluster using the kubeadm command as follows. This initializes a control plane in the master node.
$ sudo kubeadm init --pod-network-cidr=192.168.10.0/16
Once the control plane is created, you will be required to carry out some additional commands to start using the cluster.
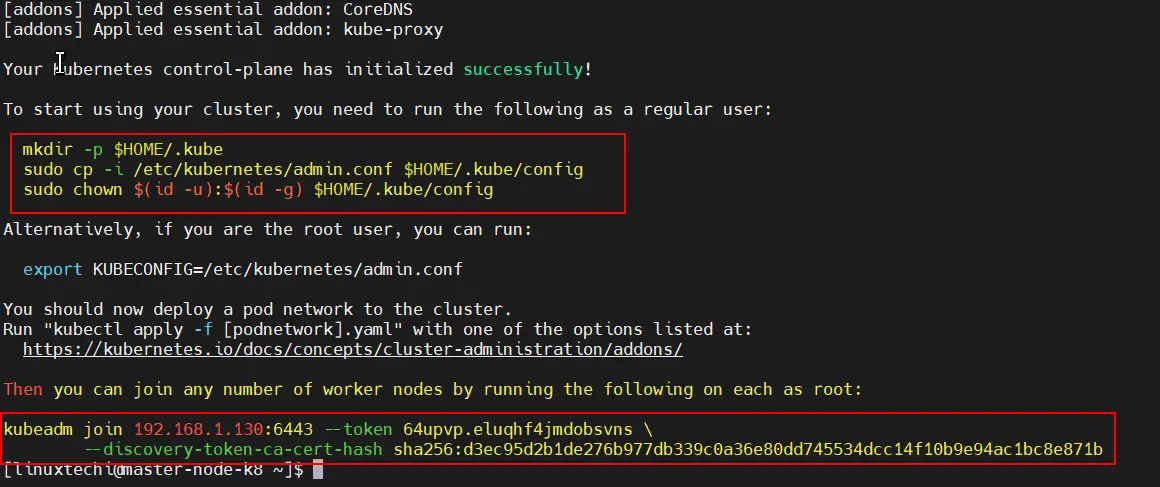
Therefore, run the commands, sequentially.
$ mkdir -p $HOME/.kube
$ sudo cp -i /etc/kubernetes/admin.conf $HOME/.kube/config
$ sudo chown $(id -u):$(id -g) $HOME/.kube/config
At the very end of the output, you will be given the command to run on worker nodes to join the cluster. We will come to that later in the next step.
Also, be sure to remove taints from the master node:
$ kubectl taint nodes --all node-role.kubernetes.io/master-
Step 8) Install Calico Pod Network Add-on
The next step is to install Calico CNI (Container Network Interface). It is an opensource project used to provide container networking and security. After Installing Calico CNI, nodes state will change to Ready state, DNS service inside the cluster would be functional and containers can start communicating with each other.
Calico provides scalability, high performance, and interoperability with existing Kubernetes workloads. It can be deployed on-premises and on popular cloud technologies such as Google Cloud, AWS and Azure.
To install Calico CNI, run the following command from the master node
$ kubectl apply -f https://raw.githubusercontent.com/projectcalico/calico/v3.28.0/manifests/calico.yaml
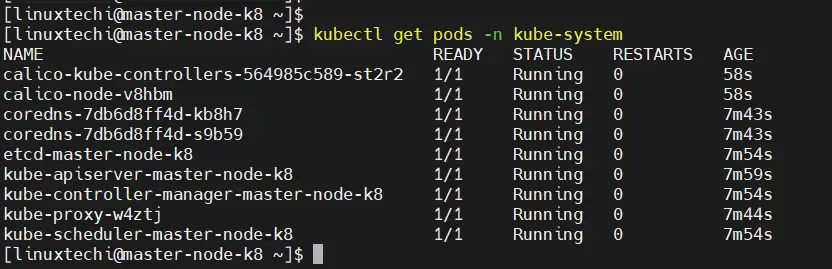
To confirm if the pods have started, run the command:
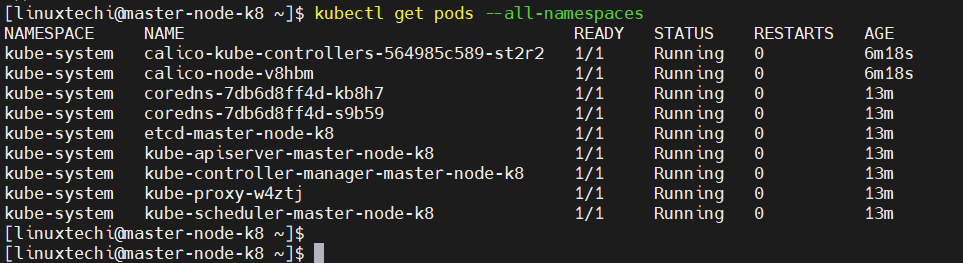
$ kubectl get pods -n kube-system
You should see that each pod is ‘READY’ and has the ‘RUNNING’ status as shown in the third column.
To verify the master node’s availability in the cluster, run the command:
$ kubectl get nodes
NAME           STATUS   ROLES            AGE    VERSION
master-node-k8 Ready    control-plane    9m56s  v1.30.4
$
In addition, you can retrieve more information using the -o wide options.
$ kubectl get nodes -o wide

The above output confirms that the master node is ready. Additionally, you can check the pod namespaces:
$ kubectl get pods --all-namespaces
Step 9) Adding worker node to the cluster
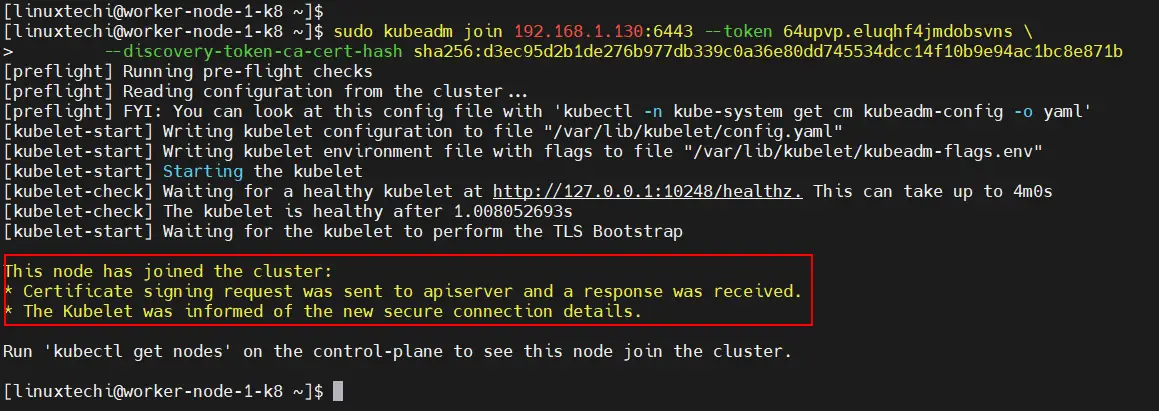
To add the worker node to the Kubernetes cluster, follow step 1 up until Step 6. Once you are done, run the command generated by the master node for joining a worker node to the cluster. In our case, this will be:
$ sudo kubeadm join 192.168.1.130:6443 --token 64upvp.eluqhf4jmdobsvns \
--discovery-token-ca-cert-hash sha256:d3ec95d2b1de276b977db339c0a36e80dd745534dcc14f10b9e94ac1bc8e871b
If all goes well, you should get the notification that the node has joined the cluster. Repeat the same procedure for other nodes in case you have multiple worker nodes
Now, head back to the master node and, once again, verify the nodes in your cluster. This time around, the worker node will appear in the list on nodes in the cluster,
$ kubectl get nodes

Conclusion
That was a walk through of how you can install a Kubernetes Cluster on RHEL 8. Your feedback on this guide is welcome.
Hi Getting below exception in cordns pod and calico-kube-controllers pod can any one suggest what is the is the solution:
coredns: exec /coredns: operation not permitted
calico-kube-controllers: exec /usr/bin/kube-controllers: permission denied
Thanks in advance !
This tutorial is awesome. Thanks alot
Hi Pradeep, you rock, I installed the k8s on rocky 9.1, it worked. Only thing to take care firewall-cmd does not come enabled. So u install first with sudo yum install firewalld
sudo systemctl enable firewalld –now. After which the step 4 can be executed. Since firewalld is not installed, same as can be skipped as well, as firewall in not installed and enabled. Else it was cakewalk…. Great… thanks a ton…
Great tutorial, after going through a lot of different documents this one help me to set up my kubernetes cluster. Thank you
Hi
we were able to setup the cluster with the above mentioned steps.
K8s :- V1.26.1
OS : – RHEL 8.7
VM is hosted using Azure cloud provider.
Core dns logs :-
CoreDNS-1.9.3
linux/amd64, go1.18.2, 45b0a11
[ERROR] plugin/errors: 2 2568389657905608835.8295431261288812352. HINFO: read udp 192.168.54.66:34391->168.63.129.16:53: read: no route to host
[ERROR] plugin/errors: 2 2568389657905608835.8295431261288812352. HINFO: read udp 192.168.54.66:34275->168.63.129.16:53: read: no route to host
[ERROR] plugin/errors: 2 2568389657905608835.8295431261288812352. HINFO: read udp 192.168.54.66:59435->168.63.129.16:53: read: no route to host
Unable to reach internet from inside the pod. nslookup fails while connecting to internet.
Do you have idea on this ?
Hi Parshva Shah,
We are facing the same issue in azure. Stuck in this for while . Did you resolve it?. We are also using azure
The installation went through well. But when I am doing `kubectl` sometimes it is getting connected and fetching details and sometimes or most of the time it is complaining `connection refused`
Excellent Documentation! Thanks!!
A few notes:
* I’ve struggled a bit to handle things behind a proxy and find a solution here – “https://jbn1233.medium.com/docker-cri-o-behind-http-proxy-4a5645a9ff7b”
Hello everyone, Now I am trying the same repository, but it has the following error…
Updating Subscription Management repositories.
Kubernetes 0.0 B/s | 0 B 02:04
Errors during downloading metadata for repository ‘kubernetes’:
- Curl error (28): Timeout was reached for https://prod-cdn.packages.k8s.io/repositories/isv:/kubernetes:/core:/stable:/v1.31/rpm/repodata/repomd.xml [Connection timed out after 30757 milliseconds]- Curl error (28): Timeout was reached for https://prod-cdn.packages.k8s.io/repositories/isv:/kubernetes:/core:/stable:/v1.31/rpm/repodata/repomd.xml [Connection timed out after 30746 milliseconds]
- Curl error (28): Timeout was reached for https://prod-cdn.packages.k8s.io/repositories/isv:/kubernetes:/core:/stable:/v1.31/rpm/repodata/repomd.xml [Connection timed out after 30646 milliseconds]
- Curl error (28): Timeout was reached for https://prod-cdn.packages.k8s.io/repositories/isv:/kubernetes:/core:/stable:/v1.31/rpm/repodata/repomd.xml [Connection timed out after 30740 milliseconds]
Error: Failed to download metadata for repo ‘kubernetes’: Cannot download repomd.xml: Cannot download repodata/repomd.xml: All mirrors were tried
Hi Yogeswaran,
I have updated this post along with the repository URL, Please follow the steps. It should work now