In this guide, we explore how you can implement a dual-boot setup of Linux Mint 21 (Vanessa) alongside Windows 11.
If you are running Windows on your PC and want to try out Linux, one of the options is to install a hypervisor on which you can create and run Linux VMs. While this is okay, it does not allow you to reap the full benefits of your Linux system. This is because some of the features are unavailable or do not work as expected in a virtual environment.
The other alternative is to install Linux alongside Windows in such a way that only one operating system can run at a time. During boot time, you can choose which OS to login into and run. It’s also worth noting that both systems are installed on separate partitions on the hard drive. As such, no conflict arises between the two systems. This is known as a dual-boot setup and is precisely what we are going to look at.
Prerequisites
To get started with the dual-boot setup, ensure that you have the following things are in place:
- A bootable USB drive ( 8GB or more ) of Linux Mint 21. To create a bootable drive, first, download the Linux Mint 21 ISO image from the Official Linux Mint download page.
- Next, grab the USB drive and make it bootable using Rufus which is a utility for creating bootable USB flash drives.
Step 1) Reserve a free partition for Linux Mint 21
Since you are starting out with Windows 11 as the primary operating system, you need to reserve an additional partition on which Linux Mint 21 will be installed.
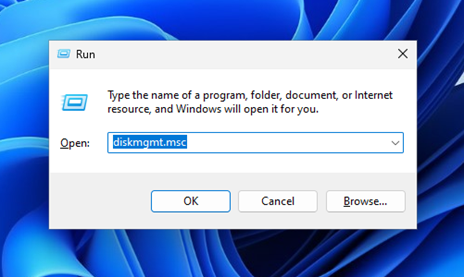
To accomplish this, first launch the disk management utility, to do this, press Windows Key + R. Then type diskmgmt.msc and hit ENTER.
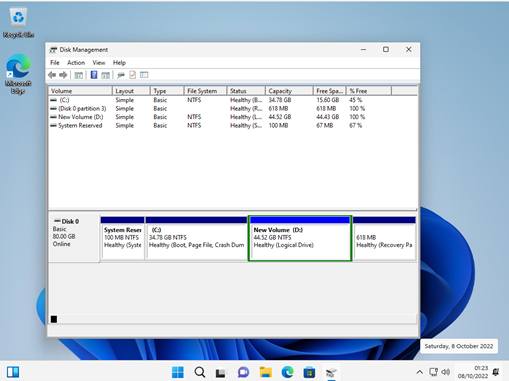
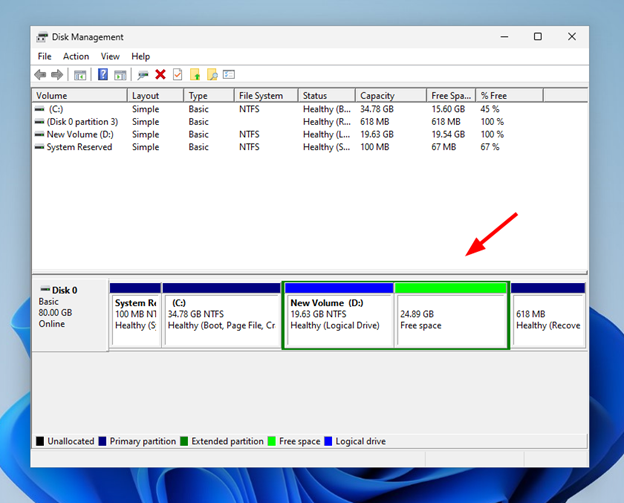
The disk management console pops open as shown. It displays a list of available disk partitions on the system. In our setup, we have two partitions that are available to the system for data storage: C and D. This might vary in your setup. We are going to shrink Volume D and create an additional partition for Linux Mint 21.
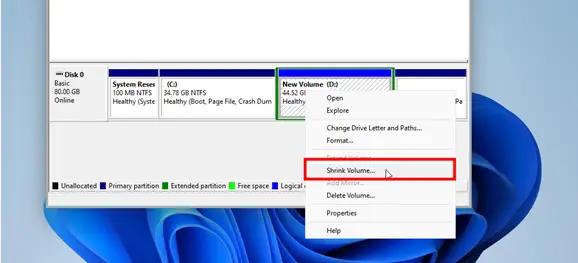
Right-click on the volume that you want to shrink and select ‘Shrink’.
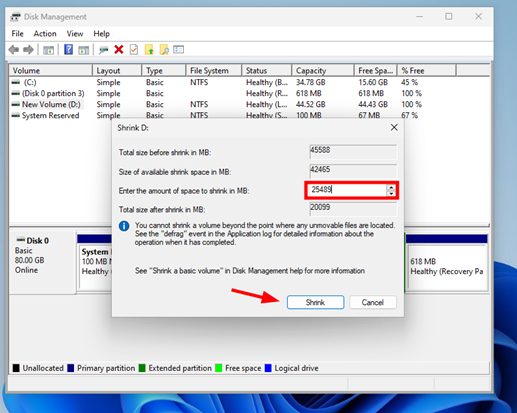
In the dialogue that appears, specify the amount of space to shrink the volume in MB and click ‘Shrink’. In our case, we will shrink by 25GB which is the free space that will be reserved for Linux Mint.
From the screen below, we can see that we now have a partition labeled ‘Free Space’
From here, now plug in the USB installation medium to your PC and reboot it. Be sure to access the BIOS settings and set the USB installation media to have the highest boot priority so that the system can boot from it. Save the changes and reboot.
Step 2) Begin Installation of Linux Mint 21
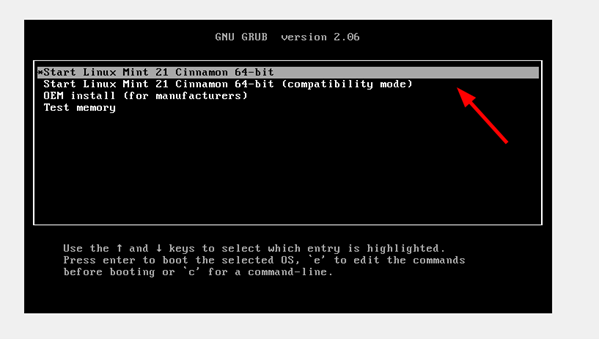
On the boot-up screen, you will see a GRUB menu as shown below with a list of options displayed. By default, the first option is already selected, and as you might have guessed it right, this is the option that will enable you to kick start the installation process.
Therefore, simply press ‘ENTER’ on the keyboard.
The system will initialize the installer in preparation for the installation process and you will momentarily see the Linux Mint 21 logo.
![]()
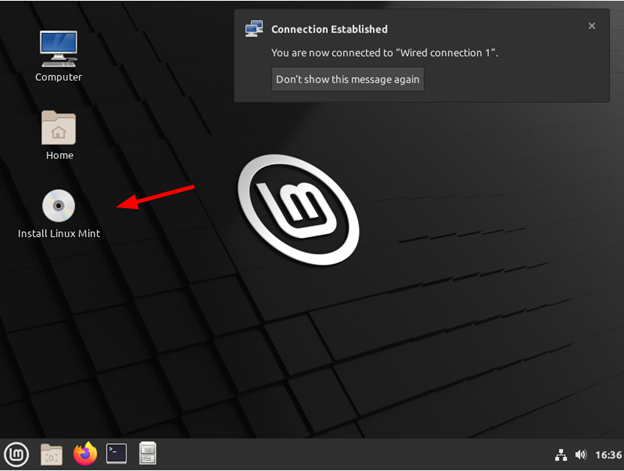
Shortly thereafter, you will be ushered to the Linux Mint live desktop environment. Take note that Linux Mint is not yet installed on your system. The live environment only allows you to test and run Linux Mint as if it was installed on your system.
Since your objective is to end up with a dual-boot setup, you need to install Linux Mint. Therefore, click the ‘Install Linux Mint’ icon on the desktop.
Step 3) Select Installation language
The installation wizard will start and the first task is to select the installation language. So, select your preferred installation language, and click ‘Continue’.

Step 4) Select Keyboard Layout
Next, select your preferred keyboard layout. You can test the layout by typing a few words in the text field located just below the keyboard layout options. Alternatively, you can click ‘Detect Keyboard Layout’ which automatically detects your keyboard and recommends the best layout.

Once you have selected your keyboard layout, click ‘Continue’.
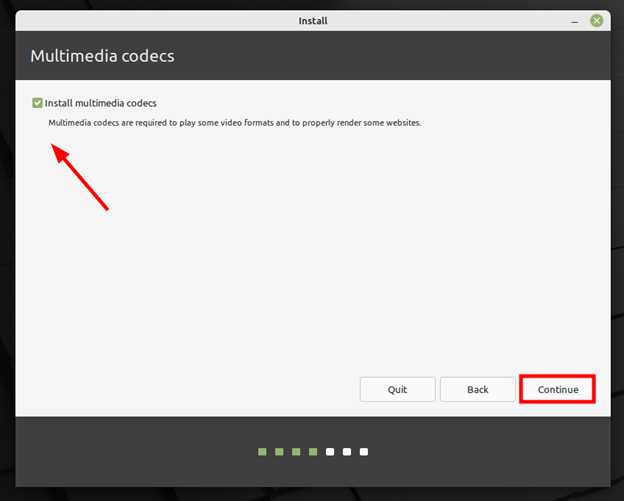
Step 5) Choose to Install Multimedia Codecs
Next, choose to install multimedia codecs that provide added functionality to your system including playing a wide variety of video formats and better rendering of websites.
Step 6) Partition the Hard Drive
The installer will then present you with two options for partitioning your hard drive:
- Erase disk and install Linux Mint
- Something else
The first option wipes clean the entire disk and hence all the files and programs are deleted. In addition, the option automatically and intelligently partitions your hard drive.
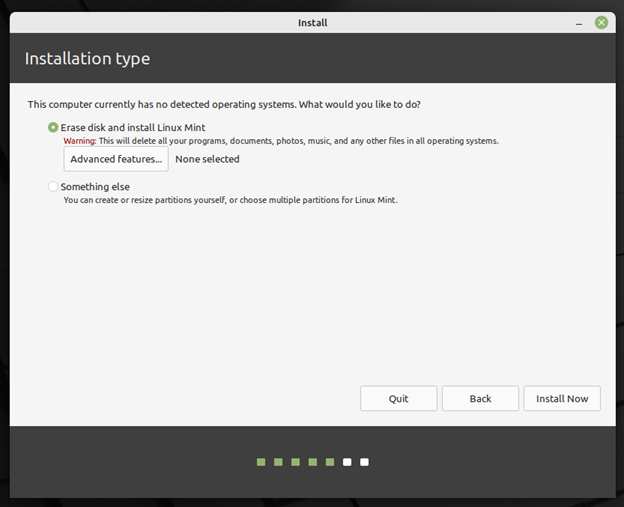
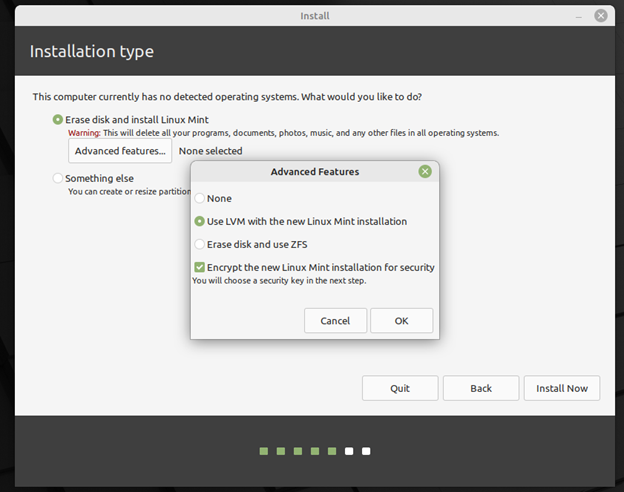
It also offers advanced features such as Encrypting the hard disk using LUKS encryption. This option is mostly recommended for beginners and novices who do not have much experience in manually partitioning the hard drive.
The second option – Something else – provides more control over how you want to partition your hard drive. It allows you to manually configure the disk partitions, hence offering more autonomy and flexibility. This option is mostly used by intermediate and advanced Linux users who are adept with manual partitioning.
More specifically, it is used when you want to install another operating system on the hard drive, and this is precisely what we will go for since we want a dual boot setup.
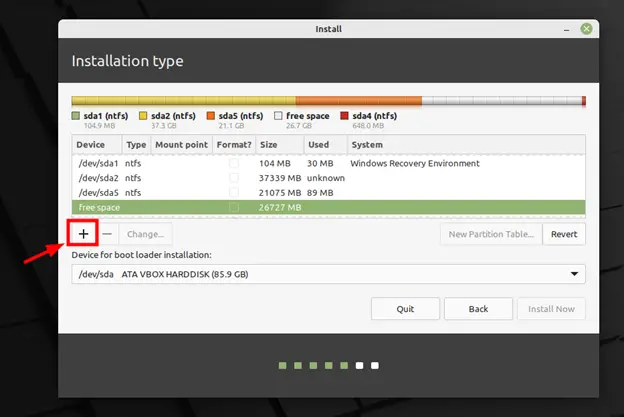
So, click ‘Something else’. This will display all the disk partitions on your hard drive including the Windows NTFS partitions.
To proceed with the disk partitioning, locate the free space that you created in Step 1.

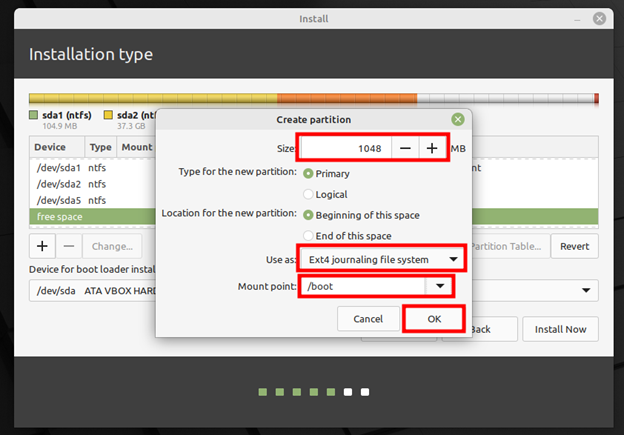
We are going to create the following disk partitions on our hard drive:
- /boot : 1GB
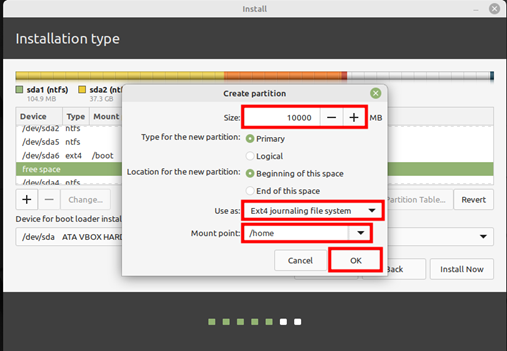
- /home : 10GB
- / : 12GB
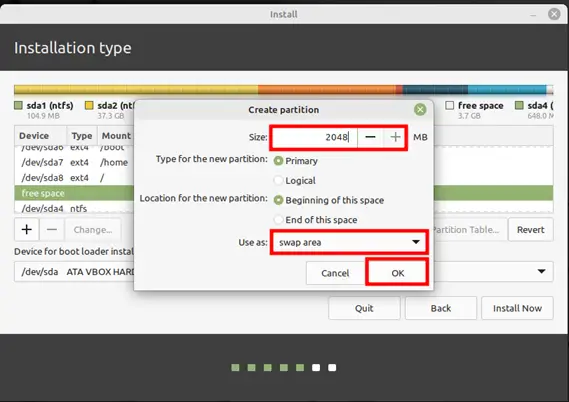
- Swap : 2GB
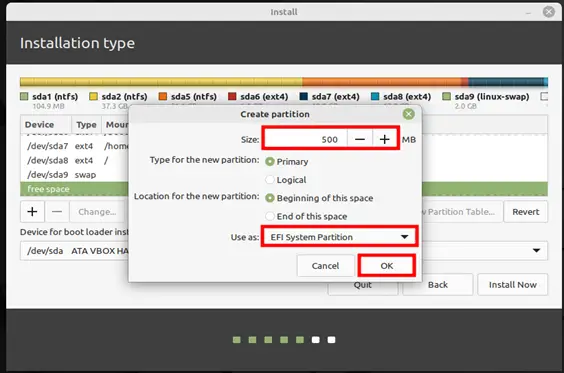
- EFI : 500MB
To start creating the partitions, click on the plus tab [+]
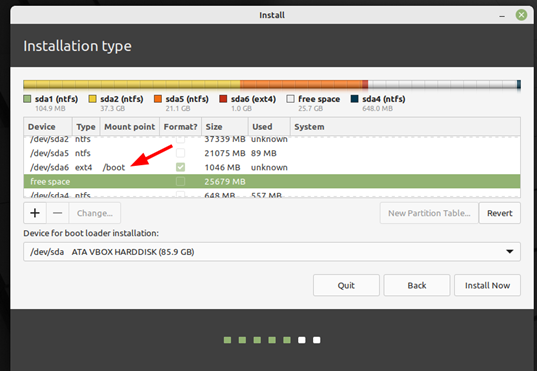
For the /boot partition, we will configure the size as 1048MB and use the Ext4 Filesystem and specify the mount point as /boot.
Once done, click ‘OK’
This takes you back to the partition table and this time around, you can see that the /boot partition has been created.
Repeat the same steps and create the /home partition by specifying the values as shown.
For the / (root) partition

For the swap area, specify ‘Swap Area’ in the “Use as:” label.
And finally, create the EFI partition as shown.
Your partition table should look similar to what we have. Next, click ‘Install Now’.
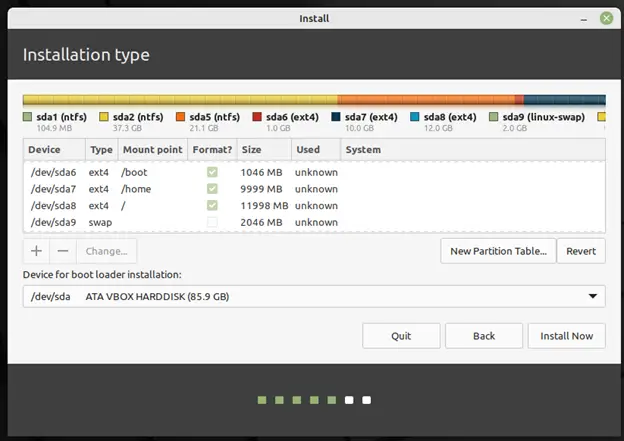
On the pop-up that appears, click ‘Continue’ to write the partition changes to the hard drive.

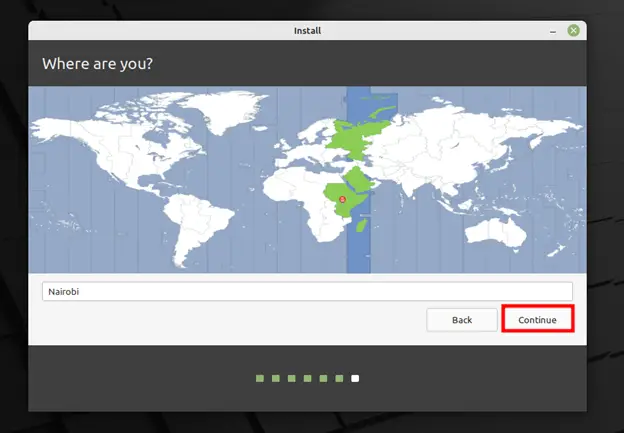
Step 7) Configure Geographical Location
From here the installation is pretty much forward. The installer will auto-detect your geographical location if you are connected to the internet. Alternatively, you can click anywhere in the world to set your preferred location.
To proceed, click ‘Continue’.
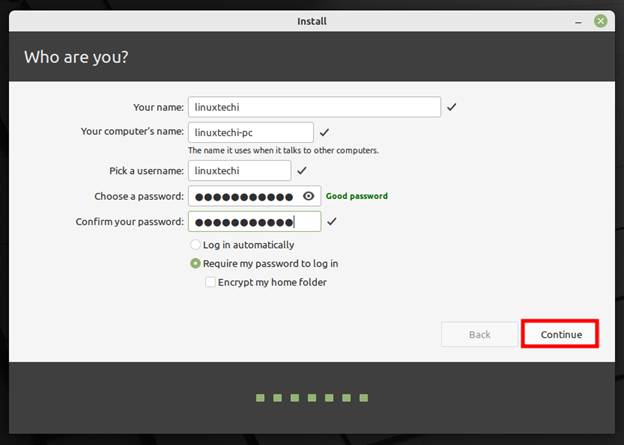
Step 8) Create a Regular Login User
The next step is to create a login user, So proceed and pick your preferred name, computer name, username, and user’s password. Then click ‘Continue’.
Step 9) Continue With the Installation
From here, the installer will copy all the files from the installation media to the hard drive’s Linux partitions. This takes around 30 minutes or so, so just be patient or take a much-deserved break.

Once the installation is complete, click on ‘Restart Now’ to log in to your new Linux Mint 21 installation.
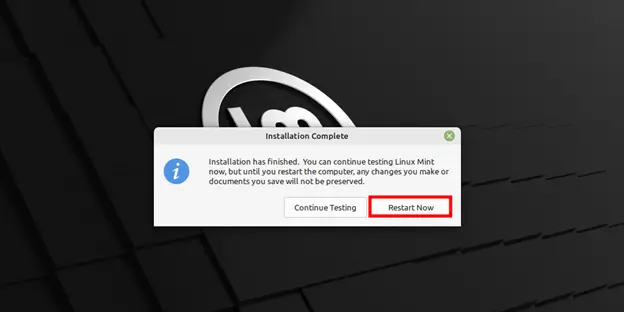
Now remove the installation medium, and press ENTER to reboot the system.
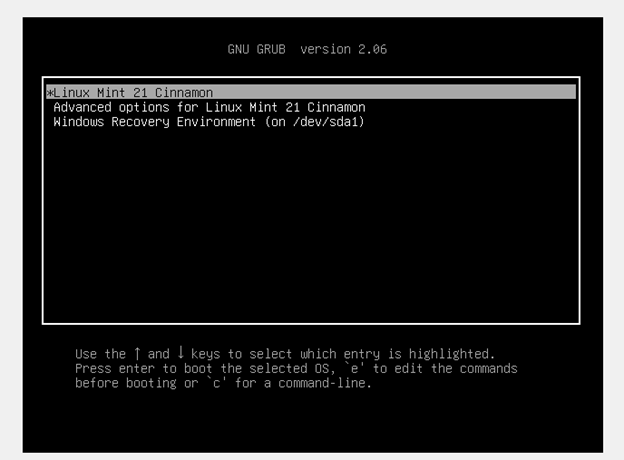
Once the system reboots, you a GRUB menu will be displayed as shown. The first entry allows you to boot into the freshly installed Linux Mint 21 OS while the last option will enable you to boot into Windows 11. You can select either option depending on which system you want to boot into.
 \
\Conclusion
In this guide, we have demonstrated how to configure a dual boot setup of windows 11 and Linux Mint 21. You now have two separate operating systems, and you can log into and run either of them without affecting the other.
How about the other way around? Installing windows 11 after linux mint? Then dual booting?
Lets have an article on that please.
Hey Andrew, we will look into that later. However, generally, it’s much easier to install Windows first and then Linux later as the bootloader will easily detect and identify the Windows OS and display its option on the GRUB menu.
You say “Linux Mint will easily detect/identify Windows first”. Then why, in Step6, Linux Mint 21 did _not_ detect the presence of “Microsoft Windows 11”. Why is that?
It should state “This computer currently has Windows Boot Manager on it. What would you like to do?” followed by – amongst others – “Install Linux Mint alongside Windows Boot Manager”.
Also, the grub menu lists “Windows recovery environment (on /dev/sda1)” instead of “Windows Boot Manager” (on /dev/sda1).
It does work, but this does not feel right.
It’s probably easier to keep Linux from writing stuff where it shouldn’t, all over the Windows partition, than keeping M$ from putting its nose where it doesn’t belong when that’s installing itself after you’ve put Linux in place.
Thanks James for a detailed and thorough tutorial. This solved my problem of not being able to install Mint on my new Dell 3511/3520 without damaging the Win 11 installation. I was unable to install Mint 20.3 due to some missing drivers that prevented Wi-Fi access. Also, I found I had to turn off disk encryption (or BitLocker on Pro edition) in the BIOS prior to Mint installation. And that using the partition resize bar in the installer killed Win11. Also found I had to use the exact sizes you recommend for each of the partitions. Sizing the /home partition last is best, that way I could use all the available free space for my Mint install (move over, Win 11!!)
I used 12000 for my / folder and after install and updating, I was almost out of space. I’m reinstalling now with 30gb.
How to handle the Secure Boot issue of the Windows 11 system?
use linux distro with sb support, like open suse, or reinstall win11 using bootable usb created with rufus and distable that reqiurement while creating that bootable stick. then install that windows, distable secure boot, and then install linux
After many years of installing Linux on various Win10 computers without problems, I recently came with installs that did not show Grub. This tutorial showed me a way that worked perfect for dual boot. Thank you.
So many partitions…. in addition to the partitions created by Win 10 the laptop I’m using at the moment has just two partitions for linux 20 – swap and everything else – the home and boot are in the same partition, and I do not have an efi partition.
TPM is disabled in the bios.
Thanks for the guide.
I needed to update the Linux and did not want to risk losing any data so decided to do this by buying a brand new SSD hard drive.
First I did a factory restore of Win 10 as this ensured that I got all the drivers and computer company software.
I then installed Linux Mint 21. This worked although I had to go to bios and manually select the Linux partition as default boot partition. The computer then saw grub and all worked as it should.
I then decided to perform a feature update that would take the Win 10 from version 1709 to 22H2. This worked but in the process it wiped clean the Linux formatted partitions (EXT4 and swap). I was not surprised by this as it has happened before.
I was going to further upgrade to Windows 11 but the upgrade advisor says that my laptop’s CPU is not compatible. I think that Rufus might have an option to disable any Microsoft route that prevents Win 11 from installing on non-supported hardware. If I do try this then I will expect to be reinstalling Linux mint afterwards.
Oh and to prevent future problems I’ll alter the networking settings to ensure that Windows can see my local network but not the Internet – a trick that I adopted last time Windows performed a feature update. Of course the Linux will retain web access.
Help, after partitioning mine says “unallocated space” instead of “free space” and i think that is what is causing mine to fail
Hello Bernardo. This is not a problem at all. When installing Mint, the installer should be able to detect the unallocated space and create partitions without an issue. Alternatively, you can create a simple volume from the unallocated space and use it for your Linux Mint 21 OS.