In this guide, we will show you how to install Zorin OS 17 step-by-step with screenshots.
Good News for all the Zorin users out there! Zorin has launched its latest version (Zorin OS 17) of its Ubuntu based Linux distro. This version is based on Ubuntu 22.04, since its launch in July 2009, it is estimated that this popular distribution has reached more than 17 million downloads. Zorin is renowned for creating a distribution for beginner level users and the all-new Zorin OS 17 comes packed with a lot of goodies that surely will make Zorin OS lovers happy.
New Features of Zorin OS 17
Zorin OS has always amazed users with different set of features when every version is released Zorin OS 17 is no exception as it comes with a lot of new features as outlined below:
- Faster and smoother performance
- Spatial Desktop
- Improved Software store
- GNOME Software version 45.2
- Advanced window tiling
- New Quick Settings menu
- New Zorin logotype
- Long-Term Support until 2027
- Enhanced support for Windows software
- Redesigned Weather app
- New screenshot & screen recording
Minimum system requirements for Zorin OS 17 (Core)
- Dual Core 64-bit (1GHZ)
- 2 GB RAM
- 10 GB free disk space
- Internet Connection Optional
- Display (800×600)
Zorin OS 17 Installation Steps with Screenshots
Before you start installing Zorin OS 17, ensure you have a copy of the Zorin OS 17 downloaded in your system. If not download, then refer official website of Zorin OS 17. Remember this Linux distribution is available in 4 versions including:
- Core (Free Version for basic usage)
- Lite (Free Version for low-spec PCs)
- Pro (Paid)
- Education (Free)
Note: In this guide we will demonstrate Zorin OS 17 Core Installation Steps
Step 1) Prepare Zorin OS 17 Installation Media
Once you have downloaded Zorin OS 17, copy the ISO into an USB disk and create installation media (bootable USB drive).
On Windows OS use Rufus software to create bootable USB drive and on Linux system use following:
Restart the target system and change your system settings to boot using bootable USB disk.
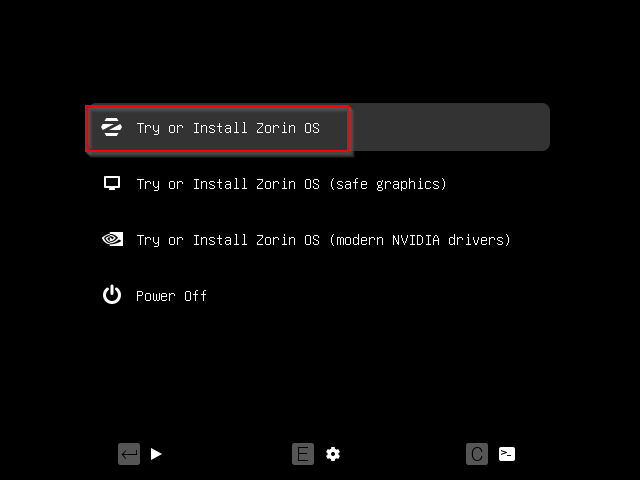
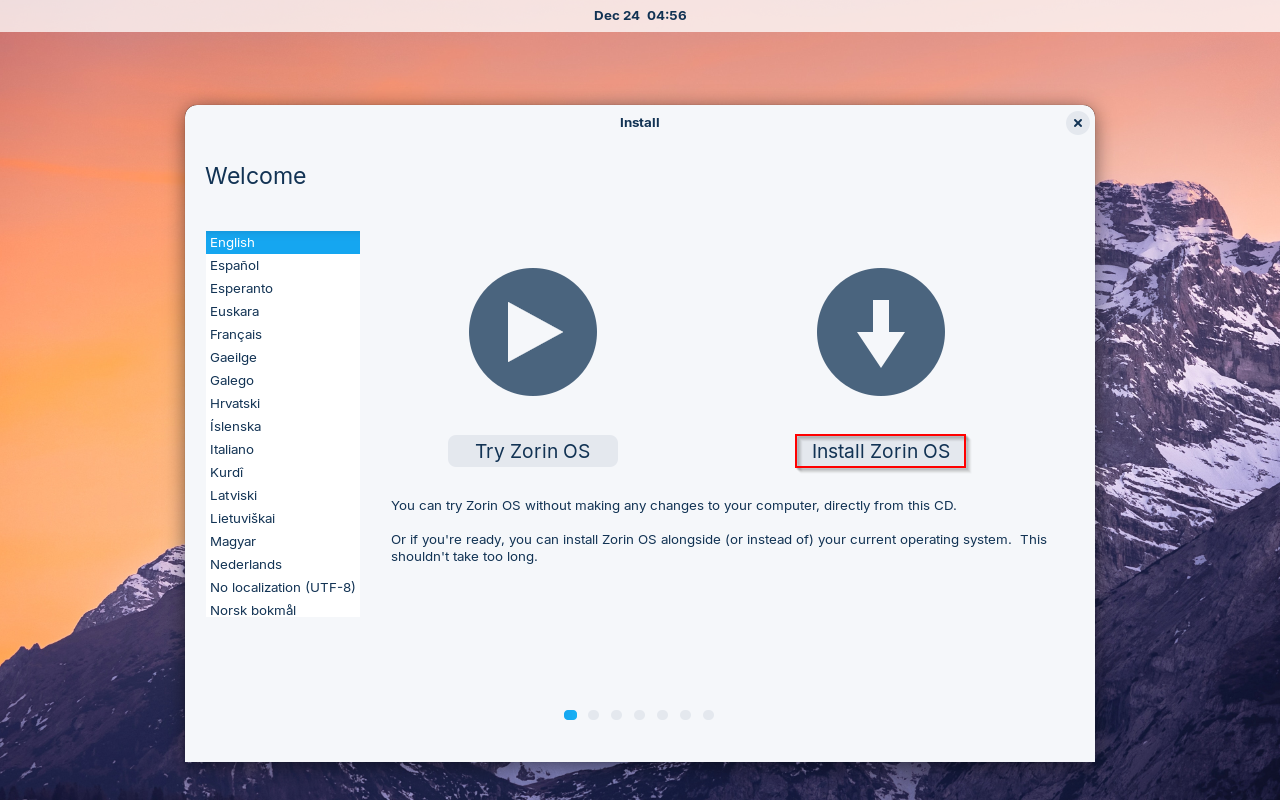
Step 2) Choose Install Zorin OS
When the system boot up with bootable disk then we will get the following screen, select the first option “Try or Install Zorin OS” to continue the installation process.
In the following screen choose “Install Zorin OS” option
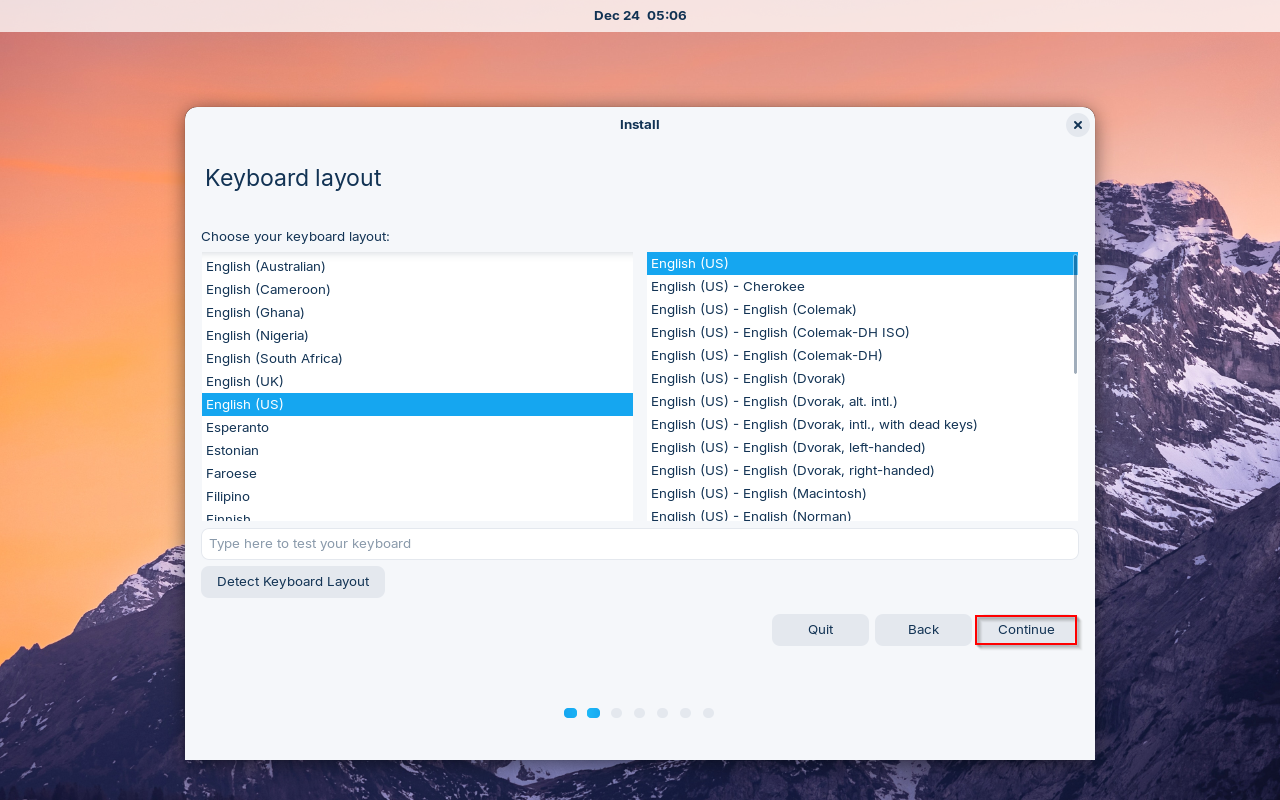
Step 3) Choose Keyboard Layout
Next step is to choose your keyboard layout. By default, English (US) is selected and if you want to choose a different layout, then choose it and click “Continue”.
Step 4) Download Updates and Other Software
On this step, you will be asked whether you need to download updates while you are installing Zorin OS and install other 3rd party applications. In case your system is connected to internet then you can select both of these options, but by doing so your installation time increases considerably, or if you don’t want to install updates and third-party software during the installation then untick both the options and click “Continue”.

Step 5) Choose Zorin OS 15 Installation Method
If you are new to Linux and want fresh installation and don’t want to customize partitions, then better choose option “Erase disk and install Zorin OS”
If you want to create customize partitions for Zorin OS then choose “Something else“, In this guide, I will demonstrate how to create customize partition scheme for Zorin OS 17 installation.
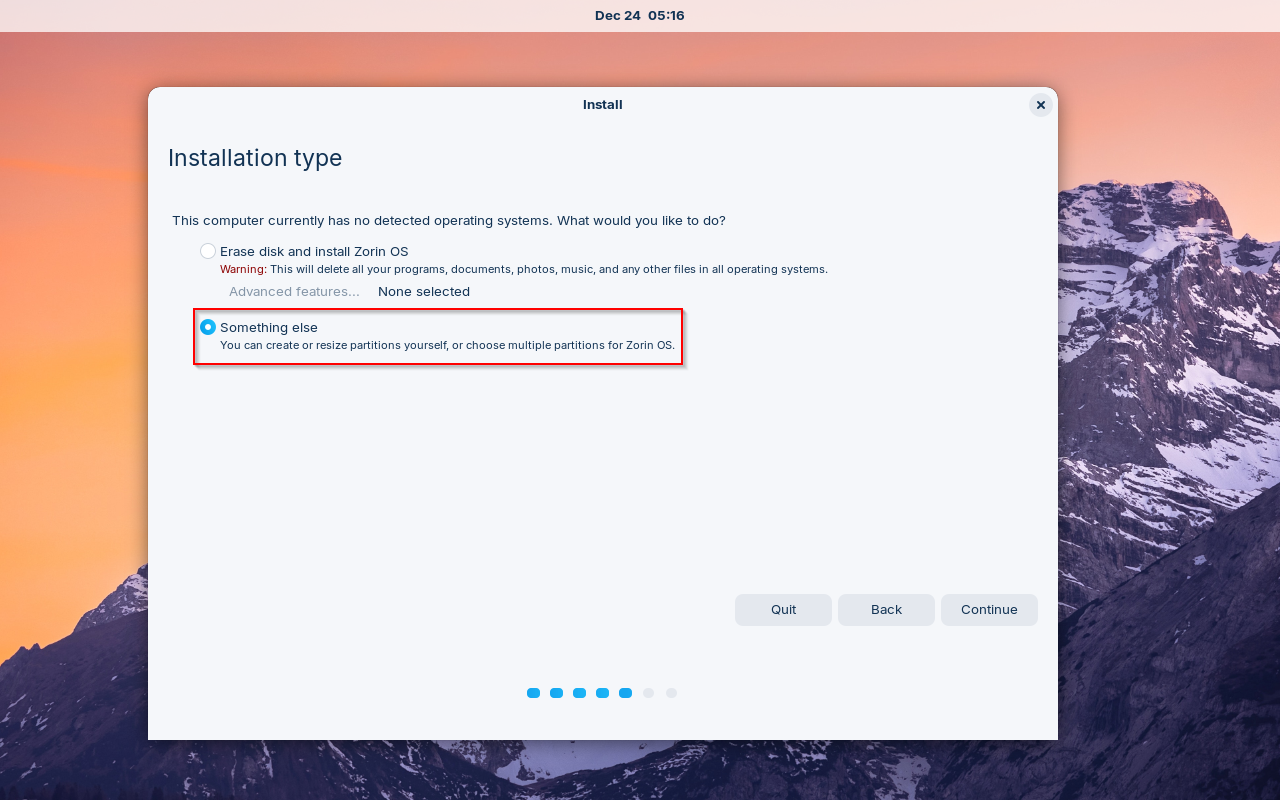
Choose “Something else” option and then click on Continue
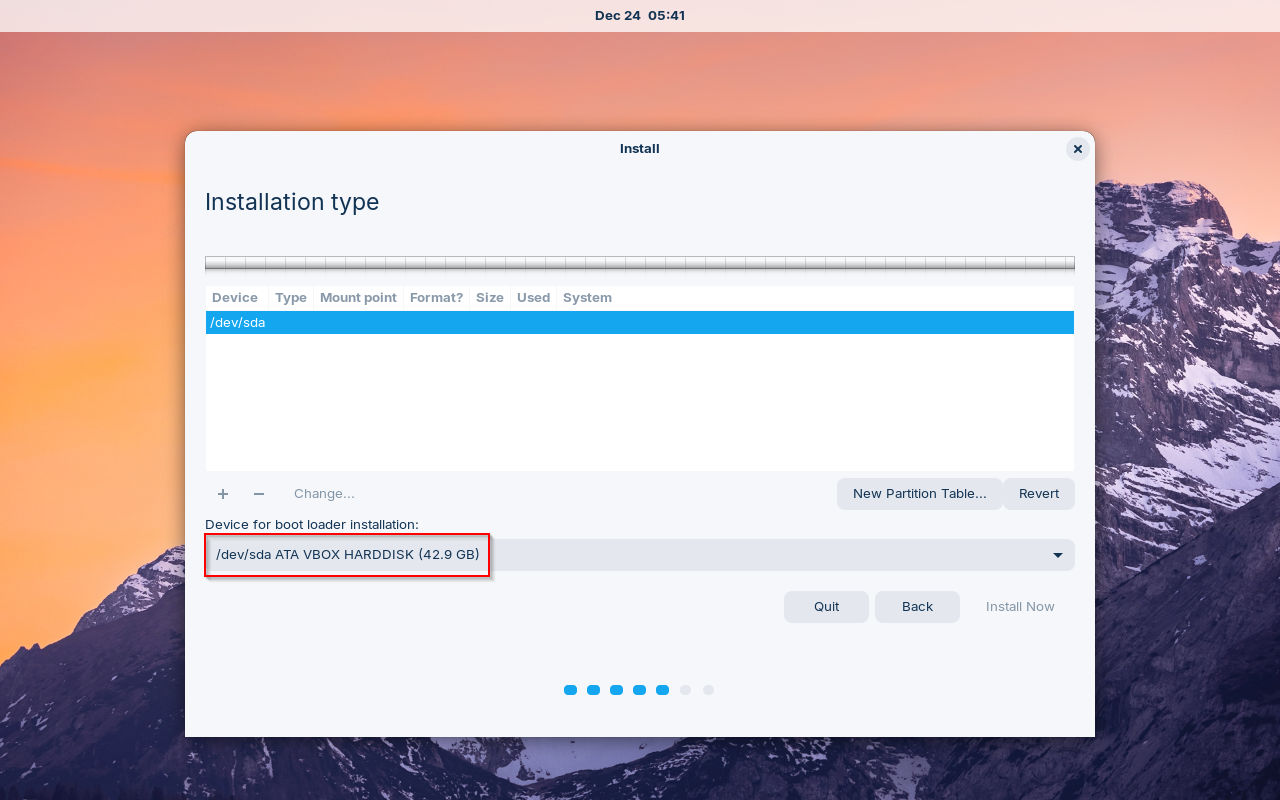
As we can see we have around 42 GB disk available for Zorin OS, we will be creating following partitions,
- EFI System Partition: 500 MB
- Reserved Bios Boot Area: 8 MB
- /boot = 2 GB (ext4 file system)
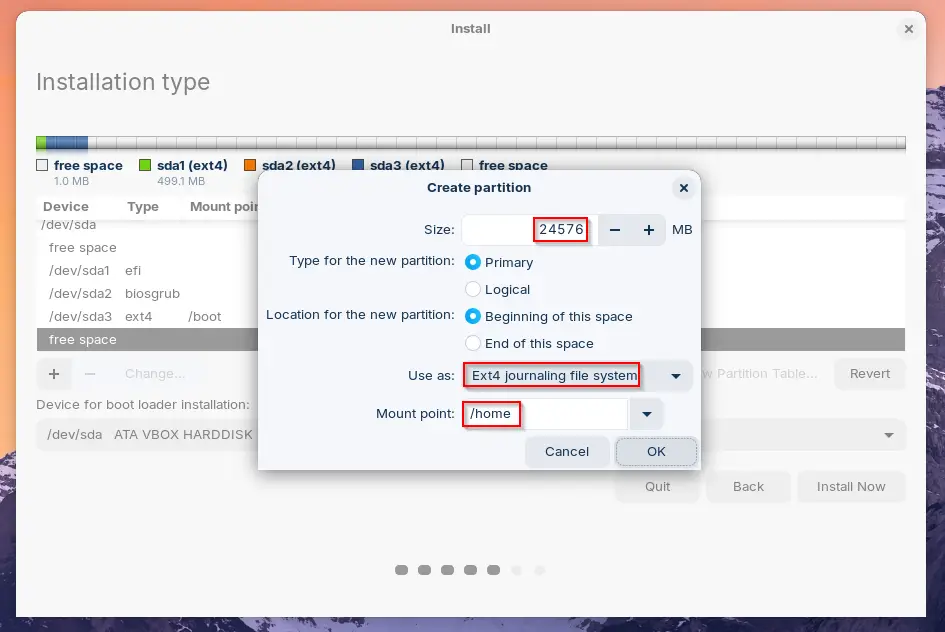
- /home = 24 GB (ext4 file system)
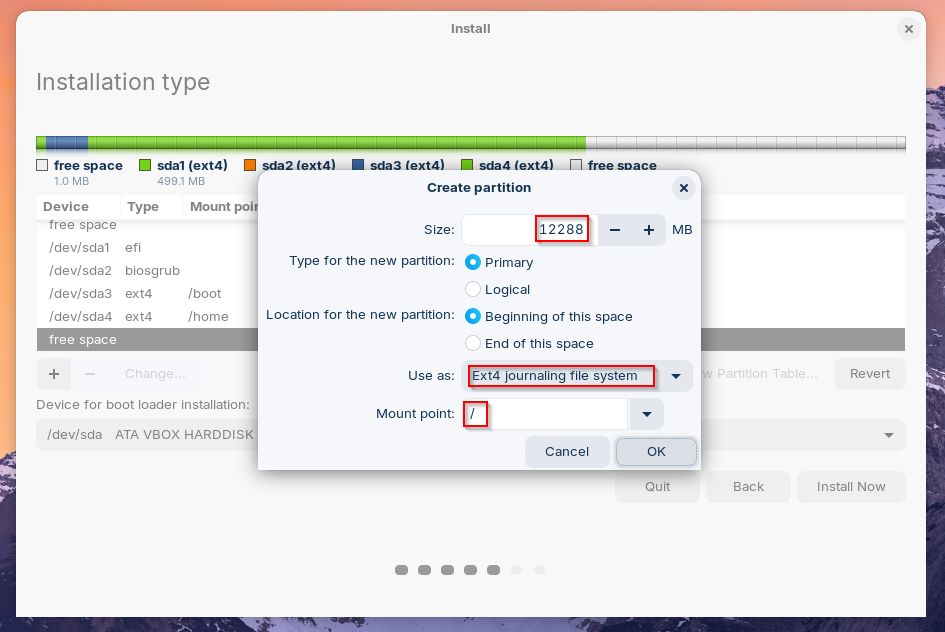
- / = 12 GB (ext4 file system)
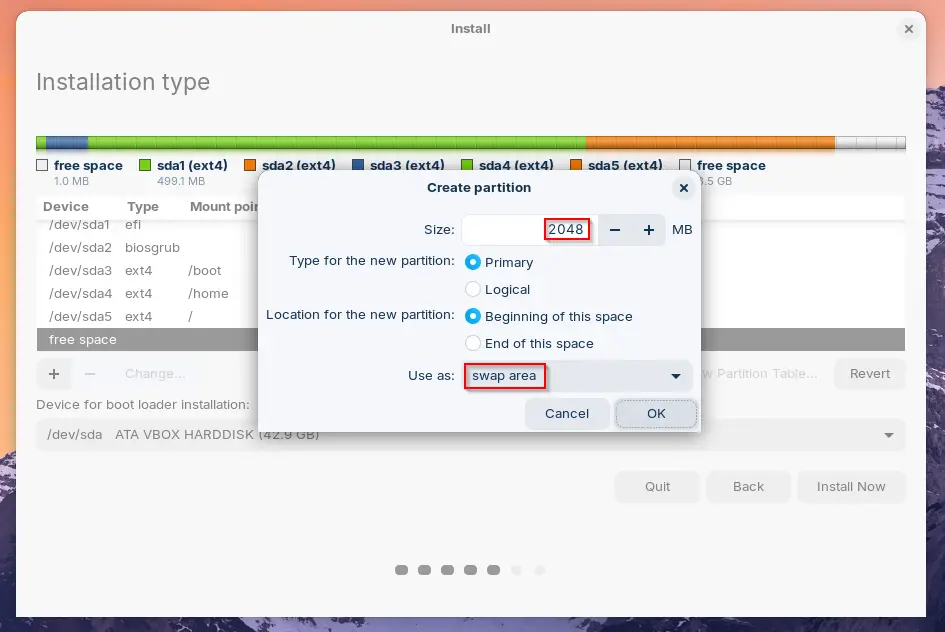
- Swap = 2 GB (ext4 file system)
Step 6) Create Custom Partitions for Zorin OS Installation
To start creating partitions, first click on “New Partition Table” and it will show it is going to create empty partition table, click on Continue.
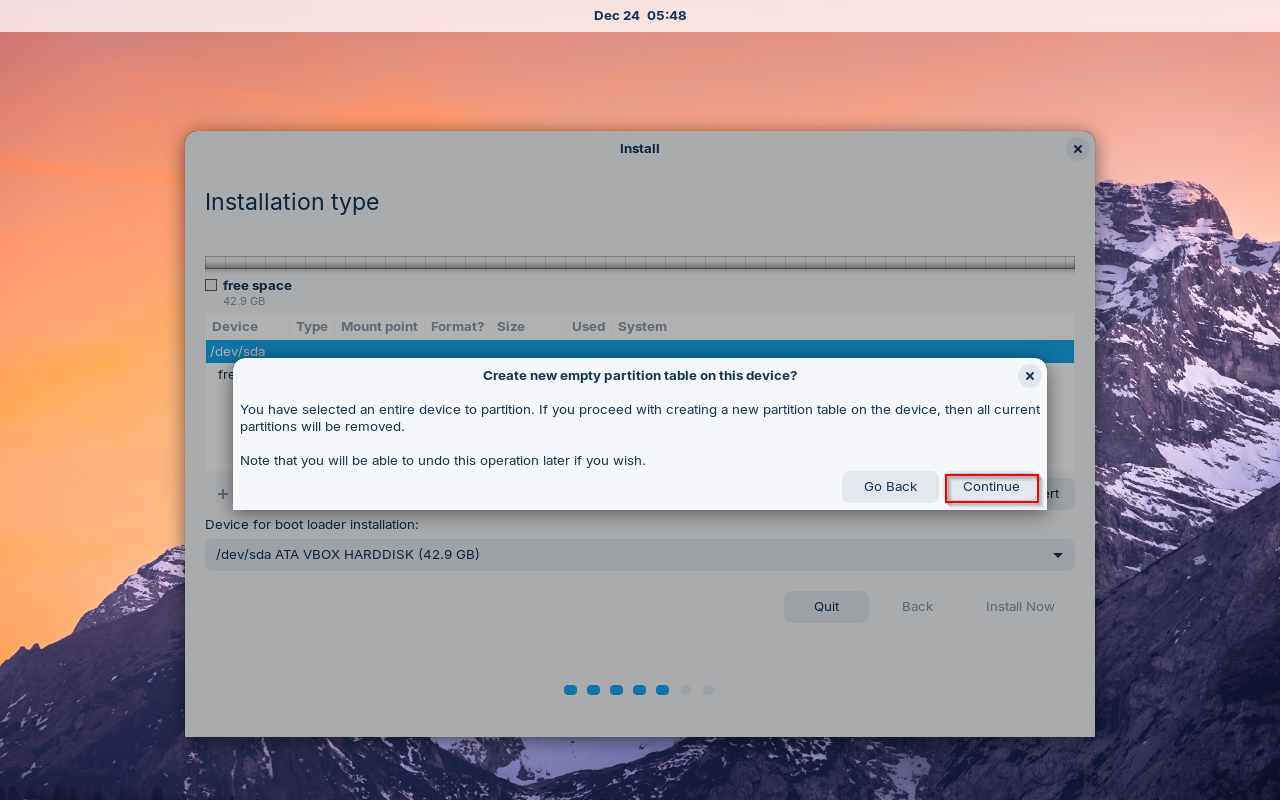
In the next screen we will see that we have now 42 GB free space on disk (/dev/sda), so let’s create our first partition as EFI,
Select the free space, then click on + symbol and then specify the partition size as 500 MB as shown below:
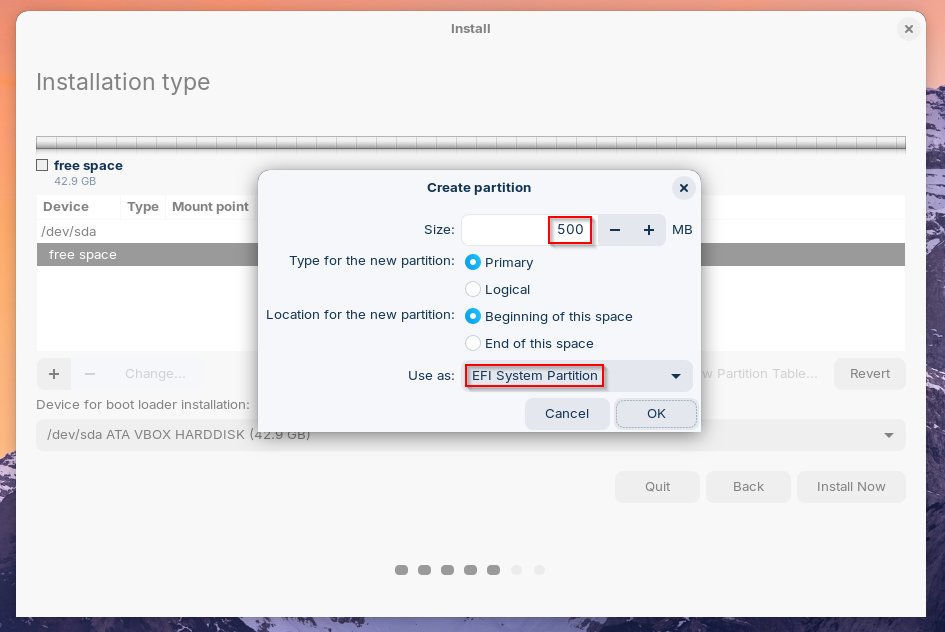
Click on OK
Next, create partition as “Reversed BIOS Boot Area” of size 8 MB.
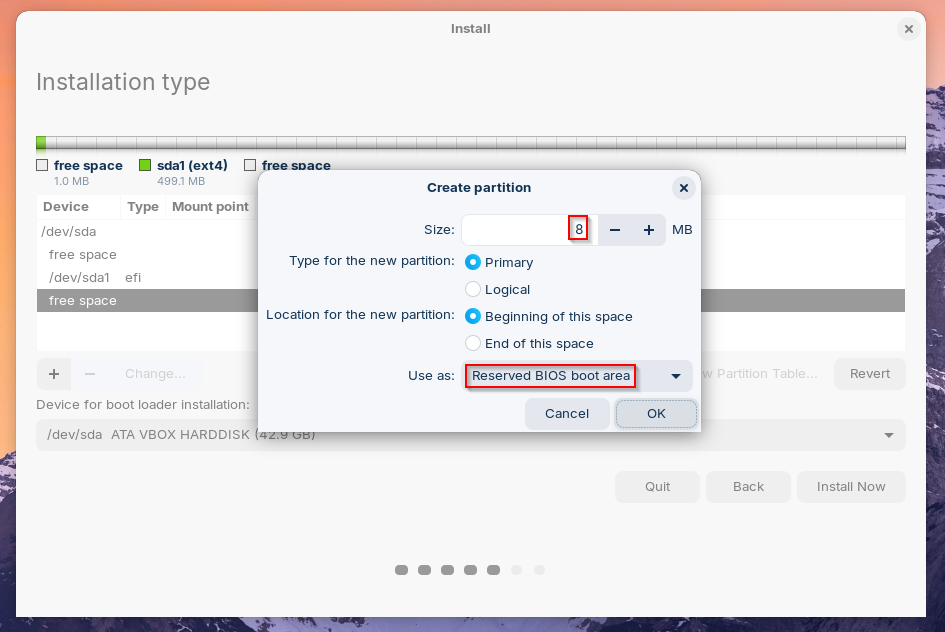
Click on OK
Next create /boot partition of size 2 GB as shown below:

Now create the next partition as /home of size 24 GB (24576 MB),
Similarly create / partition of size 12 GB.
Next, create the last partition as swap of size 2 GB.
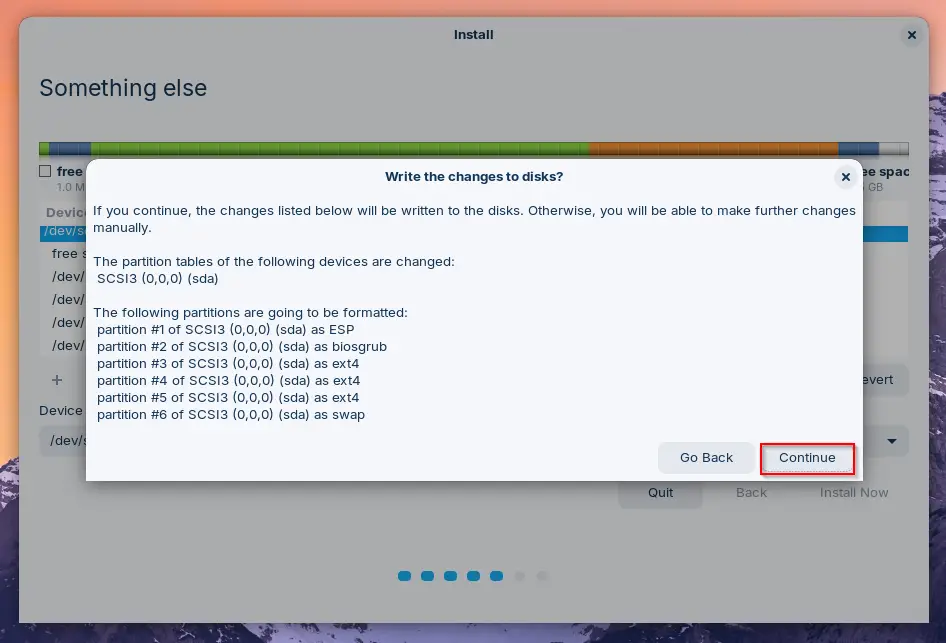
Click on OK and then Choose “Install Now” option.
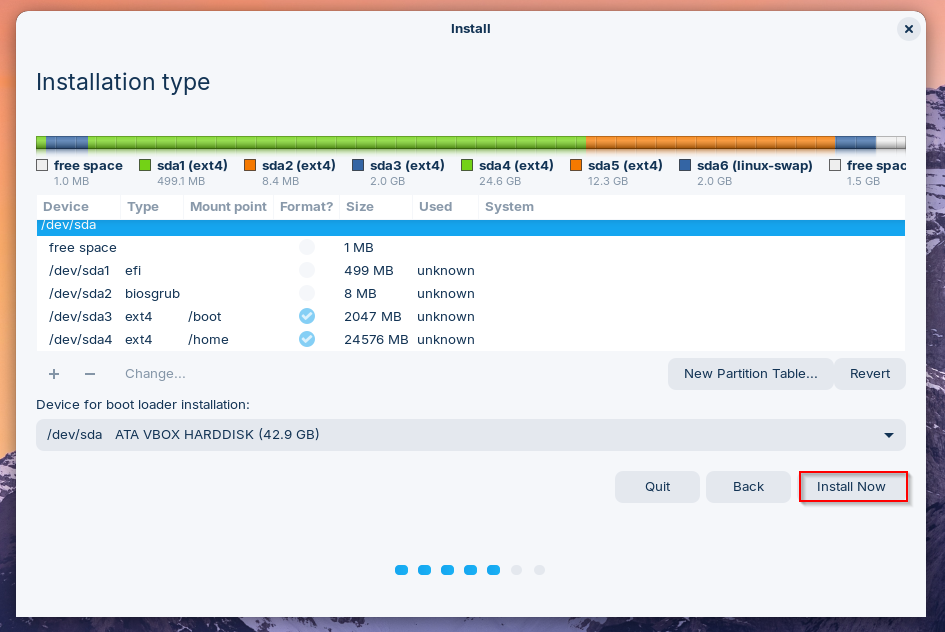
In next window, choose “Continue” to write changes to disk and to proceed with installation.
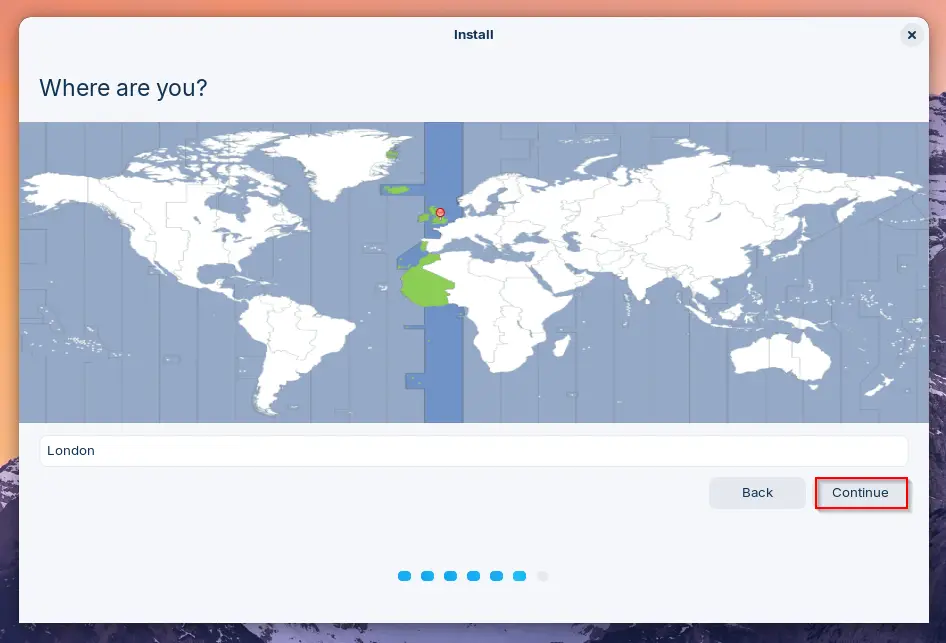
Step 7) Choose Your Preferred Location
In the next screen, you will be asked to choose your location and click “Continue”
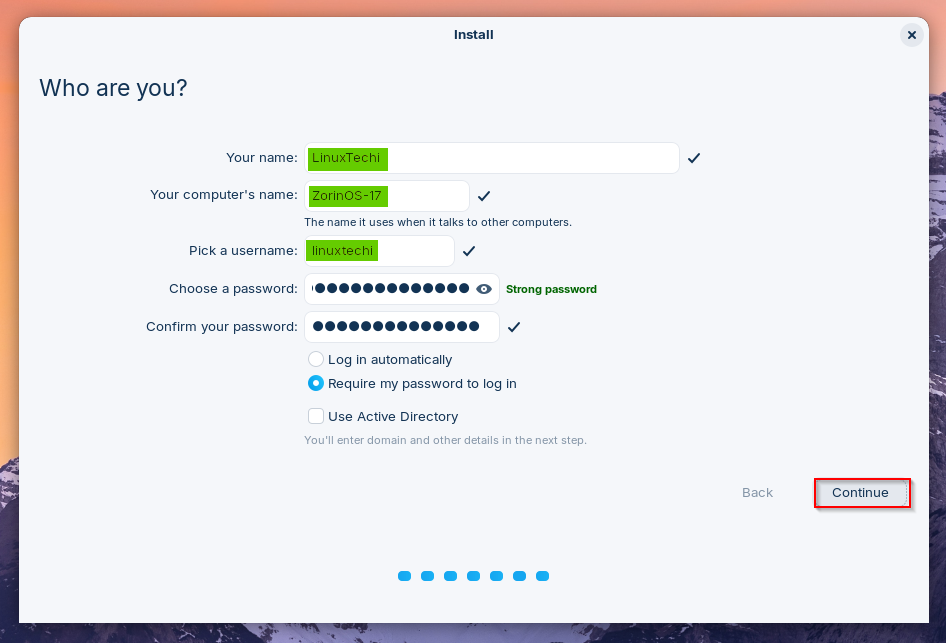
Step 8) Provide Compute Name and User Credentials
In the next screen, you will be asked to enter the user credentials including your name, computer name, Username and password. Once you are done, click “Continue” to proceed with the installation process.
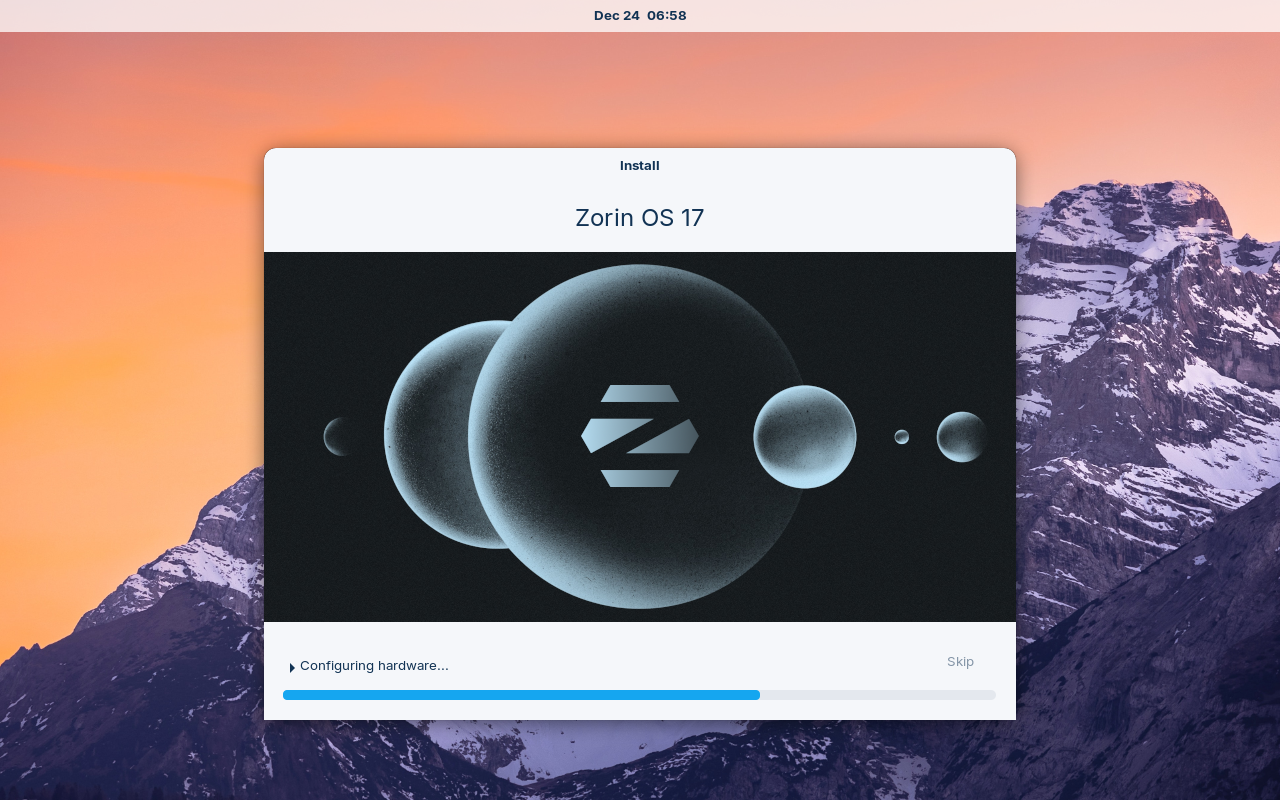
Step 9) Installing Zorin OS 17
Once you click continue, you can see that the Zorin OS 17 starts installing and it may take some time to complete the installation process.
Once the installation process is completed, installer will ask to restart your computer. Hit “Restart Now”
Note : Don’t forget to remove the installation media and change boot medium from USB to disk from BIOS settings.
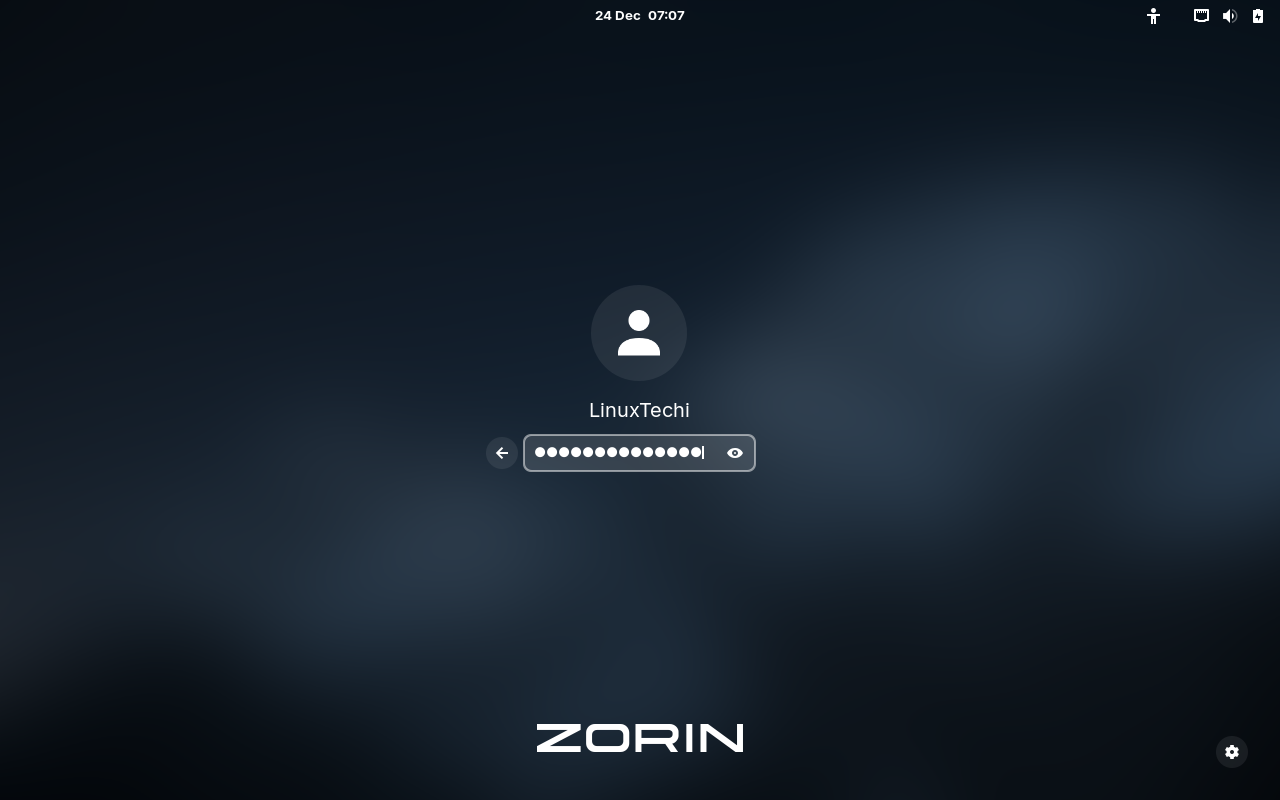
Step 10) Login and Desktop Environment of Zorin OS 17
Once the system restarts post installation, you will be asked to login into the system using the login credentials provided earlier in step 8.
After entering the credentials, hit enter then it will take us to following Welcome Screen,
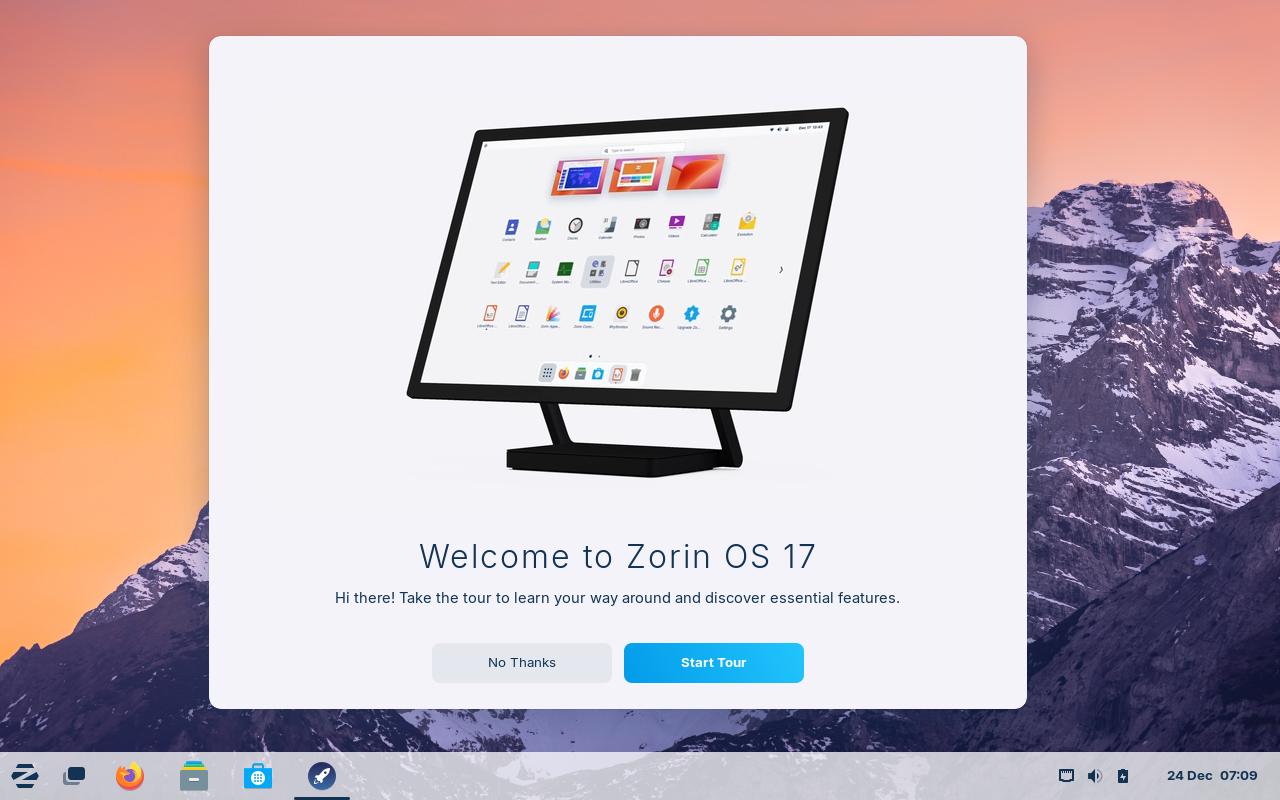
Choose “No Thanks” to skip the start tour. Now you can start exploring all the incredible features of Zorin OS 17.
That’s all from this guide, we hope, you have found it useful and informative. Feel free to post your queries and feedback in below comments section.
What about NVIDIA DRIVERS?, besides, what means each particion?
you can install nvidia diver through software and update, then click additional driver
On upgrade, some of the applications won’t install.
After install, restart. The system crome up and the display is in blocks. Can’t see login.
Any suggestions? I HAVE AN IBM THINKPAD.
If there is 1 Tb of memory in the ssd, the partitions have the same size that in the tutorial?
Hi Ignacio,
You can keep the same partitions but assign more space to these as per your requirements, if you are planning to place all the data on your user’s home directory then give more space to /home partition.
Hi Pradeep,
I’m trying to install on a 80GB External HDD, all went well until I got to the Swap area, there is no listed Mount Point for it, as it happened it automatically set /usr as the mount point so I carried on but I got a message saying it was too small, so I tried to alter it but couldn’t work out how. Is there a formula to work out the ratios of the partitions? on an 80 GB HDD what should they be? and most importantly what is the mount point name for the swap area???
All help gratefully received
Terry B
Hi Terry,
There is no mount point for Swap partition or swap area. If you not sure about partitions then i would recommend go with option “Erase disk and install Zorin OS” in Step:5, installer will automatically create partitions for you.
Is there any iso file to burn DVD to install ?
This is a fair to good OS once installed. I know the very basic Linux CMDs and have installed Linux before. What INSTALLATION guides like this do is get a windows user unfamiliar with Linux a good installed OS and leaves them hanging with no experience or very limited guidance to setup the desktop and other app and setting to have the computer work like their old windows OS. That is what I am looking for ZORIN OS setup guide NOT an installation guide.
Suppose my music and documents are in D drive and I install zorin on E:. Will I be able to access them through Zorin, or only Windows?
There is no mount point for swap. You have to change the ext4 journal tab to select the swap option.