Overview
Today virtualization is a major component of IT industry. We can see virtualization is gaining popularity in server, network and storage domains. To fulfill users need many open source virtualization solutions came into existence and Oracle VirtualBox is one of them.
In this article we’ll discuss VBoxManage utility which is used to manage VirtualBox from command line interface. Below is the syntax of VBoxManage utility
$ VBoxManage [<general option>] <command>
In above command general option can be verbose mode, suppress logo, response file etc. Command can be various actions like – create vm, list vm, show vm information etc.
Create VM using VBoxManage
To create VM we have to use createvm command with VBoxManage utitlity. Below is the syntax of same:
createvm     --name <name>
              [--groups <group>, ...]
              [--ostype <ostype>]
              [--register]
              [--basefolder <path>]
              [--uuid <uuid>]
We can list supported OS types using below command:
$ VBoxManage list ostypes
Let us create Ubuntu-64 vm from CLI:
$ VBoxManage createvm --name ubuntu-server --ostype Ubuntu_64 --register
When you execute above command it will generate following output:
Virtual machine 'ubuntu-server' is created and registered.
UUID: 7433725a-f314-44c7-8625-91d61cc6125d
Settings file: '/home/linux-techi/VirtualBox VMs/ubuntu-server/ubuntu-server.vbox'
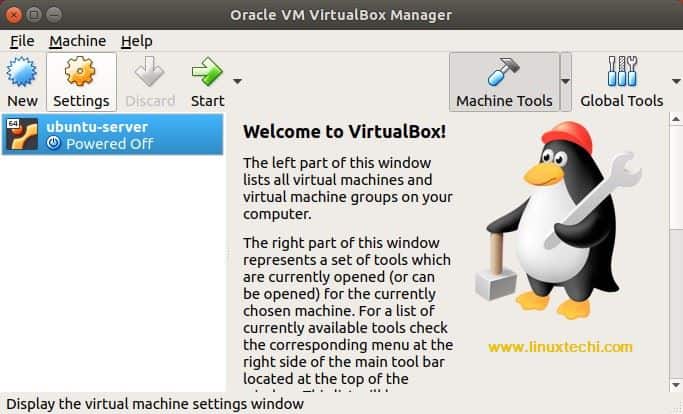
Now we can see newly created VM in VirtualBox Manager
Update VM
We have successfully created VM from CLI. But this VM is not usable at this moment we can make it usable by assigning NIC, allocating memory and attaching disk to it.
Create network via VBoxManage
To create bridged network execute following two commands:
$ VBoxManage modifyvm ubuntu-server --bridgeadapter1 vmnet1
$ VBoxManage modifyvm ubuntu-server --nic1 bridged
In above example I’ve use vmnet1 network. It is created by default when Oracle VirtualBox is installed.
Allocate memory
To allocate memory execute following command:
$ VBoxManage modifyvm ubuntu-server --memory 2048
Create hard disk
To create hard disk execute following command:
$ VBoxManage createhd --filename VirtualBox\ VMs/ubuntu-server/ubuntu-server.vdi --size 10000 --format VDI
When you execute above command, it will generate following output:
0%...10%...20%...30%...40%...50%...60%...70%...80%...90%...100%
Medium created. UUID: 5f530d25-da57-4030-bf56-32d5a29c91b5
This command will create virtual hard disk. At present it is not associated with any VM.
Add SATA controller
In previous section we have created virtual hard disk. We need a SATA controller to attach that disk. Below command creates SATA controller.
$ VBoxManage storagectl ubuntu-server --name "SATA Controller" --add sata --controller IntelAhci
Attach storage
Now we have SATA controller and virtual hard disk in a place. Let us attach virtual disk to SATA controller using below command:
$ VBoxManage storageattach ubuntu-server --storagectl "SATA Controller" --port 0 --device 0 --type hdd --medium VirtualBox\ VMs/ubuntu-server/ubuntu-server.vdi
Add IDE controller for ISO
We are creating fresh VM hence we need to install OS from ISO image. So let us add IDE controller using following command:
$ VBoxManage storagectl ubuntu-server --name "IDE Controller" --add ide --controller PIIX4
Attach ISO image to IDE controller
To attach ISO image to IDE controller execute following command:
$ VBoxManage storageattach ubuntu-server --storagectl "IDE Controller" --port 1 --device 0 --type dvddrive --medium /home/linux-techi/ubuntu-18.04-desktop-amd64.iso
Start VM
Now VM is configured and it is installation ready. Let us start VM using following command
$ VBoxManage startvm ubuntu-server
This command will open VirtualBox Manager from where OS installation can be done.
Working with snapshots
Snapshot is a point-in time copy of VM. We can take a snapshot using following command:
$ VBoxManage snapshot ubuntu-server take "first-snapshot"
When you execute above command, it will generate following output:
0%...10%...20%...30%...40%...50%...60%...70%...80%...90%...100%
Snapshot taken. UUID: cd5dadc1-dd8f-427e-a6b8-5a3e93307ef9
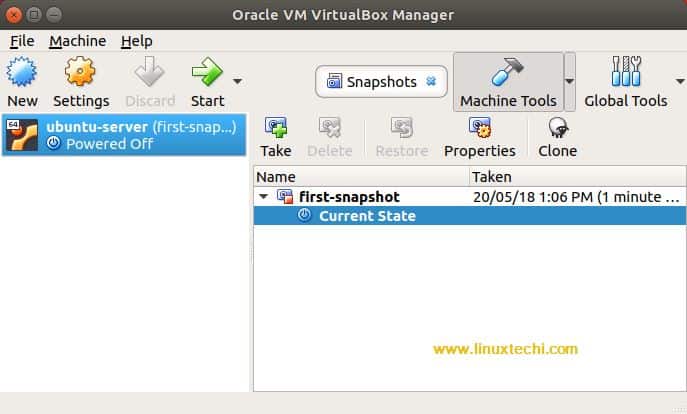
We can see this snapshot in VirtualBox manager:
To revert back to snapshot execute following command:
$ VBoxManage snapshot ubuntu-server restore "first-snapshot"
When you execute above command, it will generate following output:
Restoring snapshot ' first-snapshot' (cd5dadc1-dd8f-427e-a6b8-5a3e93307ef9)
0%...10%...20%...30%...40%...50%...60%...70%...80%...90%...100%
Delete VM
To delete VM execute following command:
$ VBoxManage unregistervm ubuntu-server --delete
When you execute above command it will generate following output:
0%...10%...20%...30%...40%...50%...60%...70%...80%...90%...100%
Please note that this command will delete all Virtual Machine files (configuration files as well virtual hard disks) from system.
Conclusion
This tutorial is good starting point for VBoxManage utility. Covering each and every detail about it – is beyond the scope of this tutorial. For additional details please refer official document from here
Also Read : How to Install VirtualBox on Arch Linux
Also Read : How to Enable Nested Virtualization in VirtualBox on Linux
Thank you.