If you are looking for an easy and cost-effective way of getting started with Kubernetes, then Minikube is your go to resource. So what is Minikube? Minikube is a versatile tool that allows you to run a single-node Kubernetes cluster on your local machine. This enables developers to experiment with Kubernetes features, test configurations, and deploy applications without the complexity of a full-blown cluster setup.
In this post, we will show you the steps to install Minikube on Debian 12, allowing you to create a local Kubernetes environment for development and testing purposes.
Prerequisites
- A newly installed instance of Debian 12
- 2 GB RAM & 2 CPUs or more
- 20 GB free hard disk space
- A regular user with sudo
- A stable internet connection
- Docker / Virtual Machine Manager (KVM or VirtualBox)
Let’s now roll our sleeves and get into installing Minikube on Debian 12.
1) Apply Updates
First and foremost, we need to update the system packages on our instance. To achieve this, execute the commands:
$ sudo apt update
$ sudo apt upgrade -y
Additionally, ensure that you have installed the necessary packages to enable you execute subsequent commands later on in this guide.
$ sudo apt install curl wget apt-transport-https -y
Reboot the system once post installing all the updates,
$ sudo reboot
2) Install Docker
Run the following set of commands one after the another to install latest docker,
$ sudo install -m 0755 -d /etc/apt/keyrings
$ curl -fsSL https://download.docker.com/linux/debian/gpg | sudo gpg --dearmor -o /etc/apt/keyrings/docker.gpg
$ sudo chmod a+r /etc/apt/keyrings/docker.gpg
$ echo \
"deb [arch="$(dpkg --print-architecture)" signed-by=/etc/apt/keyrings/docker.gpg] https://download.docker.com/linux/debian \
"$(. /etc/os-release && echo "$VERSION_CODENAME")" stable" | \
sudo tee /etc/apt/sources.list.d/docker.list > /dev/null
$ sudo apt update
$ sudo apt install docker-ce docker-ce-cli containerd.io docker-buildx-plugin docker-compose-plugin -y
Allow your local user to run docker commands without sudo,
$ sudo usermod -aG docker $USER
$ newgrp docker
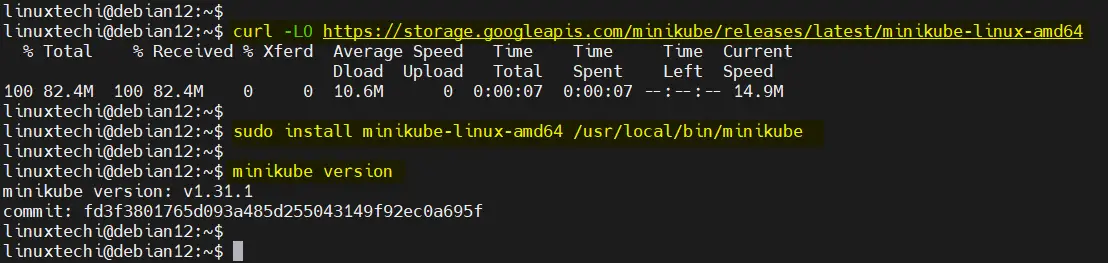
3) Download & Install Minikube Binary
Once you have Docker is in place, then run following commands to install latest and stable minikube binary,
$ curl -LO https://storage.googleapis.com/minikube/releases/latest/minikube-linux-amd64
$ sudo install minikube-linux-amd64 /usr/local/bin/minikube
At this point, you can check the version of Minikube installed by running the command below. At the time of writing this guide. The latest version of Minikube is Minikube v1.31.1
$ minikube version
4) Install kubectl tool
Kubectl is Kubernetes command-line tool that enables you to execute commands against a Kubernetes cluster. With kubectl, you can deploy applications, manage and inspect cluster resources including having a peek at the log files.
To install kubectl , you first need to download the binary file using the curl command as shown:
$ curl -LO "https://dl.k8s.io/release/$(curl -L -s https://dl.k8s.io/release/stable.txt)/bin/linux/amd64/kubectl"
Make the binary file executable and move it under /usr/local/bin folder
$ chmod +x ./kubectl && sudo mv ./kubectl /usr/local/bin
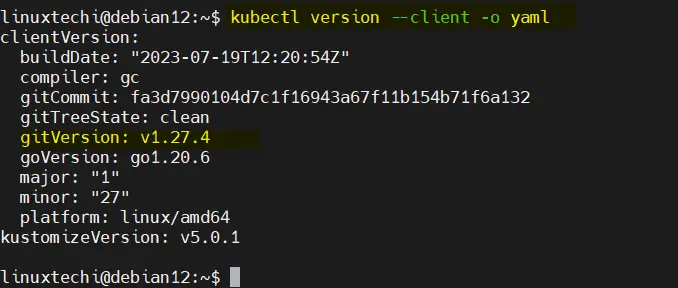
You can now verify the installation by running the command:
$ kubectl version --client -o yaml
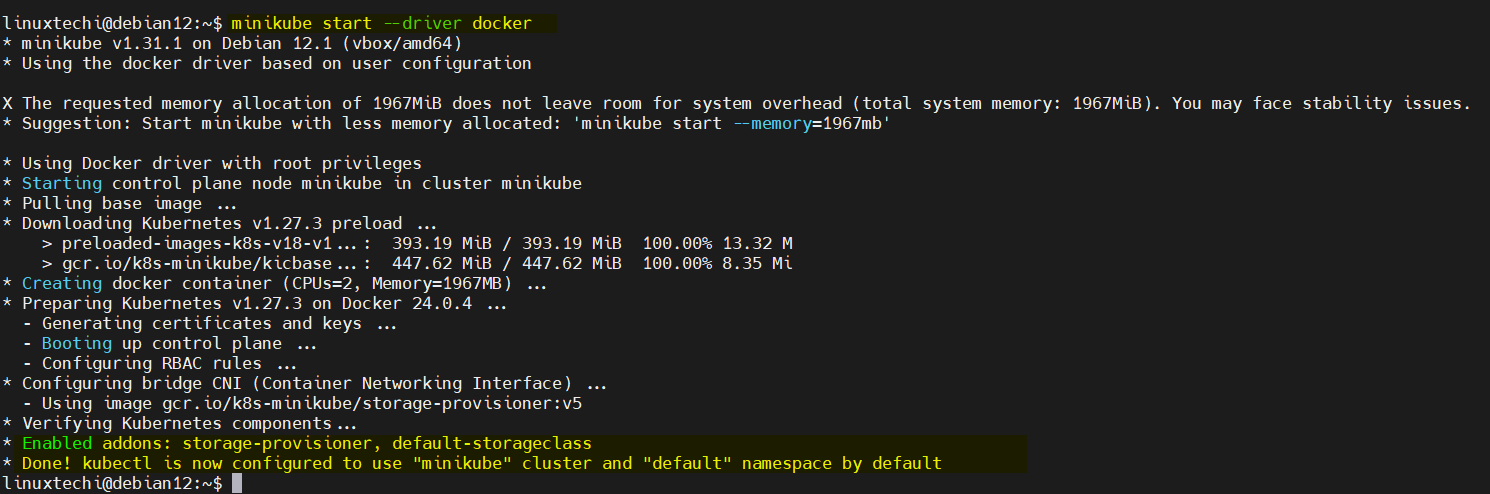
5) Start Minikube Using Docker driver
To start Minikube cluster using docker driver, run the following command:
$ minikube start --driver docker
Above minikube command will set up a Kubernetes cluster locally using Docker containers. This might take a few minutes depending on your internet connection..
To view the status of minikube, run following minikube command:
linuxtechi@debian12:~$ minikube status
minikube
type: Control Plane
host: Running
kubelet: Running
apiserver: Running
kubeconfig: Configured
linuxtechi@debian12:~$
Run below command to check k8s version and nodes status
$ kubectl get nodes
NAME       STATUS   ROLES    AGE     VERSION
minikube   Ready    master   6m47s   v1.27.3
$
To verify the status of the cluster, invoke the command:
$ kubectl cluster-info
Some output similar to what we have will be displayed on the terminal.

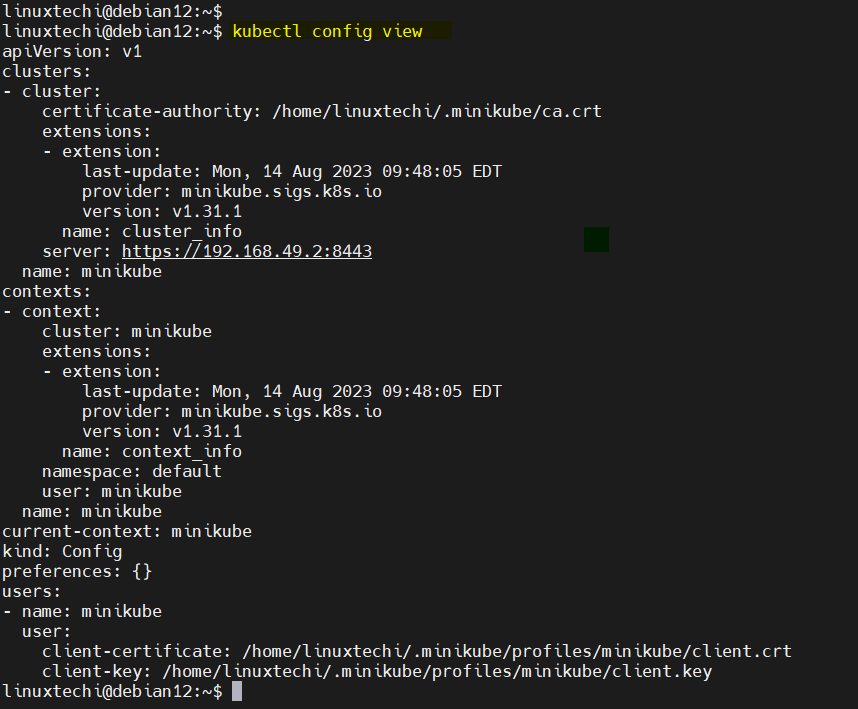
Additionally, to get a glance at kubectl’s default configuration, run the command:
$ kubectl config view
6) Accessing Kubernetes Dashboard
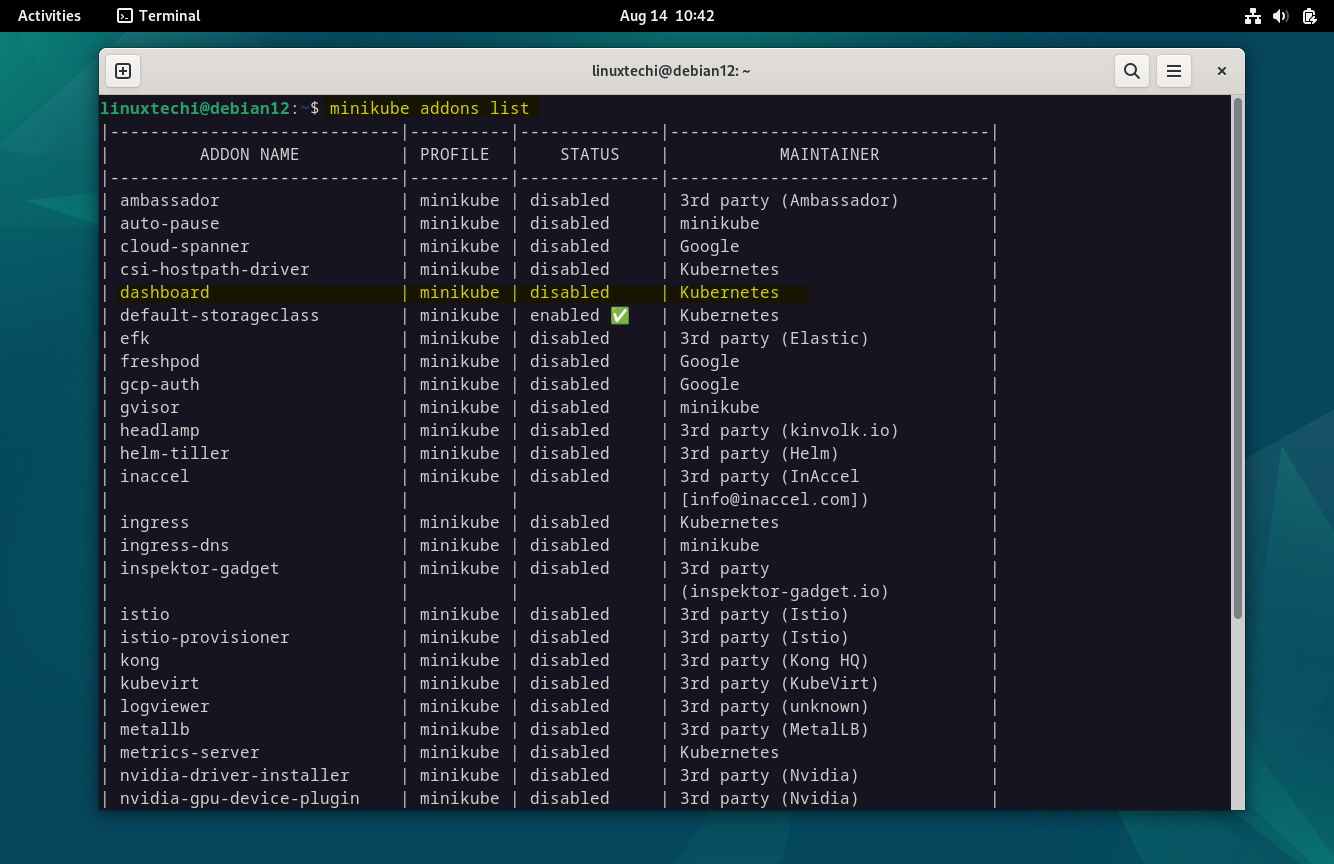
Minikube Kubernetes cluster comes with built-in dashboard that allows you to manage your cluster. To view all the addons that come with minikube run:
$ minikube addons list
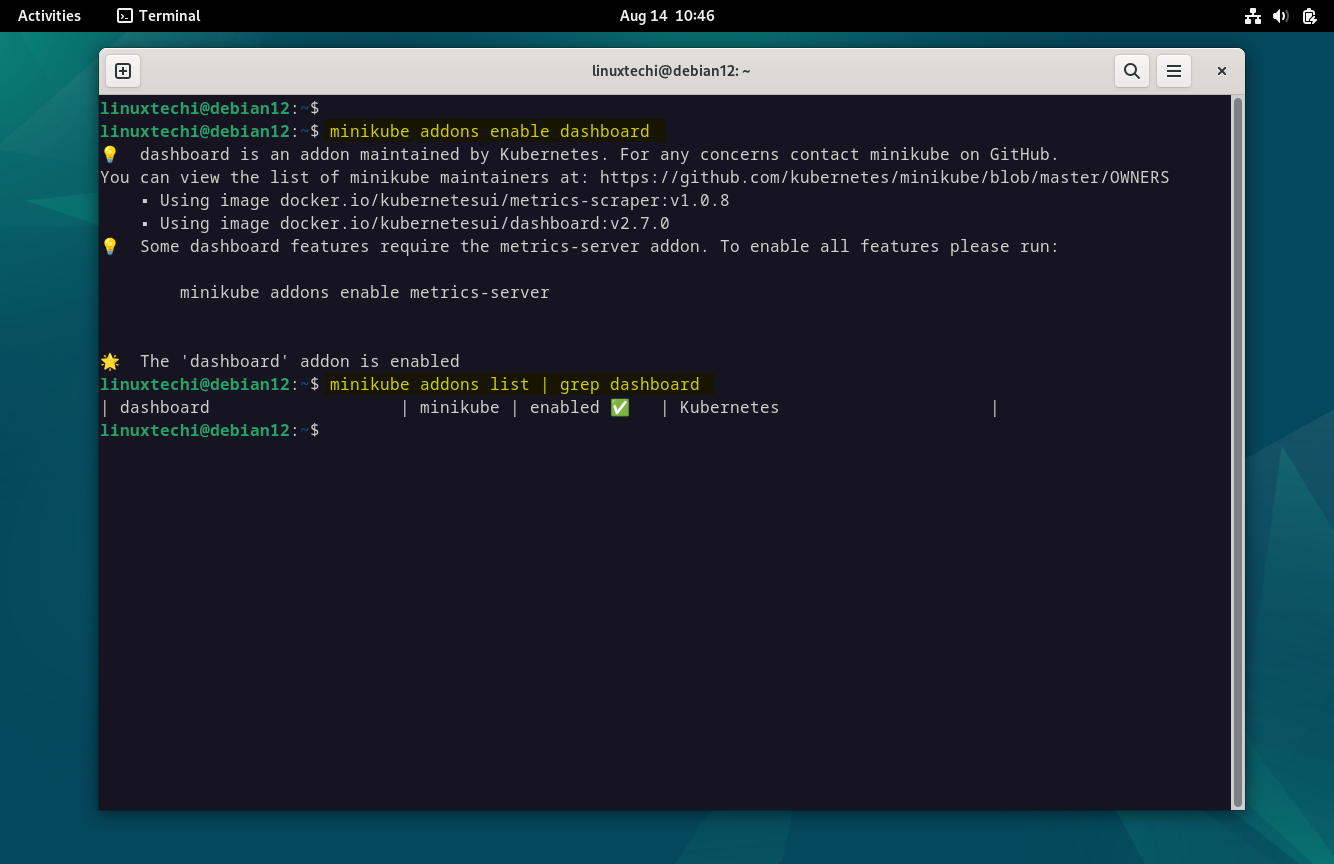
To activate the Kubernetes dashboard, execute:
$ minikube addons enable dashboard
In order to launch Kubernetes dashboard, run
$ minikube dashboard
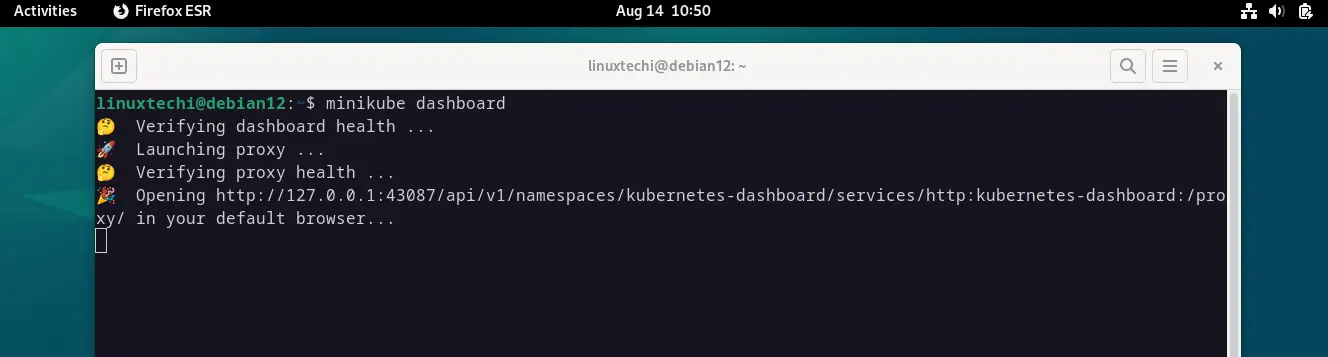
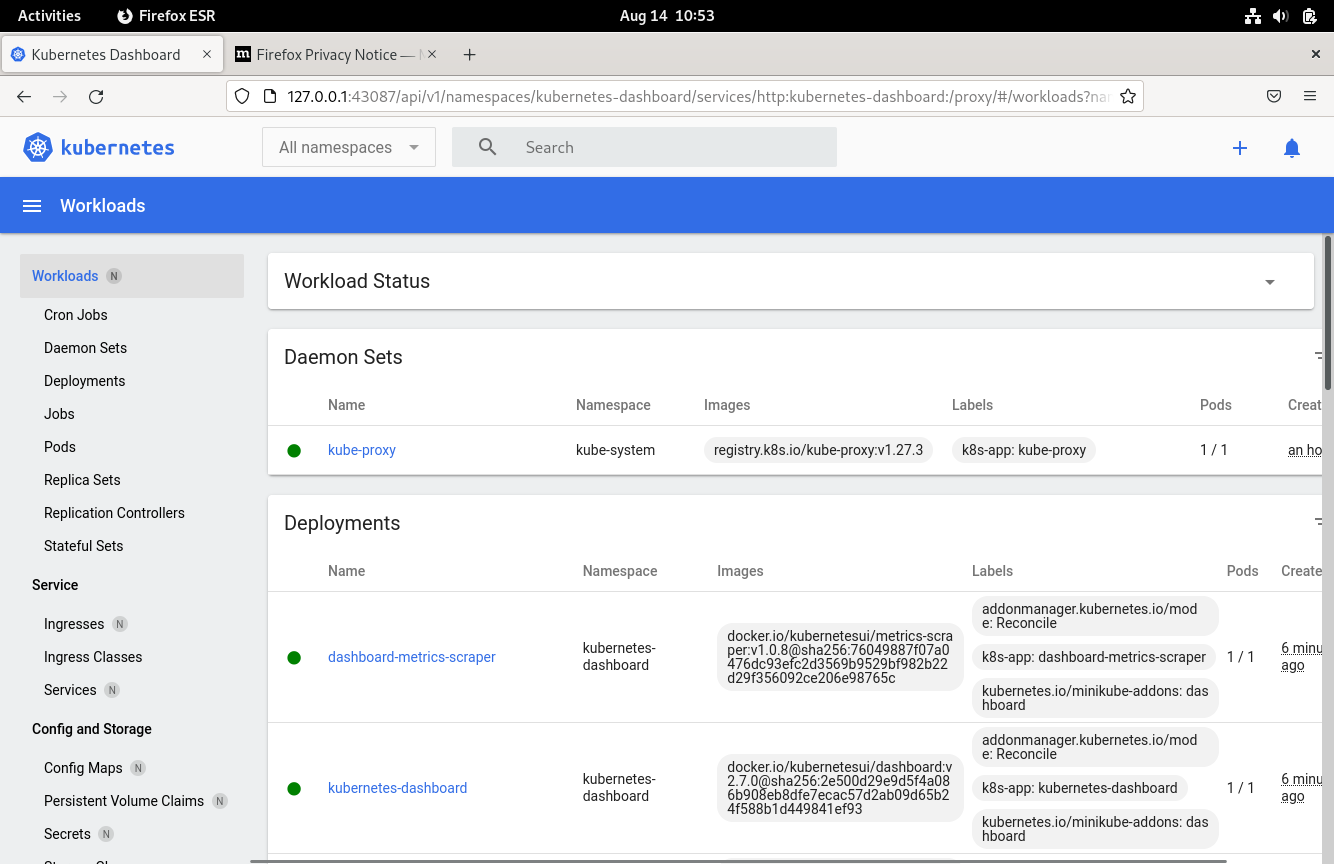
This will trigger your default web browser to pop open the Kubernetes dashboard as shown below:
7) Test Minikube Kubernetes Installation
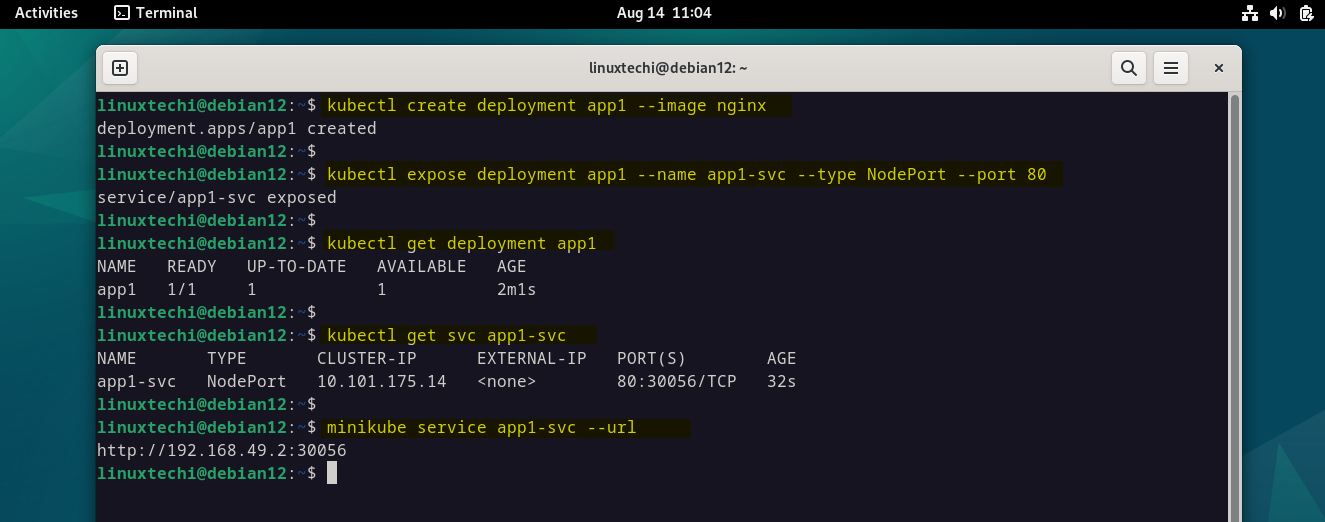
In order to test kubernetes cluster installation, let’s try to create sample nginx based deployment, run following set of kubectl commands,
$ kubectl create deployment app1 --image nginx
$ kubectl expose deployment app1 --name app1-svc --type NodePort --port 80
$ kubectl get deployment app1
$ kubectl get svc app1-svc
$ minikube service app1-svc --url
Access application using url, http://192.168.49.2:30056
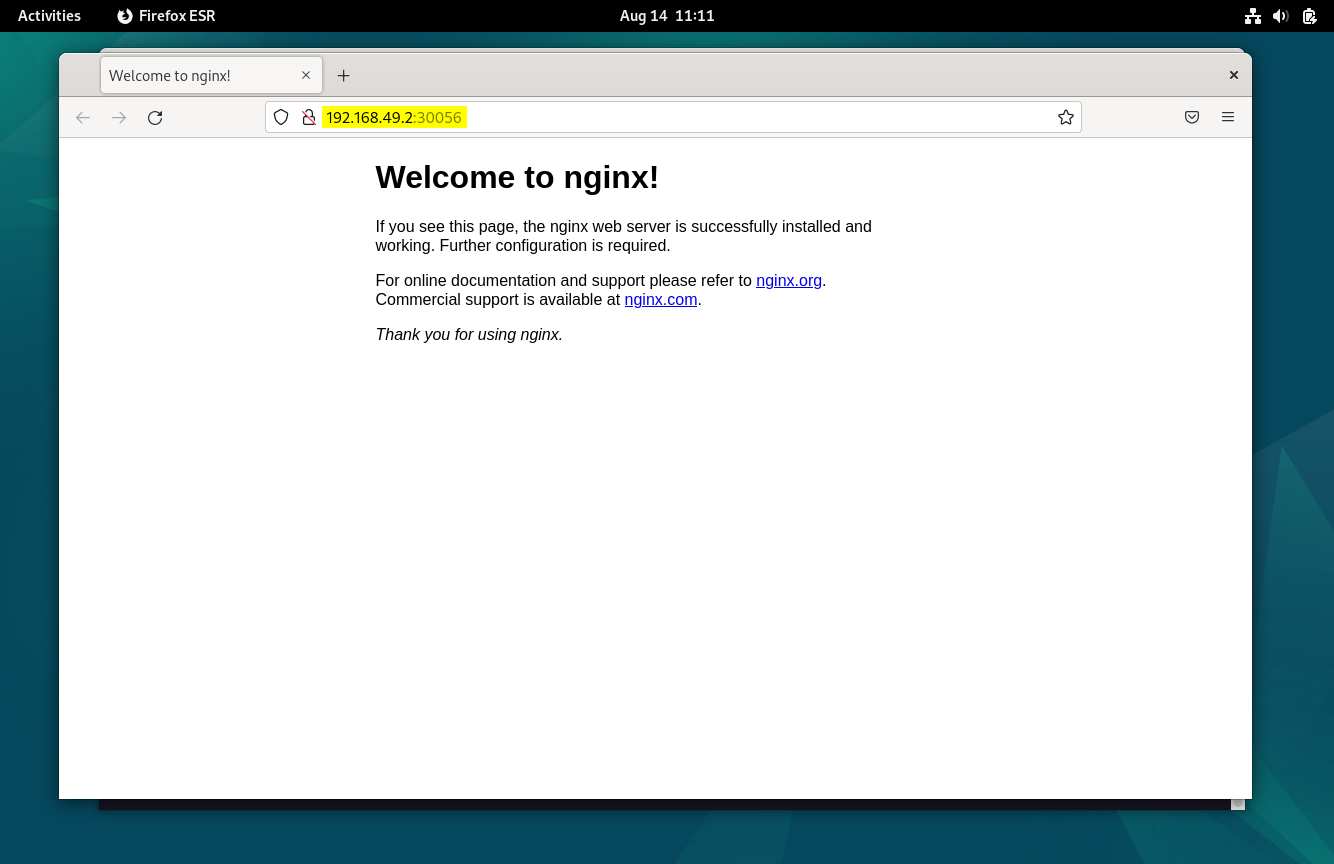
Perfect! , above page confirms we can access our application. This also confirms that minikube Kubernetes cluster is working correctly.
8) Managing Minikube Cluster
Run following minikube commands to stop, start and restart minikube ,
$ minikube stop
$ miniube start
$ minikube restart
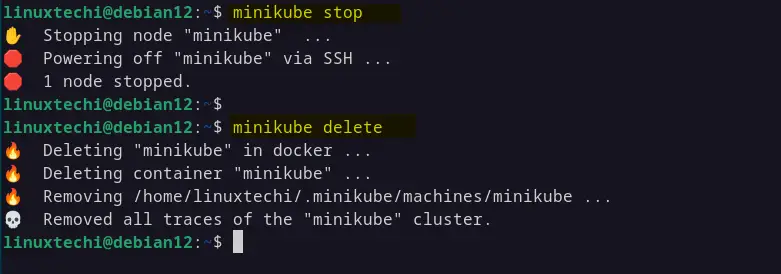
Execute beneath commands to delete minikube,
$ minikube stop
$ minikube delete
That’s all from this post, I hope you found it informative and useful. Kindly do post your queries and feedback in below comments section.
Also Read : How to Setup Kubernetes(k8s) Cluster in HA with Kubeadm
Thank you!
Is there any solution to run Kubernetes on Minikube (or other platforms) but on several virtual nodes? I know about a restriction regarding one node only in Minikube, but I would like to test Kubernetes on three nodes.
Hey Alexey,
I don’t think so , we can run multiple node kuberenetes cluster using Minikube. Refer the following URL to run multinode Kuberenetes cluster without minikube ,
https://www.linuxtechi.com/install-kubernetes-k8s-on-ubuntu-20-04/small remarks:
1) reboot is not necessary (it is not windows)
2) docker and kubectl are already part of debian 12 –>
sudo apt install docker.io kubernetes-client
3) minikube is also available as debian package (avoid bin-installer, it is not windows)
curl -LO https://storage.googleapis.com/minikube/releases/latest/minikube_latest_amd64.debbsudo dpkg -i minikube_latest_amd64.de
great step-by-step document, thanks