In this post, we will cover how to install minikube on RHEL 8, Rocky Linux 8 or AlmaLinux 8 step by step.
Minikube is a cross-platform and open-source tool that makes it possible for you to deploy a single-node Kubernetes cluster on your local machine.
Kubernetes, also known as k8s or simply as Kube, is an open-source container orchestration platform used for the automation scaling and deployment of containers.Minikube cluster helps developers and admins to build their test environment in minikube cluster.
Prerequisites of MiniKube
- Minimal Installed RHEL 8 or Rocky Linux 8 or AlmaLinux 8
- Locally Configured Repo or Subscription for RHEL 8.
- Minimum of 2 GB RAM and 2 vCPUs
- 20 GB hard disk space
- Sudo User with admin
- A stable internet connection
- Docker or virtual machine manager like VirtualBox, KVM,and VMware etc.
In this post, we will be using docker as driver for minikube. With all the prerequisites met, it’s time now to roll up our sleeves and get our hands dirty.
Step 1) Enable Official Docker Repository
To enable docker official repository run,
$ sudo dnf config-manager --add-repo=https://download.docker.com/linux/centos/docker-ce.repo
$ sudo dnf repolist

Step 2) Install Docker CE (Community Edition)
Run the following dnf command to install docker and its dependencies,
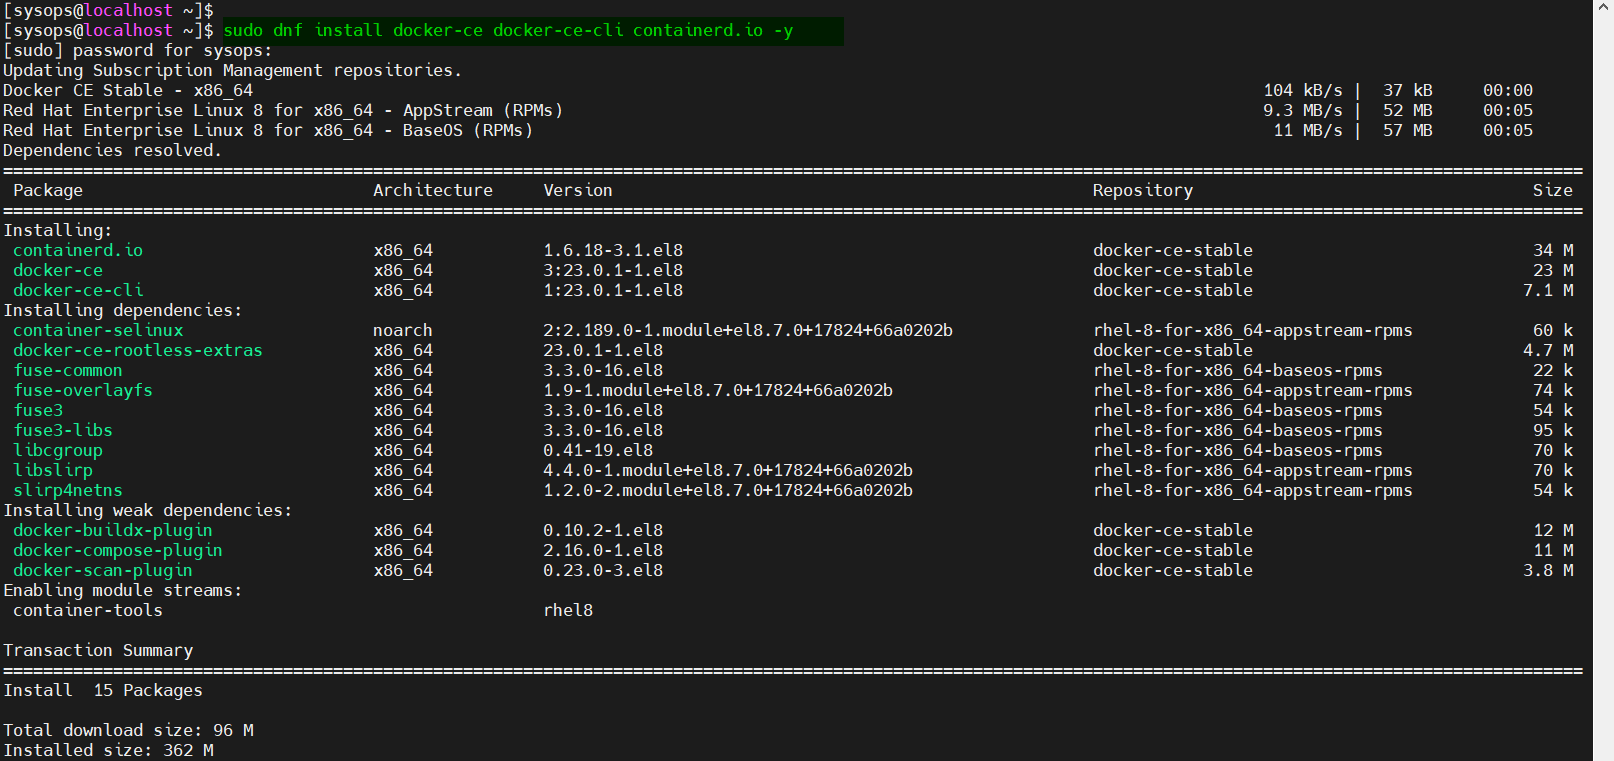
$ sudo dnf install docker-ce docker-ce-cli containerd.io -y
output,
Once docker is installed the start and enable it’s service, run following systemctl commands,
$ sudo systemctl start docker
$ sudo systemctl start docker
Allow your local user to run docker commands without sudo, run
$ sudo usermod -aG docker $USER
$ newgrp docker
Step 3) Install Kubectl Binary
Kubectl is a command-line tool which interacts with Kubernetes cluster via APIs. Using kubectl we deploy our applications as deployment. By default, kubectl is not included in RHEL 8 , Rocky Linux 8 or AlmaLinux 8 package repositories. Therefore, we are going to manually install it using beneath commands,
$ curl -LO "https://dl.k8s.io/release/$(curl -L -s https://dl.k8s.io/release/stable.txt)/bin/linux/amd64/kubectl"
$ sudo cp kubectl /usr/local/bin/ && sudo chmod +x /usr/local/bin/kubectl
$ kubectl version --client
Output of above commands would be something like below,

Step 4) Download MiniKube Binary and Start Cluster
After installing the kubectl, let’s download and install minikube binary using the following commands,
$ curl -LO https://storage.googleapis.com/minikube/releases/latest/minikube-linux-amd64
$ sudo install minikube-linux-amd64 /usr/local/bin/minikube
Now start minikube cluster using the beneath command,
$ minikube start --driver docker
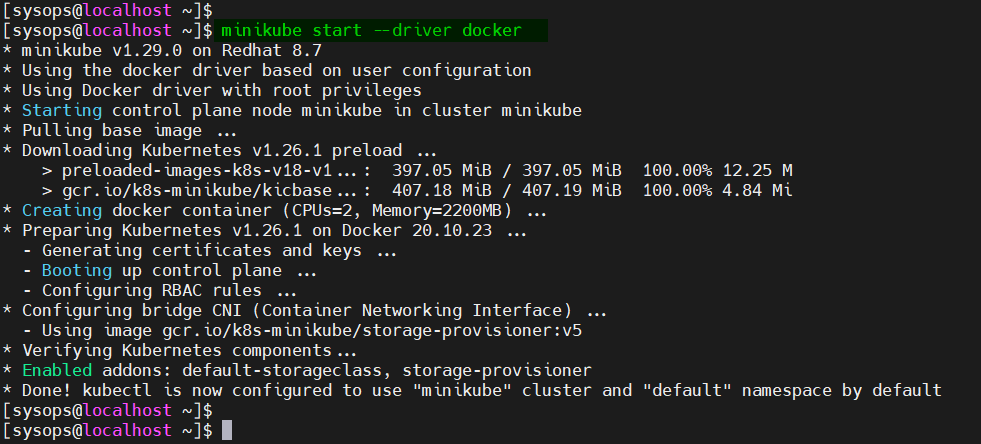
Output above confirms that minikube command has started the single node Kubernetes cluster using docker as driver.
Run below minikube command to verify the status of your local Kubernetes cluster,
[sysops@localhost ~]$ minikube status
minikube
type: Control Plane
host: Running
kubelet: Running
apiserver: Running
kubeconfig: Configured
[sysops@localhost ~]$
[sysops@localhost ~]$ minikube ip
192.168.49.2
[sysops@localhost ~]$
To stop stop the minikube cluster, execute,
$ minikube stop
Execute the “kubectl” commands to view cluster and node information
$ kubectl cluster-info
$ kubectl get nodes

Step 5) Test and Verify Kubernetes Cluster
To test Kubernetes cluster, let try to create k8s deployment using echo server image, it is equivalent to http web server and expose it as a service on port 8080,
[sysops@localhost ~]$ kubectl create deployment test-minikube --image=k8s.gcr.io/echoserver:1.10
deployment.apps/test-minikube created
[sysops@localhost ~]$
To access test-minikube deployment, expose it as service, run the following command,
[sysops@localhost ~]$ kubectl expose deployment test-minikube --type=NodePort --port=8080
service/test-minikube exposed
[sysops@localhost ~]$
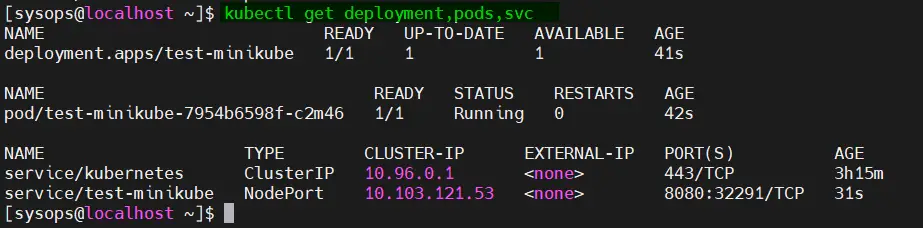
Run below kubectl command to get deployment,pods and service information for above created deployment,
$ kubectl get deployment,pods,svc
To access service, get its url by running the beneath command.
[sysops@localhost ~]$ minikube service test-minikube --url
http://192.168.49.2:32291
[sysops@localhost ~]$
[sysops@localhost ~]$ curl http://192.168.49.2:32291/
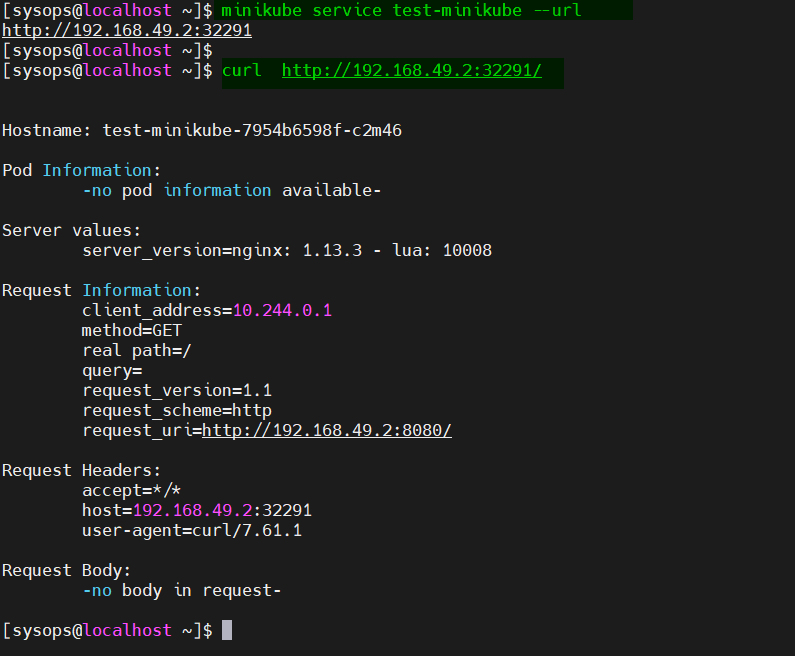
Great, it means our Kubernetes cluster is working fine as we are able to access our sample application.
Step 6) Enable MiniKube Addons
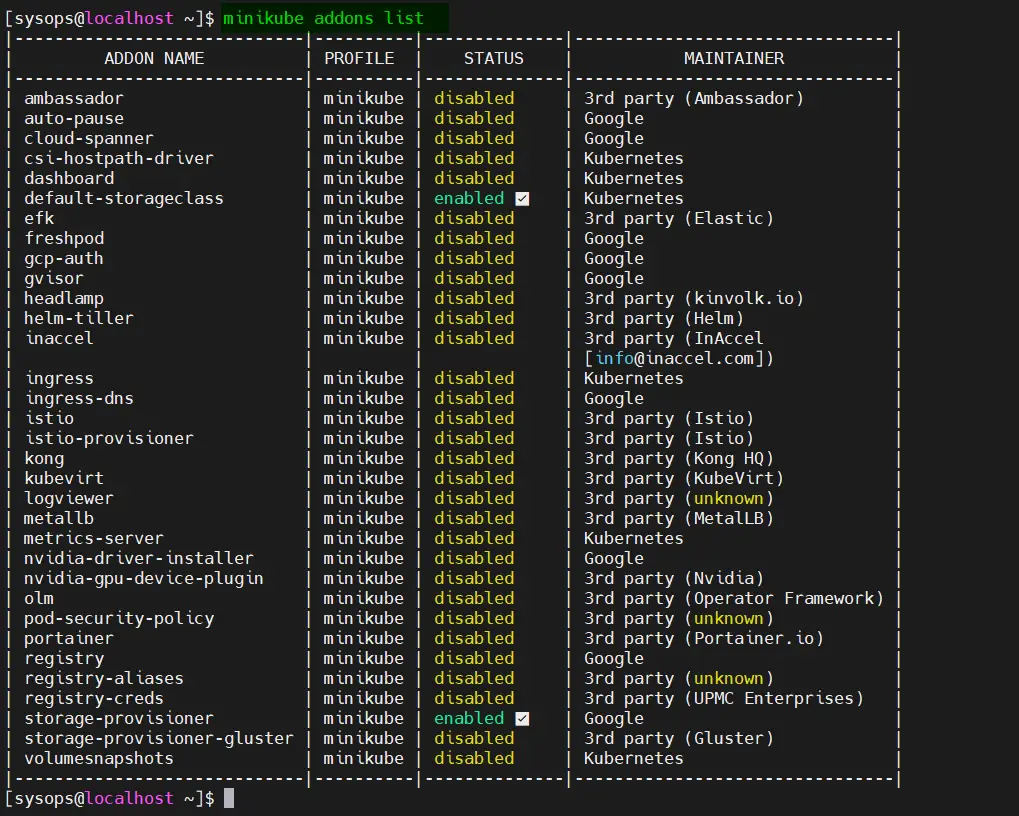
Minikube offers addons which can add additional functionality to our clusters. To list all available addons run,
$ minikube addons list
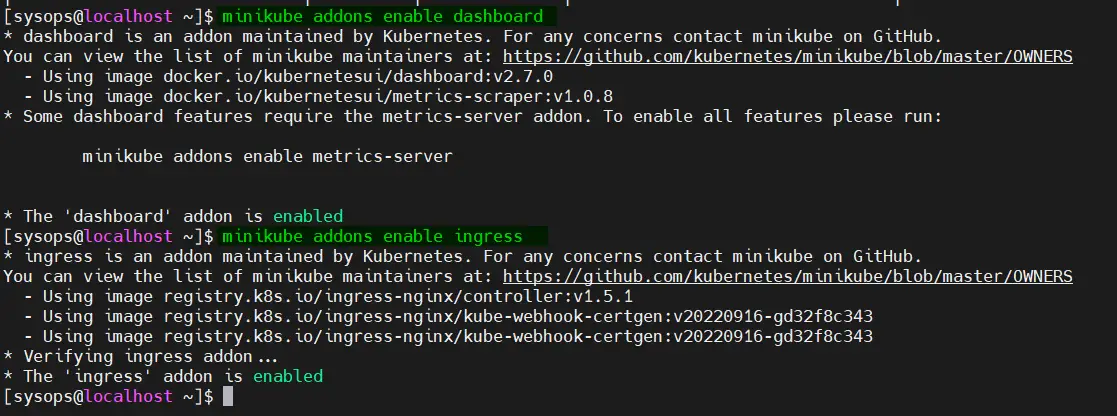
Kubernetes ships with a dashboard that allows you to manage your cluster. In Minikube, dashboard has been added as an addons. So to enable it, run
$ minikube addons enable dashboard
Also to enable nginx ingress controller, run
$ minikube addons enable ingress
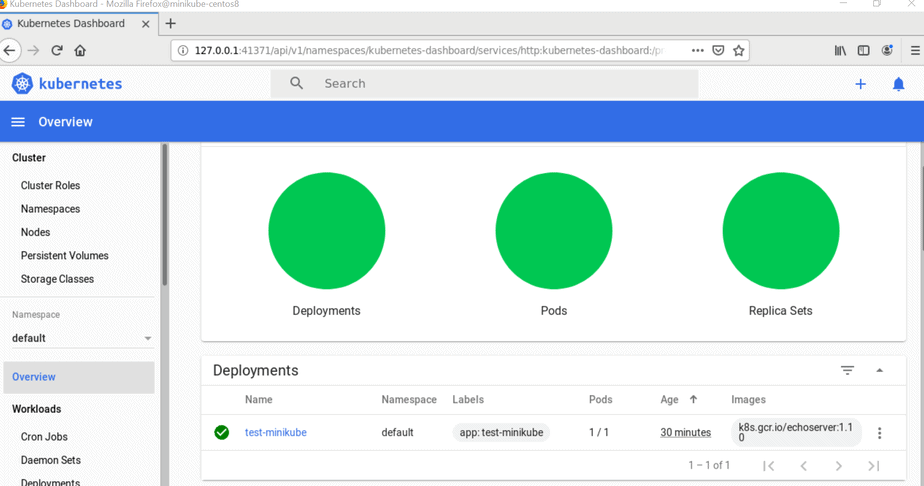
To access the dashboard, run
$ minikube dashbaord --url
This will start the dashboard in your systems’s web vrowser.
And that’s just about it. We have managed to successfully install Kubernetes with Minikube on RHEL 8, Rocky Linux 8 or AlmaLinux 8. You are welcome to share your feedback and comments in below comments section.
Also Read : How to Configure NFS based Persistent Volume in Kubernetes
Very Good Article to set up minikube.
[root@centosnews ~]# minikube dashboard –url
? Verifying dashboard health …
? Launching proxy …
? Verifying proxy health …
‘http://127.0.0.1:38423/api/v1/namespaces/kubernetes-dashboard/services/http:kubernetes-dashboard:/proxy/’
Dashboard url is not working getting msg “This site can’t be reached”
@Lokesh:
This worked for me: kubectl proxy –address=’0.0.0.0′ –disable-filter=true
For more info: https://stackoverflow.com/a/54960906
This is an excellent article, there’s been a few out there that I’ve tried with some error or lack of success. First article i’ve walked through that got it right e2e. Thanks!
You cant use ingress with the driver none, any workaround?
After Docker installation, one has to add user to ‘Docker’ group
sudo groupadd docker
sudo usermod -aG docker $USER
If not then one has to face the issue reported
‘https://github.com/kubernetes/minikube/issues/10589’
Hey,
Thanks a lot for sharing such informative article and such crystal clear steps to setup the minikube.
Appreciated your efforts to share knowledge.