Apache Subversion is also known as SVN, it is an open-source versioning and revision controlling program which helps in storing the present and past historic file versions like documents, source codes and web pages. SVN comes under Apache License.
In this tutorial, we will learn how install & configure SVN on RHEL 8 and Rocky Linux 8. Here authenticated users will be allowed to perform check-in and checkout operations on SVN repository.
Step 1) Install SVN and Apache
SVN & Apache (http) package are available in the default package repositories of RHEL 8 and Rocky Linux 8. Run following dnf command to install required packages,
$ sudo dnf install -y httpd subversion mod_dav_svn
Step 2) Edit Configuration File of Apache Subversion
Create a file ‘/etc/httpd/conf.d/subversion.conf’ and add the following lines to it.
$ sudo vi /etc/httpd/conf.d/subversion.conf
<Location /svn>
DAV svn
SVNParentPath /var/www/svn/
AuthType Basic
AuthName "SVN Repository"
AuthUserFile /etc/svn/svn-auth-accounts
Require valid-user
</Location>
Above settings will allow only the authenticated users to use SVN repository.
Step 3) Create SVN Users via htpasswd command
Run the beneath command to create user for SVN via htpasswd command,
$ sudo htpasswd -cm /etc/svn-auth-accounts linuxtechi
New password:
Re-type new password:
Adding password for user linuxtechi
$
In the above htpasswd command we have used ‘-c’ & ‘-m’ options. -c is used to create the password file (/etc/svn-auth-accounts) and -m used to create MD5 encryption password for the user. To create second user remove the ‘-c’ from the above command otherwise it will overwrite existing file.
$ sudo htpasswd -m /etc/svn-auth-accounts pkumar
New password:
Re-type new password:
Adding password for user pkumar
$
Step 4) Create SVN Repository
Run following commands one after the another to create your first svn repository and to set the required permissions,
$ sudo mkdir /var/www/svn
$ cd /var/www/svn/
$ sudo svnadmin create repo
$ sudo chown apache.apache repo/
Note: In case SELinux is enable then apply below selinux rules by running,
$ sudo chcon -R -t httpd_sys_content_t /var/www/svn/repo/
$ sudo chcon -R -t httpd_sys_rw_content_t /var/www/svn/repo/
Step 5) Start and Enable Apache Service
Run the beneath systemctl commands to start and enable apache web server’s service.
$ sudo systemctl start httpd
$ sudo systemctl enable httpd
In case firewall is enabled on your system then allow following port by running,
$ sudo firewall-cmd --permanent --zone=public --add-service=http
$ sudo firewall-cmd --permanent --zone=public --add-service=https
$ sudo firewall-cmd --reload
Step 6) Access SVN Repo from Web Browser
Type the following URL in your web browser,
http://<SVN-System-IP>/svn/repo
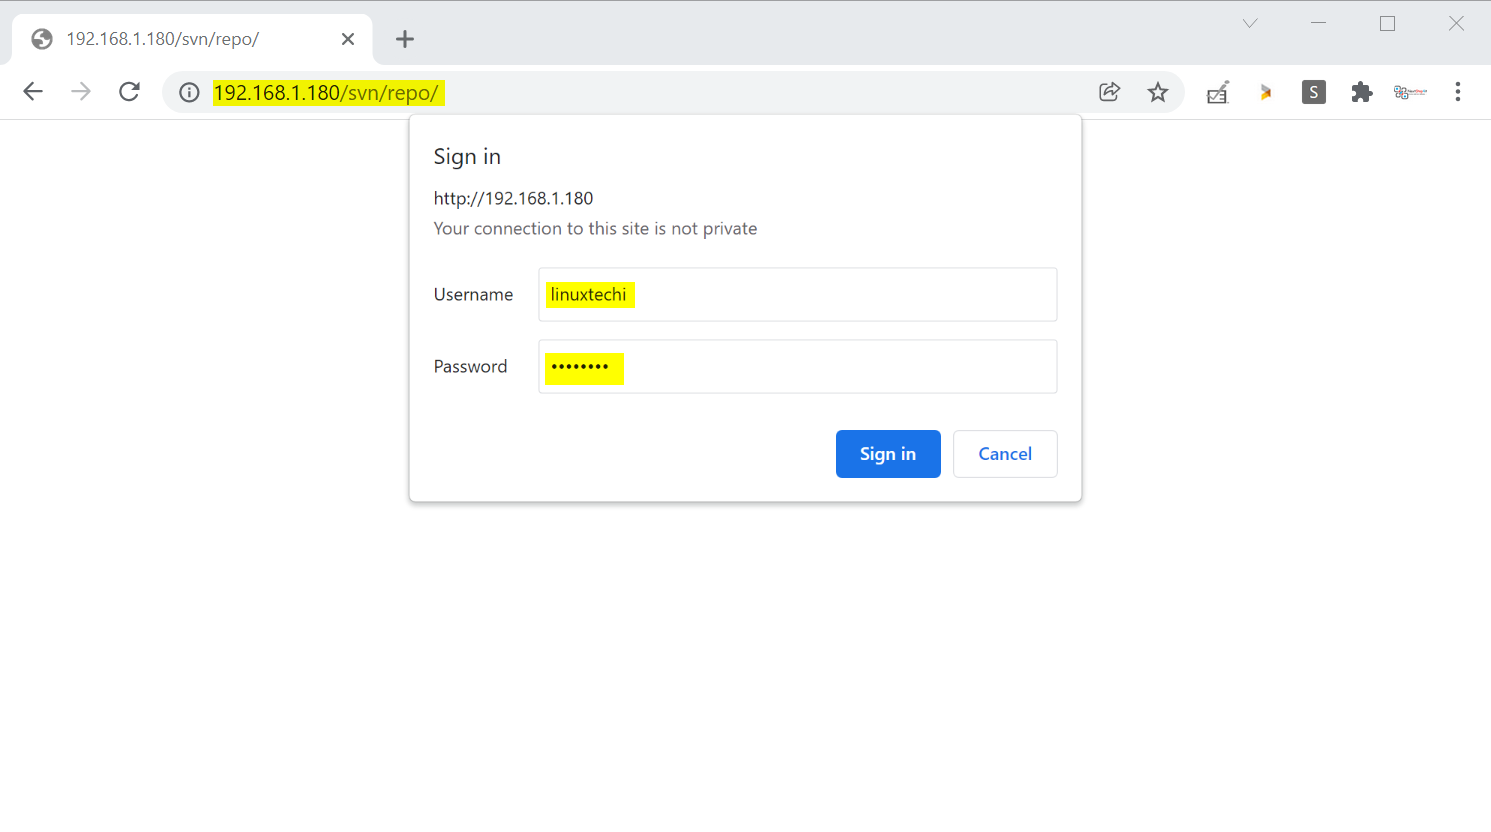
In the browser just replace ip address with your SVN Server’s IP

Step 7) Disable anonymous access on SVN Repository
Edit the file – /var/www/svn/repo/conf/svnserve.conf, add the below two lines
## Disable Anonymous Access
anon-access = none

## Enable Access control
authz-db = authz
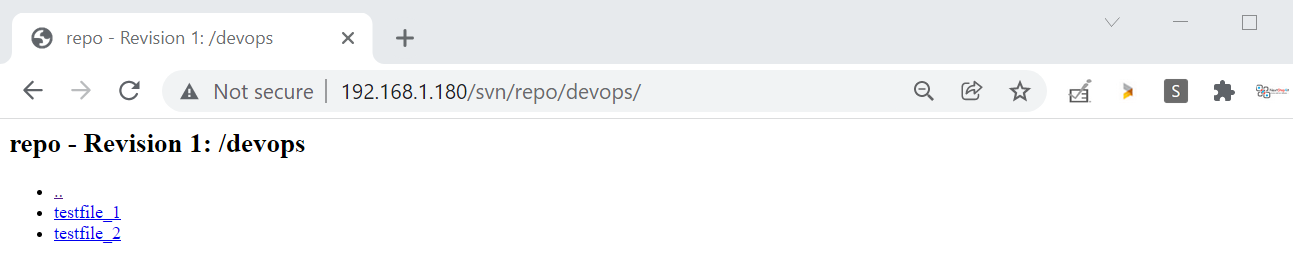
Step 8) Import Project Directory’s Content to SVN repository
Let’s create our first sample project directory and its file.
$ mkdir devops
$ cd devops/
$ touch testfile_1 ; touch testfile_2
$
Now use SVN command to import ‘devops’ project to the repo. As we have created sample ‘devops’ project on the svn server itself. So run following svn command,
$ sudo svn import -m "First SVN Repo" devops file:///var/www/svn/repo/devops
Adding devops/testfile_1
Adding devops/testfile_2
Committing transaction...
Committed revision 1.
$
Now Check from the Browser
Step 9) Check Out the Project
In my case, I want to checkout the devops project on my Ubuntu laptop using SVN command. So to perform checkout operations, please make your system has subversion package installed, if not then use “sudo apt install -y subversion“ command to install required package.
$ mkdir svn_data
$ svn co http://192.168.1.180/svn/repo/devops/ /home/pkumar/svn_data/ --username linuxtechi
A svn_data/testfile_1
A svn_data/testfile_2
Checked out revision 1.
$
Step 10) Committing Changes
After making required changes in the project code , we can commit the changes to the SVN repos. In my case i have created one more file in linuxproject folder.
$ cd svn_data/
$ touch testfile_3
$ svn add testfile_3 --username linuxtechi
A testfile_3
$
$ svn commit -m "New File addedd" --username linuxtechi
Adding testfile_3
Transmitting file data .
Committed revision 2.
$
Note: While committing the changes if you are getting below error
svn: E000013: Commit failed (details follow):
svn: E000013: could not begin a transaction
Then to solve this error , make sure that Apache user has read & write access to the entire repository.
$ cd /var/www/svn/repo
$ sudo chown -R apache:apache *
$ sudo chmod -R 664 *
That’s all from this tutorial, please do share your feedback and queries in below comments section.
chmod -R 700 * work better for me
permission denied
svn: commit fail
please run this command for this error
chown apache.apache /var/www/svn -R