In this post, we will show you how install GitLab CE (Community Edition) on Debian 12 (Bookworm) system step-by-step.
GitLab is a powerful web-based platform for version control and DevOps collaboration. It allows developers to manage and track their source code repositories, collaborate with team members, and automate various DevOps processes.
Prerequisites
Before getting started, ensure that you have the following in place:
- An instance of Debian 12 with SSH access.
- Minimum of 8 GB RAM
- 20GB of hard disk space
- A valid domain name pointed to the IP address of the server.
- User with sudo rights
Let’s get started with installing GitLab CE on Debian 12.
1) Update the System
To get started, access your Debian server using SSH as a sudo user and invoke the following command to update the package lists on your system.
$ sudo apt update
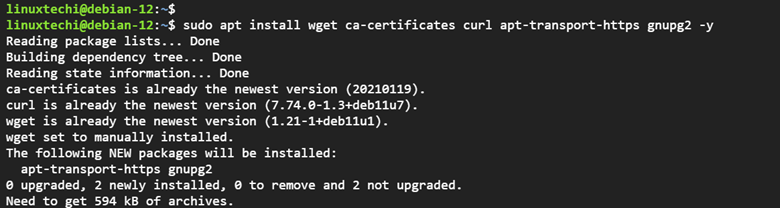
2) Install GitLab Dependencies
The next step is to install dependencies that will be essential when installing GitLab. To do so, run the command:
$ sudo apt install wget ca-certificates curl apt-transport-https gnupg2 -y
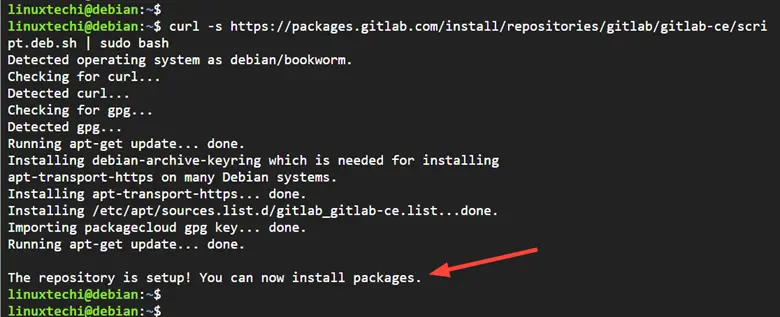
3) Install Gitlab on Debian 12
Once all the prerequisites have been installed, the next step is to install Gitlab. Thankfully, Gitlab provides an automated script that handles the installation of Gitlab including adding the Gitlab repository and importing the GPG key.
$ curl -s https://packages.gitlab.com/install/repositories/gitlab/gitlab-ce/script.deb.sh | sudo bash
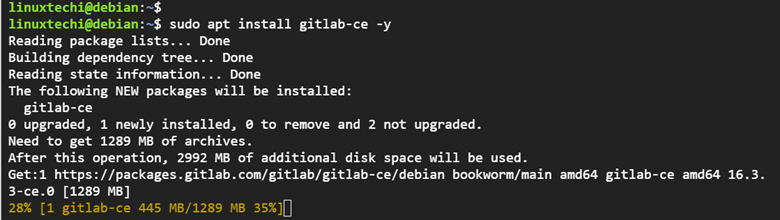
Next, install the GitLab community edition on Debian 12 as shown.
$ sudo apt install gitlab-ce -y
During the installation, you will see a notification that GitLab has not yet been configured as well as not being able to detect a hostname for your instance. In addition, you will be required to configure a URL for your instance by setting the `external_url` directive in the /etc/gitlab/gitlab.rb configuration file.
We are going to do this in the next steps.
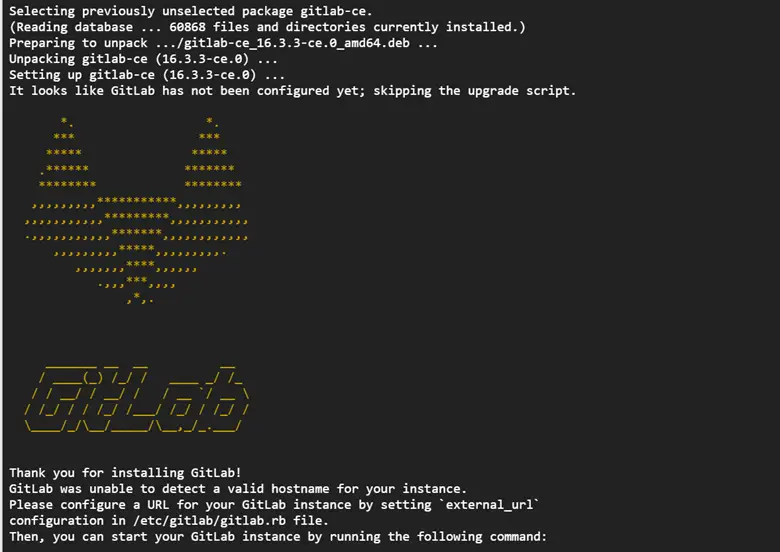
We will go a step further and make the necessary configurations.
4) Configure Gitlab
To configure your GitLab installation, you need to edit the ‘github.rb’ file as indicated in the summary output. Here we will use the vi editor to open the file.
$ sudo vi /etc/gitlab/gitlab.rb
Search and locate the ‘external_url‘ parameter. Update the field to correspond to your domain as follows:
external_url ‘http://domain.com’
Using our test domain, this will be:
external_url ‘http://crazytechgeek.info’
Next, locate the letsencrypt[‘contact_emails’] field and update it to include an email address that will be used to alert the user when the Let’s Encrypt SSL certificate nears its expiration date.
letsencrypt[‘contact_emails’] = [‘[email protected]’]
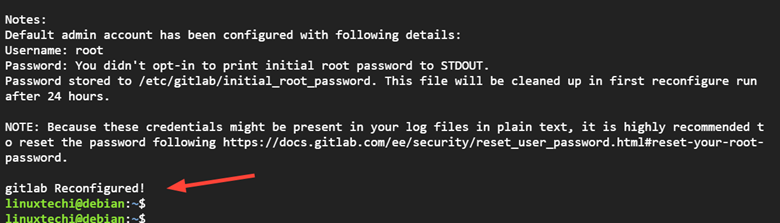
Finally, save the file and reconfigure the GitLab installation as shown.
$ sudo gitlab-ctl reconfigure
The reconfiguration takes a while – roughly 7 minutes. Once done, you should get the notification ‘GitLab Reconfigured!’.
5) Access Gitlab Web Interface
All the steps for installation a basic installation of GitLab are complete. The next step is to log into the web interface using the root credentials.
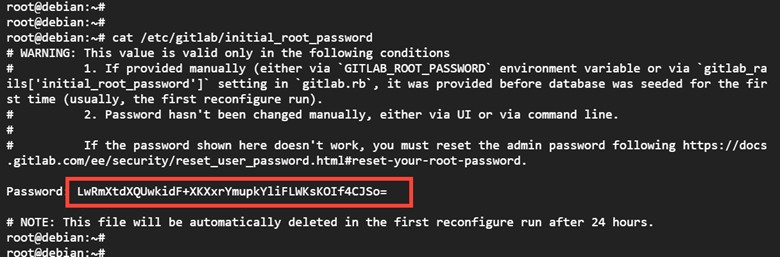
NOTE: By default, Gitlab generates a root password and stores it in the /etc/gitlab/initial_root_password file.
$ cat /etc/gitlab/initial_root_password
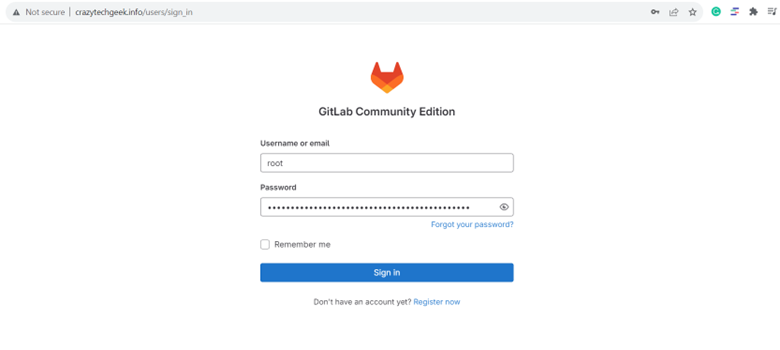
Next, access the web interface
http://domain.com
Use `root` as the username and the password from the initiall_root_password file then click ‘Sign In’.
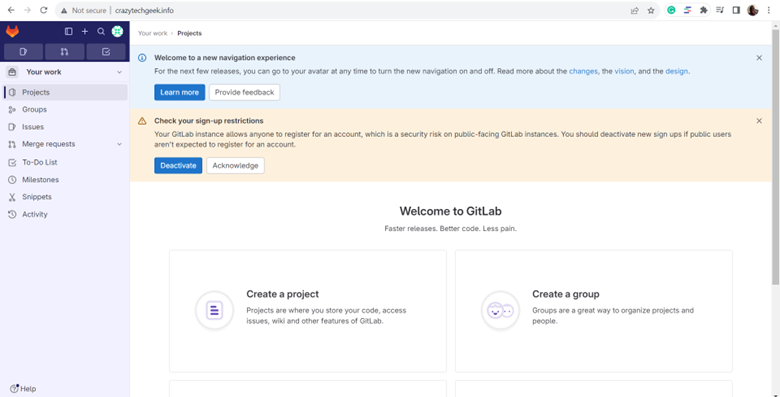
This ushers you to the dashboard below.
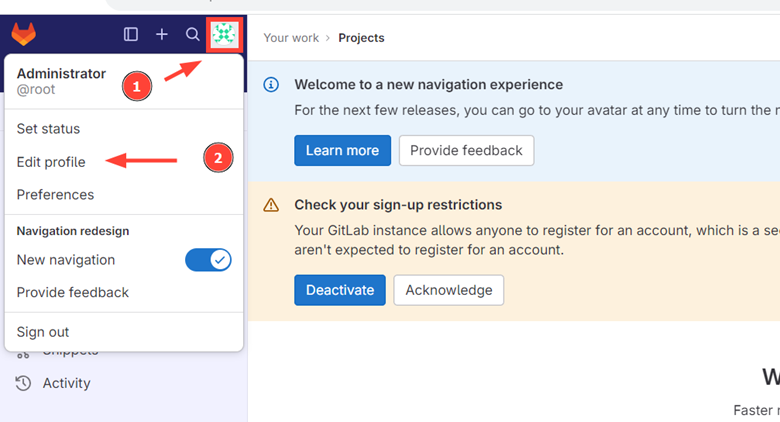
6) Change Root Password
Unlike previous Gitlab releases that allowed you to reset the root password after providing the initial password for the first time, the current version requires you to manually set a new password from the ‘Admin’ settings.
So, click on the ‘Admin’ icon shown and select ‘Edit’ profile.
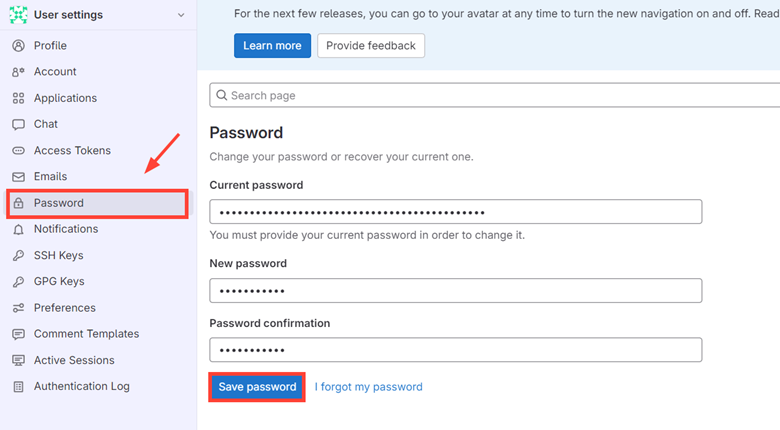
Next, navigate and select ‘Password’ and create a new password. Then click ‘Save password’ to save the new password that you have just created.
7) Secure Gitlab using Let’s Encrypt SSL Certificate
Another step you should consider is encrypting your GitLab instance with an SSL certificate to encrypt traffic transmitted back and forth. You can easily achieve this using the Let’s Encrypt SSL certificate.
GitLab configuration supports Let’s Encrypt and, in this step, we will configure our Gitlab instance to use Let’s Encrypt SSL for secure connections.
Now back to the gitlab.rb file
$ sudo vi /etc/gitlab/gitlab.rb
Edit the following parameters as shown.
letsencrypt['enable'] = true
letsencrypt['auto_renew'] = true
The first line allows Let’s Encrypt to be configured and the second line sets the renewal of the certificate to be automatic.
Along with that, you can define the auto-renewal hour and day of the month as follows:
letsencrypt['auto_renew_hour'] = 5
letsencrypt['auto_renew_day_of_month'] = "*/6"
Also, set the URL to use HTTPS protocol instead of HTTP.
external_url 'https://crazytechgeek.info'
Save the changes and exit the config file. To effect the changes, once again, run the command below.
$ sudo gitlab-ctl reconfigure
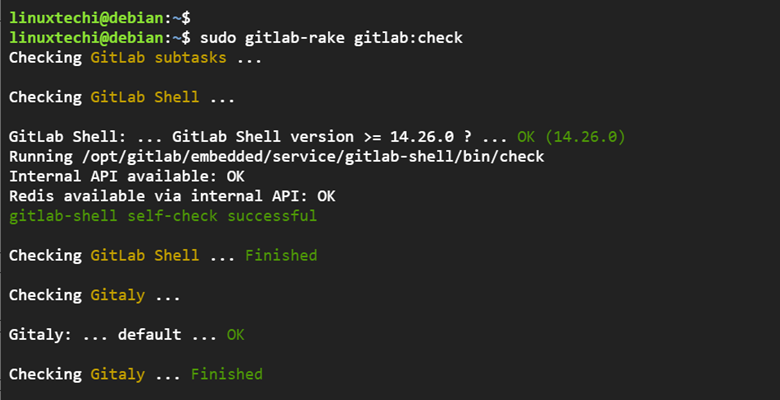
To verify that everything went according to plan, invoke the command:
$ sudo gitlab-rake gitlab:check
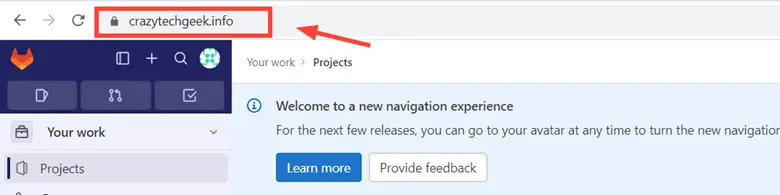
Now Reload the browser. This time around, you will notice that the URL to your server’s instance is now secured using Let’s Encrypt SSL certificates.
This wraps up our guide for today. In this guide, we showed you how to install and configure GitLab on Debian 12 step-by-step.
I hope you have found it informative and useful. Kindly do post your queries and feedback in below comments section.
Also Read: How to Install NFS Server on Debian 12 Step-by-Step