Monitoring disk usage and storage space in your system is important for you as a stand-alone system owner or as a system admin of a company to know to maintain the efficiency of your Linux system. In this article, we will discuss about the top tools and command line utilities available in Linux to monitor your disk usage to provide information about total size available, total used, file system information and partition information etc. Let’s see how these tools help in retrieving this information:
1. df command
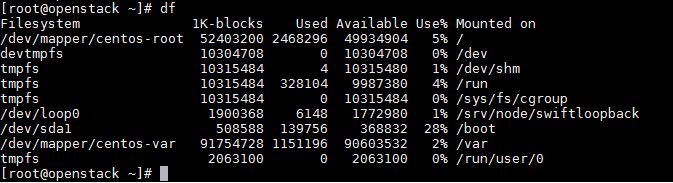
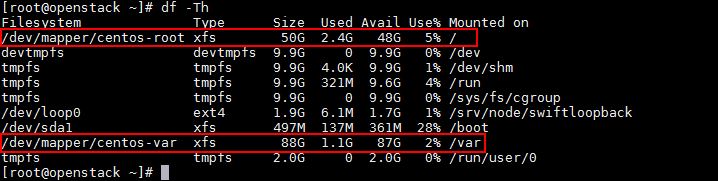
df is a Linux command line utility to monitor your Linux disk usage. The df command prints the complete summary of the disk usage details of your file system. With -hT switch along with df command, it displays details about the filesystem, type, total size of the disk, size used already, size still remaining, total used percentage level and where the disk is mounted on etc. in an easy readable format.
To display the disk usage of all file systems and its type in human readable format.
[root@openstack ~]# df -Th
For more details of df of command refer this “11 df command examples in Linux”
2. pydf command
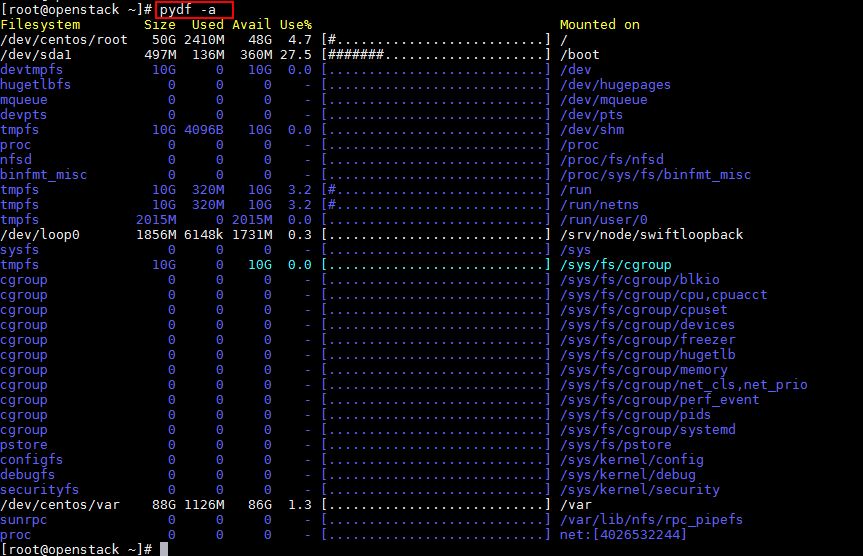
pydf is a python command line utility and one of the best alternative for df command in Linux. It works similar to df command, but one difference is that the output is highlighted in different colors. Pydf command is not available by default in CentOS 7.x and RHEL 7.x. To install pydf on CentOS 7.x / RHEL 7.x , run the beneath commands one after the another.
[root@openstack ~]# yum install -y python-pip
[root@openstack ~]# pip install --upgrade pip
[root@openstack ~]# pip install pydf
Collecting pydf
  Downloading pydf-12.tar.gz
Installing collected packages: pydf
  Running setup.py install for pydf ... done
Successfully installed pydf-12
[root@openstack ~]#
Refer the below steps to install ‘pydf’ utility on Ubuntu 16.04/16.10 and Linux Mint 18
$ sudo apt-get update
$ sudo   apt-ge install pydf
Display the output of all the file system using below command
[root@openstack ~]# pydf -a
Output of pydf command in human readable format
[root@openstack ~]# pydf -h

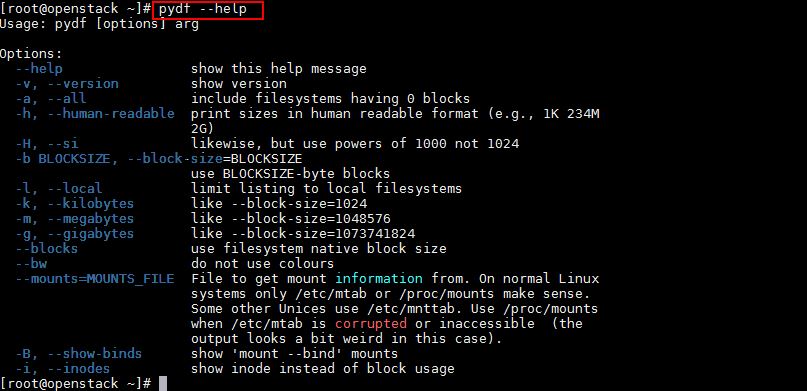
To list all the available options of pydf command , use the below command
[root@openstack ~]# pydf --help
3. fdisk Command
One of the most commonly used command line utility in Linux to monitor the partitions is the fdisk command. fdisk also called as fixed disk and fdisk helps you to get all details about the partitions in your system and also helps you to monitor, create, delete, move, copy any partition in your Linux system. With the fdisk command, data can be moved to a new disk as well. Make sure that you are a root user to run this command, or else you may get error “command not found”. Let’s see some of the basic fdisk commands and how does it help you in monitoring the partitions in your Linux system.
- View all disk partitions
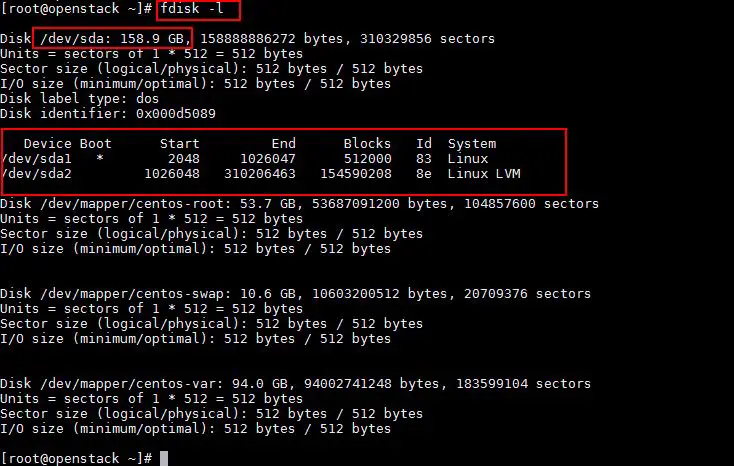
One of the most commonly used arguments in fdisk command is the “-l” which lists all the available partitions in your Linux system with their device names.
[root@openstack ~]# fdisk -l
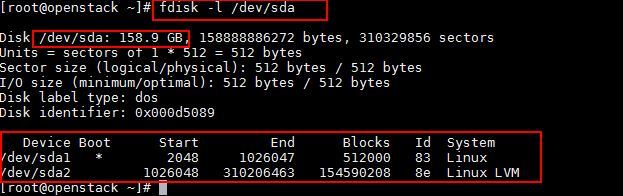
- View details about specific disk partition
Argument “-l” is to view all the available partitions, you can also view details about a specific partition by providing the device name next to the “-l” argument like this below:
[root@openstack ~]# fdisk -l /dev/sda
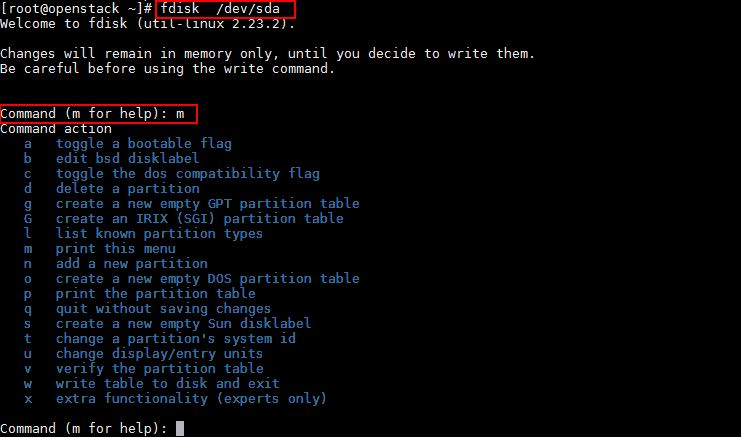
- View all fdisk commands
If you need to have a look at all the commands of fdisk for a particular hard disk /dev/sda, just type fdisk followed by the hard disk name like “fdisk /dev/sda” and in the following screen, type “m” to view all the commands for fdisk utility.
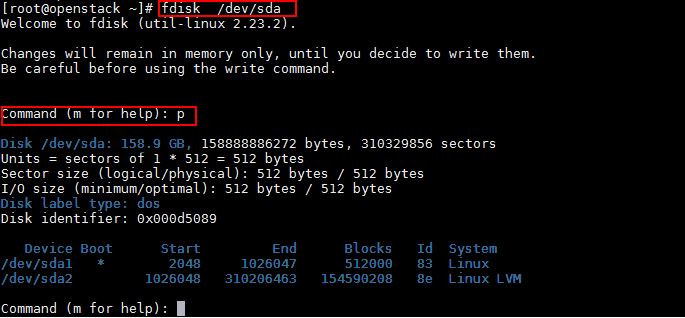
- Print details about all partitions tables
Like the previous operation, type “fdisk /dev/sda” and in the following screen type “p”, it will print all the details about that specific hard disk /dev/sda.
- Delete a Partition
To do any operation on any specific disk, you should be in the fdisk command mode of that particular hard disk like “fdisk /dev/sda” and enter d to being the delete operation. Once you enter “d” the system will prompt for which partition number need to be deleted and once you enter the partition number and then enter “w” to write the table to disk and exit the process. Please be careful with the delete operation as it would wipe out the whole partition and its data from your system. - Create new Partition
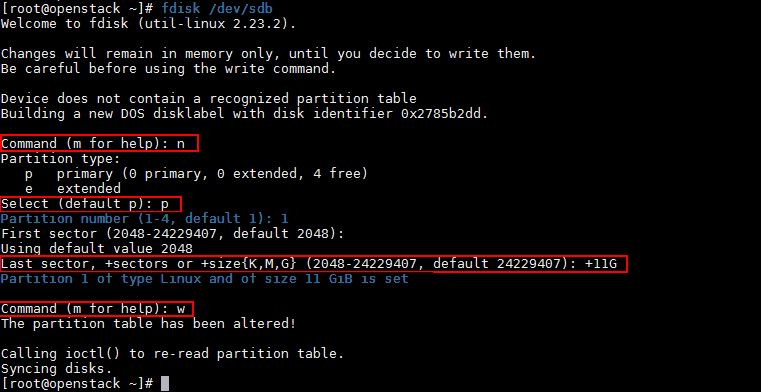
To create a new partition, as usual be in the fdisk command mode “fdisk /dev/sdb” and enter “n” to create new partition and it will ask you to create whether a primary “p” or extended partition “e” and then enter the size of the cylinder by “+11G” where it means 11 GB will be set as the size for the cylinder.
4. sfdisk command
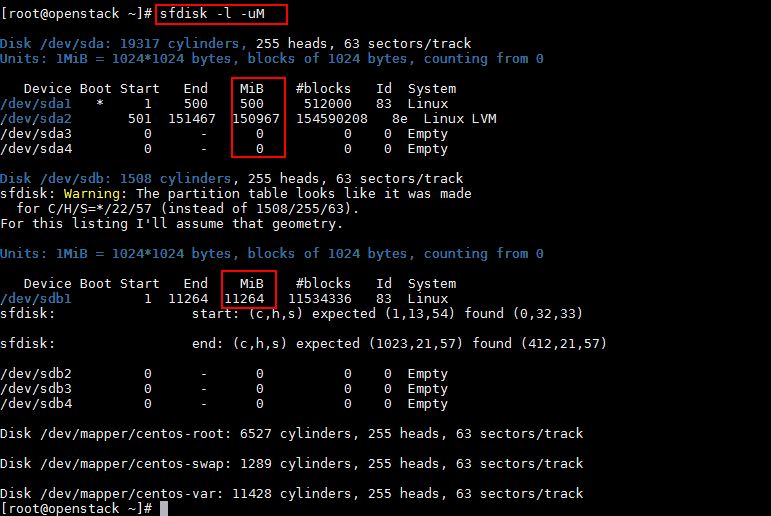
sfdisk stands for scriptable fdisk, sfdisk is a similar command like fdisk, but comes with more features than fdisk as it can display the partition size in MB. sfdisk also supports GPT, Sun, MBR and SGI partition tables, but sfdisk cannot create standard partitions for Sun and SGI disk label where as fdisk command is capable of creating partitions of these disks.
To display the size of partitions in MB, run the below command :
[root@openstack ~]# sfdisk -l -uM
5. cfdisk command
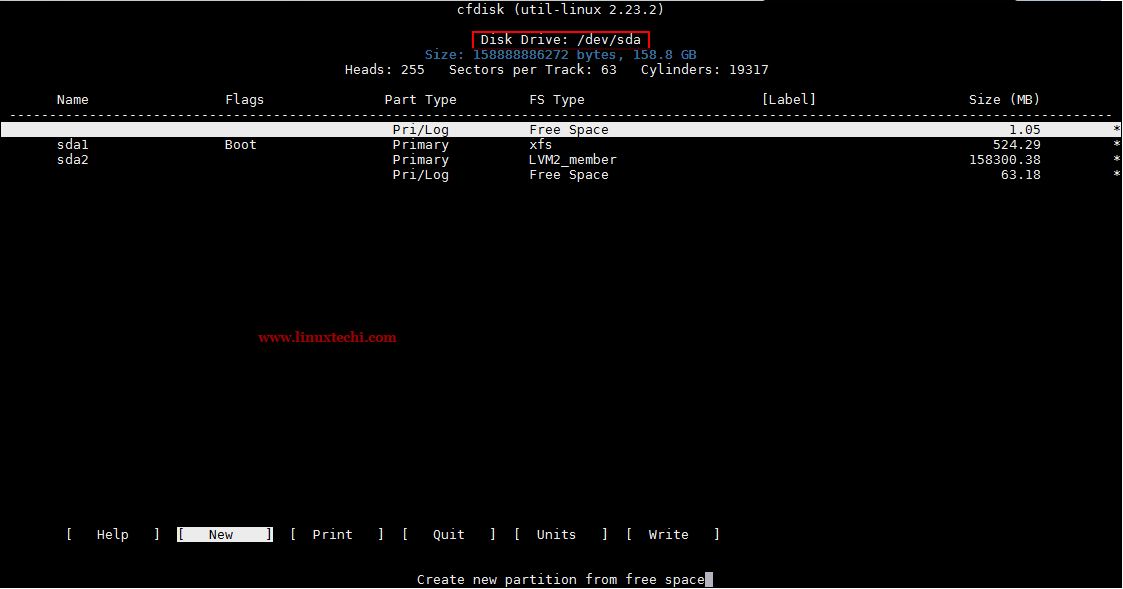
cfdisk stands for curses fdisk, cfdisk is another command line utility that helps in managing your linux disk partitions with ease. With an easy to use user interface, one can easily create, edit, delete or modify your partitions.
Use the below command to view partitions of a specific disk using cfdisk
[root@openstack ~]# cfdisk /dev/sda
Apart from the above list “parted command” can also be used to create, edit and view the partitions.
That’s all for this article. Please share your feedback and comments
Read Also : How to Create Disk Partitions with Parted Command in Linux