Shutter is a screenshot tool in Ubuntu Linux. Using Shutter we can take a screenshot of a specific area, window and whole screen. It also allows us to draw and highlights important area on screenshot image. Screenshot image can be saved as jpeg, png, gif, bmp, pdf, ps or svg and can be uploaded to image hosting site using FTP credentials.
In this article we will demonstrate how to install and use shutter in Ubuntu Linux.
There are two ways to install shutter either from command line using apt-get command or by using synaptic package manager
Install Shutter from command line :
Open the terminal and type below command command
linuxtechi@linuxtechi:~$ sudo apt-get update
linuxtechi@linuxtechi:~$ sudo apt-get install shutter
Note: Up to Ubuntu 18.04 LTS, Shutter package is available in their default package repositories. But after 18.04, shutter package has been removed from Ubuntu official repository.
Use below command to set unofficial shutter repository and then use apt command to install shutter
linuxtechi@linuxtechi:~$ sudo add-apt-repository -y ppa:linuxuprising/shutter
Install Shutter from Synaptic Package Manager
In case Synaptic is not installed then use the below command to install.
linuxtechi@linuxtechi:~$ sudo apt-get install synaptic
Start the Synaptic and search ‘shutter’

Select ‘mark for installation’ and then click on Apply.
Once the Installation is completed , Now try to access the shutter.
Click on the Shutter icon.
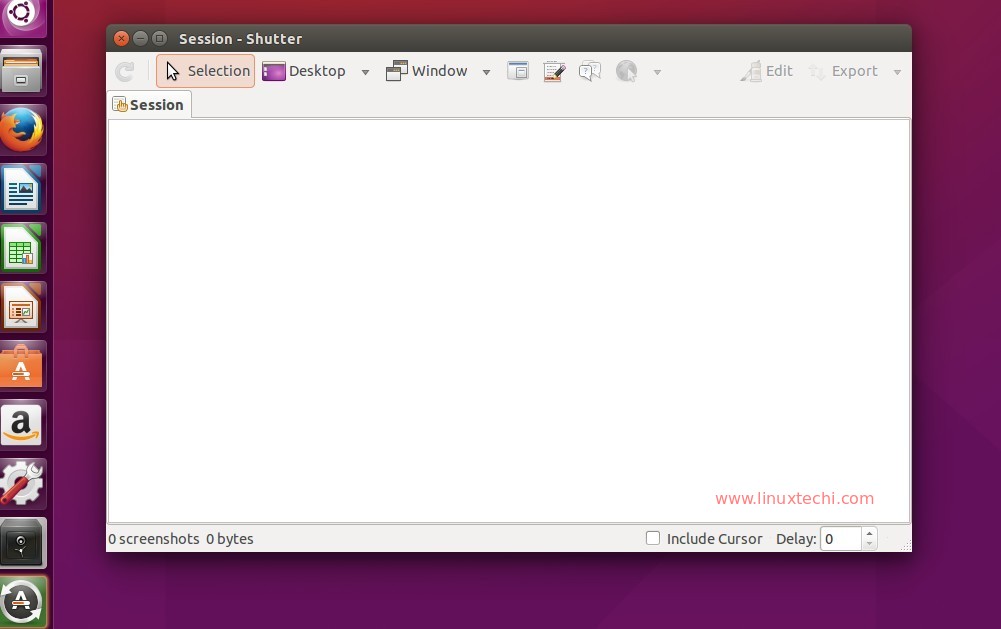
Different Screenshots that can be captured using shutter :
- To take a screenshot of particular or selected area click on ‘Selection’ option
- To take a screenshot of the whole desktop click on ‘Desktop’ option
- To take a screenshot of a particular window click on ‘window’ option
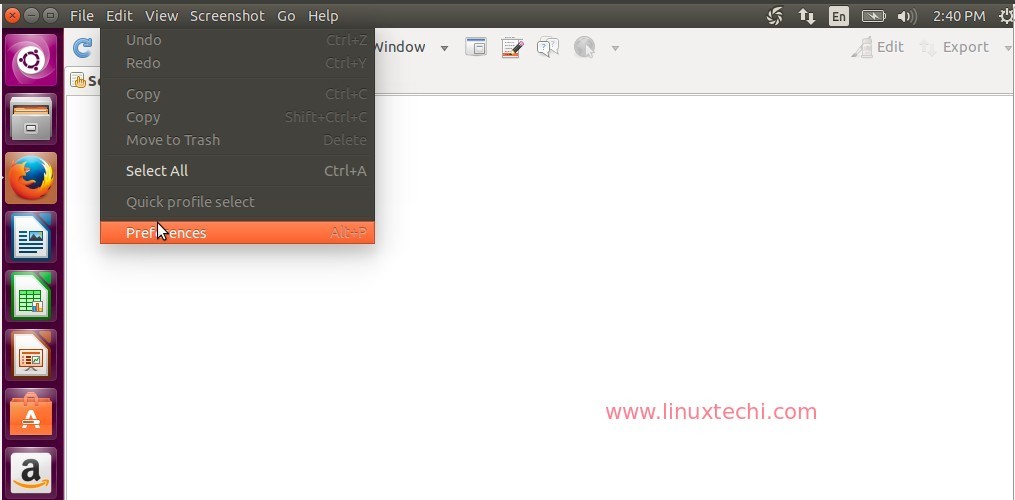
To change the default settings of Shutter , Got to Edit —> Preferences
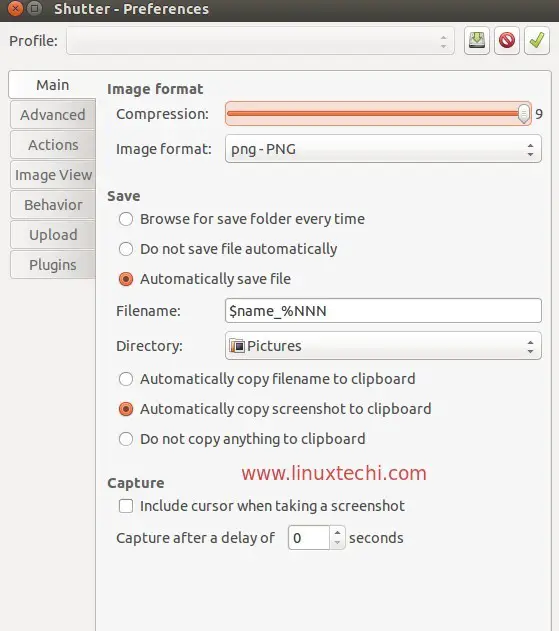
Change the settings as per your requirements and save the changes.
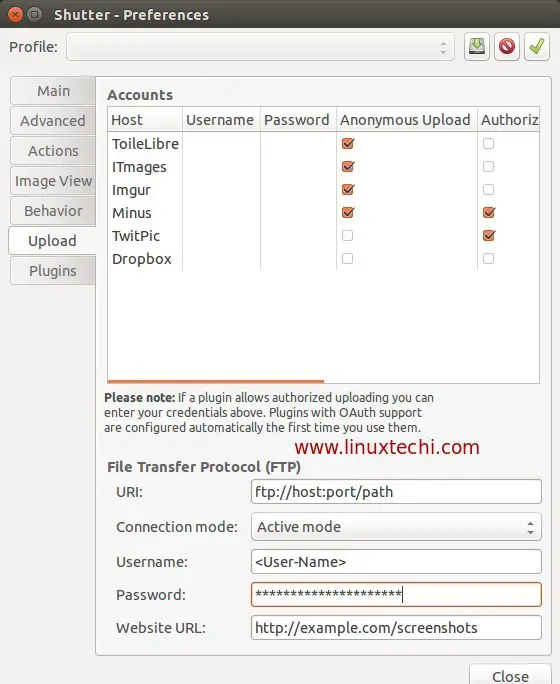
Using shutter We can also upload the screenshot images to image hosting websites using FTP credentials.
Click on upload option on Shutter Preferences window. Specify the FTP URI , ftp user name & its password and Web Site URL.
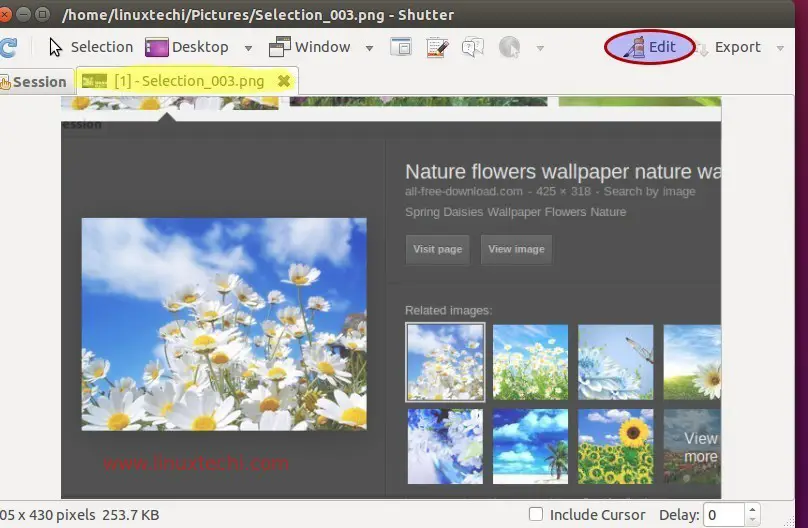
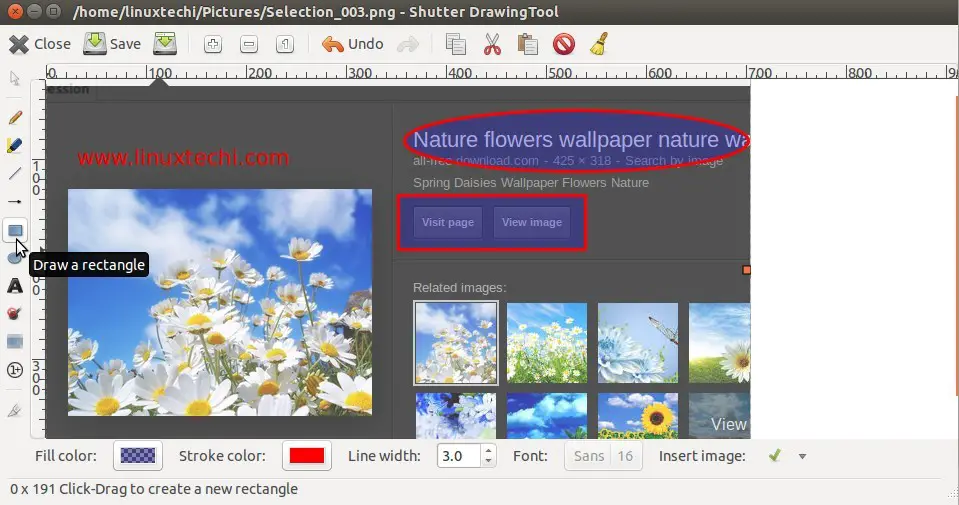
Insert Text and highlight important area on screenshot Image.
Select the image file and then click on Edit option.
we can draw rectangle, eclipse and insert text into image, example is shown below.
That’s conclude this article. Enjoy & have fun with Shutter 🙂