phpMyAdmin is a frontend, open-source tool used for managing MariaDB/MySQL databases. It gives users the ability to intuitively and easily manage databases from a web browser. If you are not a fan of administering databases over the terminal, then phpMyAdmin is your greatest ally.
In this guide, we look at how you can install phpMyAdmin on the latest Linux flavors, namely Ubuntu 20.04 LTS / 21.04 and CentOS 8.x / RHEL 8.x. Without much further ado, let’s get started!
phpMyAdmin Installation Steps on Ubuntu 20.04 LTS / 21.04
To get started out follow the steps below.
Step 1) Install LAMP server
Launch your terminal and execute the command below to update the package lists
$ sudo apt update
Next, install the LAMP stack as shown.
$ sudo apt install apache2 apache2-utils mariadb-server php7.4 libapache2-mod-php7.4 php7.4-mysql php7.4-common php7.4-cli php7.4-json php7.4opcache php7.4-readline
When prompted press ‘Y’ and hit ENTER to install all the packages.
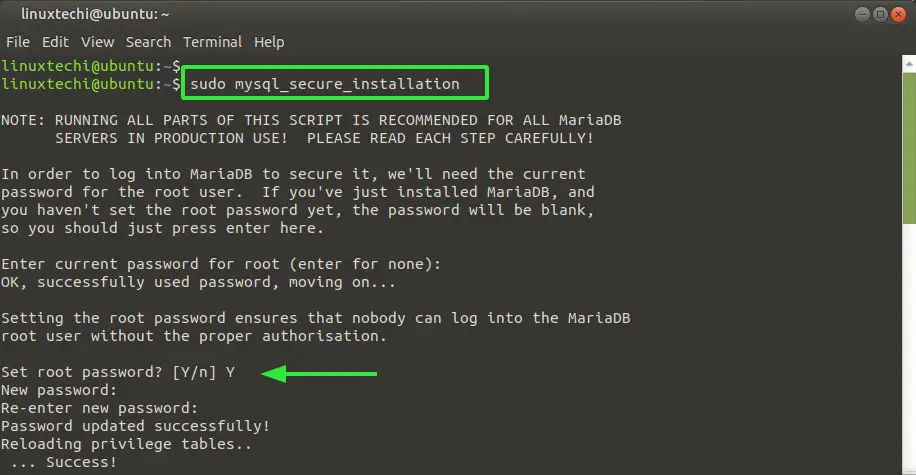
Step 2) Secure MariaDB database server
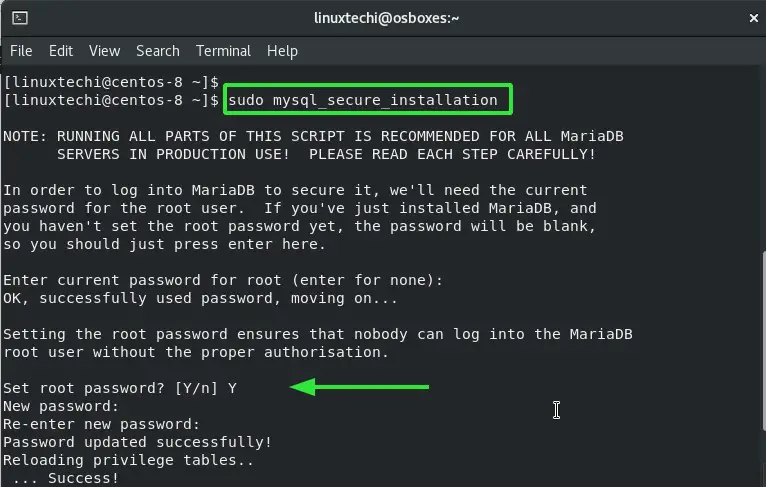
The default settings for MariaDB are not secure and do not provide the degree of security recommended for the database server. We therefore need to go a step further and harden the MariaDB engine. To do so we will run the script shown.
$ sudo mysql_secure_installation
Be sure to set the root password as shown.
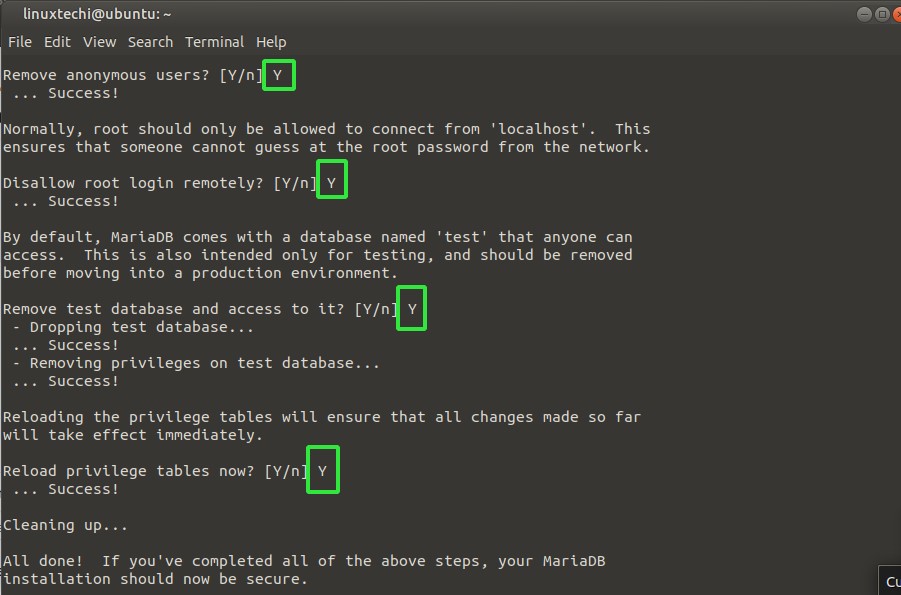
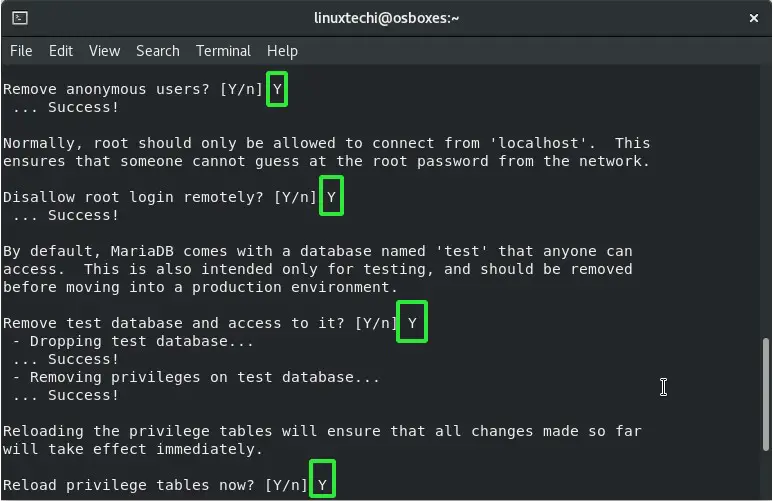
For the remainder of the prompts, simply type ‘Y’ for the most recommended options.
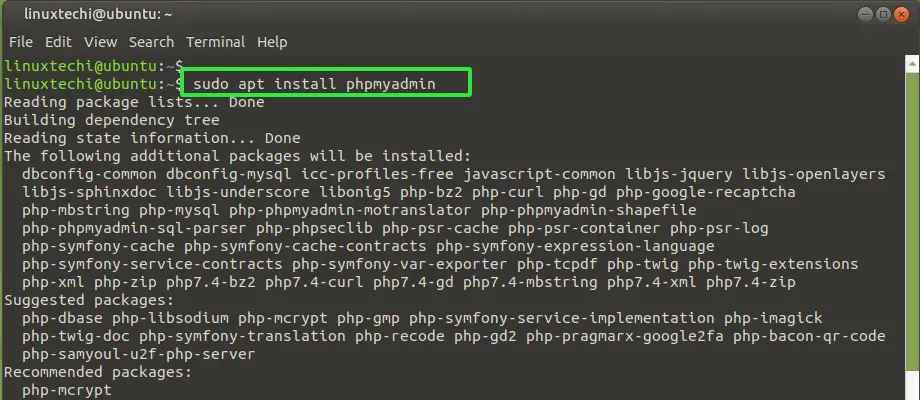
Step 3) Install phpMyAdmin
Once the LAMP stack is installed and the database secured, proceed and install phpmyadmin as follows.
$ sudo apt install phpmyadmin
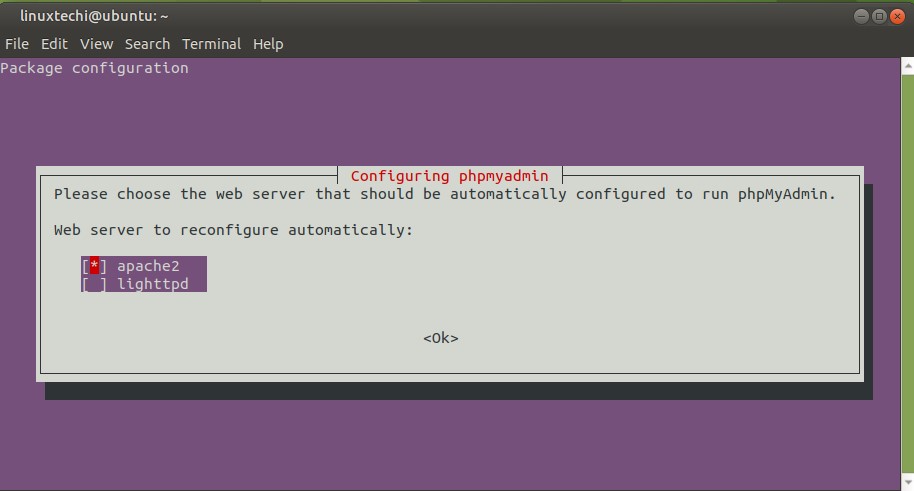
Along the way, you will be prompted to select the web server. Since we are running Apache, press the SPACE key on the ‘apache2’ option to select it and hit ENTER.
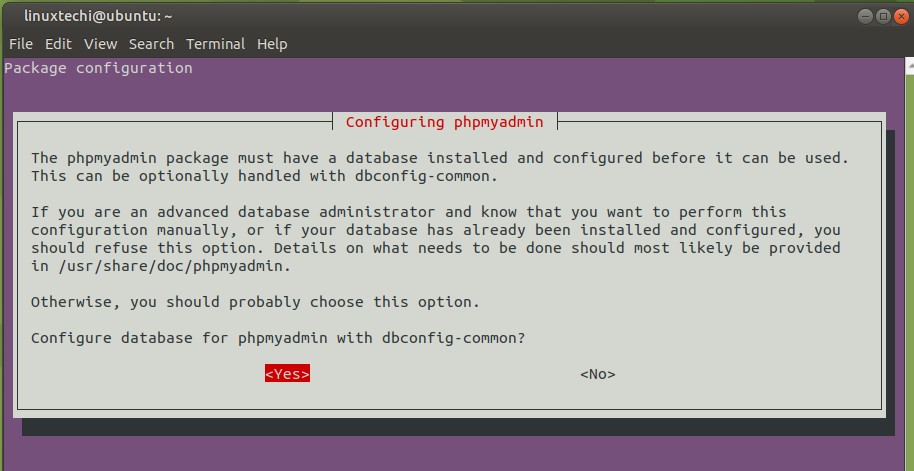
Next, hit ‘YES’ to create the database for phpmyadmin.
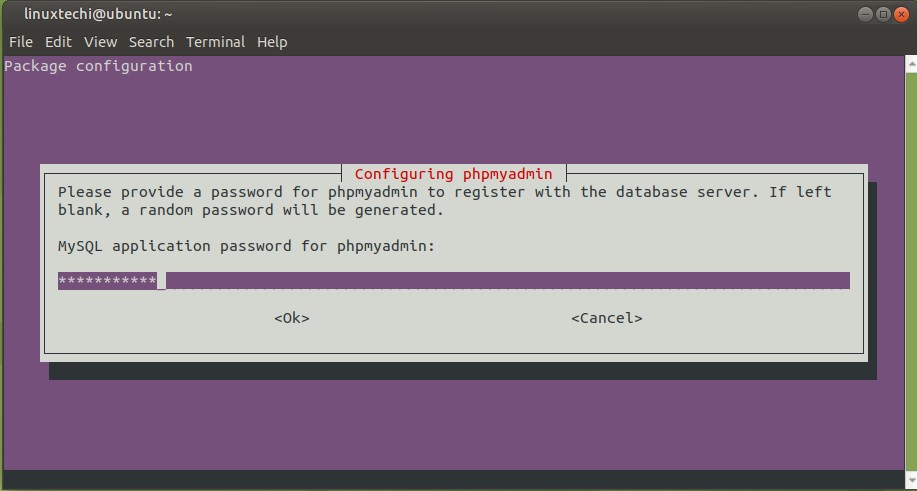
When the database is configured, a user called phpmyadmin is created. The next step prompts you to provide a password for the phpmyadmin user.
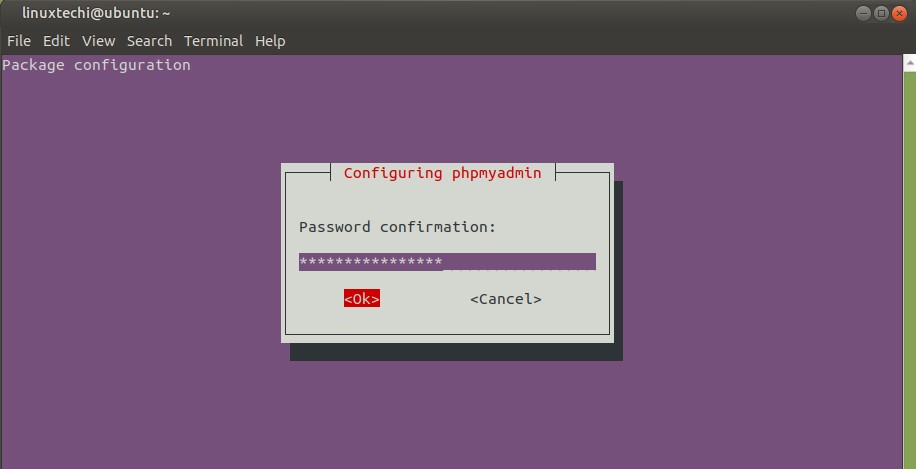
Then confirm it as shown and press ‘ENTER’.
When the installation is complete, restart the Apache webserver as shown.
$ sudo systemctl restart apache2
Step 4) Log in to phpMyAdmin
To log in to phpMyAdmin, browser the URL shown:
http://server-IP/phpmyadmin
Log in using the user phpmyadmin and the password that you configured in Step 3.
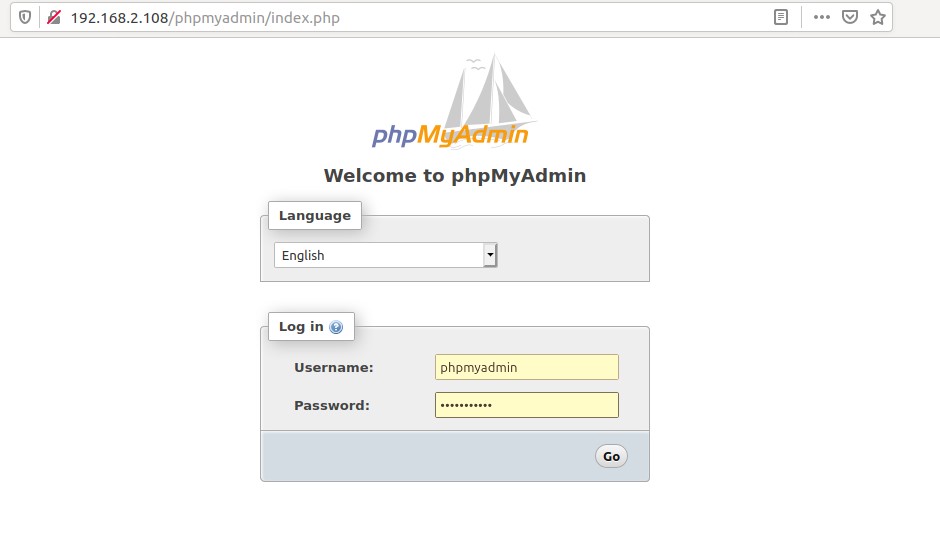
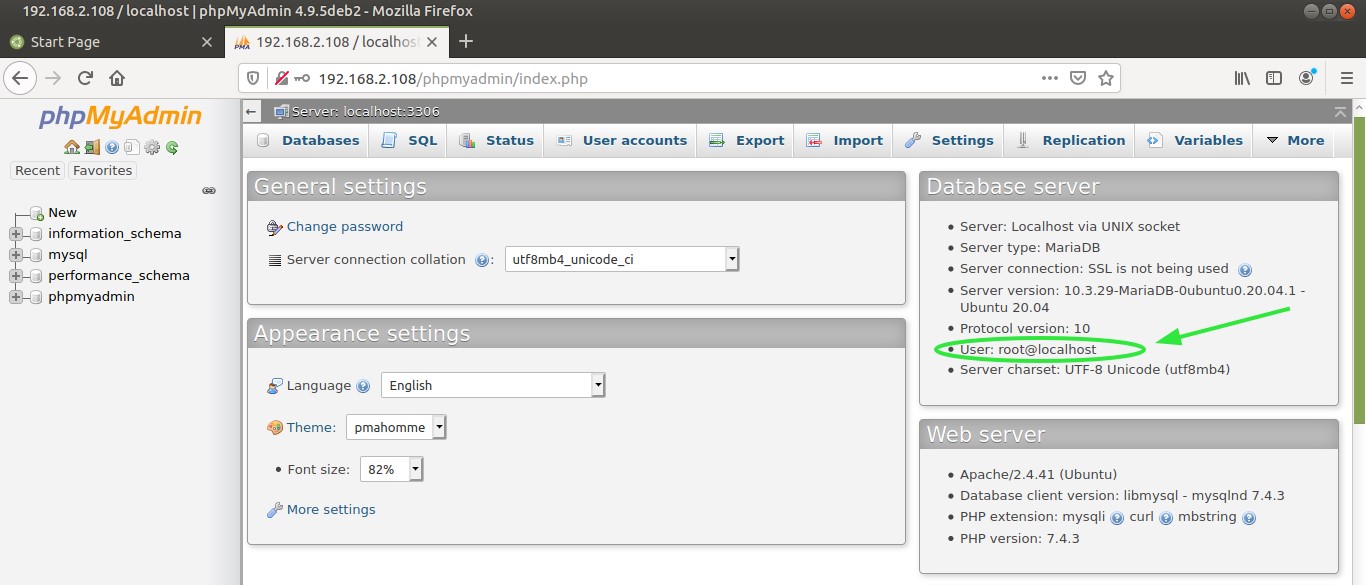
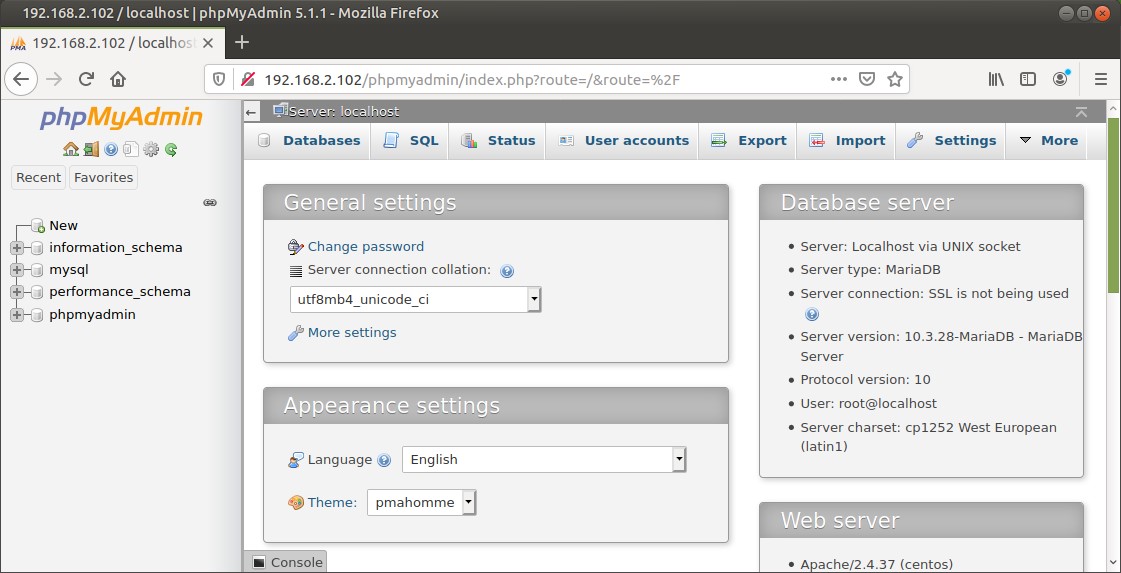
This ushers you to the phpMyAdmin dashboard as shown.
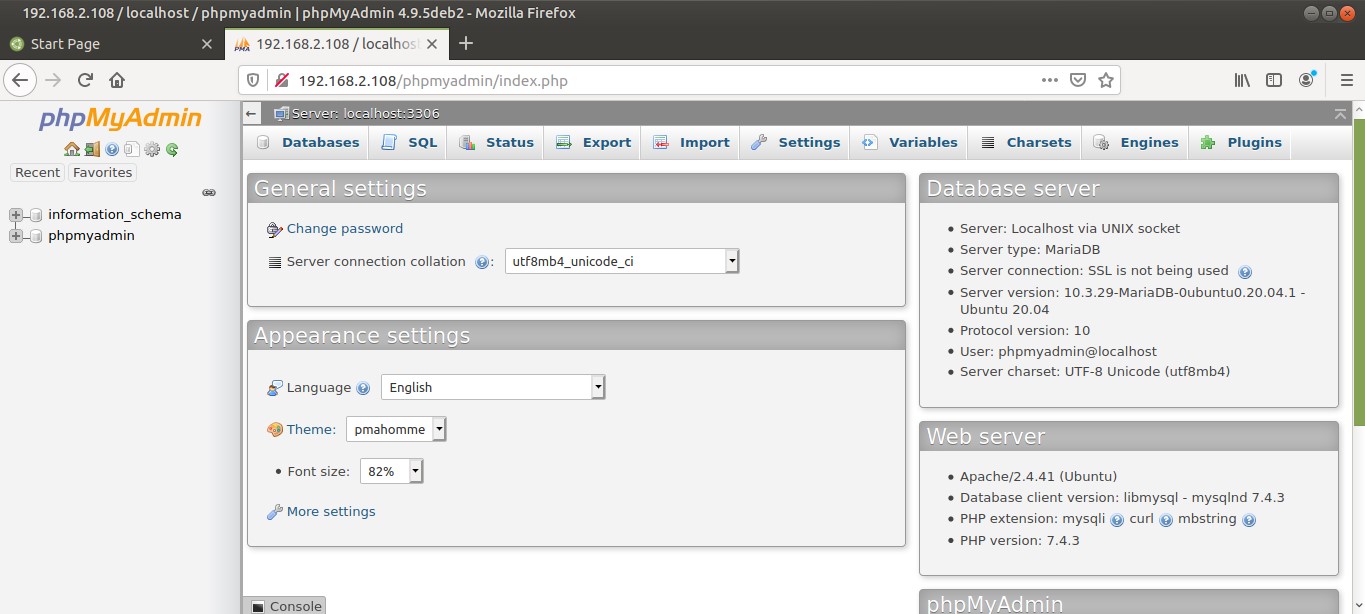
NOTE: To have all the privileges on the databases and tables, you need to log in as the root user. At this point, however, you cannot log in as the root user. This is because we have not yet configured the mysql_native_password plugin for authentication for the root user. Let’s now see how we can accomplish this.
Step 5) Configuring the password for the MariaDB root account
Authenticating as the root user requires the mysql_native_password plugin for authentication. We need to change this authentication method.
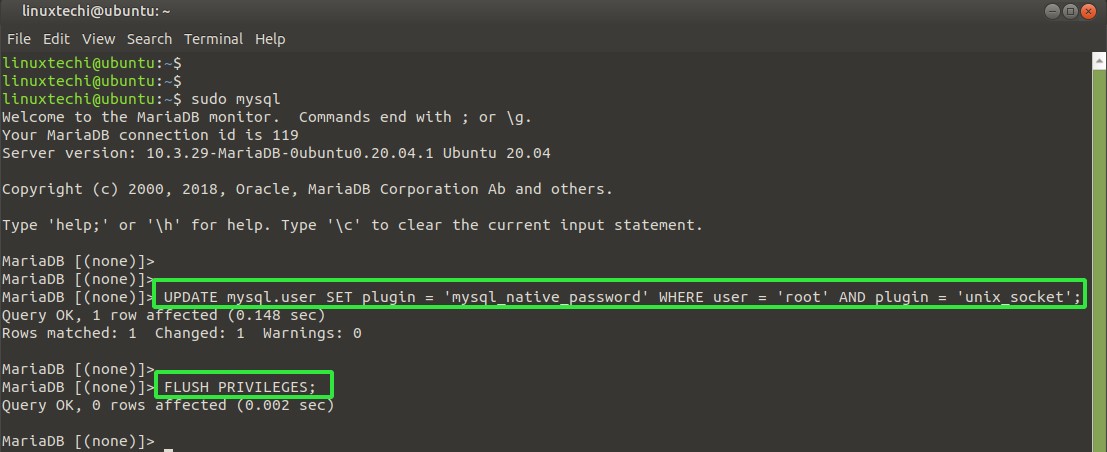
So, log in to the MariaDB prompt.
$ sudo mysql -u root -p
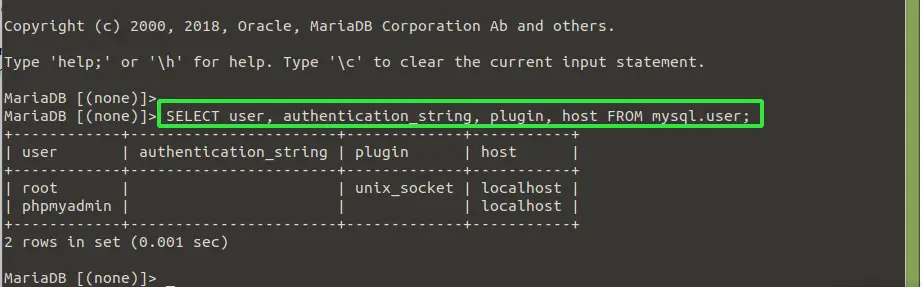
Next, list all the MariaDB users and their properties such as authentication string, plug, and host.
SELECT user, authentication_string, plugin, host FROM mysql.user;
From the results, we see that the root user is using the unix_socket plugin for authentication. We need to change this to the mysql_native_password plugin.
Run the command below to modify the plugin for the root user.
UPDATE mysql.user SET plugin = 'mysql_native_password' WHERE user = 'root' AND plugin = 'unix_socket';
Then flush privileges for the changes to come into effect.
The root user is now using the mysql_native_password plugin for authentication.
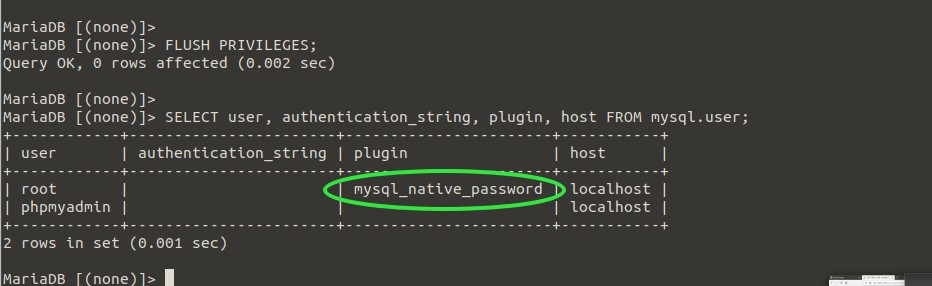
You can now log in as the root user and the root password you used when securing the MariaDB server in Step 2.
This concludes the installation of phpMyAdmin on Ubuntu 20.04 LTS / 21.04 . Let’s now switch gears and see how we can do the same for CentOS 8.x / RHEL 8.x
phpMyAdmin Installation Steps on CentOS 8.x / RHEL 8.x
To install phpMyAdmin on CentOS 8 / RHEL 8, follow the steps shown.
Step 1) Install LAMP server
First off, update all the system packages to their latest versions as shown.
$ sudo dnf update -y
And just like in Ubuntu, install the LAMP stack by running the command shown. This installs Apache, MariaDB, and PHP 7.2 alongside its modules.
$ sudo dnf install httpd mariadb-server php php-cli php-json php-mysqli php-xml php-mbstring php-pdo php-pecl-zip php-mysqlnd -y
Step 2) Secure MariaDB server
Likewise, you also need to secure your MariaDB instance. Begin by first starting MariaDB and enabling it to start at boot time as shown.
$ sudo systemctl start mariadb
$ sudo systemctl enable mariadb
Next, secure it by running the command shown.
$ sudo mysql_secure_installation
Set the root password.
And type ‘Y’ for every subsequent prompt to tune MariaDB to the recommended settings
Step 3) Install phpMyAdmin
The LAMP stack is in place and the MariaDB secured. The next step is to install phpMyAdmin.
So, head over to the webroot directory as shown:
$ cd /var/www/html/
Using the wget command download the latest phpMyAdmin zip file. At the time of writing this tutorial, the latest version is phpMyAdmin 5.1.1. Consider checking the latest version from the Official phpMyAdmin download page.
$ sudo wget https://files.phpmyadmin.net/phpMyAdmin/5.1.1/phpMyAdmin-5.1.1-all-languages.zip
Once the download is complete, unzip the compressed file as shown.
$ sudo unzip phpMyAdmin-5.1.1-all-languages.zip
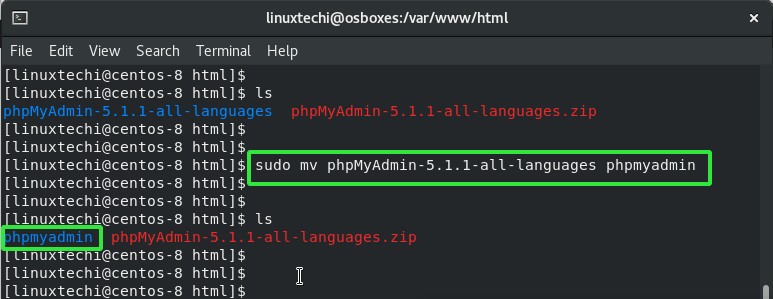
Then rename it to phpmyadmin as indicated.
$ mv phpMyAdmin-5.1.1-all-languages phpmyadmin
Next, set the directory ownership to apache user and group.
$ sudo chown -R apache:apache phpmyadmin
Next, navigate into the phpmyadmin directory and rename the config.sample.inc.php file to config.inc.php.
$ cd phpmyadmin/
$ mv config.sample.inc.php  config.inc.php
After renaming the configuration file, open it.
$ sudo vim config.inc.php
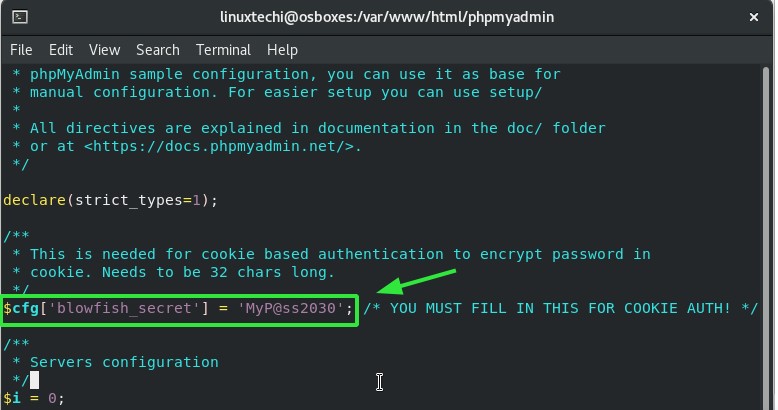
Locate the line below and provide a strong password. Save and exit the file.
$cfg['blowfish_secret'] = 'your-secure-password';
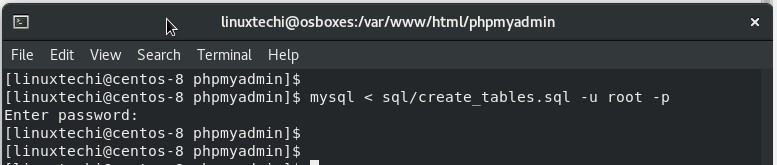
Lastly, import tables for phpMyAdmin as follows.
$ mysql < sql/create_tables.sql -u root -p
Wonderful! The only step remaining is to set up Apache to host phpMyAdmin files.
Step 4) Configure Apache web server for phpMyAdmin
Begin by creating a virtual host file for phpMyAdmin.
$ sudo vim /etc/httpd/conf.d/phpmyadmin.conf
Append the lines below.
Alias /phpmyadmin /var/www/html/phpmyadmin
<Directory /var/www/html/phpmyadmin/>
   AddDefaultCharset UTF-8

   <IfModule mod_authz_core.c>
     # Apache 2.4
     <RequireAny>
      Require all granted
     </RequireAny>
   </IfModule>
   <IfModule !mod_authz_core.c>
     # Apache 2.2
     Order Deny,Allow
     Deny from All
     Allow from 127.0.0.1
     Allow from ::1
   </IfModule>
</Directory>

<Directory /var/www/html/phpmyadmin/setup/>
   <IfModule mod_authz_core.c>
     # Apache 2.4
     <RequireAny>
       Require all granted
     </RequireAny>

   </IfModule>

   <IfModule !mod_authz_core.c>
     # Apache 2.2
     Order Deny,Allow
     Deny from All
     Allow from 127.0.0.1
     Allow from ::1
   </IfModule>

</Directory>
Save the file and exit. Then finally restart the Apache webserver for the changes to come into effect.
$ sudo systemctl restart httpd
$ sudo systemctl enable httpd
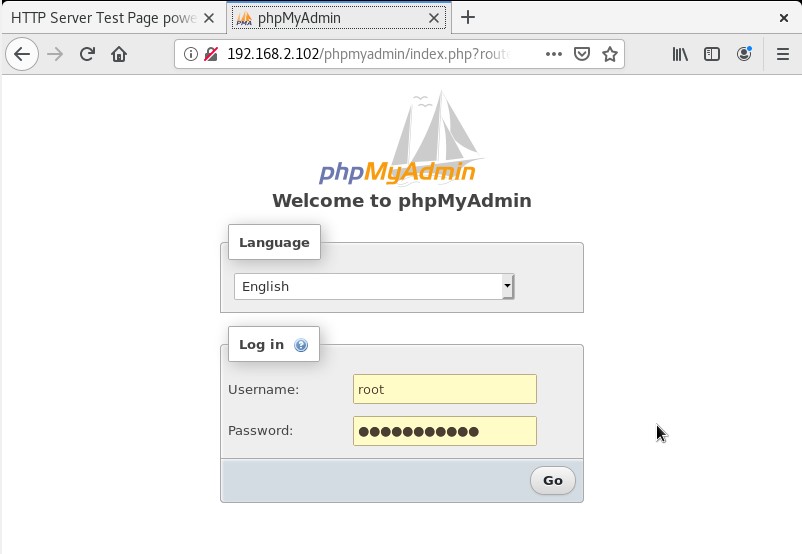
Step 5) Log in to phpMyAdmin
As indicated before, browser the URL shown to access the phpMyAdmin dashboard.
http://server-IP/phpmyadmin
This time around, use root as the login user and the password used to secure the MariaDB database server.
Bravo! We have successfully installed phpMyAdmin on Ubuntu 20.04 LTS / 21.04 and CentOS 8.x / RHEL 8.x distributions!
Hi this is Mohammed Faisal
I’m using centos8 for phomyadmin
But I’m getting error
AH00558 could not reliable determine the server fully qualified domain name
Can you please help me